

This Time We Are Connecting a Hikvision 2nd Generation Ds-kh8350-wte1: Monitor And A Hikvision Ds-kd8003-ime1: Main Doorphone Unit To Videorecorder, And After That We Are Going To Set-up up A Door Phone As The Common Ip-camera
Details
Today we are reviewing quite an unusual but yet demanded way of connecting and configuration of the 2ND Gen Hikvision intercom system. Namely, we will:
- Transmit the power and network to the doorphone and monitor from a network video recorder, having PoE support on an output.
- We will make our bundle work like a normal intercom system.
- Then we will activate the whole thing in a Hik-connect phone app.
- We will turn our door station into an IP camera, and we’ll make it operate as an IP camera with its standard functionality.
For instance, let’s say you don’t have a PoE switch, but you have a video recorder with PoE support and at least 2 channels in it. After that, in a software way, we will turn our door station into an IP camera and we’ll make it operate as an IP camera with its standard functionality.

Initial Steps
For activation and system start-up, visit this article. My Hikvision DS-7608NI-K2 Video Recorder is already activated and added to my IVMS-4200 account, but I didn’t modify anything in it. Then, we are activating and setting the devices up on the monitor screen itself, which is a faster and easier way.


1 / 2
→→→→→→→→
What we need to find is which subnet our video recorder is on. Thus, we go to its settings, Network, General tab. And here, in the very last point, we can see the outgoing IP address of the recorder’s network card, remembering it, and we leave the PC at this point.
Monitor & Door Station Activation Through Monitor
Now I’m activating a monitor and a door station from scratch. Creating passwords, selecting region, not touching anything else, but in the network settings tab – this time, a magic DHCP button won’t help us, because this is a different type of connection. There we need to input the outgoing subnet of our recorder’s network card, and from a previous step, you remember that number was 254 for me, it could be different for you. We do the same with the gateway. Now we activate our panel in a regular way. Now the network settings – typing in the recorder’s subnet address and the gateway.
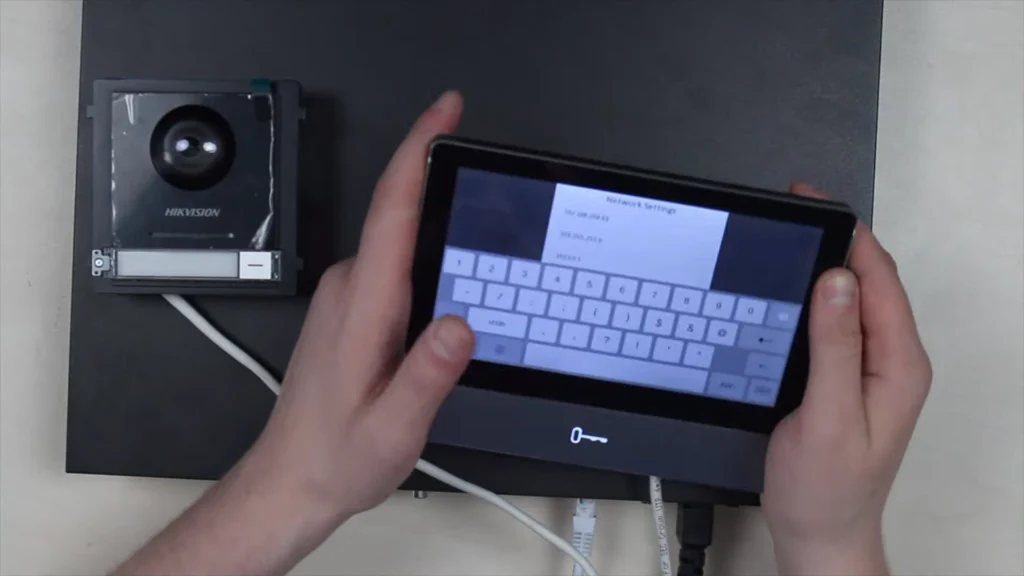
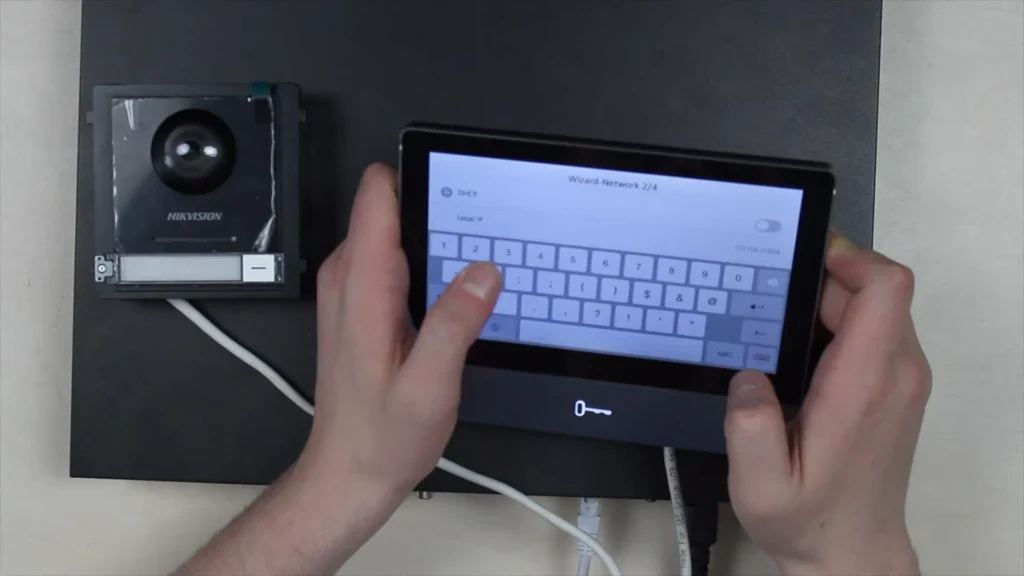
1 / 2
By the way, keep in mind these last numbers in IP address, I have the number 64, you can have other ones – we will need them later. The door phone might reboot to apply the new settings that we have set inside it. And one more thing I want to emphasize – with this connection option, we can also add our intercom system to Hik-connect on the phone to view live video, but only if there is Wi-fi support in the monitor. And if I’m not mistaken, 3 out of 5 monitors of the latest series have Wi-fi on board.
IP Intercom Functionality
To set up a Hik-connect, we have to turn on Wifi first, so do that in settings: 2nd tab → turn on → find your network → enter a password. Now we need the 3rd tab, the parameters of the Hik-connect service. Opening the app on the phone, clicking on the plus sign, and scanning the QR code – OK, and the device is instantly enrolled and has been tied to my account in the Hik-connect service.
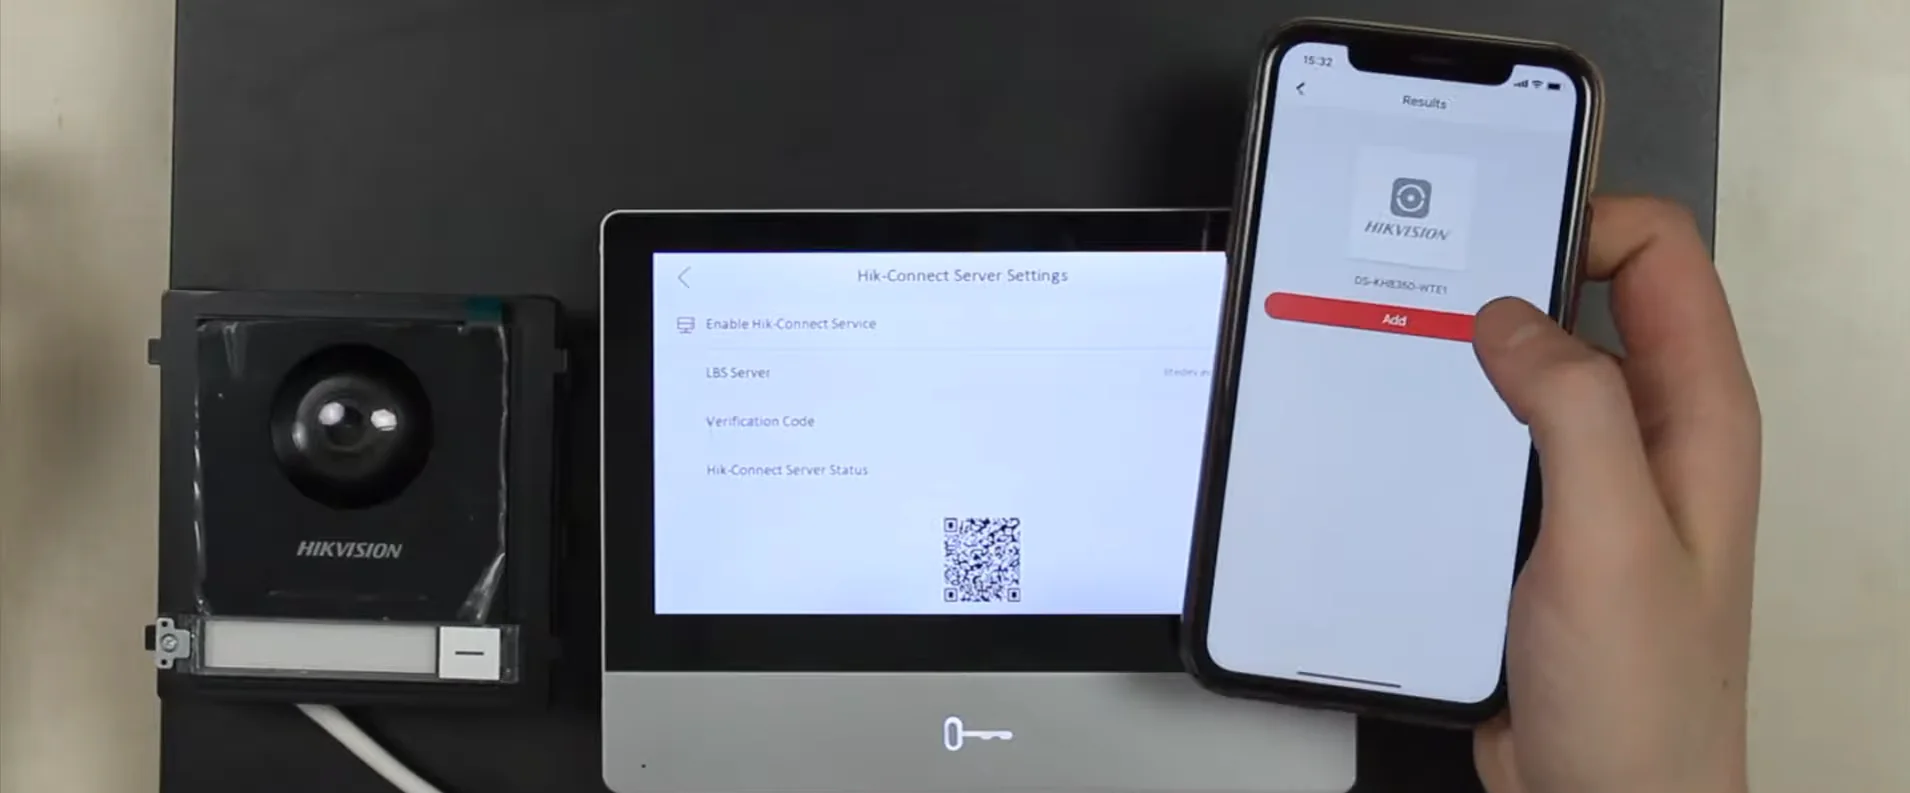
That’s such an awesome feature here in the 2ND Gen Hikvision Intercom- you don’t need to look for any verification codes on the box or on the device’s body – everything is right here on this tab, which greatly simplifies the process. Our indoor monitor and a doorphone are powered and connected to the network via the PoE-enabled network video recorder. The recorder, in its turn, of course, is plugged into the outlet and receives the network via the LAN cable. And so, all of this works like a regular IP-intercom system with all the usual functionality, even the access through a Phone app with a live view – it’s just awesome. Now we will configure the door station as an IP camera with the same functionality set of a camera and add it to a recorder.
Making an IP camera out of a Door Phone
We return to PC with a recorder’s settings open, and now we go to the System tab, and there, the camera item. Selecting the 1st channel, clicking 2 times, and what happens here – changing the adding method from “plug and play” to manual. Typing in the IP address of the panel, the password that we created during activation, saving, and waiting until the “Connected” status appears. Save, close, and now go to the main view tab to view devices in live mode. Open the recorder’s group, click on the 1st channel, and get a live video. At this point, you might have to wait a bit until it refreshes

However, if we still use the door phone as an IP camera, it is assumed that it will be powered separately and will be located away from the recorder. Logically, we're gonna plug the cable into it, not from a recorder but from the PoE switch, and then separately activate them in IVMS-4200 under our subnet, and after activation, we add it to the videorecorder in the same way as I showed earlier. The only difference is that you will input another subnet address, but everything else is one-to-one.
Conclusion
In conclusion, we continue to delve into the topic of 2ND Generation Hikvision intercom system, and we want to cover and reveal as many features and possibilities as possible so that when you work with the system, you can turn to something as a reference and instruction. We have reviewed such an unusual option for connecting an intercom via a network recorder because there will always be an application for each method.