

Today, we want to pay some special attention to a display module in the Hikvision 2nd Generation IP Modular Intercom System. We’ll power it on, configure and tell you how to do all that stuff.
What We Are Doing and How
What’s the catch? First of all, it is literally a display module so that a person on the other side can see the status. That is: a call is happening, the door is open, the password was entered successfully, and so on. And secondly, the most interesting – via IVMS-4200, you can upload a list of up to 2,000 contacts in this module, owing to built-in memory, and then, with on-body buttons, you can select a person to call among all the contacts listed and dial up. Also, a combination of a display module and a keypad module will work the best, as for the execution of many actions, for instance, entering a password and calling by typing a number, you need a keypad. Now we’re going to connect everything up, show you how to upload contacts into the display module, set a public entrance password, and demonstrate to you how it works.

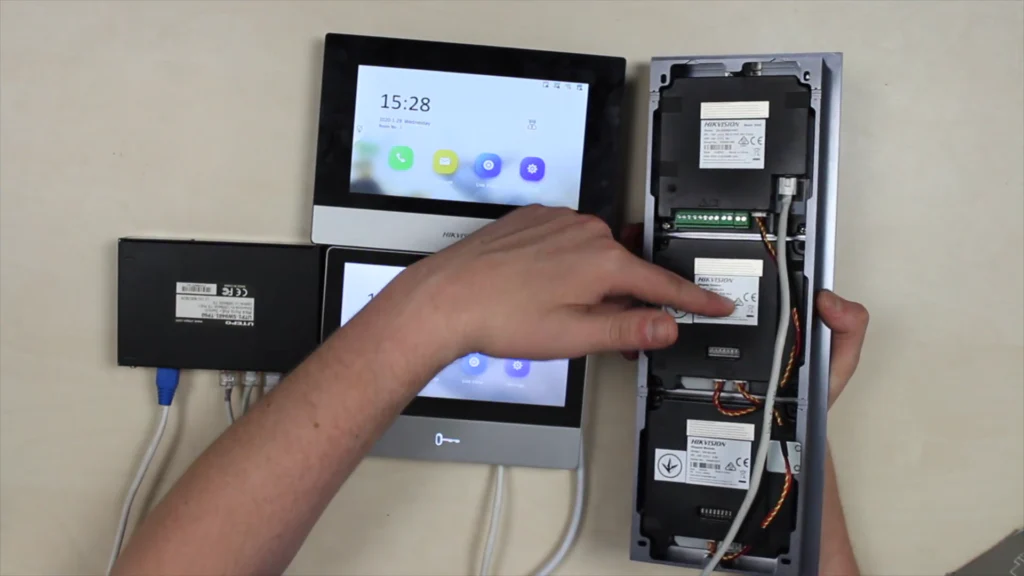
We have 2 monitors here, and I’m going to bind each of them to a certain room to show how this works if the system has more than two rooms, multiple users. And here are three modules fixed in a bracket – a door phone, a display module, and a keypad. Here’s how it looks on the back: there’s the LAN cable coming from the PoE switch to the door phone, and from there the door phone kind of distributes this power down to other modules via power transmission interface and communicates with them owing to a four eighty fifth interface. And also, we have displayed this chain on a DIP-witches here and here. The panel is zero, the display is one, and the keypad is 2. Now we need IVMS-4200.
Set Up Via IVMS-4200
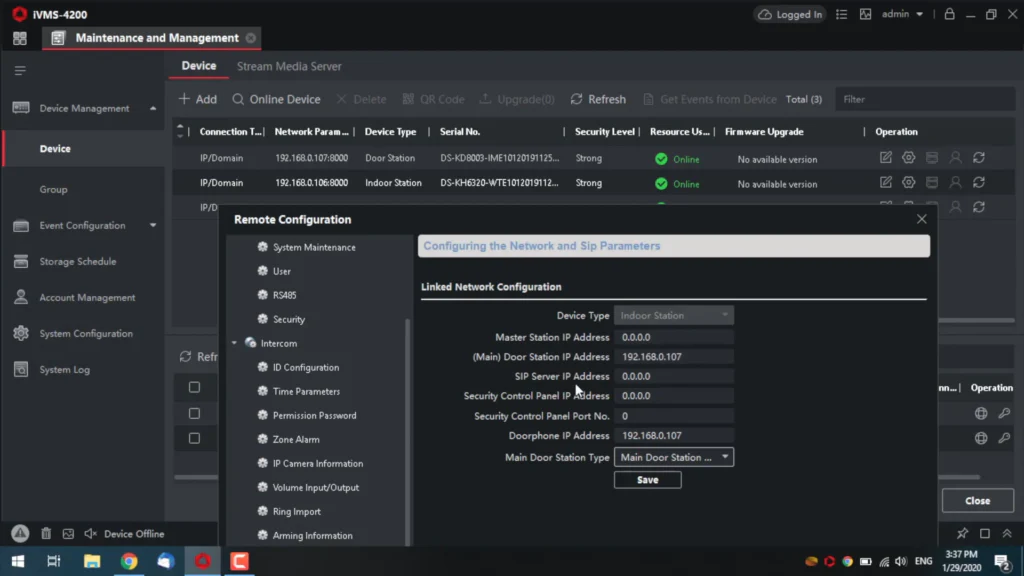
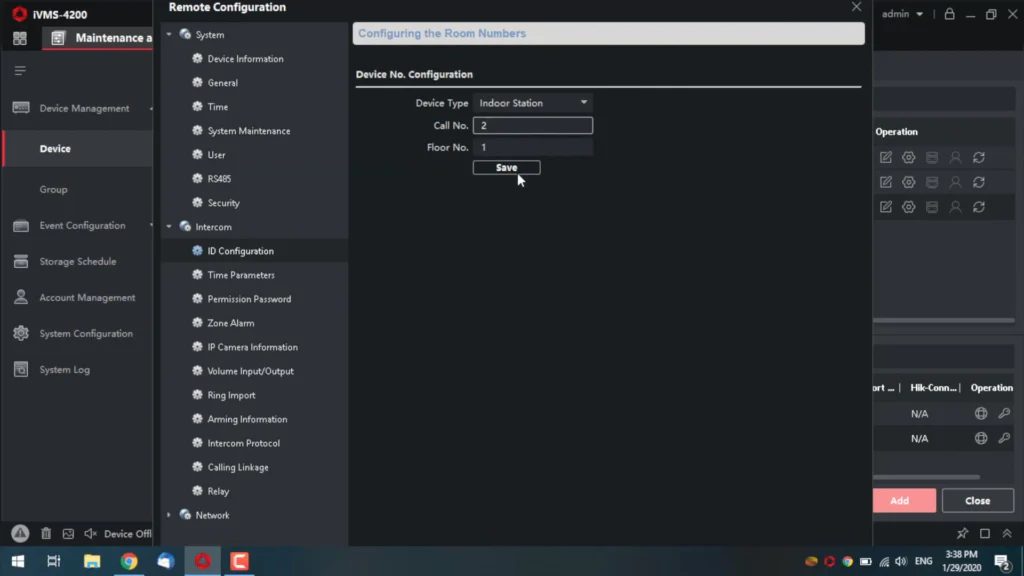
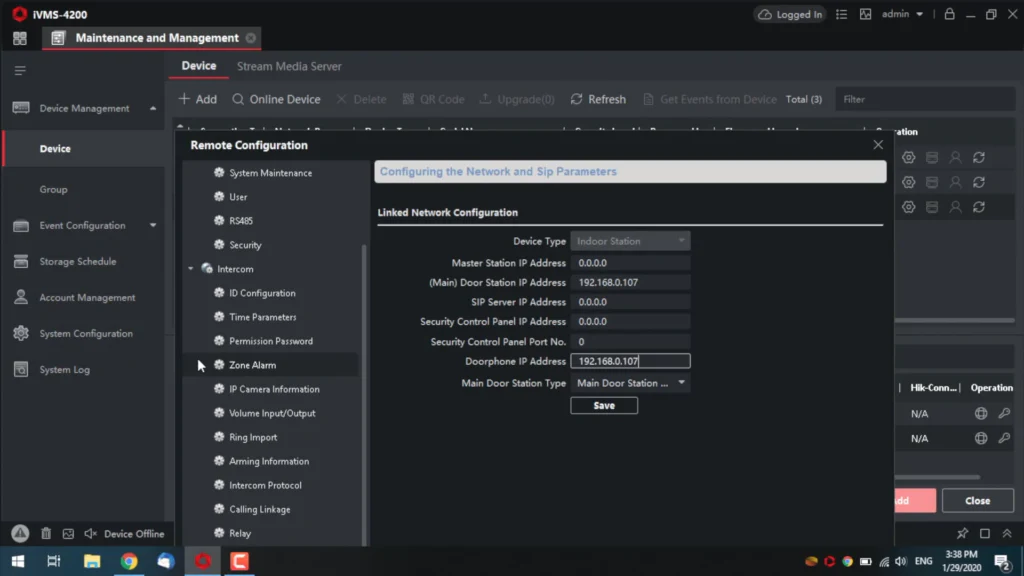
We’ve got devices activated and added to the IVMS-4200. KD8003 door phone, KH8350 monitor 1, and KH6320 monitor 2, and you don’t need to configure the modules in any way – if you got them connected correctly, they are already online. This time, we’re not showing the devices’ activation, since we have already published a dedicated article and video uncovering this question. First, we will designate monitors for different rooms. We go into the settings of the 1st monitor, let the KH6320 be the 1st one, just because it doesn’t matter which one is first. We go to the Intercom tab, and the 1st point here is ID configuration. Since we’ve decided KH6320 will be the first, we’re leaving everything as it is there – first floor and first room. Now, the Network tab, the 2nd item – writing down the address of our main door phone in the Door Station IP Address field, and in the Door phone Address. Below, respectively, you can enter the master station IP address, and below it you can input the SIP server address, which is usually bound to a concierge, but don’t need it now – save and close.


1 / 8
Demonstration
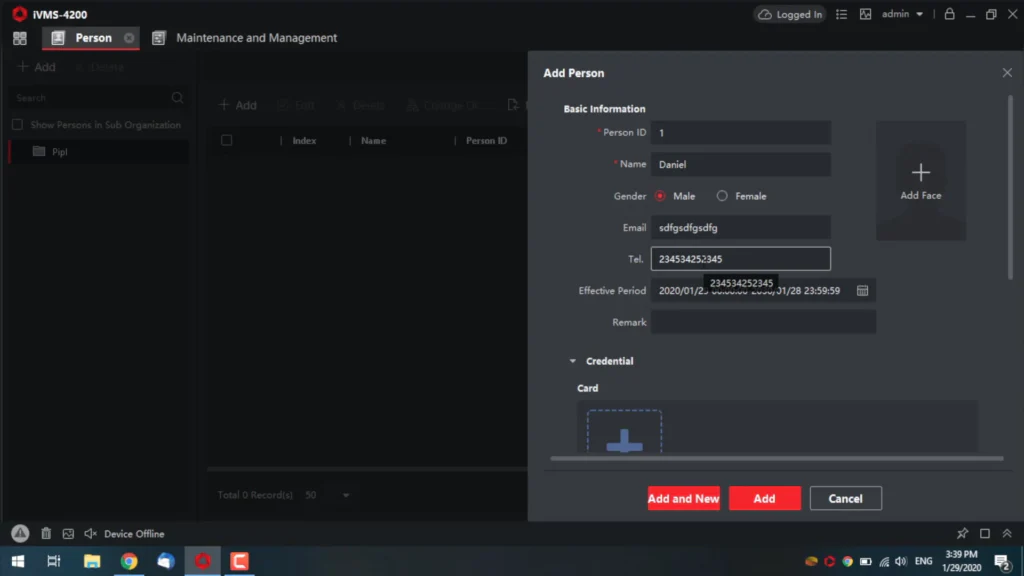
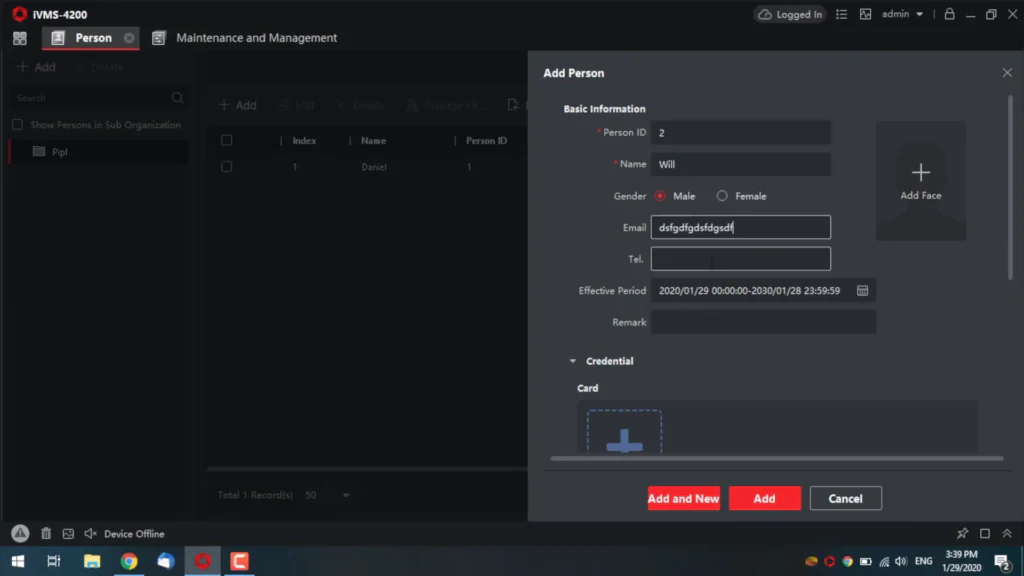
In the video below, you can see monitors, a door phone, and modules in a bracket. As you can see, different rooms are indicated on monitors 1 and 2. And now the display module – I press down to go into contacts, and here I have got those 2 users that I’ve uploaded with different numbers, by the monitors and rooms. Calling Daniel, and the call goes to monitor 1, and if I call Will, the call goes to the 2nd device. That is exactly what we need. And about displaying a status on the display module. The module already indicated what you can do – enter a password, dial a number, and go into contacts. Let’s enter a password of 123456, the status changes, and the door opens. And I can also call Daniel from the keypad, press 1 and number sign – the calling is successful, the status has been updated. The same about Will–2 and # sign, and I get identical results.
Conclusion
The main feature of the display module is the ability to load up into it up to 2 000 contacts, and that is especially convenient if you have a really large object and a lot of new visitors, because they don’t even need to know the number, they can just find the name that they need in the contact list, which simplifies everything. Of course you can use the multi-subscriber module instead of the display and keypad, but there’s only 6 buttons there, and if you have, let’s say, 100 rooms, you will need to buy about 17 of those, and you’ll need to take 2 or 3 door phones to this number of modules.