
![How To Setup Any Hikvision IP Camera: #1 Easy Way Via Hikvision Software [IVMS]](https://pipl.systems/wp-content/uploads/2023/04/1-1-1.jpg)
You got your new Hikvision camera, and now you want to set it up and start working with it with no extra help, and you have no technician or engineer skills. You hit the right article. Right now, we are going to show you the #1 easy and fast way to set up your new Hikvision Wi-Fi IP camera via the Hikvision tools and services. This guide includes the PC and Phone software that allows you to work with the cameras.
Note that Hikvision cameras require us to use a PC for the initial setup and configuration.
PC Tools
You will need:
- The SADP tool. Basically, a device search tool allowing us to find devices within our subnet and to see the device status.
- IVMS-4500: the actual software we’re going to use to set up the camera. There is also a way to use the web interface, but we will focus on this particular method now.
- EZVIZ Studio. As Hikvision has a consumer-oriented sub-brand named Ezviz, Hikvision declares a two-way support between Hikvision and Ezviz services. And that’s why we have the Ezviz Studio program on our list. Well, this is a very common entry-level software that you can use to access the basic camera’s functions, but a Hikvision camera setup process requires us to use the SADP tool and the IVMS afterwards, because Hikvision and Ezviz have a completely different setup process. But after the setup is done, you are able to control all of your cameras remotely, both via the Ezviz Studio, IVMS, or the phone’s Ezviz App, Hik-connect, and mobile IVMS.
Don’t go to the next part until you've got this software installed.
PC Setup
1. Plug in the power supply unit and/or LAN cable, and then we have to wait a minute till the cam adjusts itself and connects.
2. After that happened, go to the PC and open the SADP tool. The SADP displays the status of all devices connected to your subnet. Find your camera within the list. You can see that the SADP displays the camera is inactive.
3. Mark the checkbox located left of the ID column. The new tab should slide out on your right, and now you can see the network parameters.
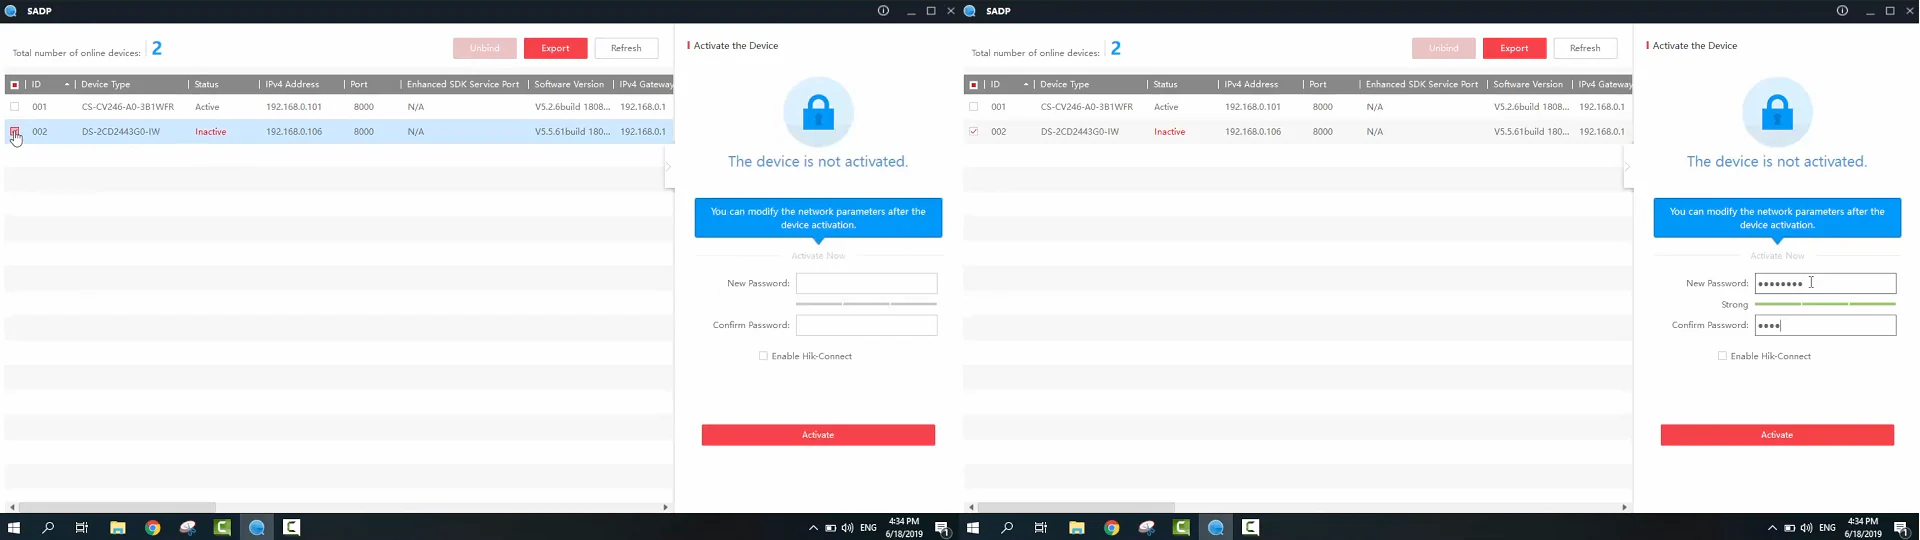
4. Create a password and press activate. That’s it, we’re done with the SADP tool.
5. Open up the IVMS-4200, and create an account if it asks you to.
6. Find your camera on the bottom tab;
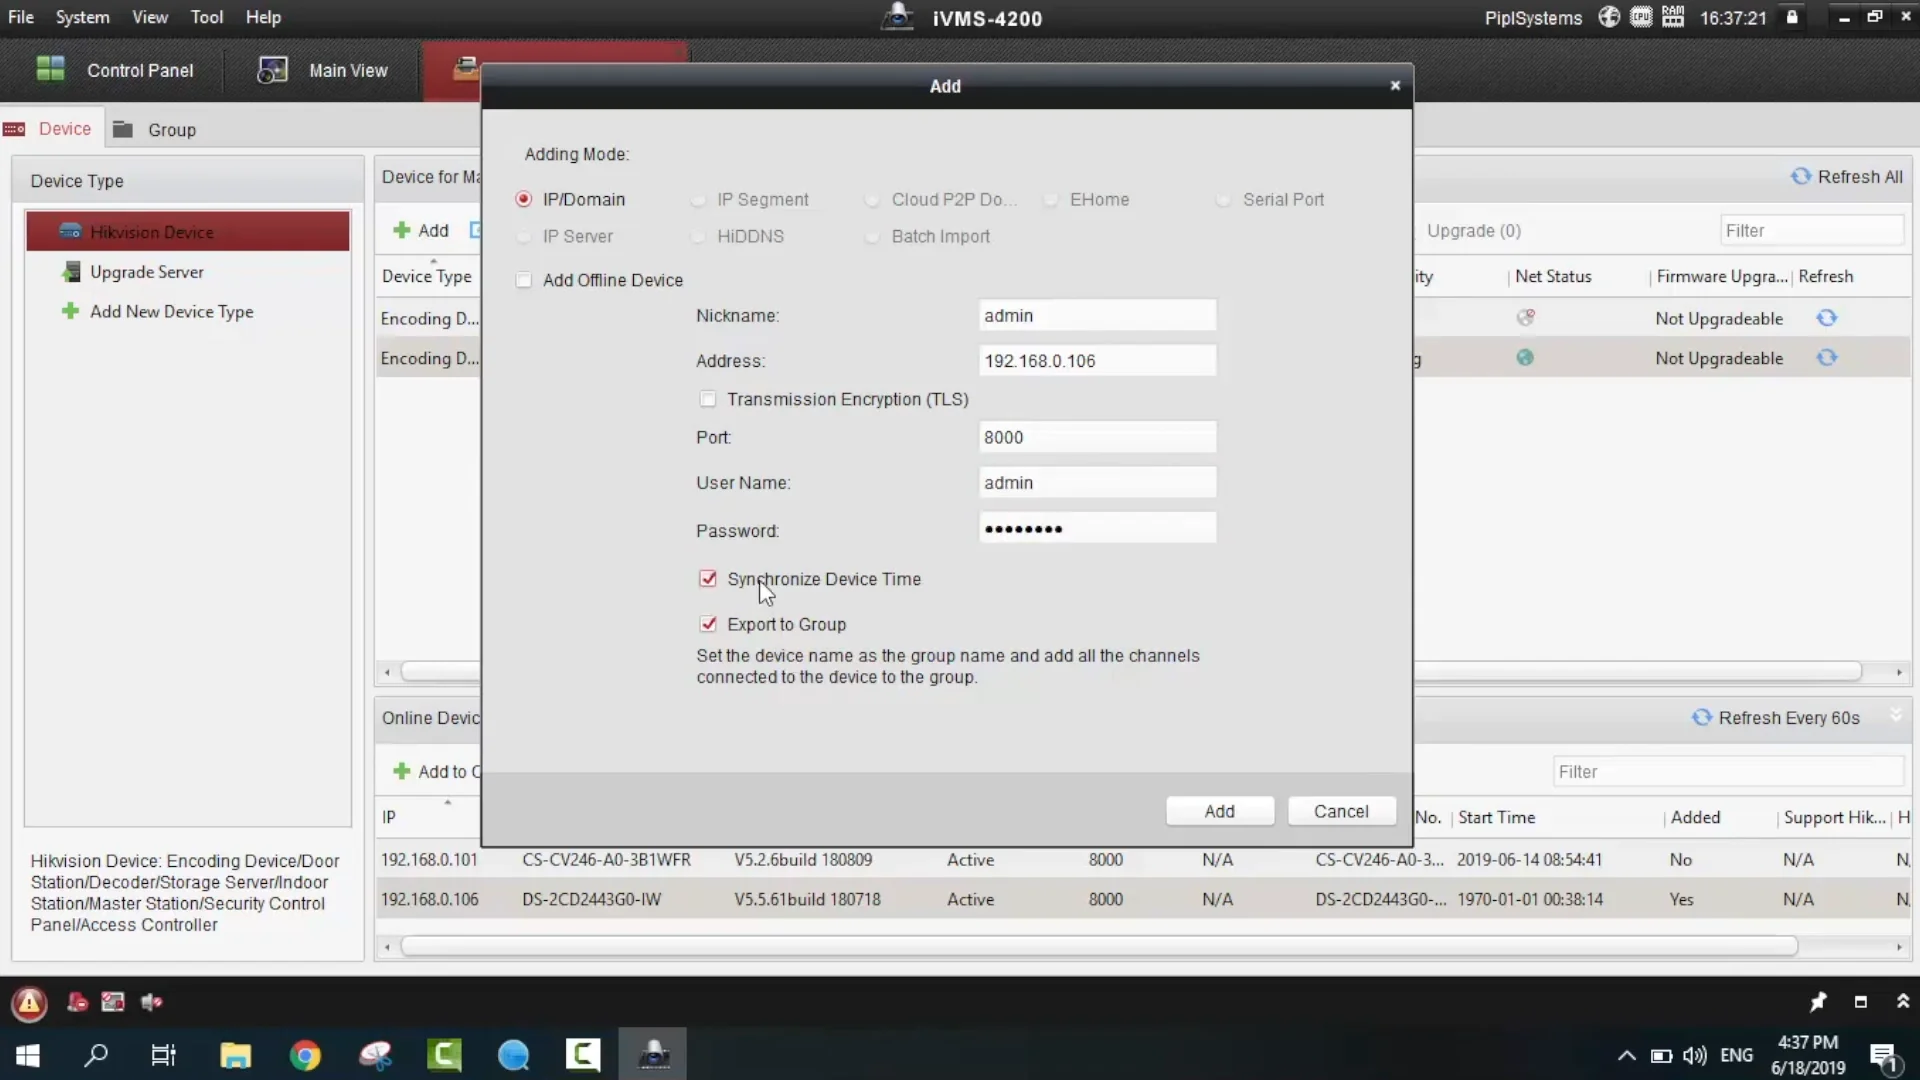
7. Press and hold on your camera and drag it to the middle tab;
8. Press the “Remote Configuration” button;
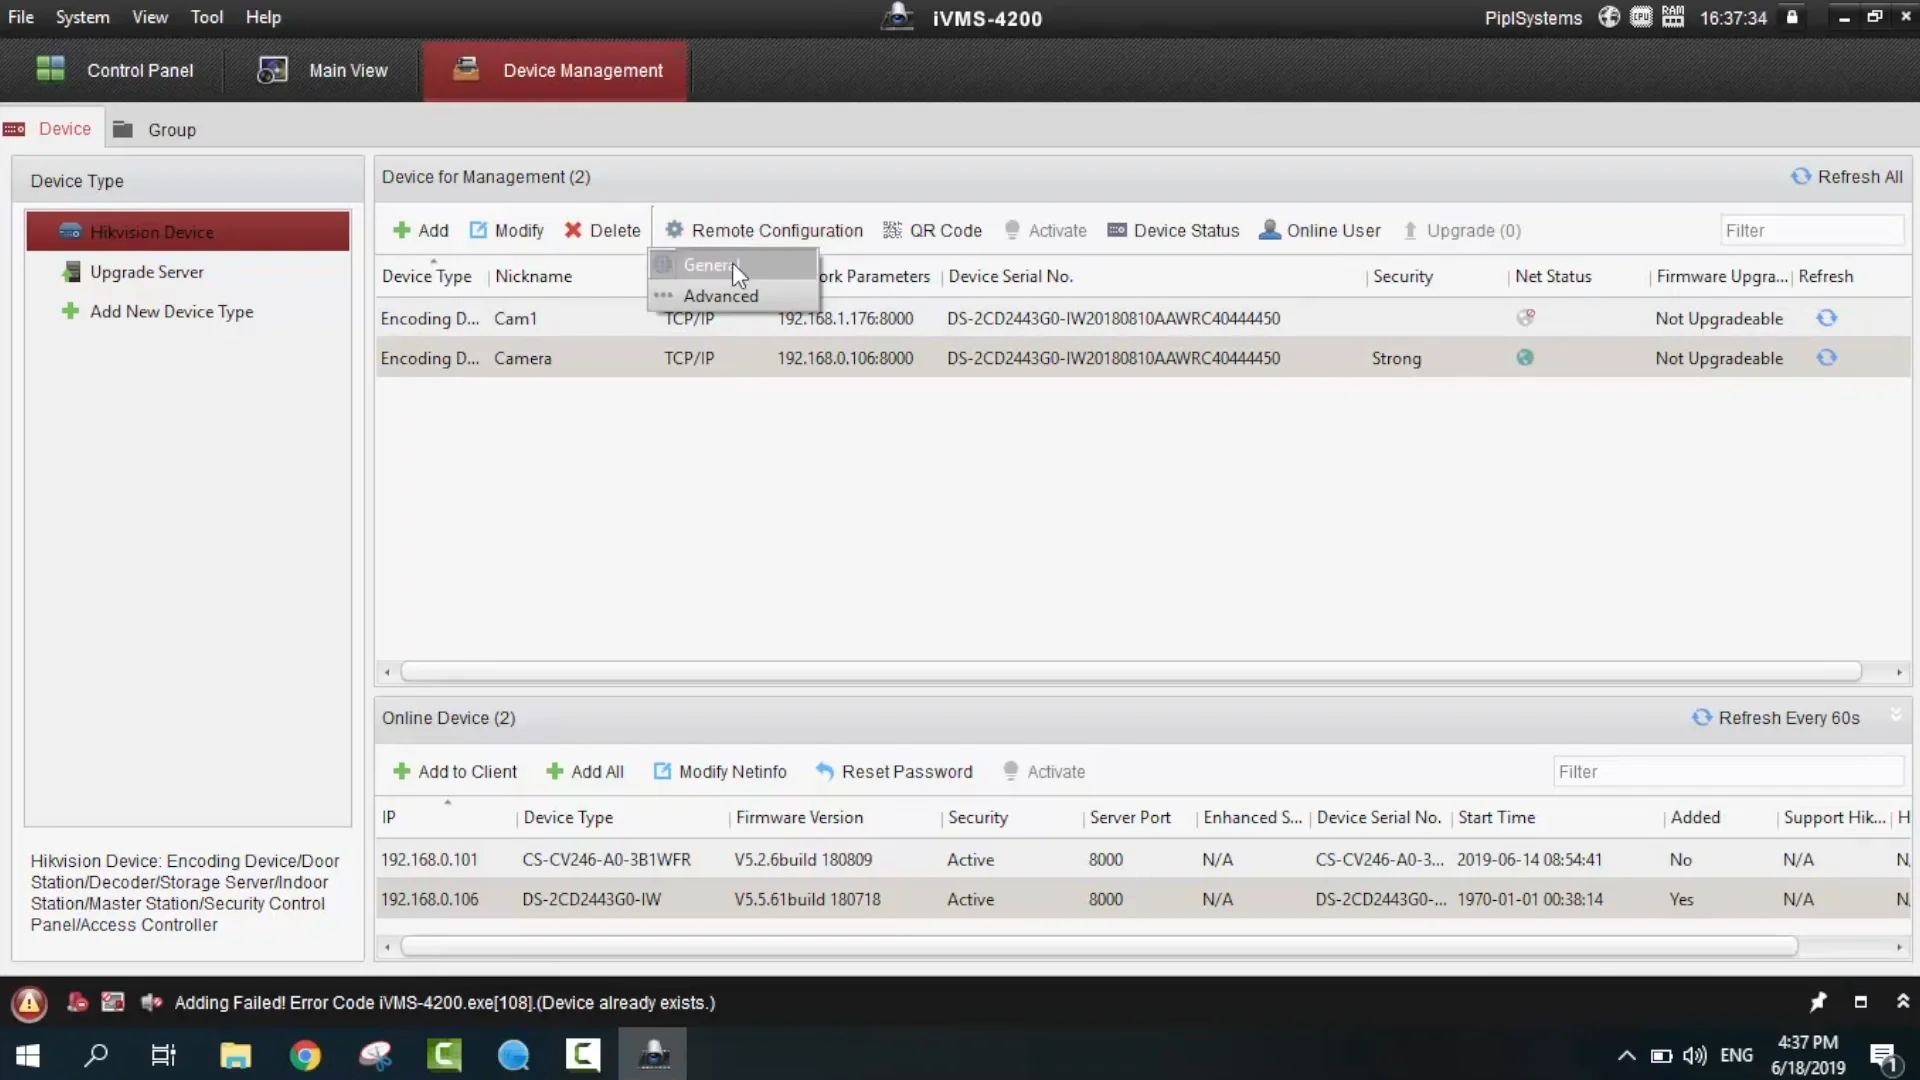
9. Install the “Active X” driver if it asks you to by pressing the link. It will download, install it, and reload automatically. That should let you into the actual camera setup menu.
Camera Configuration Inside The IVMS-4200
Note: this is a fast and easy setup tutorial. Our goal is to show you the simplest way with no additional features turned on. 1. System > System Settings > Time Settings. Select your time zone and also press the “sync with the PC” button to automatically set the correct time.

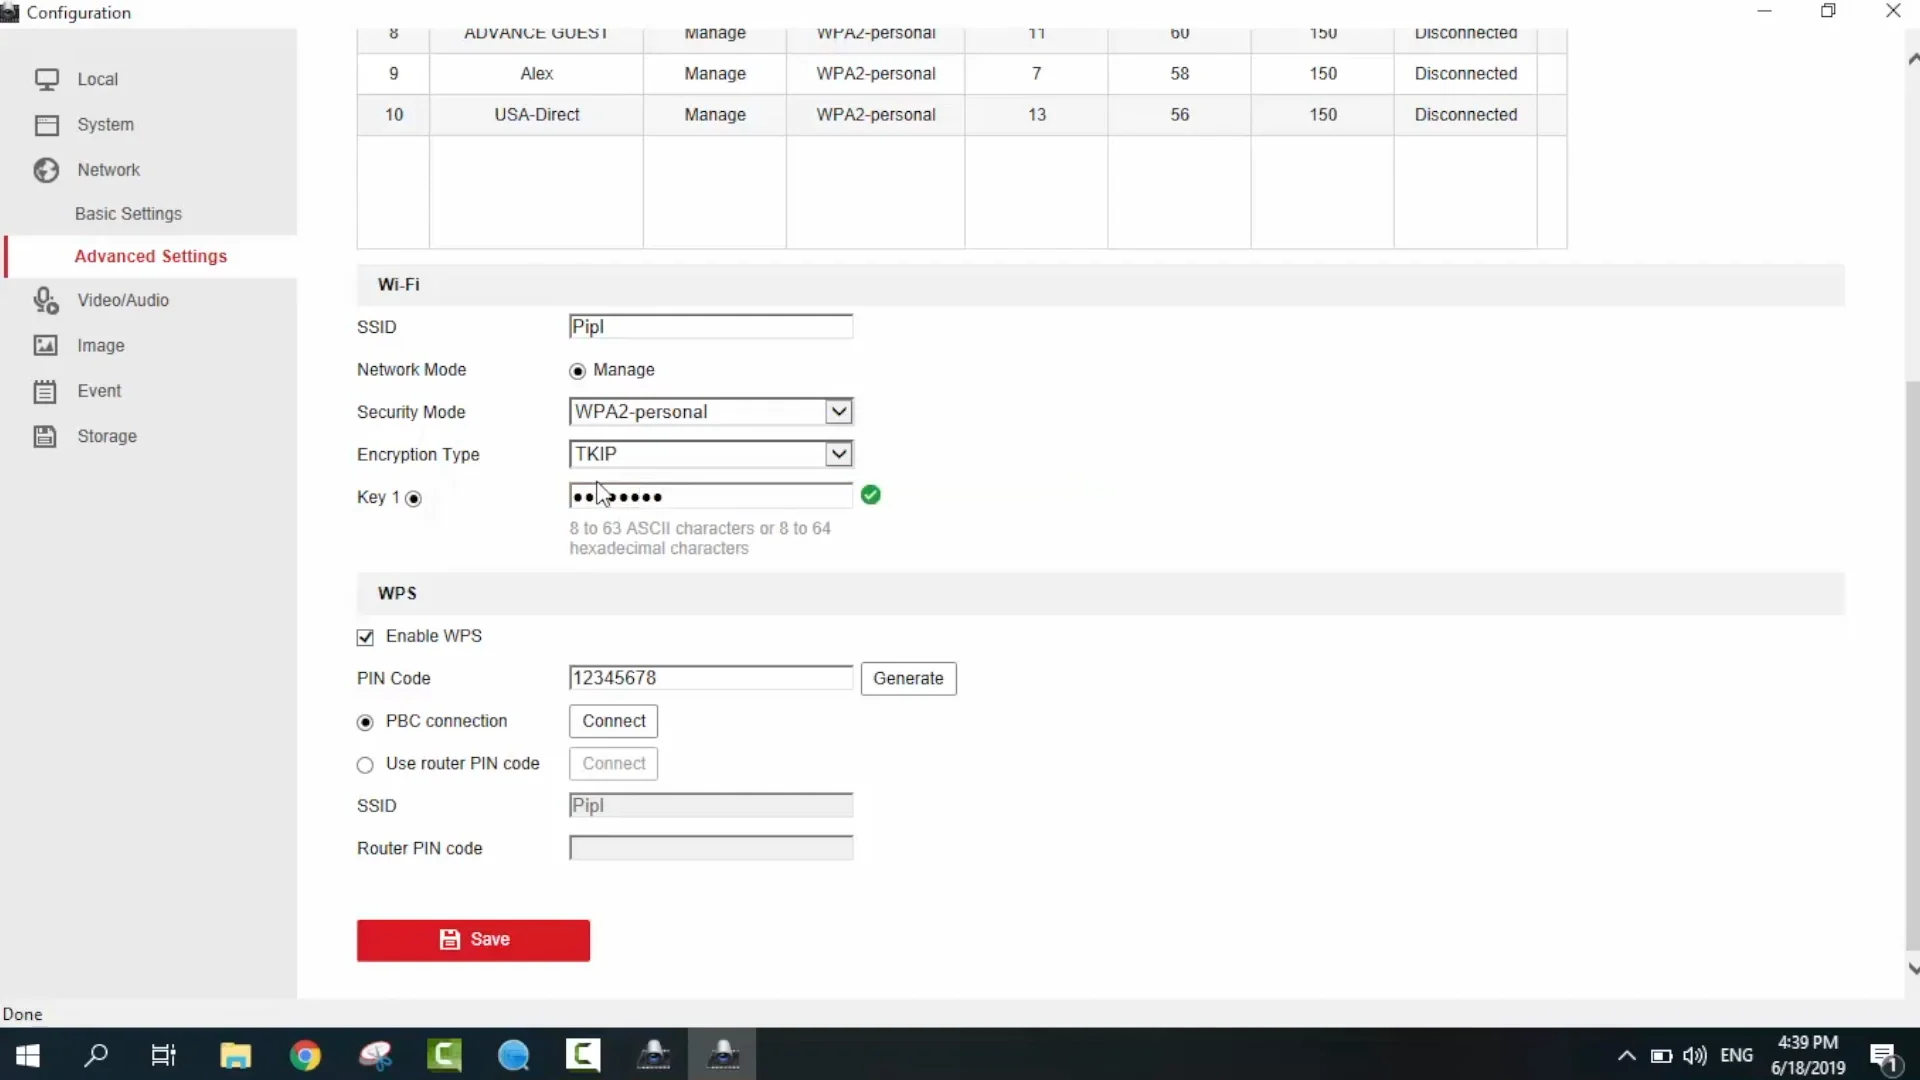
2. Go to Network > Advanced Settings > Wi-fi. Note – your router has to work on 2.4 g wave. Pick your network and type in your wi-fi password below and press save. For a static IP uncheck the box and enter the gateway manually;
3. The Video/Audio Tab. It depends on your camera: whether it has a microphone or not. So this bar is responsible for it. Don’t have the microphone built-in the cam? Just skip, it’s fine here;

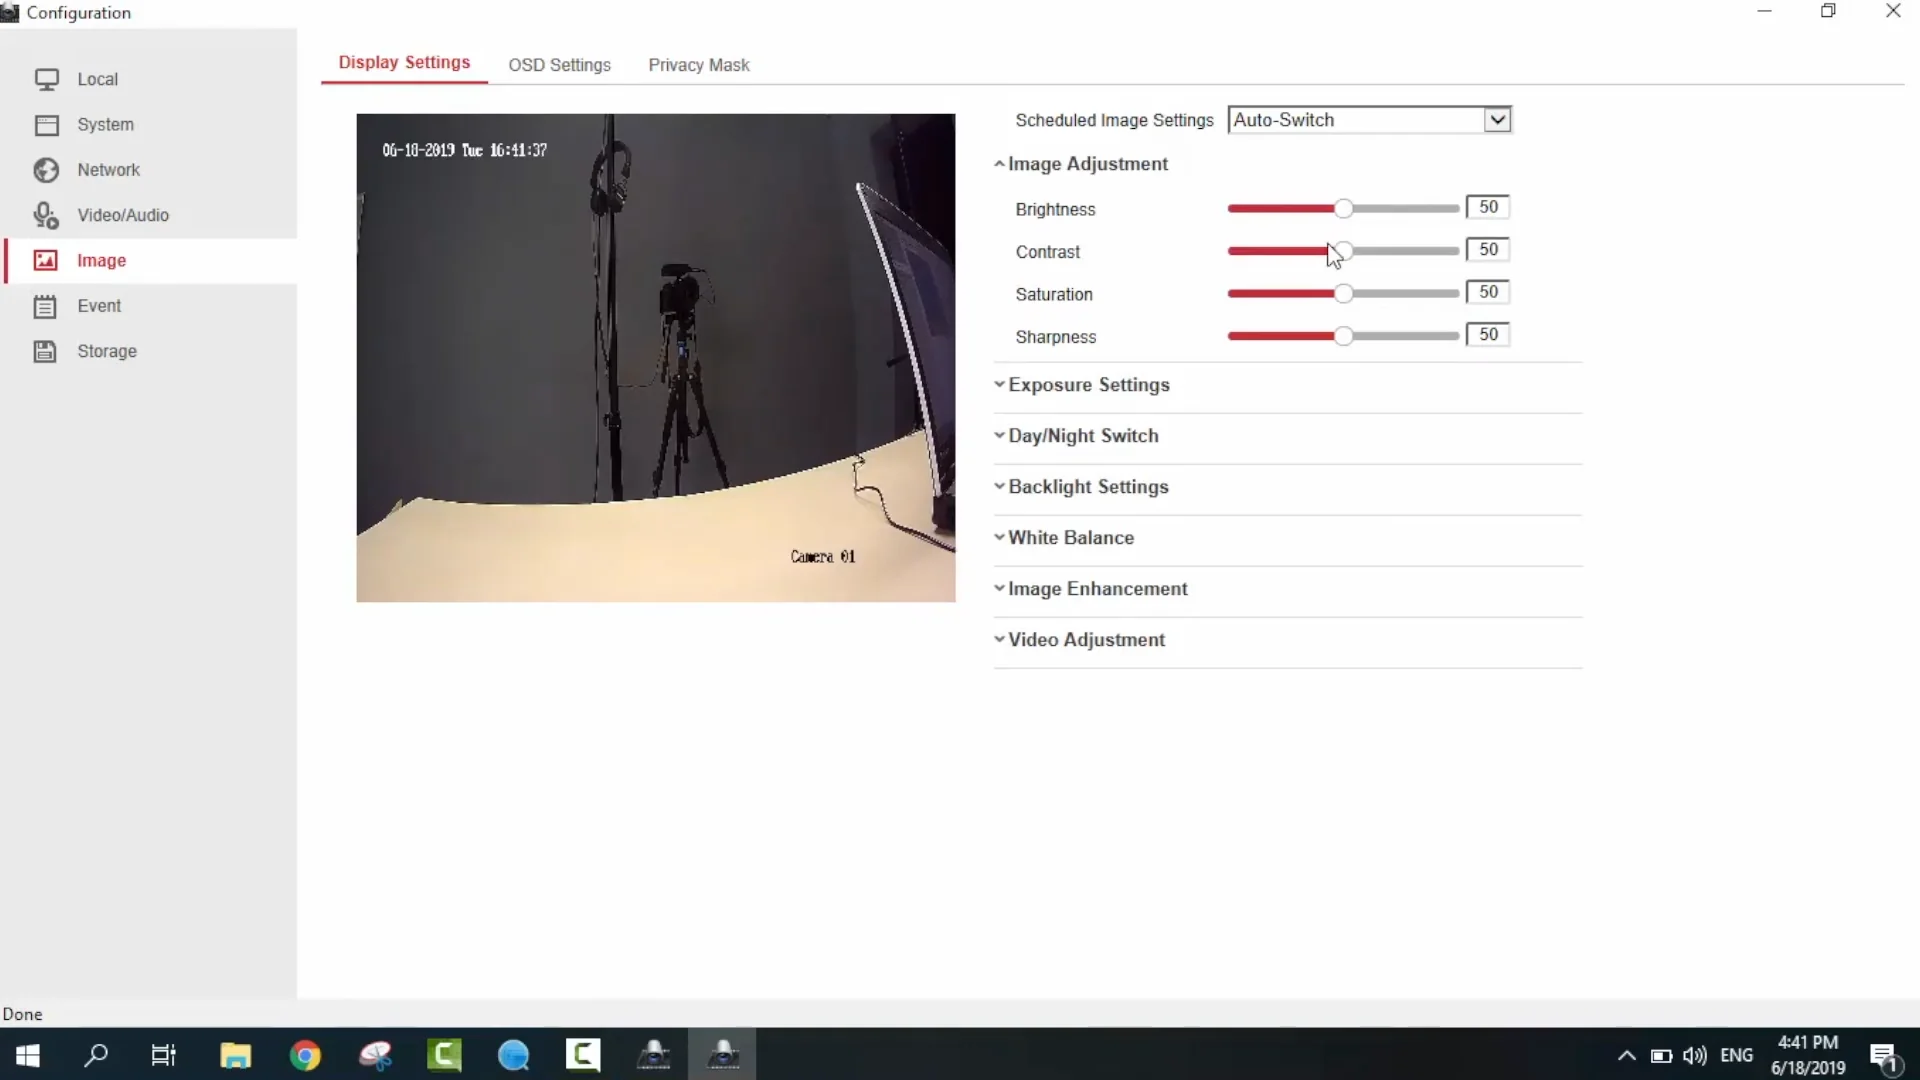
4. The image settings. They are totally individual – you have a standard sliders to adjust the image;
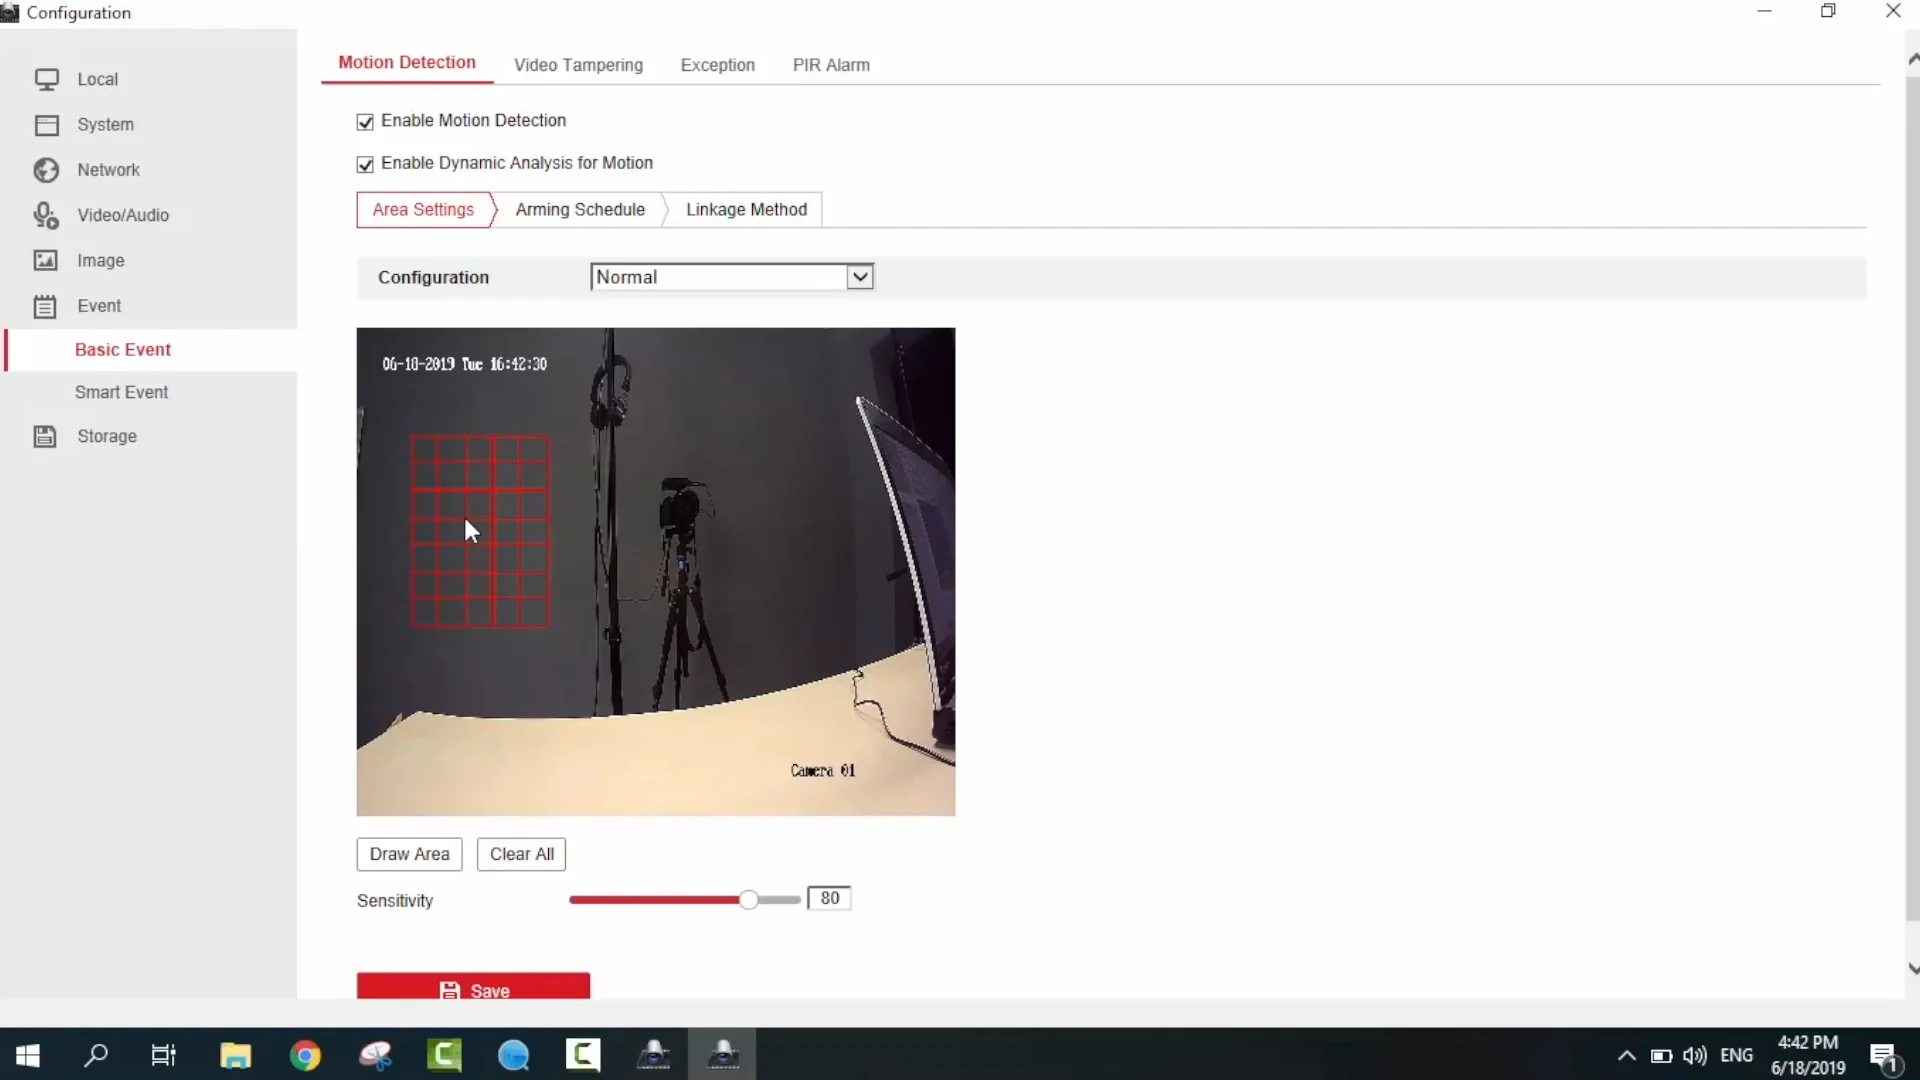
5. The Event. Tick both boxes to turn the motion detection feature on, draw the detection area, and save. If you turned on the motion detection, mark in the linkage method and the A1 box too to make it work;
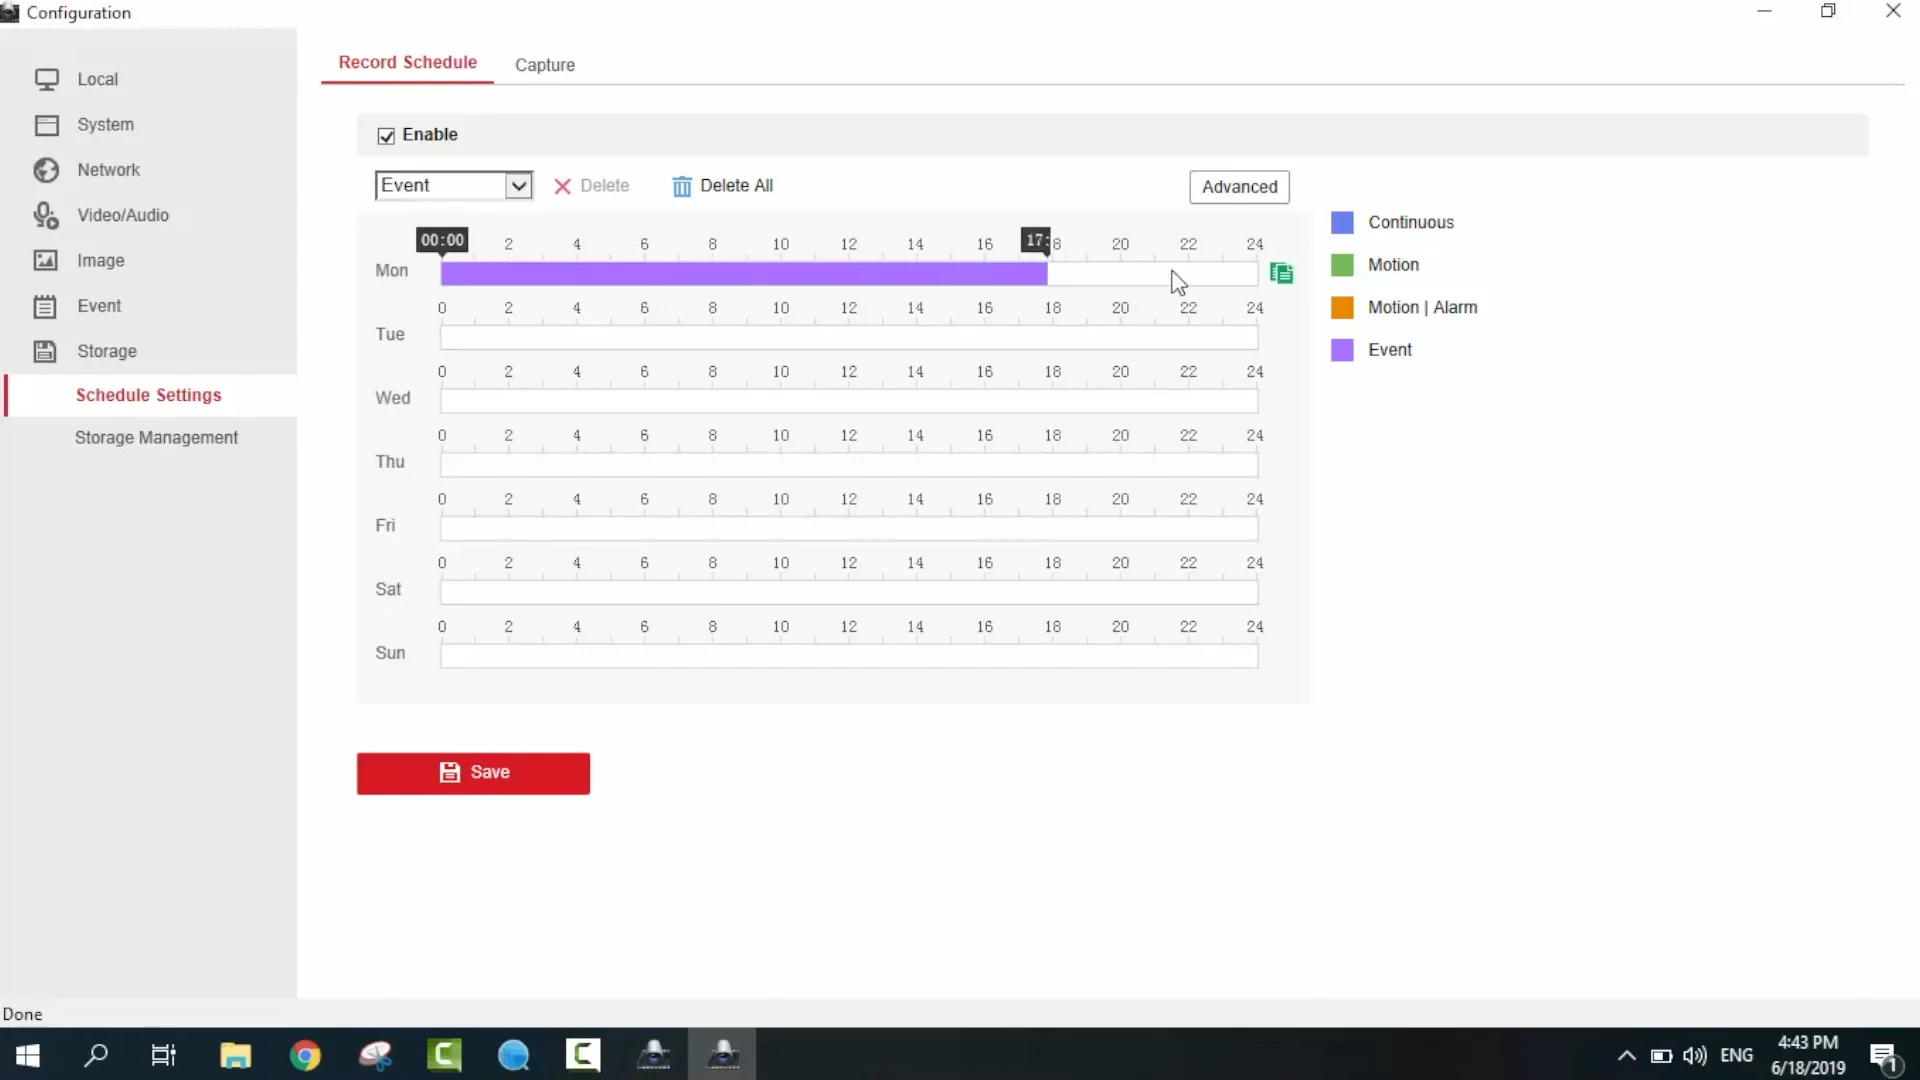
6. The final thing – schedule settings. Pick the event type if you have turned on the events and draw a required length. If you just want the camera to record continuously and you didn’t turn the events on, pick the continuous and draw the first line, then copy and multiply it to other fields. Save, and we are done.
Phone Apps
The phone apps are not actually intended for a camera's setup, and their purpose is to let you view and control some of the camera's functions. Here, we just want to show you the relevant apps that are compatible with Hikvision cams. That is the:
- IVMS-4500 as the main software;
- Hik-connect;
- EZVIZ App is an easy-to-use software.
Anyway, the Hikvision camera setup requires us to use a Personal Computer with the programs or the web interface to make everything work. The phone apps allow us to use camera functions, such as turning and remote view and control, but not the setup.