

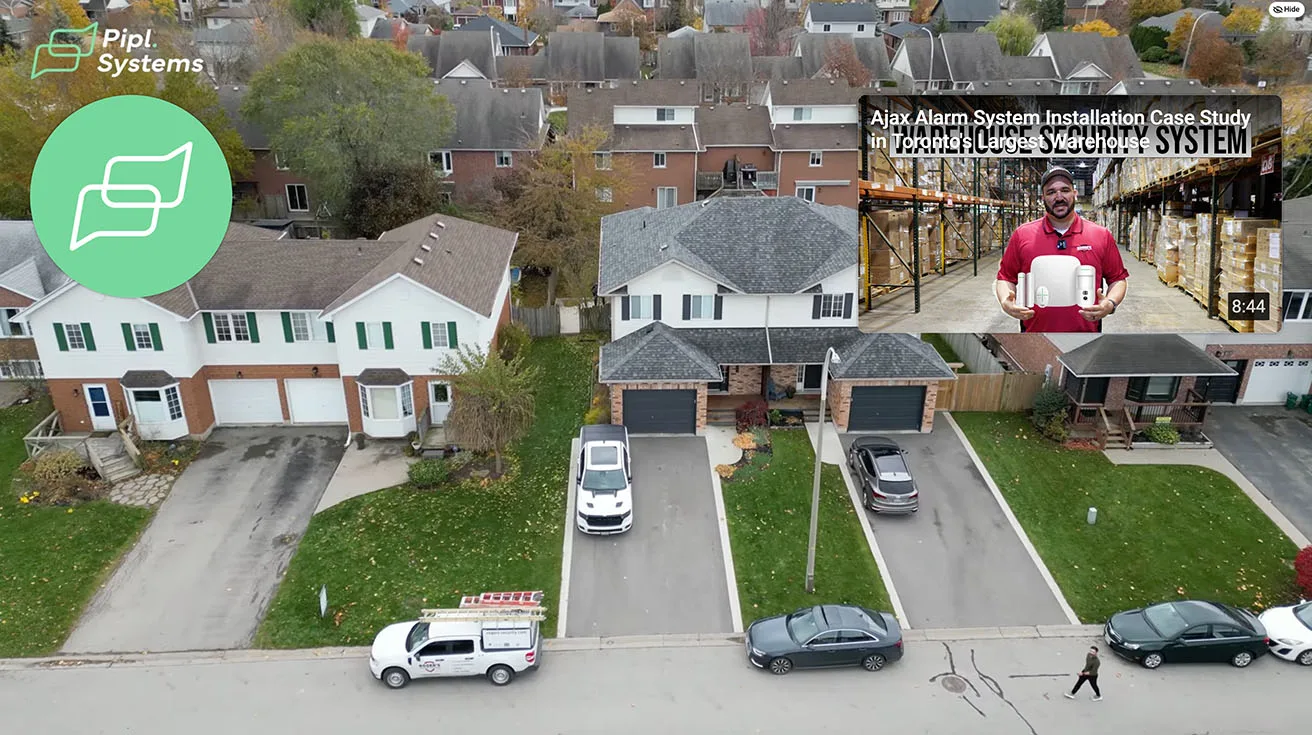
I’m Jack from Roger’s Security Systems. Together with the Pipl Systems team, we spent two days on a real residential project or Ajax Systems residential case study in Southern Ontario, Canada, filming and documenting a full Ajax Systems installation.
This is not a lab demo or show-room build:
- It’s a real home with a real family.
- More than 20 Ajax devices are deployed across all key zones.
- We designed the system to cover intrusion, video, fire, water, and automation as one ecosystem.
Our goal with this project - and this article - is to:
- Show how a complete, multi-layered home security system is designed and installed in practice.
- Explain why specific Ajax devices were chosen for each zone.
- Share practical details that actually matter day to day: notifications, false alarm reduction, user experience, and maintenance.

If you work on bigger commercial or industrial sites and want to compare how Ajax behaves in larger environments, I recommend also looking at this warehouse deployment case study:Ajax Alarm System Installation Case Study in Toronto’s Largest Warehouse - it shows how similar design principles scale up from a single house to a massive logistics facility.
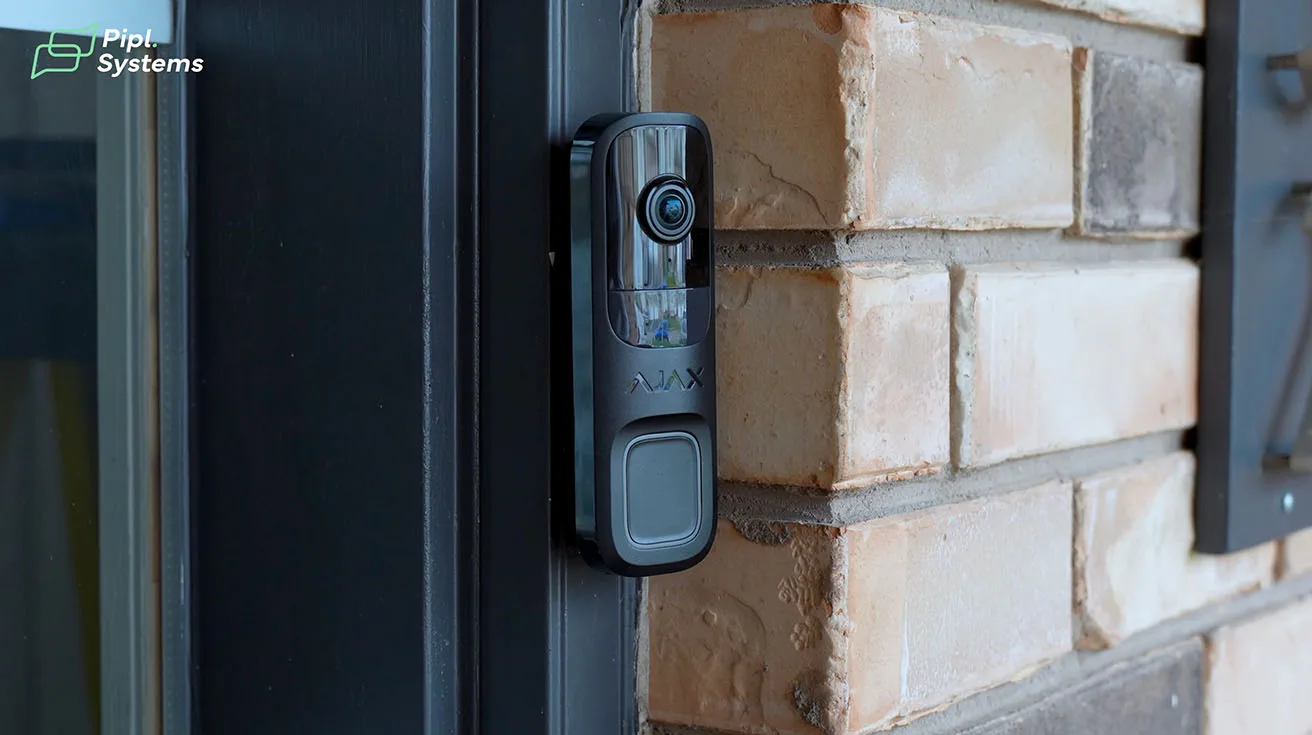
2. Front Entry: Ajax AI Video DoorBell + Yale Smart Lock
At the front door, we start with the main entry stack:
- Ajax AI Video DoorBell
- Yale smart lock integrated with Ajax
The idea is simple: this isn’t just about seeing who’s at the door - it’s about managing access remotely, safely, and without hassle.
2.1. Smart Notifications Instead of Constant Pings
Once the DoorBell is installed and added to the Ajax app, here’s how the notification logic works in practice:
- The system uses a delay between repeat notifications.
- Example: if you’re mowing the lawn or walking back and forth in front of the house, the DoorBell won’t keep pinging your phone nonstop.
- You get meaningful alerts, not noise.
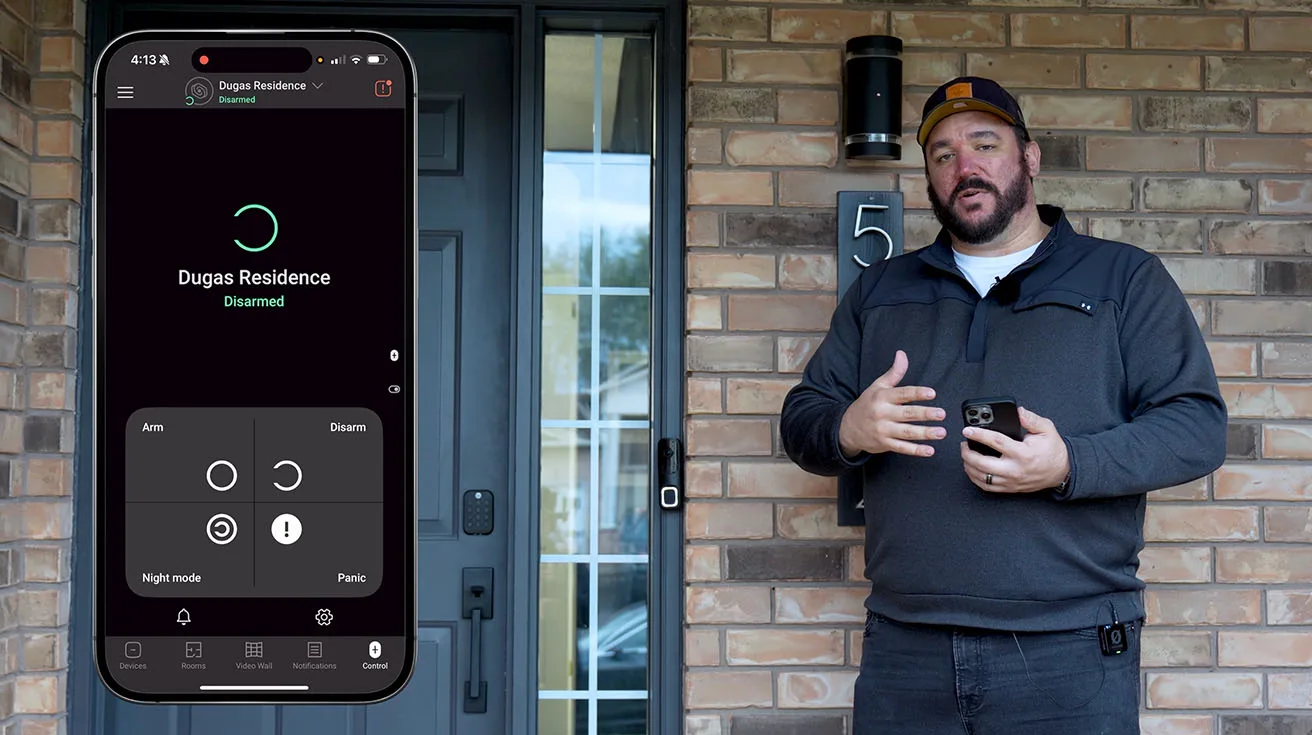
You press the DoorBell button, the app shows:
- A DoorBell notification
- One-tap access to the live video screen
- A “Talk” button for full two-way audio


1 / 6
2.2. Remote Unlock from the Same Screen
From the DoorBell screen in the Ajax app, there’s an oval icon at the bottom for home automation devices.
From that single screen, you can:
- Unlock the Yale smart lock on the front door
- Lock it again when your visitor leaves
- Do it all without leaving the video view
Real-world use case:
Your kids or family member arrive home while you’re five minutes away picking up dinner. They ring the DoorBell, you see them, talk to them, and unlock the door from the DoorBell screen - no separate app, no jumping between interfaces.
If you want a deeper technical breakdown of how this integration is done, including wiring and app-level setup, check out:How to Integrate Yale Smart Locks with Ajax Systems - it covers the integration logic behind what you see in this project.
For a dedicated deep dive into the DoorBell itself, its AI features, and configuration options, you can also read:Ajax AI Video DoorBell: Honest Review & Real‑World Use.
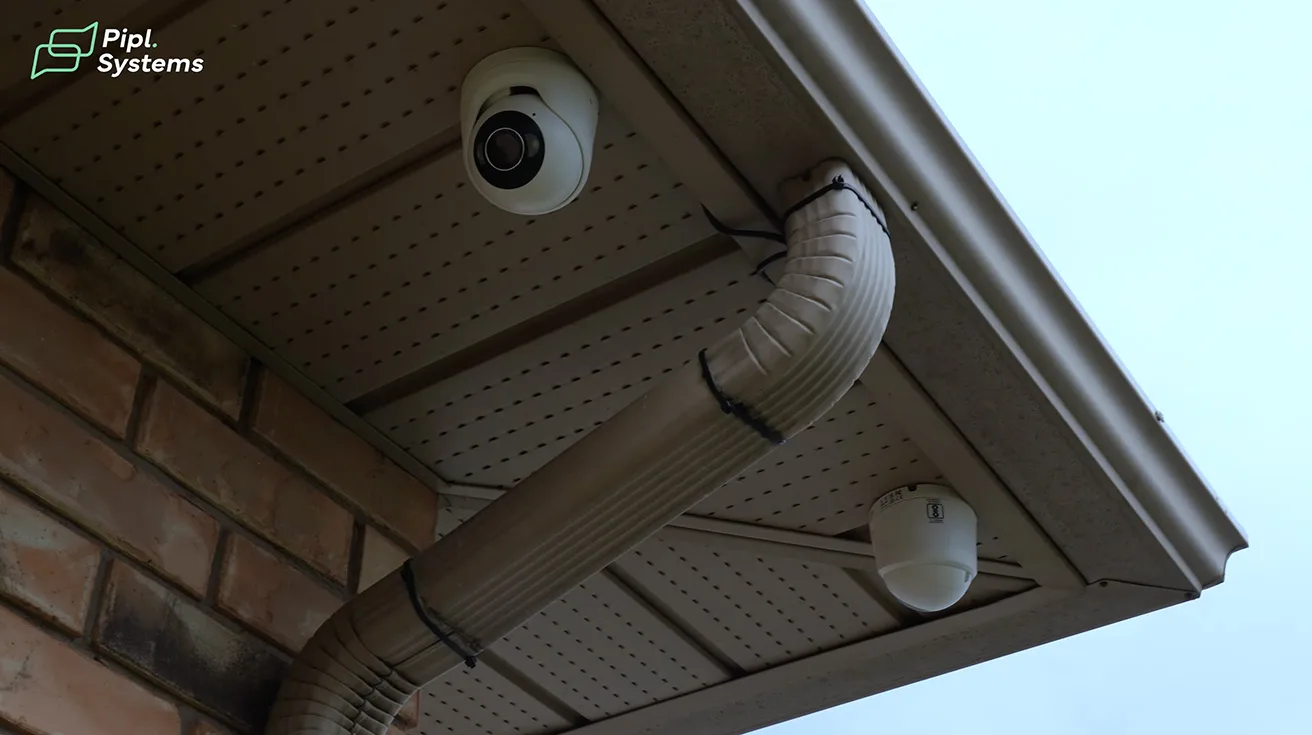
3. Exterior Video Coverage: Standard vs HL Ajax Cameras
At the side of the house, we installed two Ajax Turret cameras side by side, each solving a different lighting challenge.
3.1. Standard Ajax TurretCam - Areas with Enough Light
Facing the front area, we mounted a standard Ajax Turret camera. Why:
- The front zone already has garage lighting and street lights.
- There’s enough ambient light for the standard camera to deliver full-color images at night.
- No need to over-engineer with extra illumination where it’s not required.


1 / 9
3.2. Ajax TurretCam HL - Areas with Poor Lighting
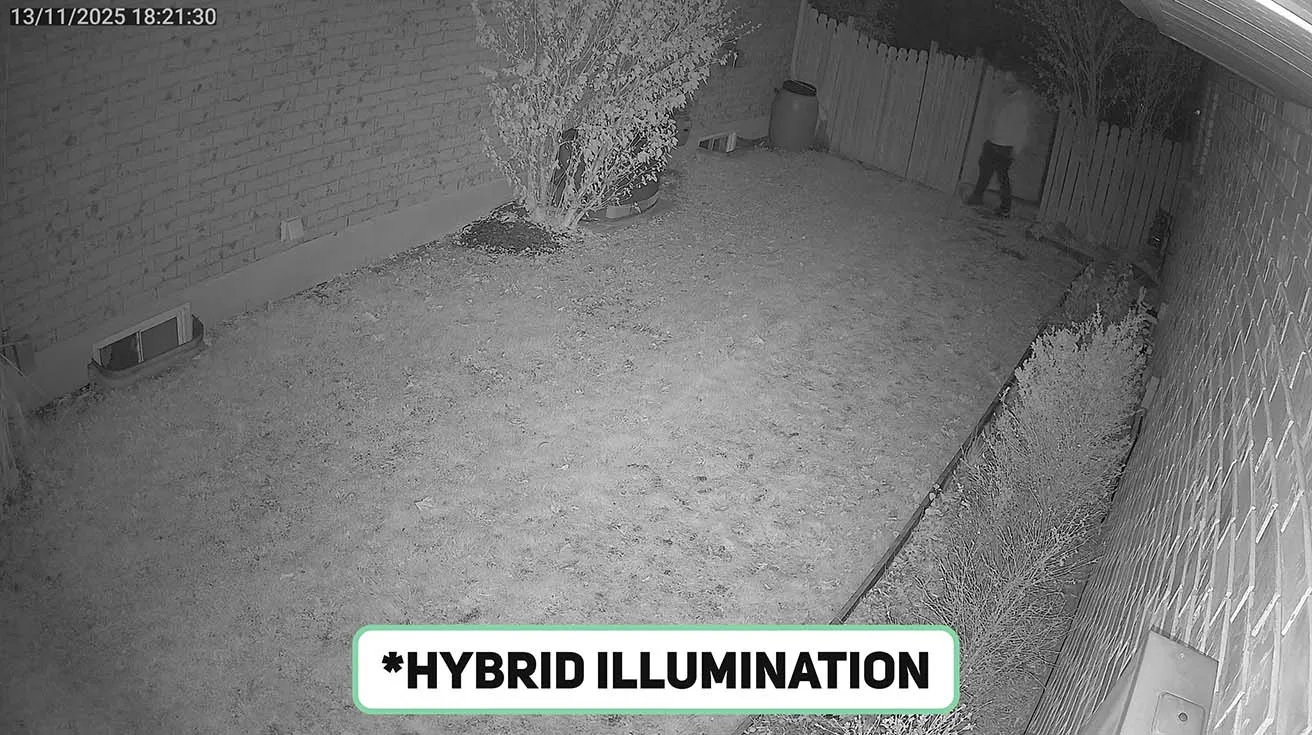
In areas with minimal or no lighting (side yard, backyard, corners), we use the Ajax TurretCam HL (Hybrid Illumination):
- Built-in dual LEDs provide extra light in low-light areas.
- This keeps color images at night, even in spots where you can’t or don’t want to add separate lighting.
We show daytime footage and then switch to nighttime clips with no additional backyard lights turned on - the difference between the standard camera and HL is immediately visible, especially in hard-to-light zones.
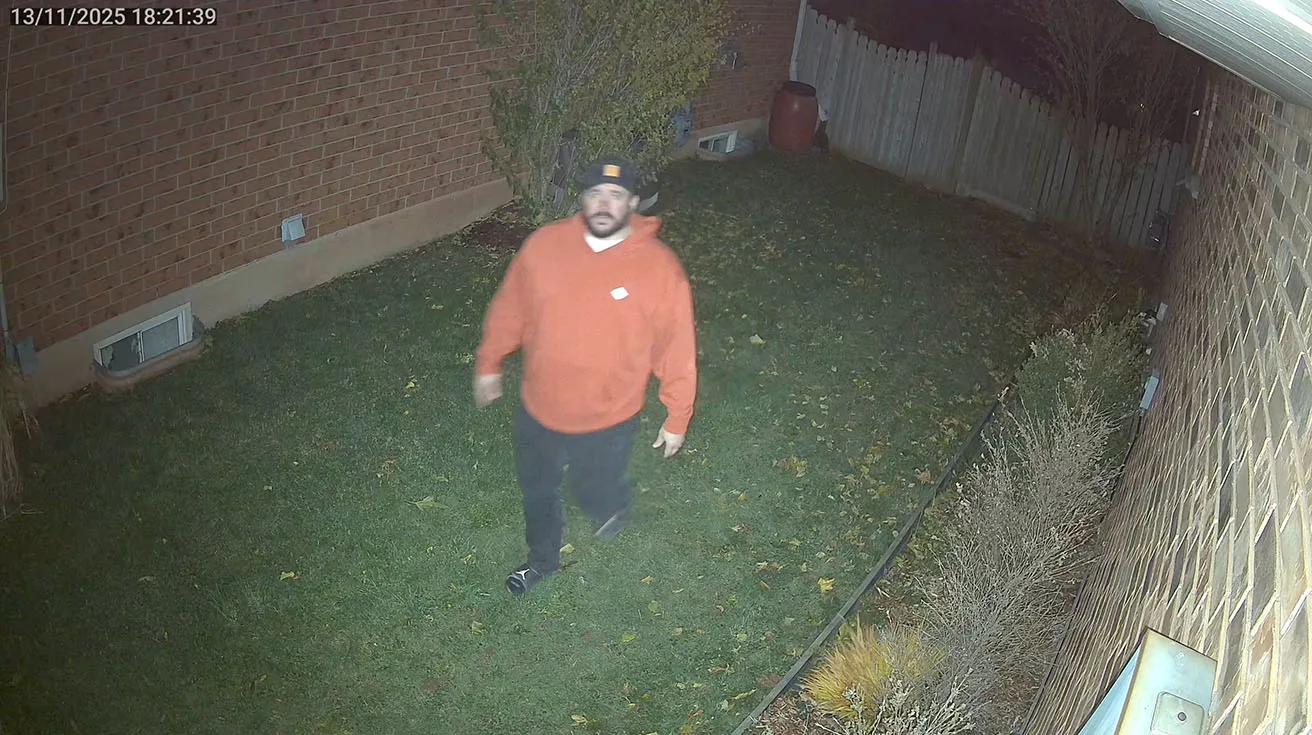
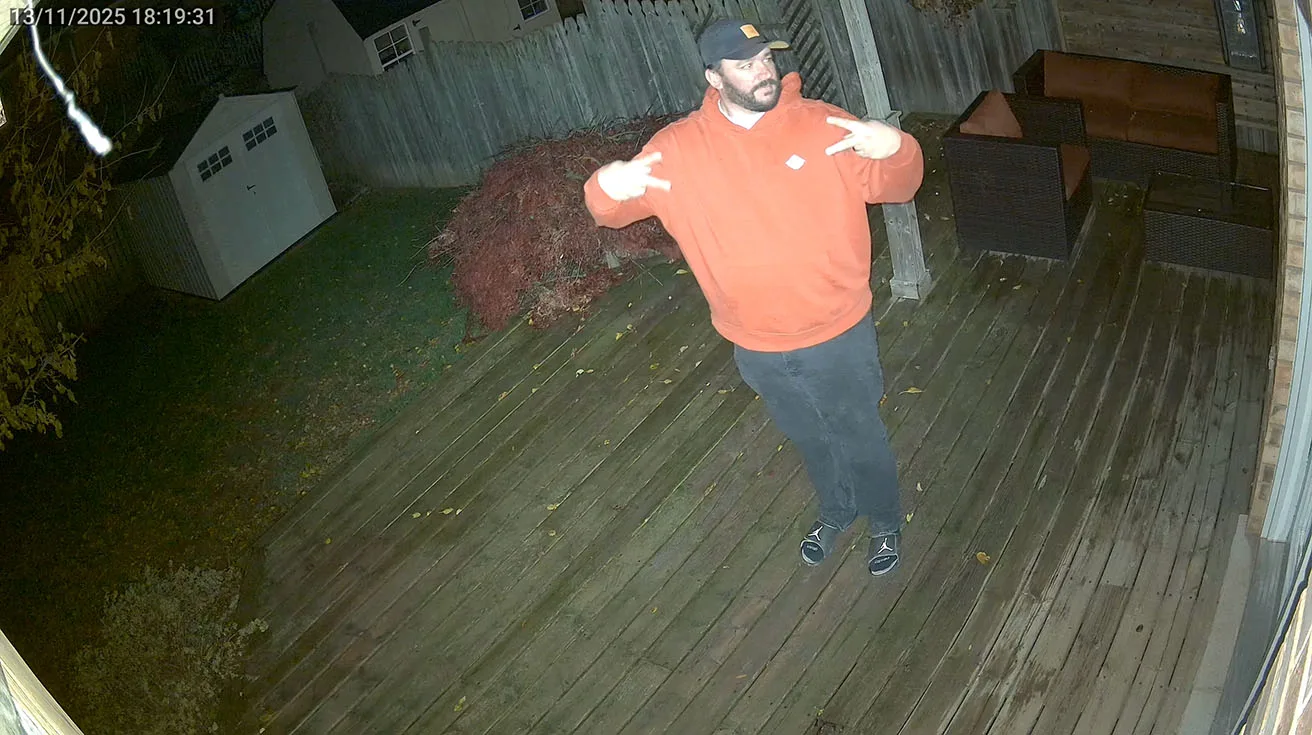
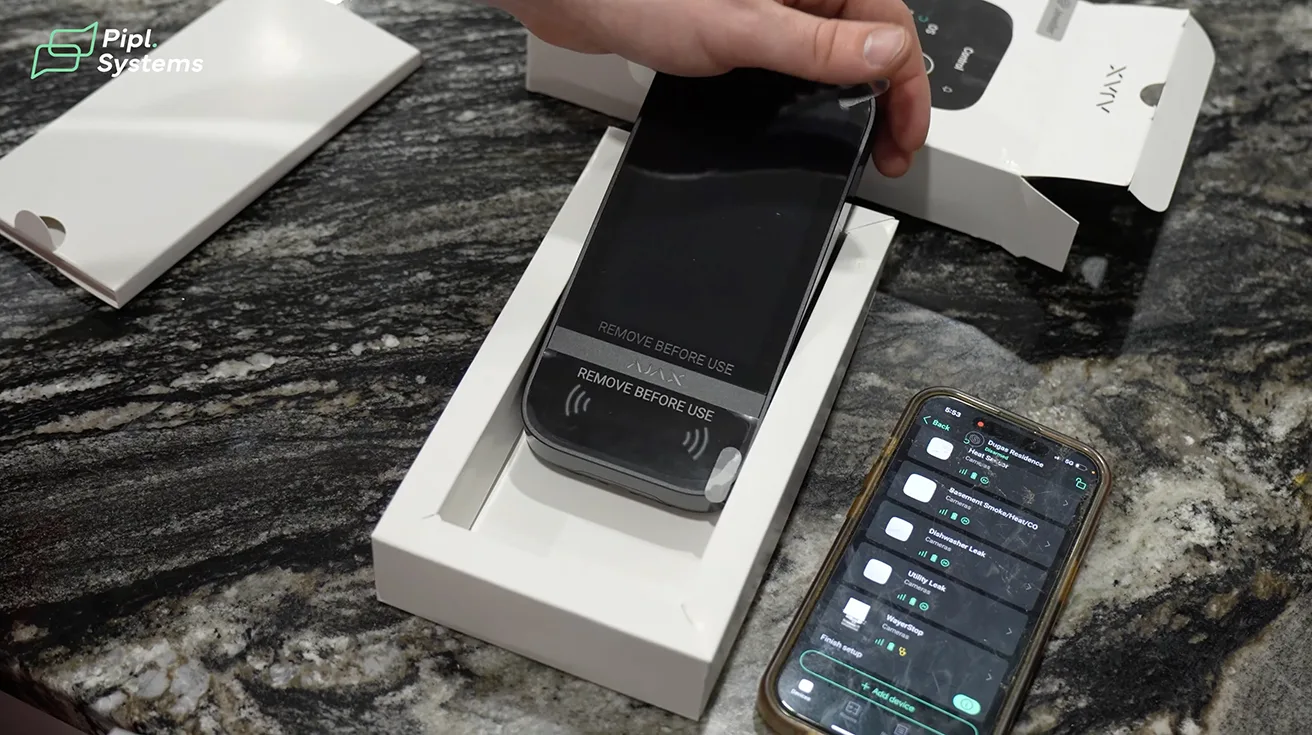
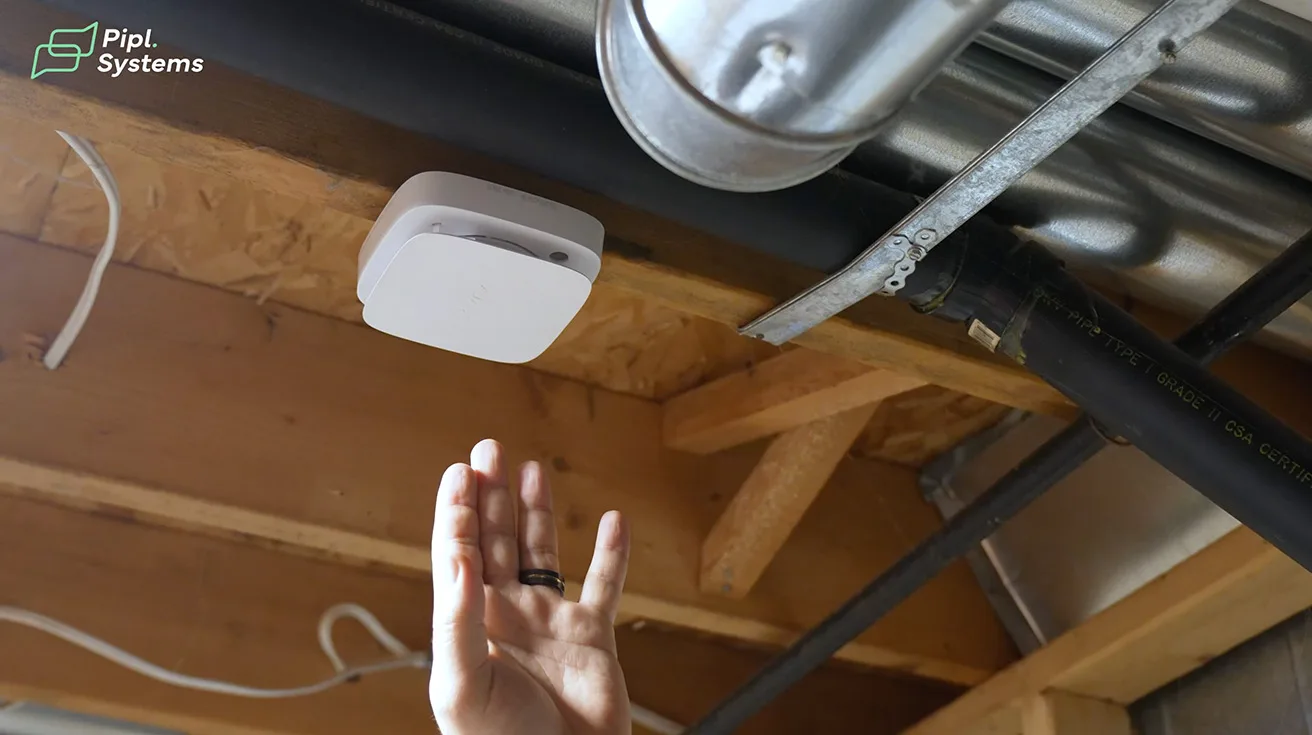
4. MotionCam Outdoor HighMount: Smart Coverage for the Backyard and Gate
Next, we move to the backyard and side gate, where running full camera wiring is not always practical or necessary.
Here we use:
- Ajax Outdoor MotionCam (high-mount version)
Key points:
- The MotionCam Outdoor HighMount can be installed higher up, making it much harder to tamper with compared to traditional 4.5-ft mounting positions.
- It’s perfect for areas that are difficult to cable or where a full camera would be overkill for the small area.
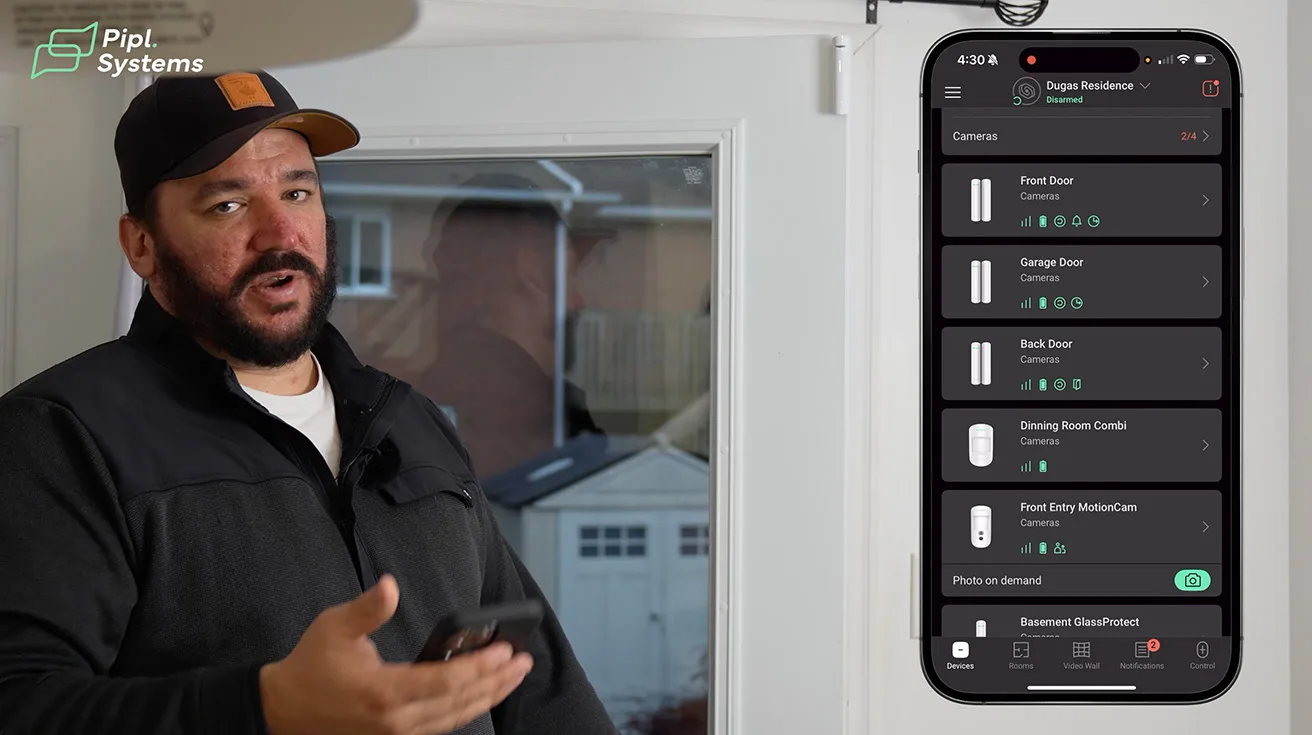
- In the app, we can request a photo on demand to see what’s happening.


1 / 6
In this project, the MotionCam covers:
- The gate area
- The approach over the fence
- A zone partially blocked for the turret cameras by trees and landscaping
This way, even where video coverage is limited, you still have an immediate visual verification when the system is armed.
5. Rear Perimeter: CombiProtect and DoorProtect on the Back Door
At the back of the house, we focus on intrusion at doors and windows.
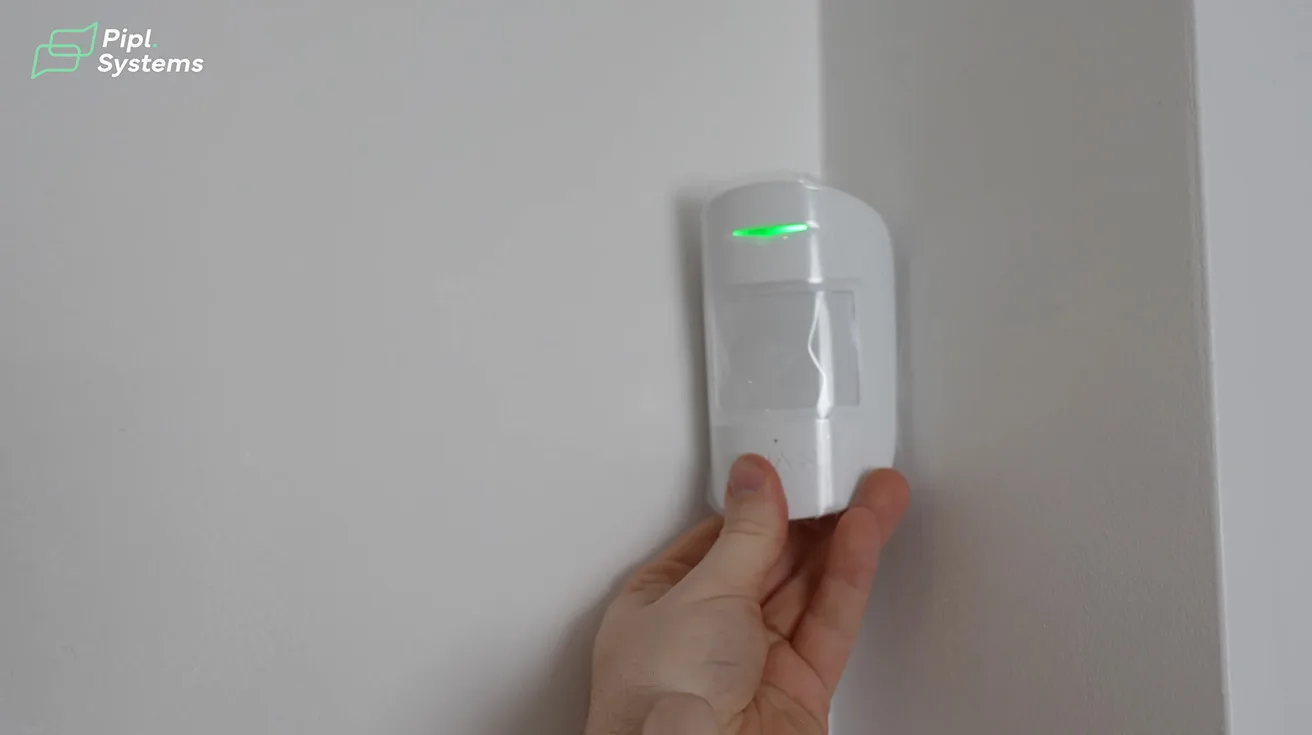
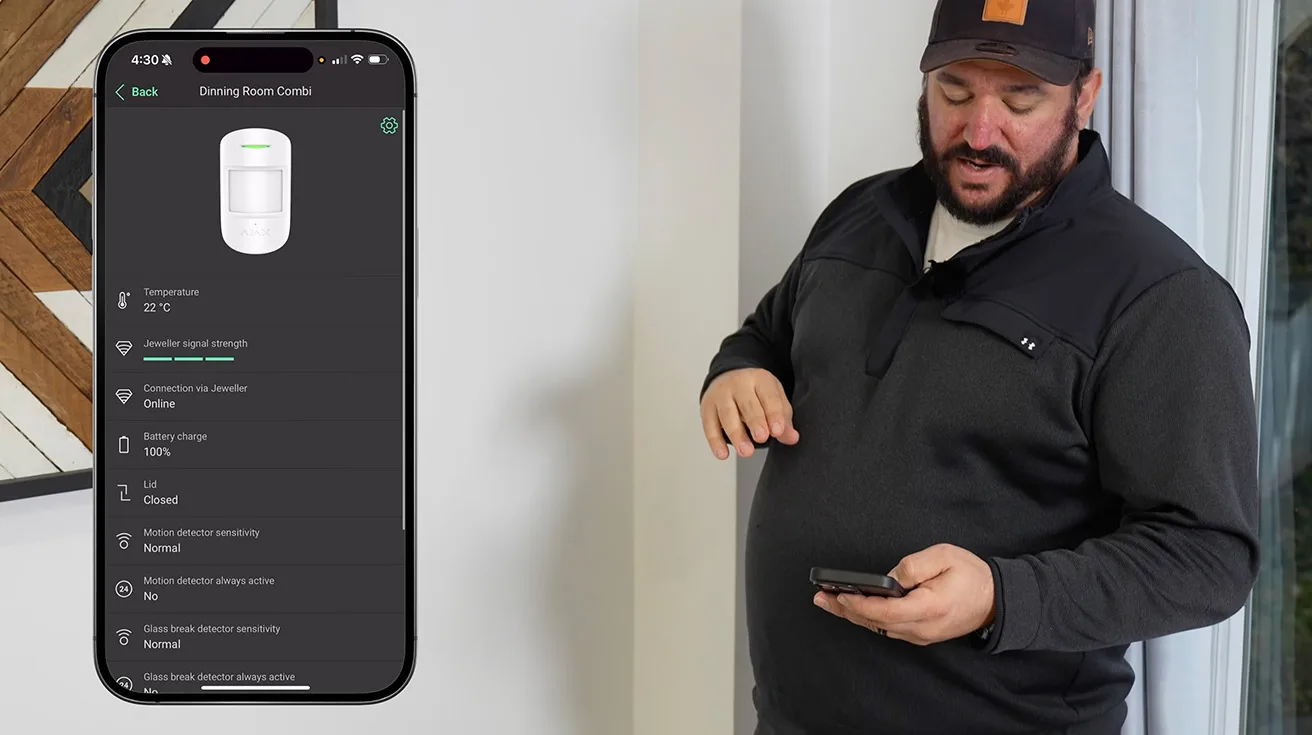
5.1. CombiProtect: Motion + Glass Break in One Device
On the rear of the house, we installed an Ajax CombiProtect. It looks like a standard motion, but:
- It includes both motion detection
- And a glass break sensor
In the app, motion and glass break each have their own settings, and we can assign them different behaviors.
We also use “follower mode”:
- If no entry/exit device has been triggered first, the CombiProtect acts as an instant alarm.
- If someone breaks glass and steps in, the system triggers immediately, even before they reach any interior doors.


1 / 7
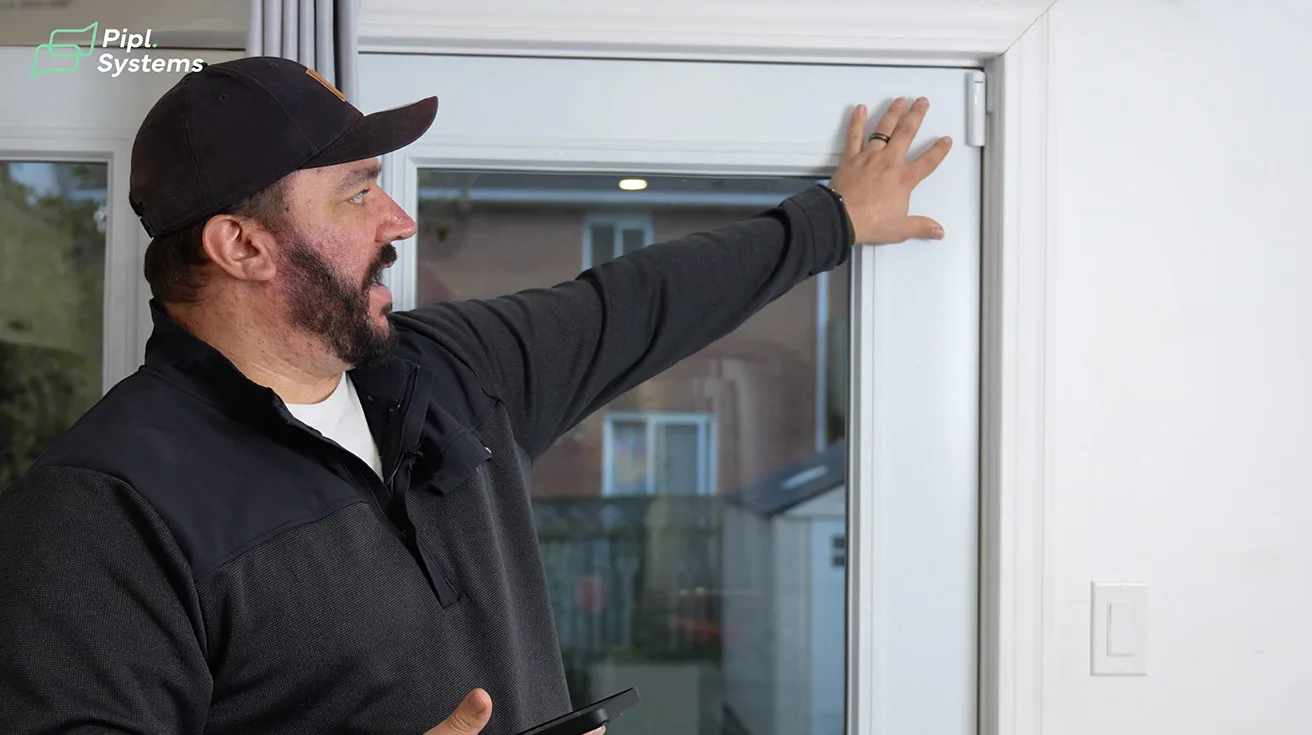
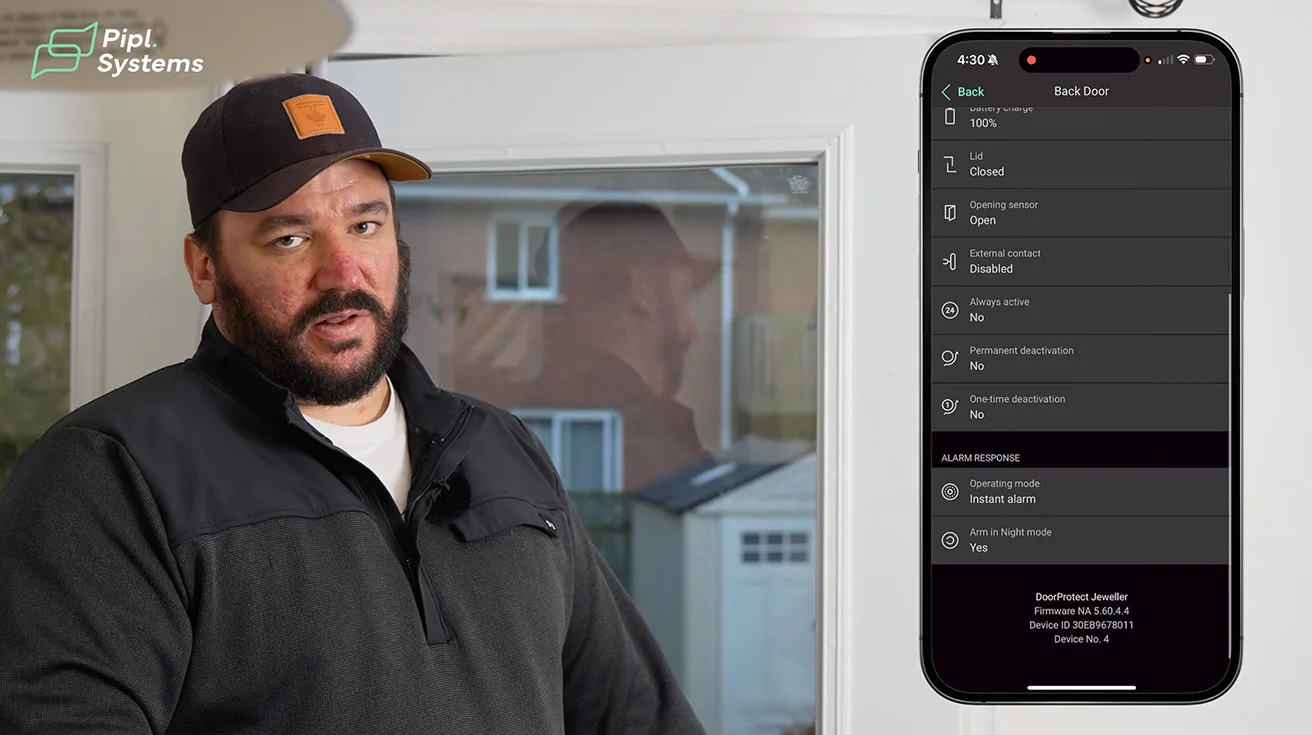
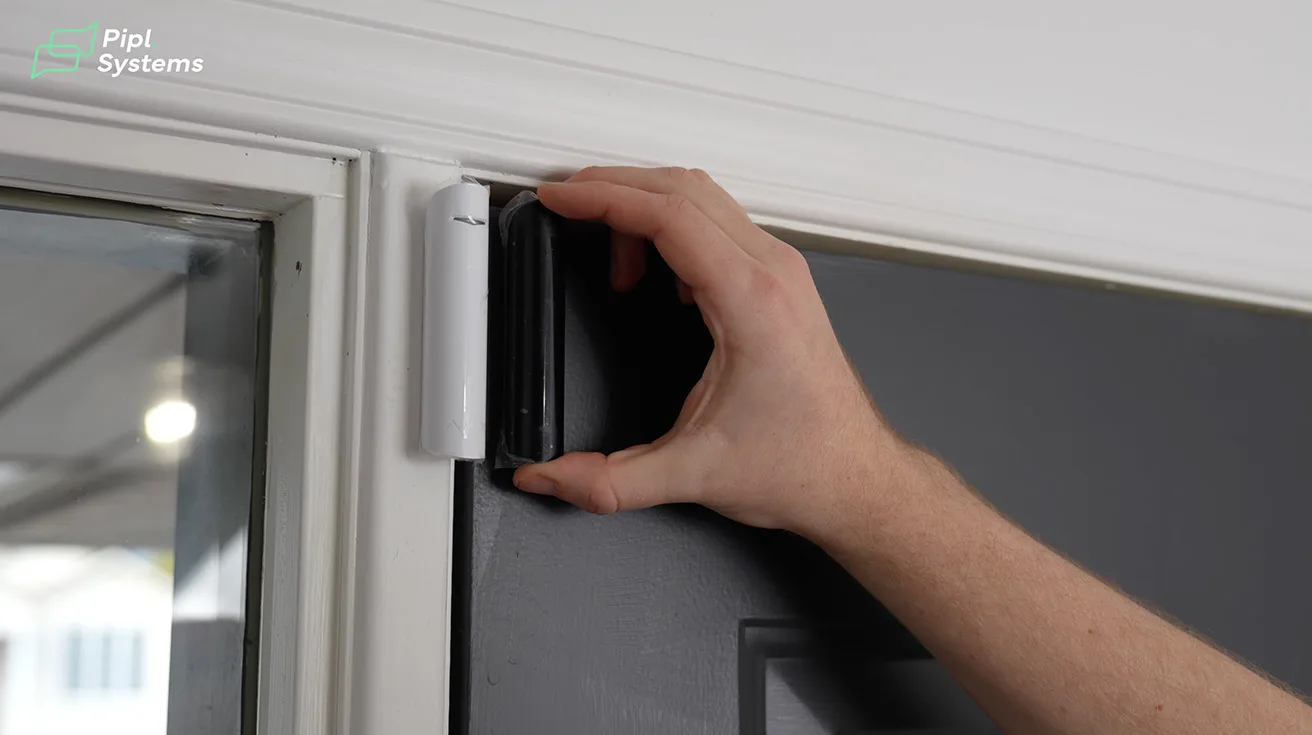
5.2. DoorProtect on the Back Door - Instant Alarm
For the back door, we use Ajax DoorProtect with:
- Instant alarm behavior - this door is not used as a normal entry point, so we don’t want an entry delay.
- If someone cracks this door, the alarm goes off right away.
Because of an unusual door frame, we also used the smaller magnet that comes in the kit:
- The standard magnet matches the sensor body size.
- The mini magnet lets us keep a clean, aligned look even on awkward framing.
- It’s a small detail, but visually and mechanically important for a professional install.
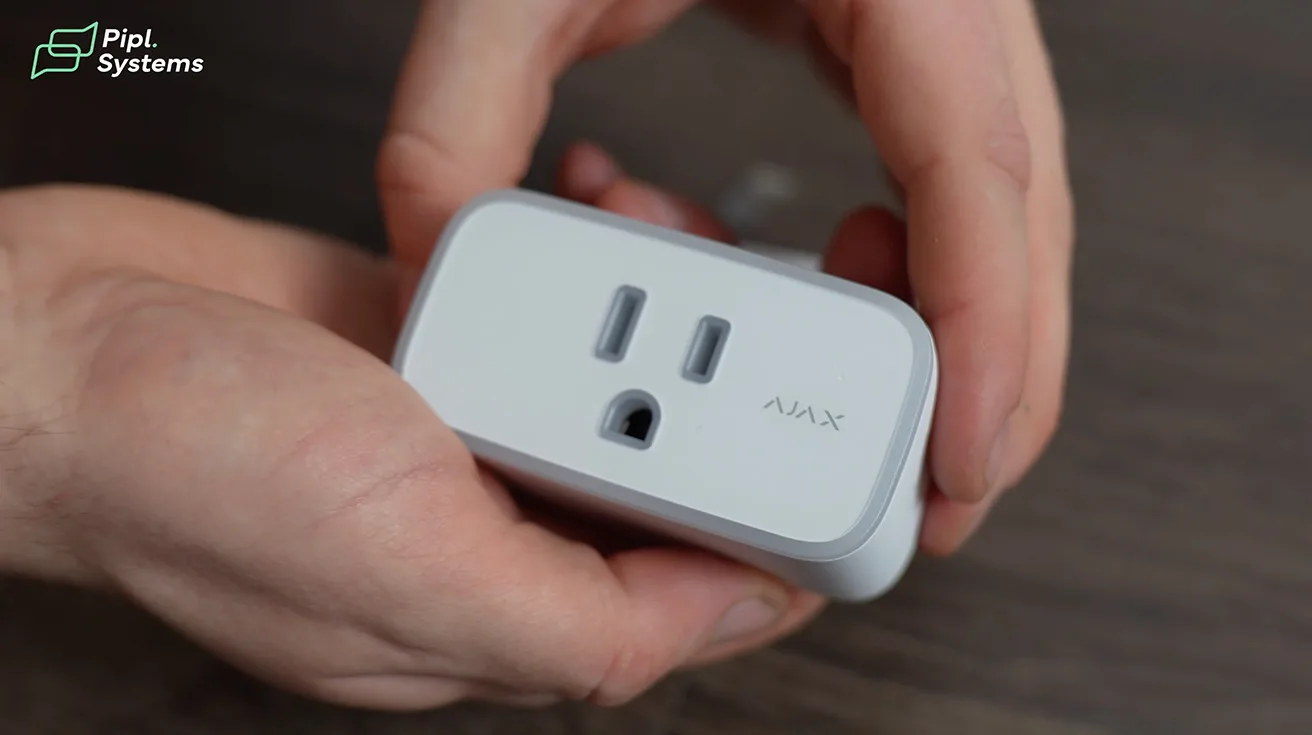
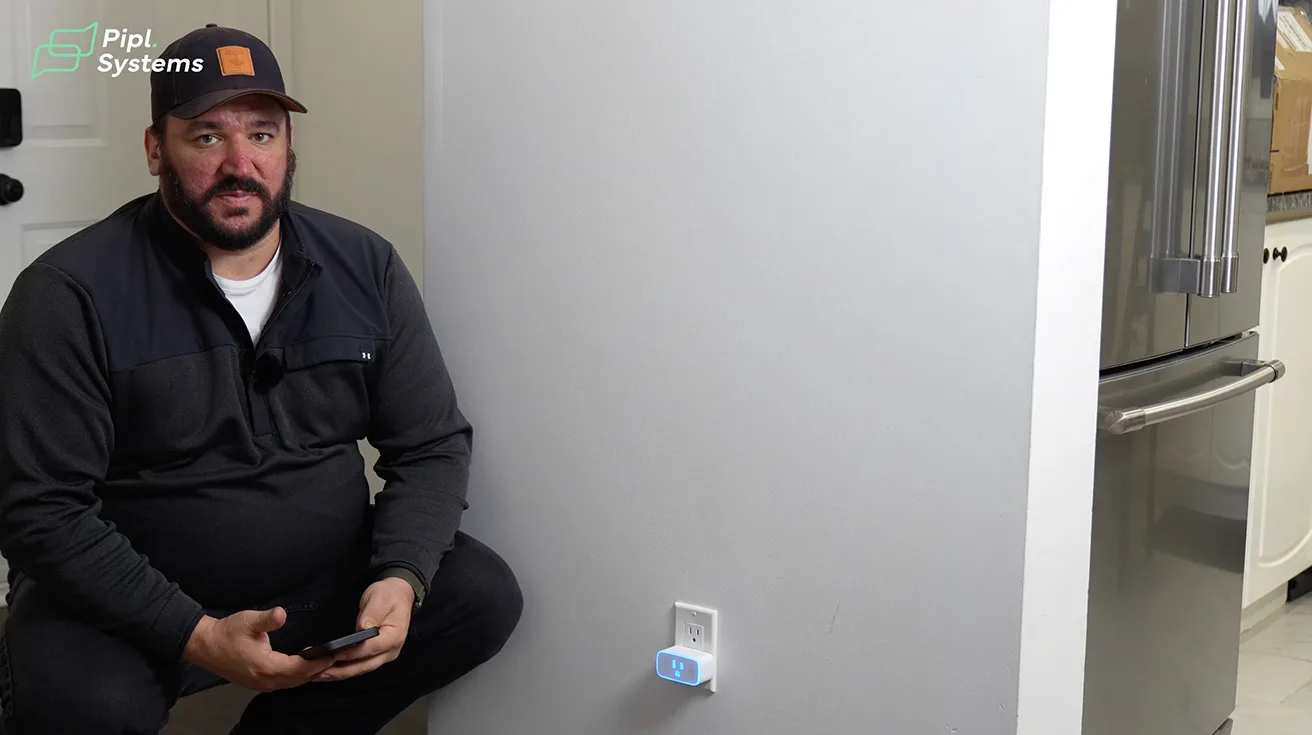
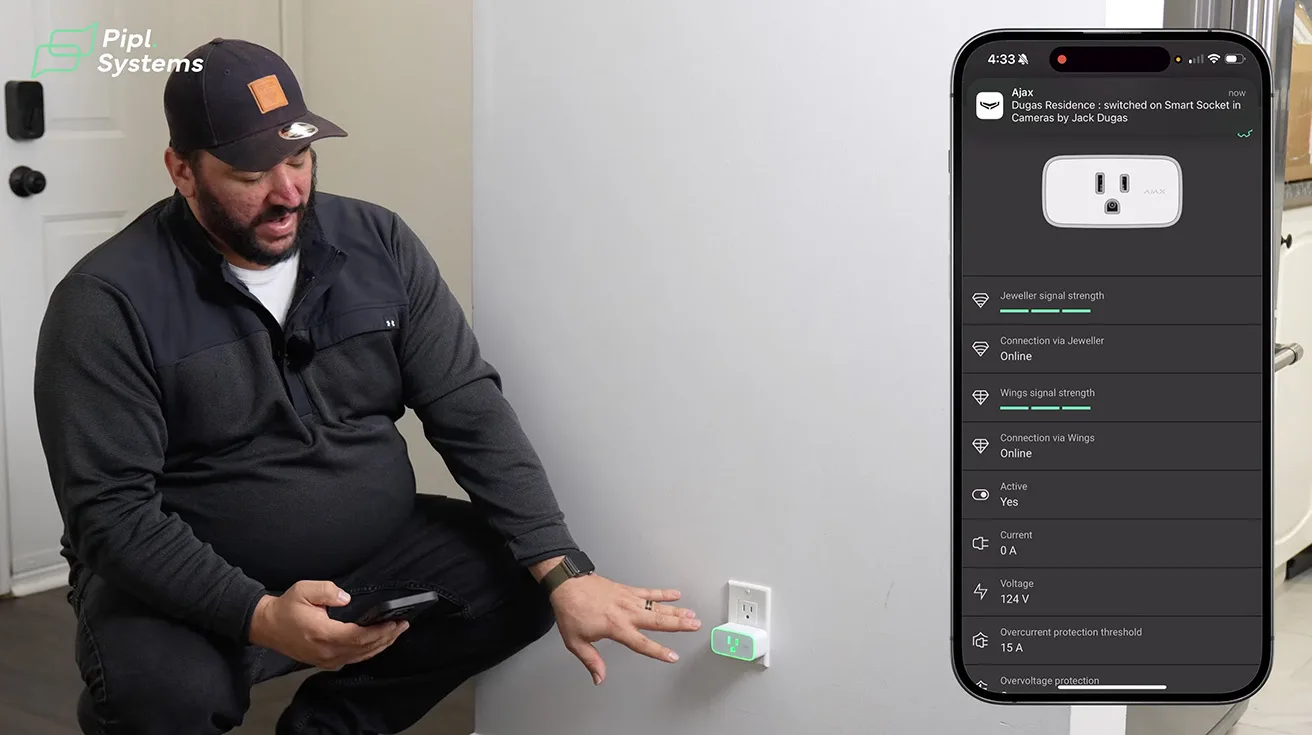
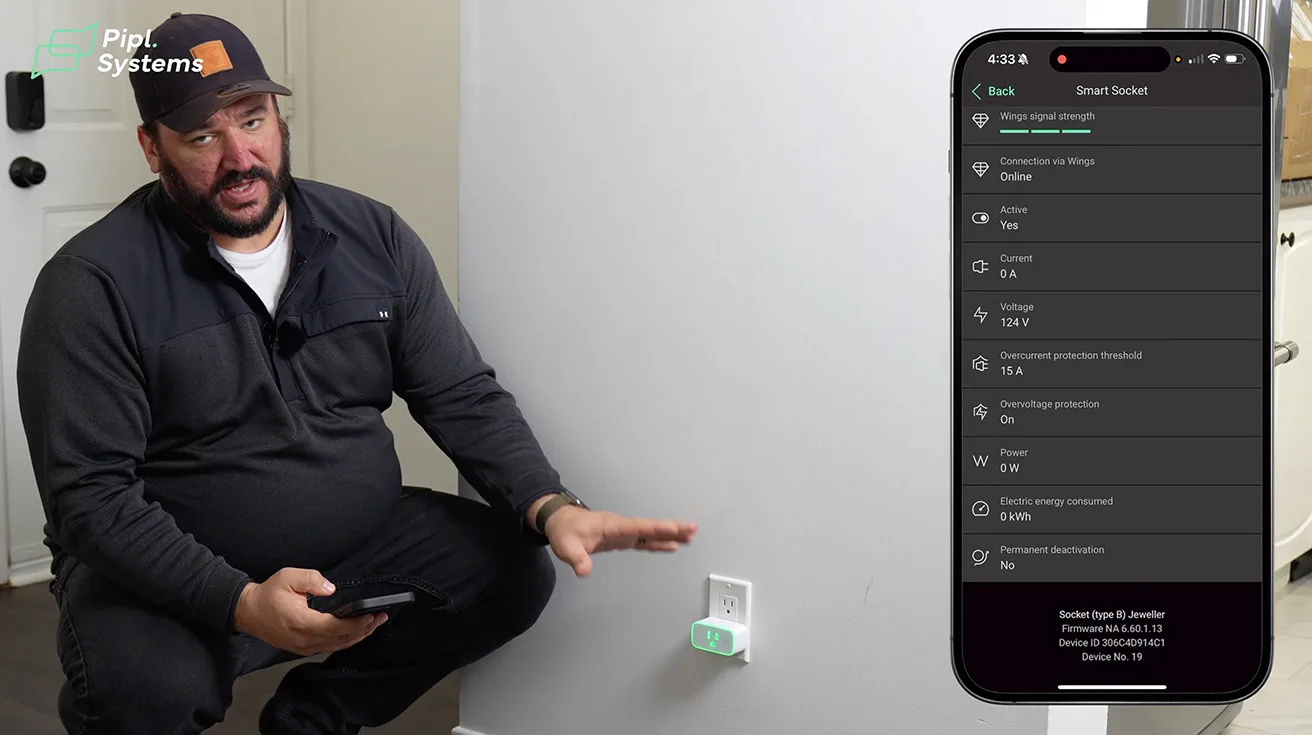
6. Ajax Smart Socket: Lighting Automation and Power Insight
Inside, we installed Ajax Smart Socket (North American version) - and it does more than just “on/off.”
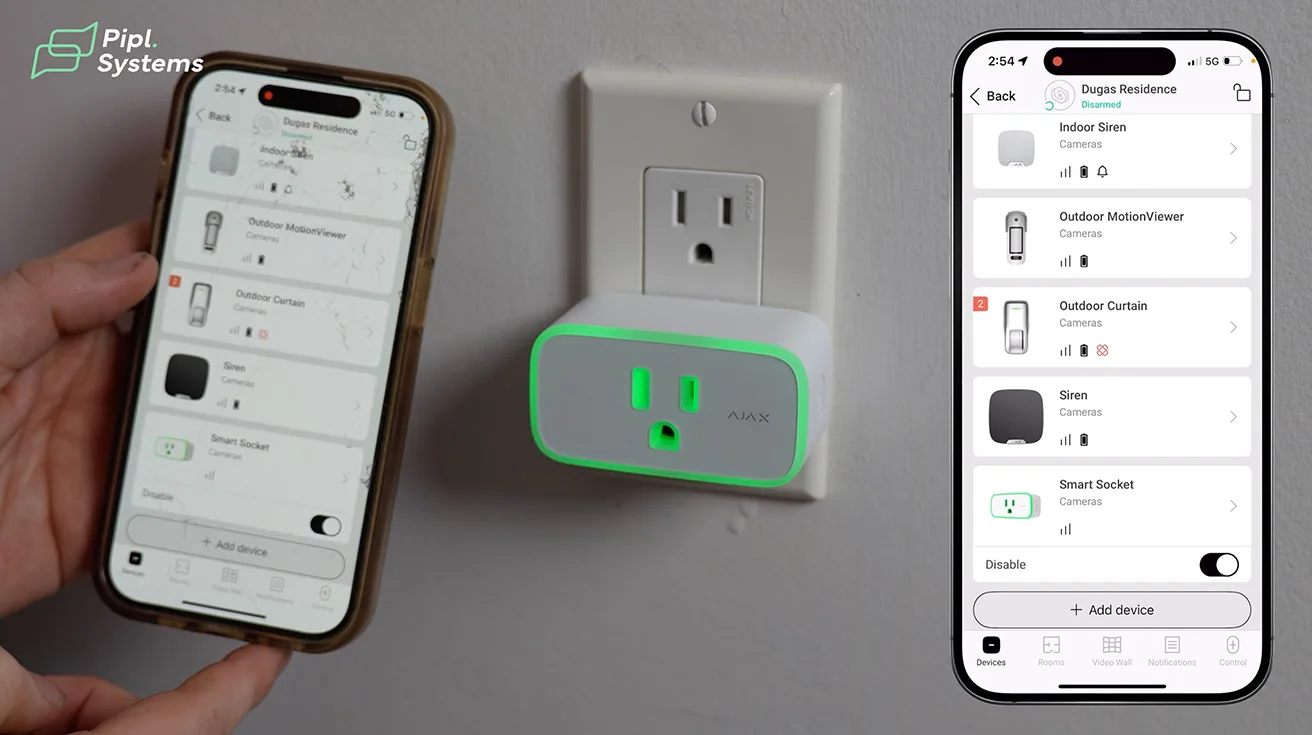
From the app, you can:
- Toggle the socket and see the status with a clear color change
- View real-time power draw
- Check the voltage passing through
- See energy consumption over selected time periods
- Reset consumption stats when needed

1 / 6
A very practical use case is presence simulation:
- When the system is armed (away mode), a scenario turns on a table or floor lamp at certain times.
- From the outside, the house looks occupied, which can deter casual vandalism and opportunistic break-ins.
This is a simple example of how Ajax blurs the line between a security system and basic home automation in a way that still stays focused on safety.
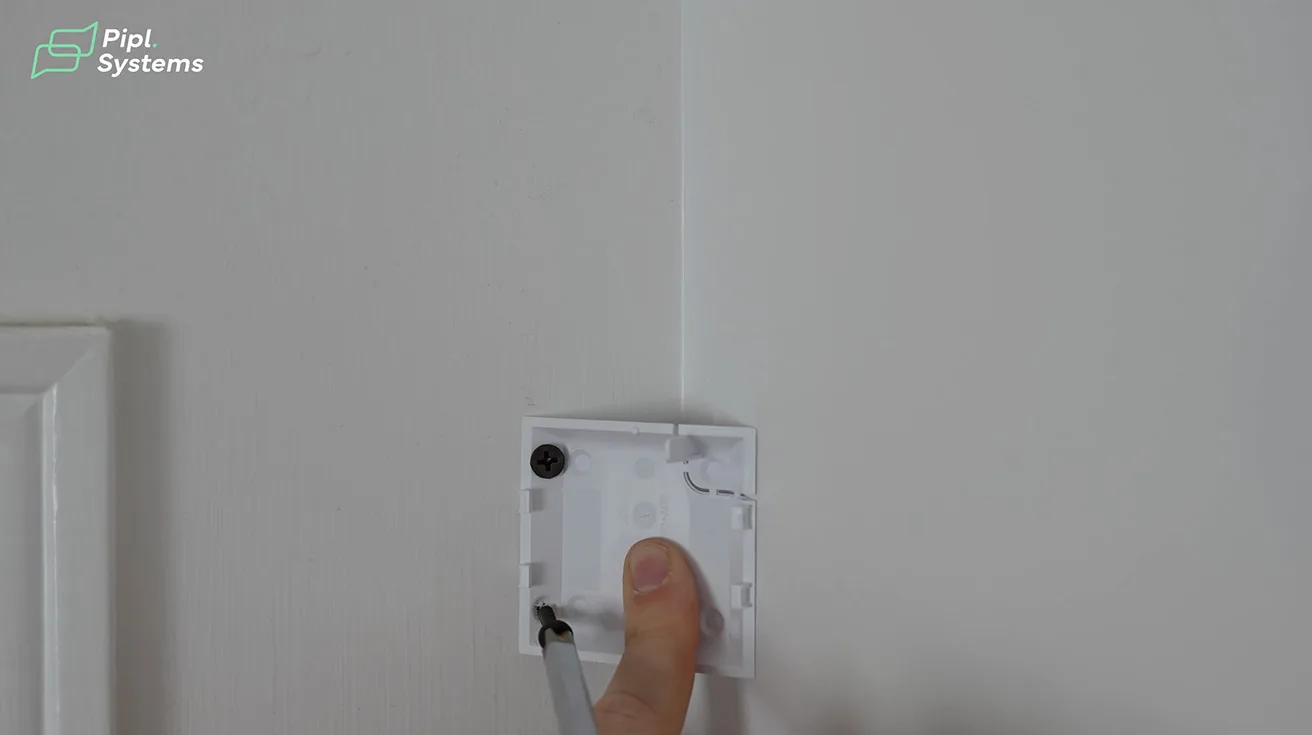
7. Front Interior: Discreet Door Sensors and HomeSiren
At the front entry inside the house, we installed:
- Another DoorProtect contact on the front door
- An Ajax HomeSiren just above it
7.1. Discreet Hardware and Color Matching
At Roger’s Security, we care a lot about how devices look in people’s homes. Here we:
- Used a white sensor with a black magnet and color-matched them to the door and trim
- Positioned them to visually blend with the frame
After a week or two, most homeowners forget they’re even there - which is exactly what we want.

1 / 3
7.2. HomeSiren for Indoor Audible Alerts
The HomeSiren is tuned for residential environments:
- Loud enough to cover a two-story home
- Clean, modern look that doesn’t dominate the interior
Later in the project, we complement this with a StreetSiren outside for external alerts.
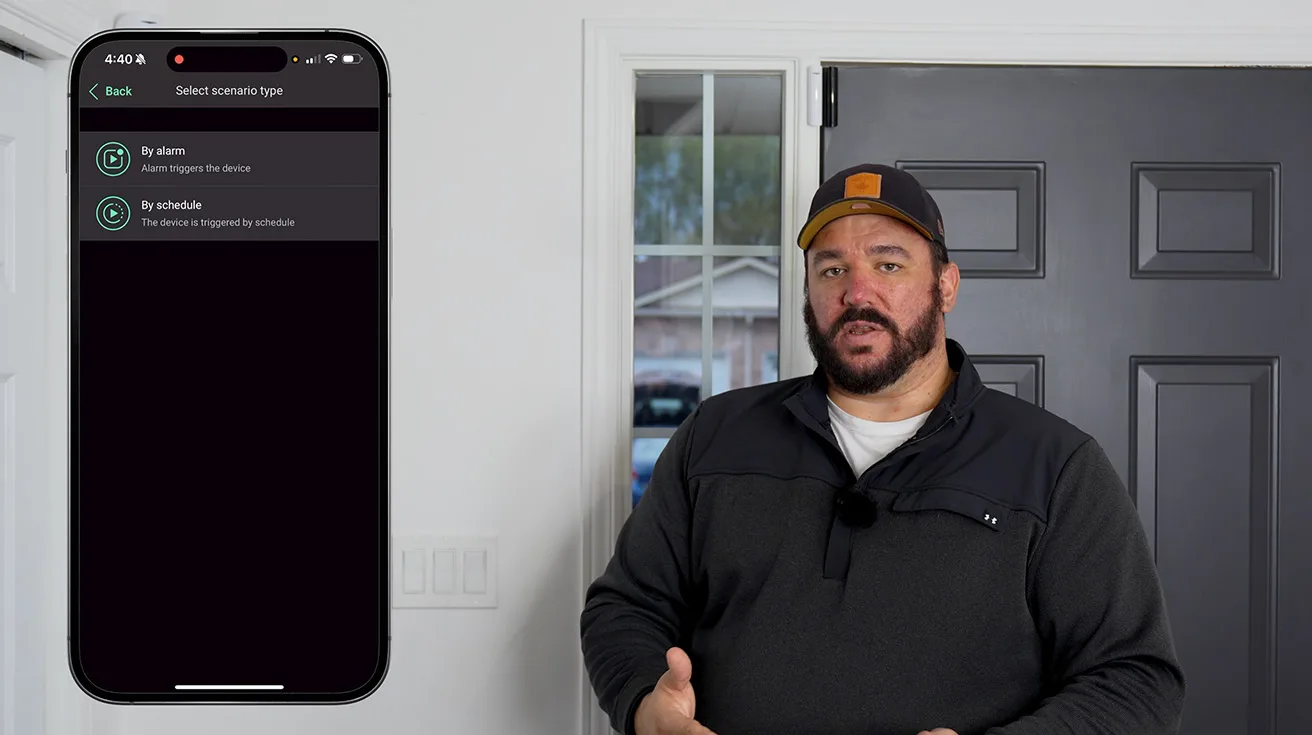
8. Ajax KeyPad TouchScreen: Access, Scenarios, and Bluetooth
Next to the front door, we installed the Ajax KeyPad TouchScreen.
It’s more than a numeric keypad:
- Arm/disarm control
- Scenarios access (automation)
- Panic button options
- Bluetooth support


1 / 3
Those “wave” icons at the bottom indicate Bluetooth functionality. That gives you multiple ways to interact:
- Tap your phone like a Bluetooth credential
- Use Ajax cards or fobs instead of entering codes
For many users, this makes daily operation faster and more secure - fewer shared PINs, more controlled credentials.
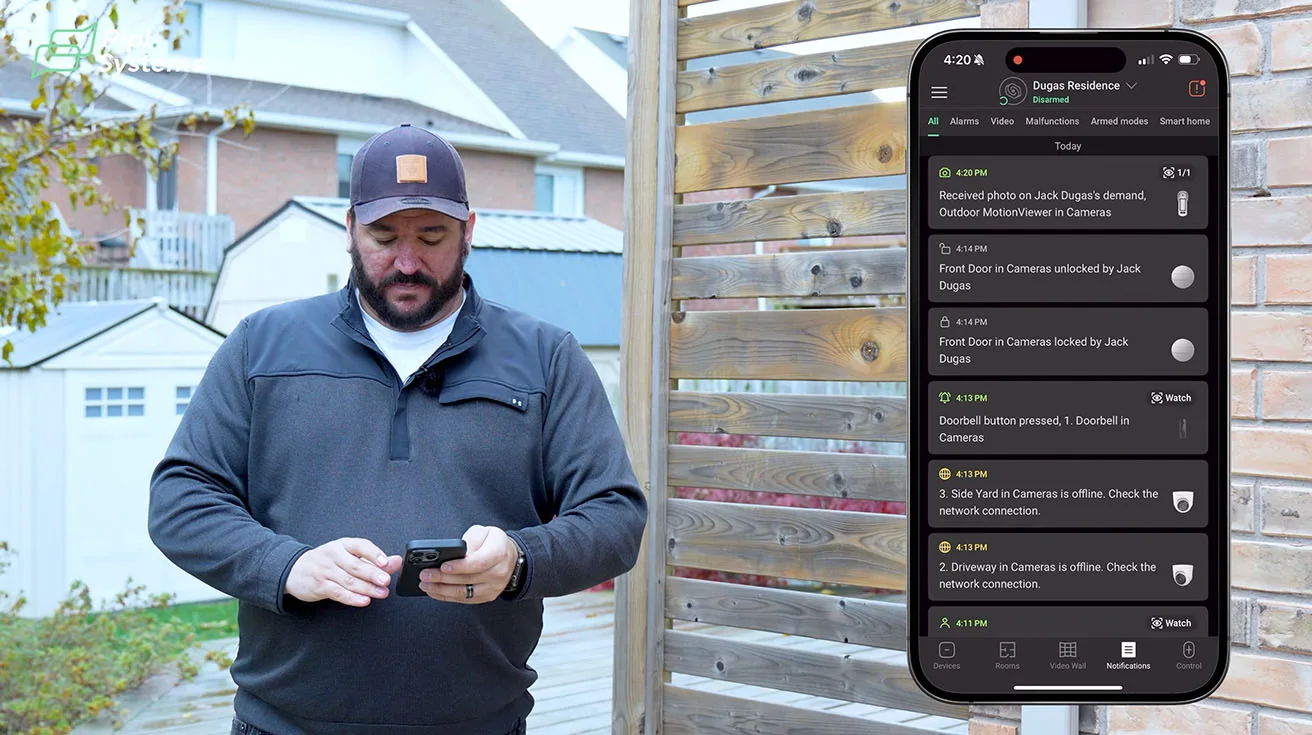
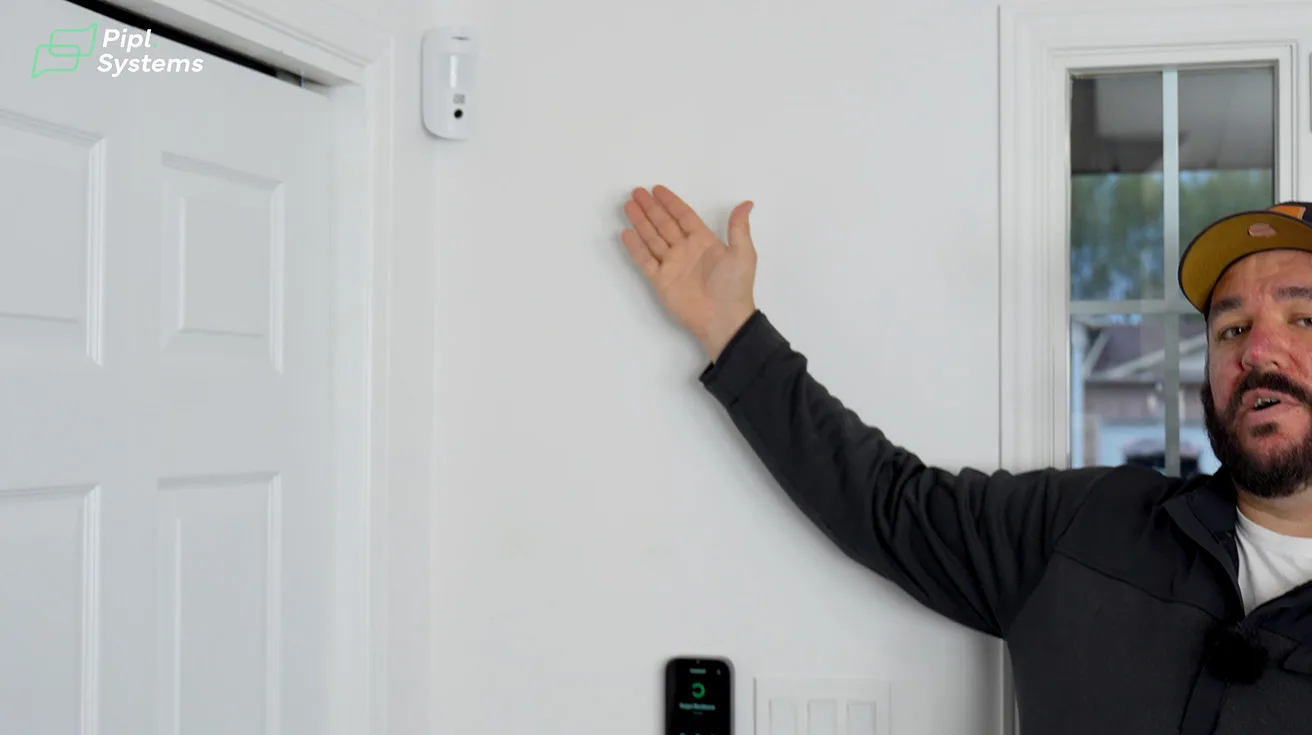
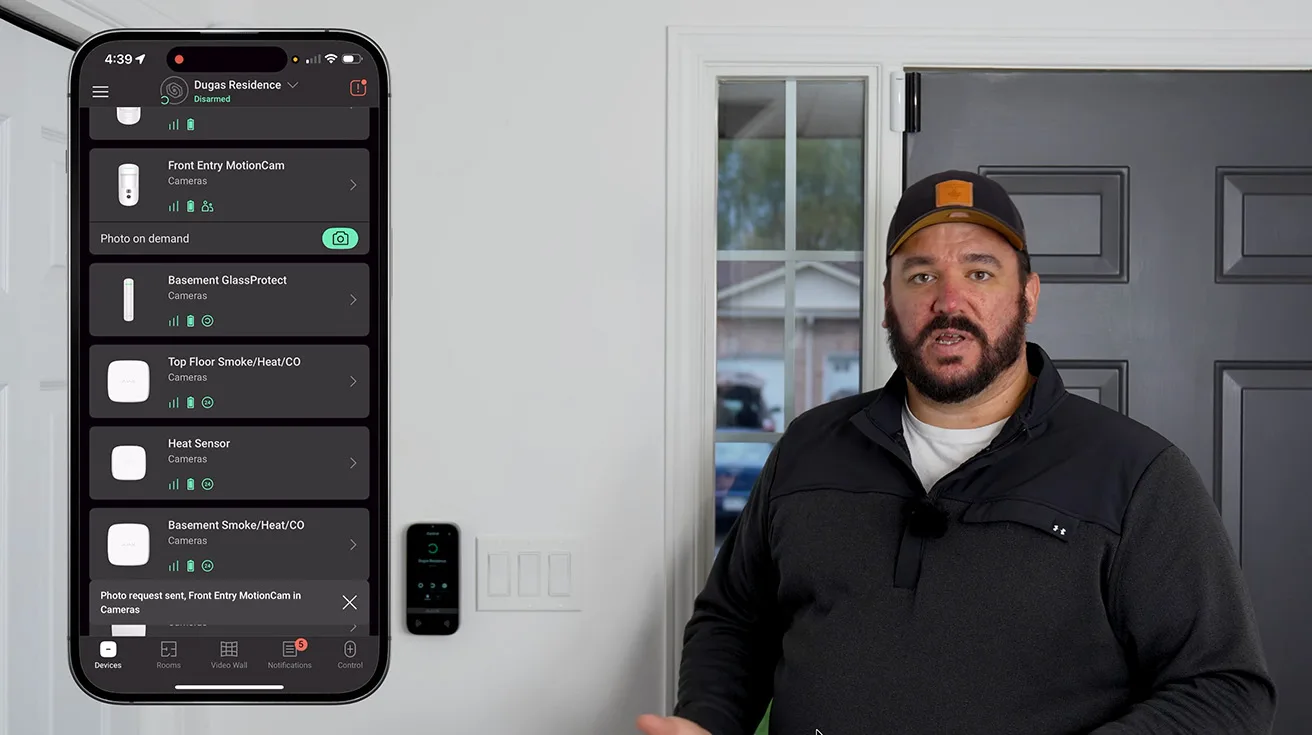
9. Indoor MotionCam: Visual Verification on Disarm
On the main floor, we also installed an indoor Ajax MotionCam.
The concept is similar to the outdoor MotionCam but focused on interior verification.
One scenario I use a lot:
- When someone disarms the system from the keypad, the MotionCam takes a snapshot and sends it to the owner.
- Kids come home from school before the parents
- You want to confirm they’re alone
- You want to see if anyone followed them in


1 / 9
In the app, we:
- Request a photo on demand
- The person at the door
- The stairs
- The hallway toward the back of the home
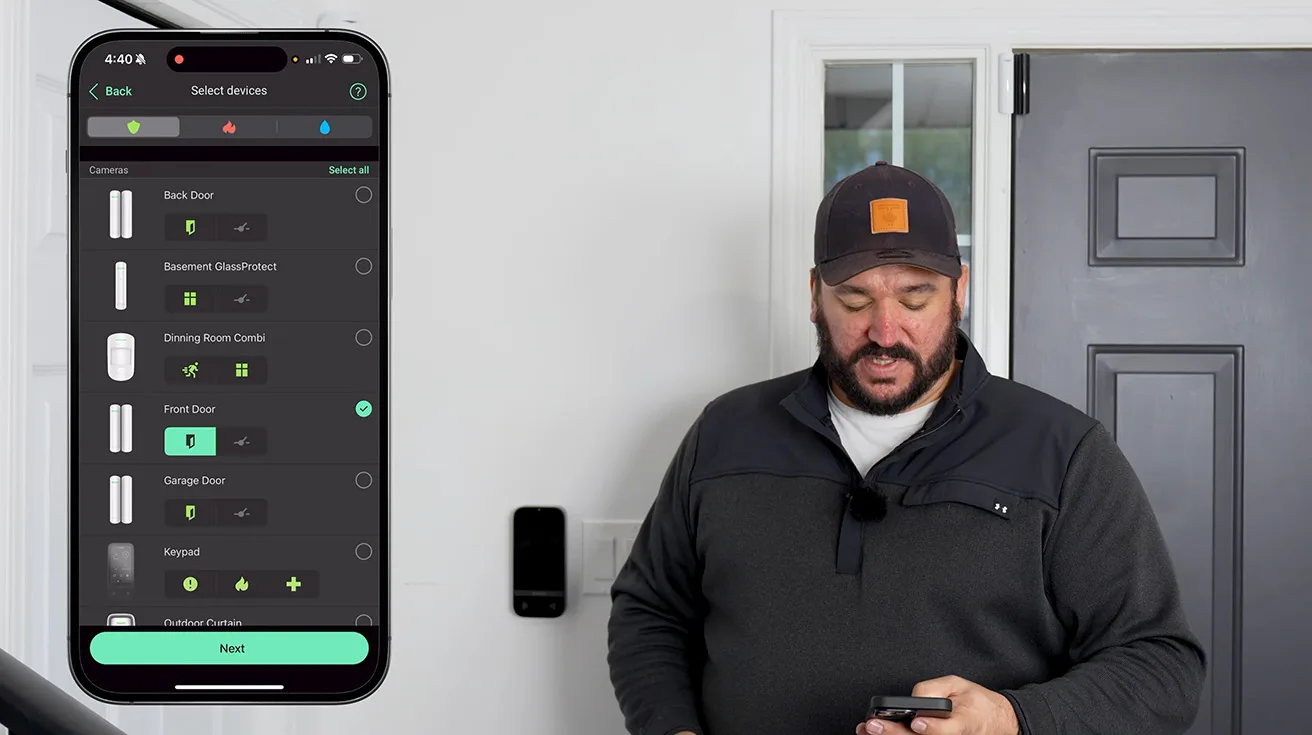
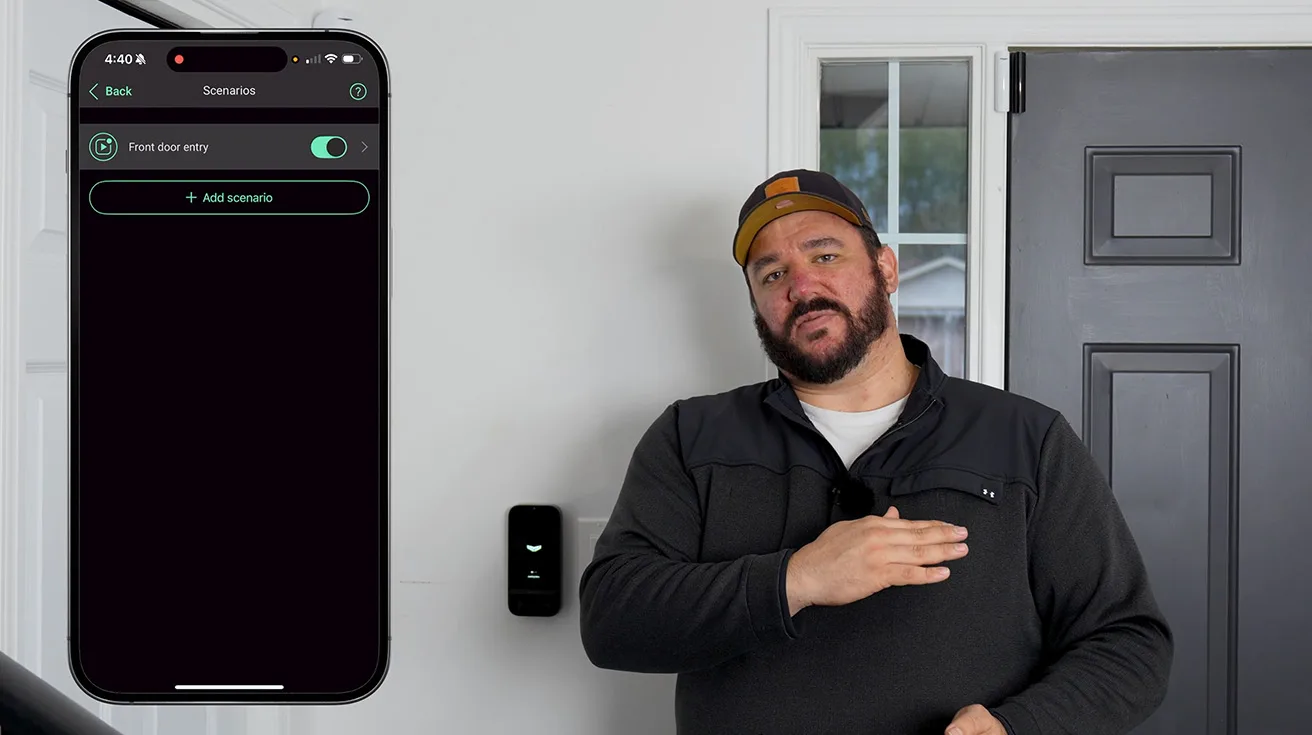
On top of that, we can create scenarios so MotionCam automatically takes pictures on specific alarm events (for example, when the front door goes into alarm). That way, you’re not just getting a siren - you’re getting immediate context.
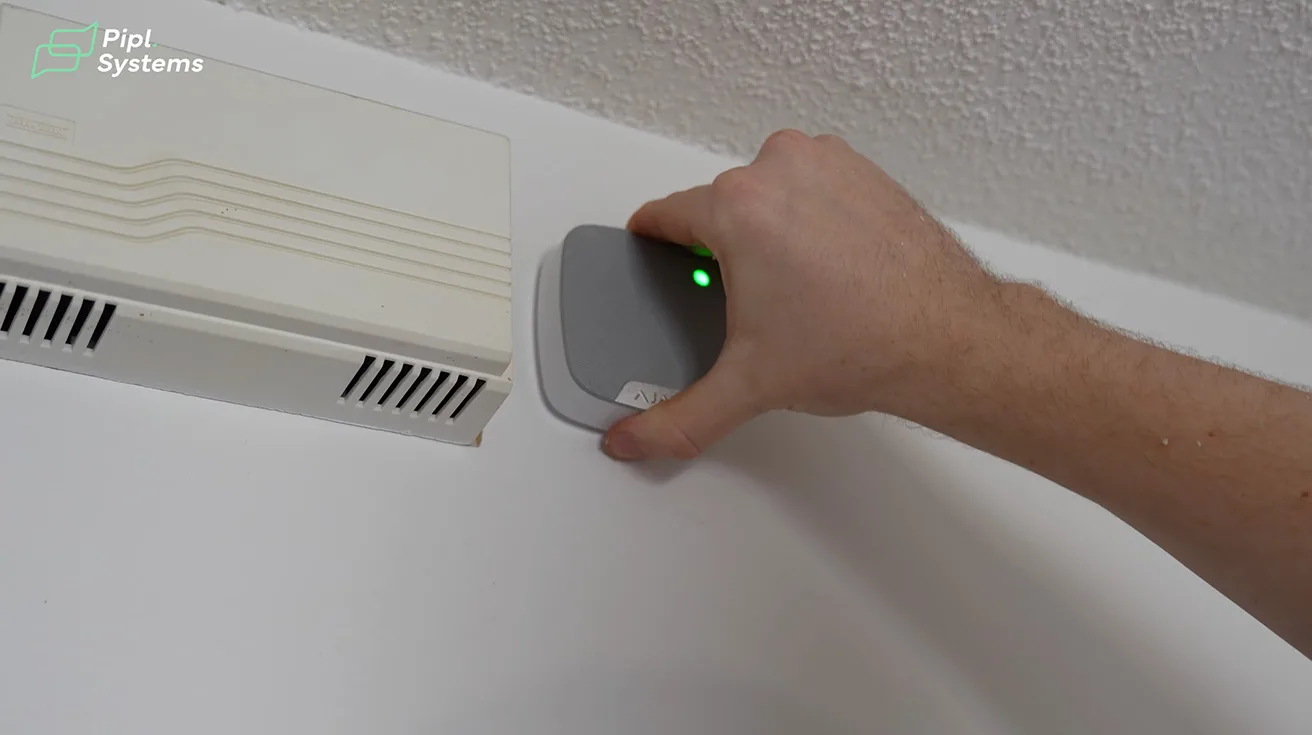
10. Outdoor StreetSiren: Commercial-Grade Audible and Visual Alert
Moving back outside, we mounted an Ajax Double-Deck StreetSiren.
This is a commercial-grade siren:
- Extremely loud, designed to be heard far beyond the property line
- Includes a red LED ring running around the outside
- When the system goes into alarm, it both sounds and flashes for strong visual deterrence


1 / 2
This unit makes it immediately clear to neighbors - and to anyone on the street - that something is wrong at this address.
11. Garage Perimeter: Curtain Outdoor Jeweller and DoorProtect Plus
For the garage and overhead doors, we use a combination of:
- Ajax Curtain Outdoor Jeweller
- DoorProtect Plus (described for this project even where not fully installed yet)
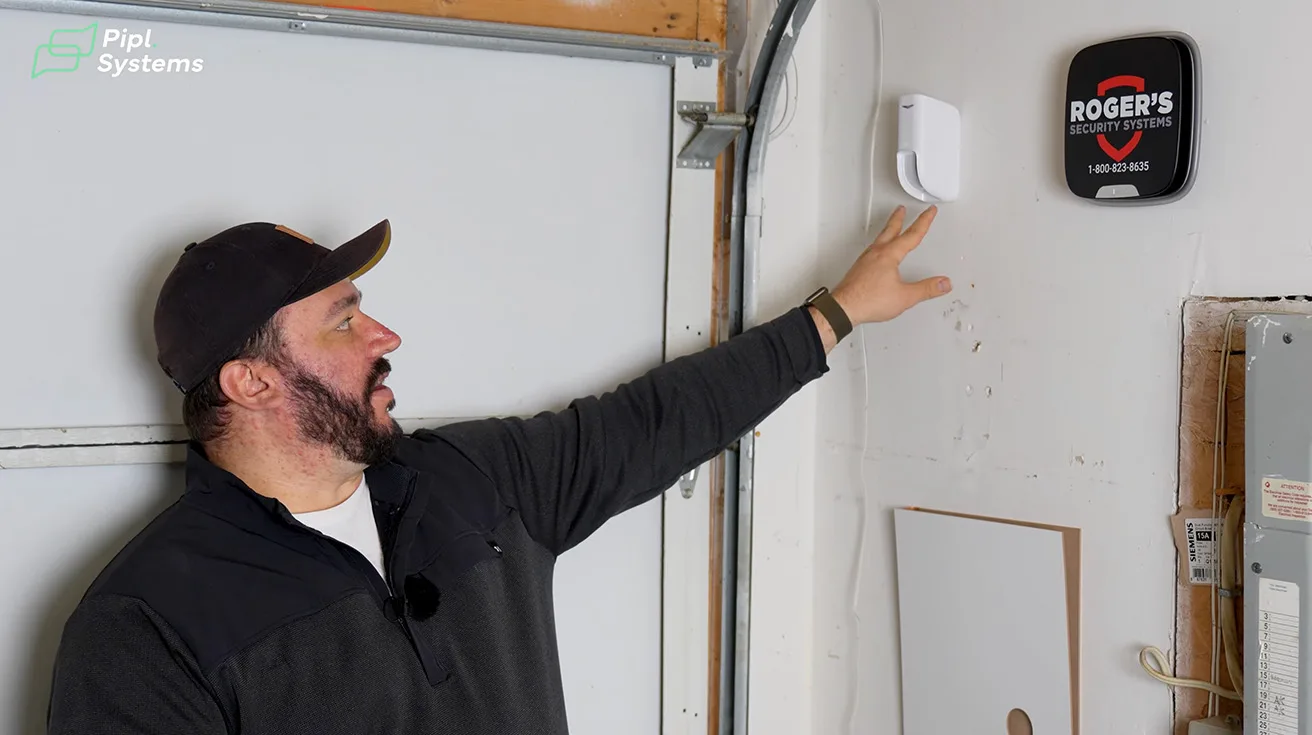
11.1. Curtain Outdoor Jeweller
The outdoor curtain detector creates a kind of vertical “laser wall” across the door or protected line:
- Perfect for overhead doors and larger openings
- Designed for outdoor conditions, including Canadian winters
- Has a lower temperature operating range than indoor curtains, making it suitable for harsh environments
11.2. DoorProtect Plus (Garage Tilt Detection)
DoorProtect Plus, which we frequently install on garages, adds:
- A tilt sensor
- As soon as the garage door opens beyond roughly 5 degrees, the sensor detects it and triggers an event or alarm.
Together, these devices cover:
- Approach to the garage door
- Actual movement of the door itself
This gives both early warning and accurate detection of a door actually being opened.
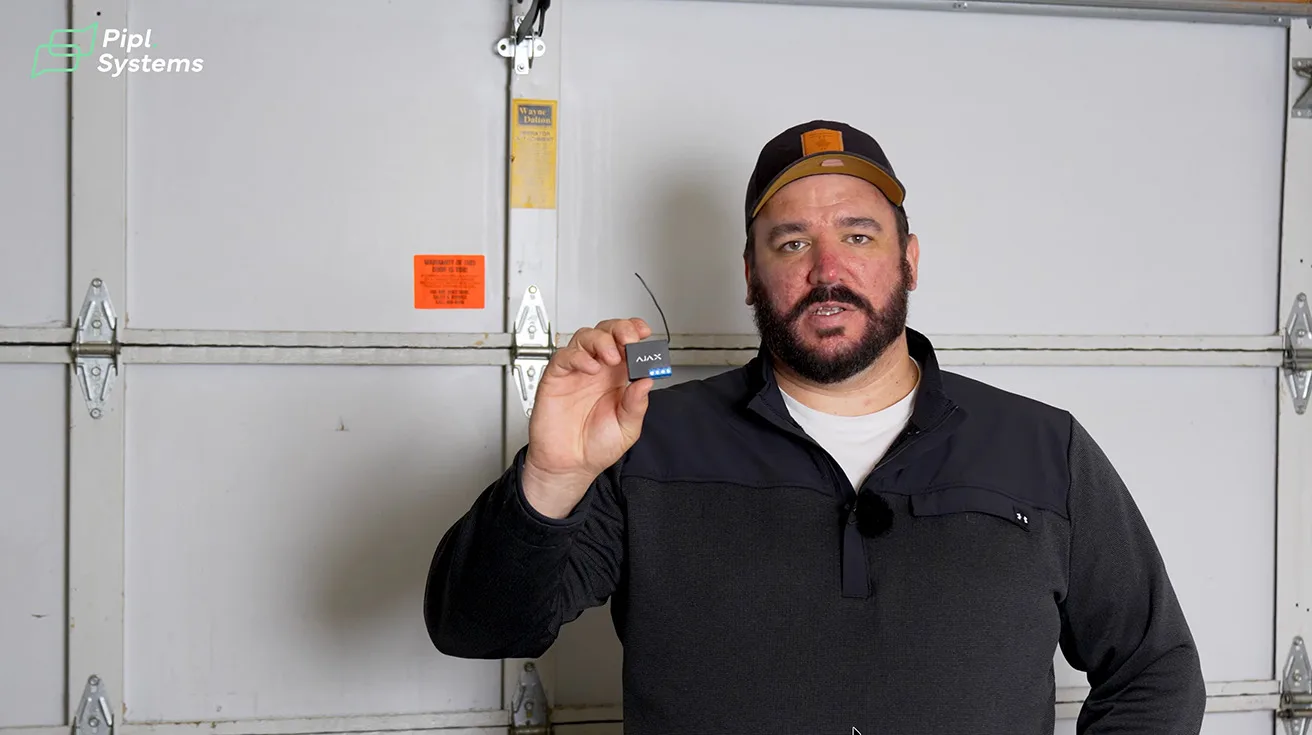
12. Ajax Relay: Encrypted Garage Door Control
In the garage, we also install an Ajax Relay module.
When the garage door opener has dry contacts available, we can:
- Integrate that opener into the Ajax system
- The Ajax app
- Scenarios configured on the touchscreen keypad
- A physical Ajax push button paired with the system

1 / 2
The main advantage vs. a typical garage door remote:
- Standard remotes can often be scanned, intercepted, or copied.
- The Ajax Relay communicates with an encrypted signal, making it significantly more secure.
Ajax is also rolling out an outdoor keypad for garage entry:
- Battery-powered, wireless
- Sends encrypted commands, just like the rest of the Ajax ecosystem
- Provides a sleek, modern, and more secure alternative to traditional keypads
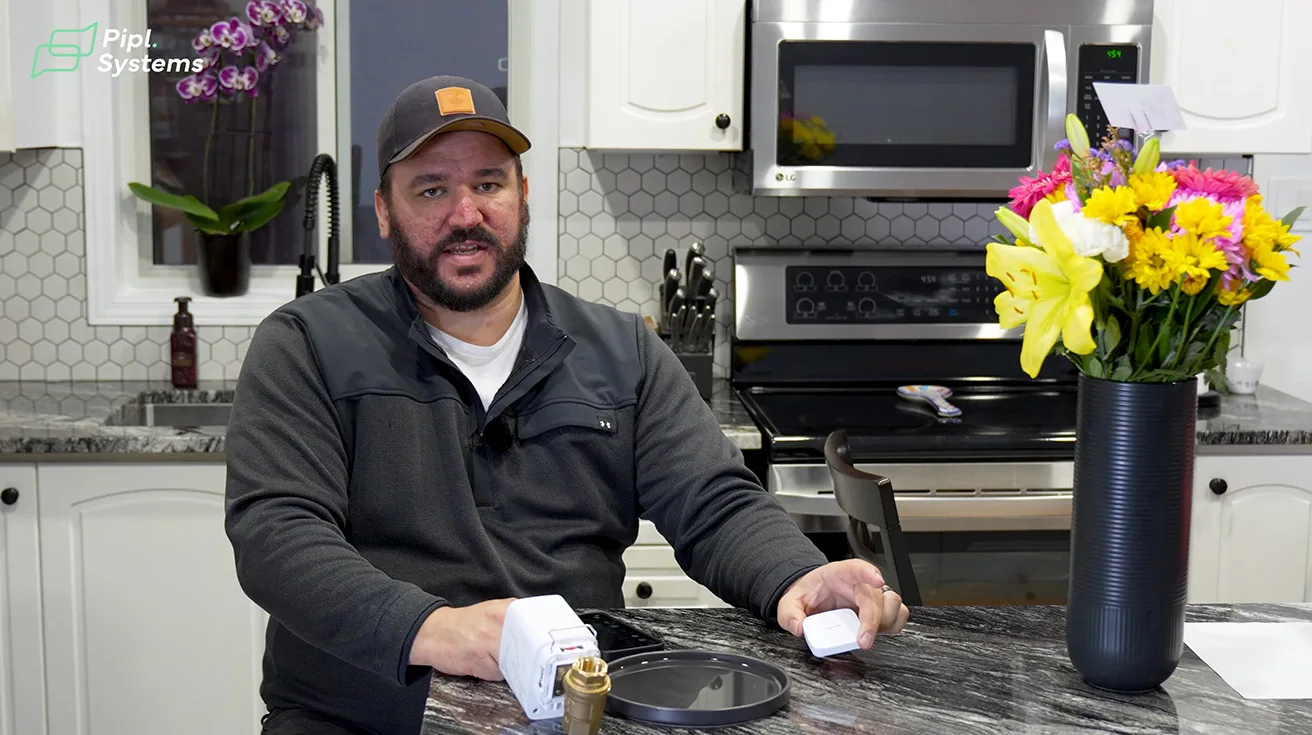
13. LeakProtect and WaterStop: Automatic Water Shutoff
Water damage is now one of the biggest sources of home insurance claims - often worse than fire in terms of cost.
To address that, we installed:
- Ajax LeakProtect sensors
- Ajax WaterStop automatic shutoff valve
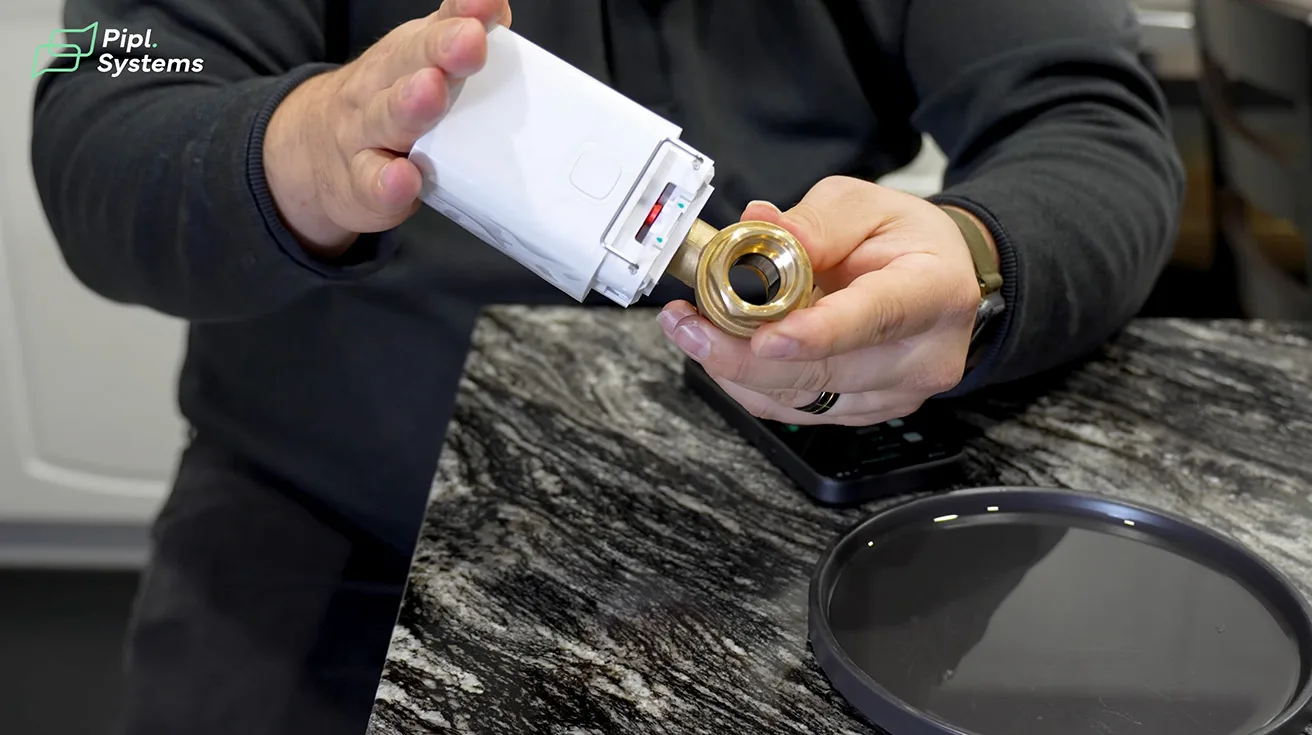
13.1. WaterStop: Ajax-Controlled Ball Valve
WaterStop is:
- A motorized ball valve with an Ajax actuator on top
- 1 in
- 3/4 in
- 1/2 in
- Integrated fully into the Ajax app and scenarios

1 / 4
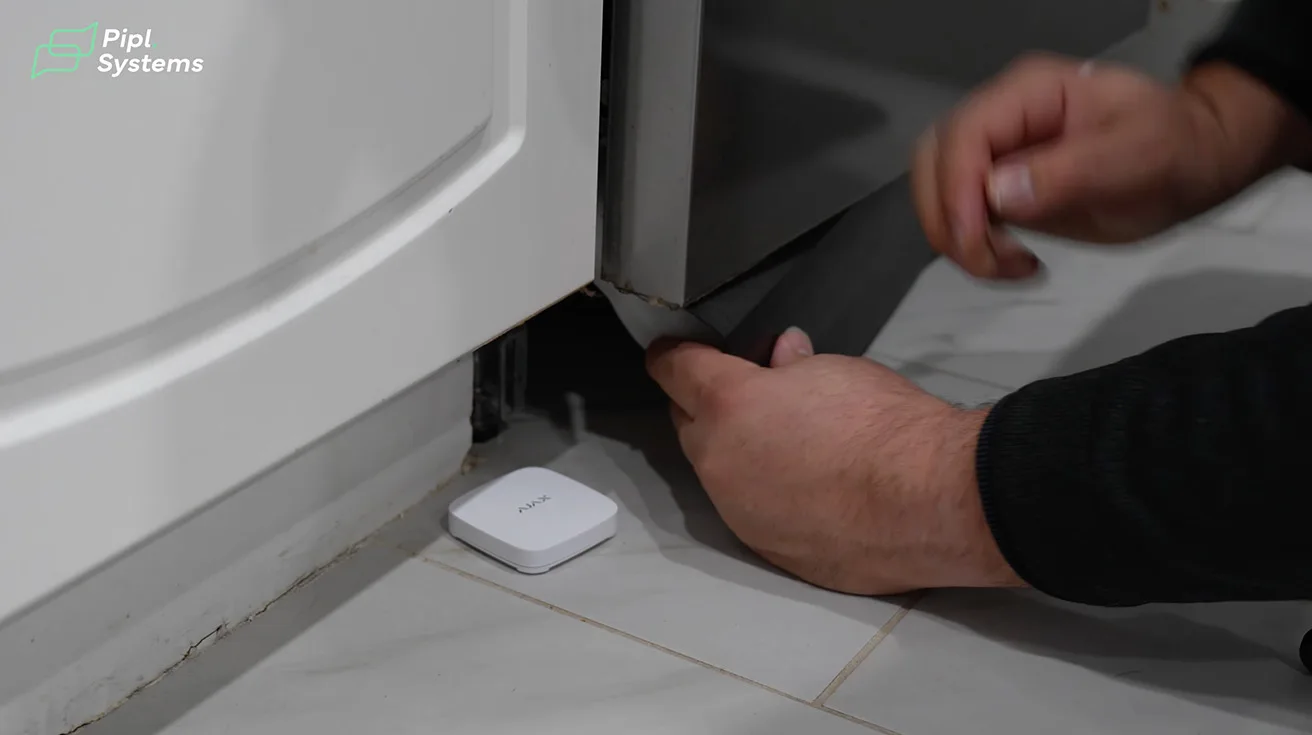
13.2. LeakProtect: Detecting Water Fast
In our demo, we:
- Place the LeakProtect near a likely water source (e.g., under a dishwasher)
- Show the app with the WaterStop valve open (green status)
- Touch both metal contacts of LeakProtect to a small plate of water
What happens:
- LeakProtect goes into alarm (red LED, app alerts)
- Ajax triggers the WaterStop to close
- The valve physically shuts off the water supply to the home
Typical placement examples:
- Under dishwashers
- Near washing machines
- Around sump pumps
- By hot water tanks
More and more, insurers are recommending or requiring flood detection and automatic shutoff in new and renovated homes - systems like Ajax make that both practical and tightly integrated with the rest of your security.
14. Basement Protection: GlassProtect and FireProtect 2
In the utility room in the basement, we focused on both intrusion and life safety.
14.1. GlassProtect on Basement Windows
We installed Ajax GlassProtect on the single basement window:
- These smaller windows are classic forced-entry points - easy to kick in and crawl through.
- The glass break sensor detects attempts to break in, even if the window is too small or awkward to use standard contacts effectively.
We also configured night mode behavior:
- Even if the motion sensors are disabled at night, GlassProtect remains armed in night mode.
- This keeps the perimeter secure while allowing normal interior movement.


1 / 3
14.2. FireProtect 2: Heat, Smoke, and CO
In the same room, near the furnace, we installed Ajax FireProtect 2 (heat, smoke, and CO model):
- Detects smoke, high temperature, and carbon monoxide
- Furnaces
- Utility areas
- Mechanical rooms
Importantly:
- FireProtect 2 runs 24/7, regardless of whether the security system is armed or disarmed.
- It gives continuous life-safety coverage, which is exactly what we want in a utility space.
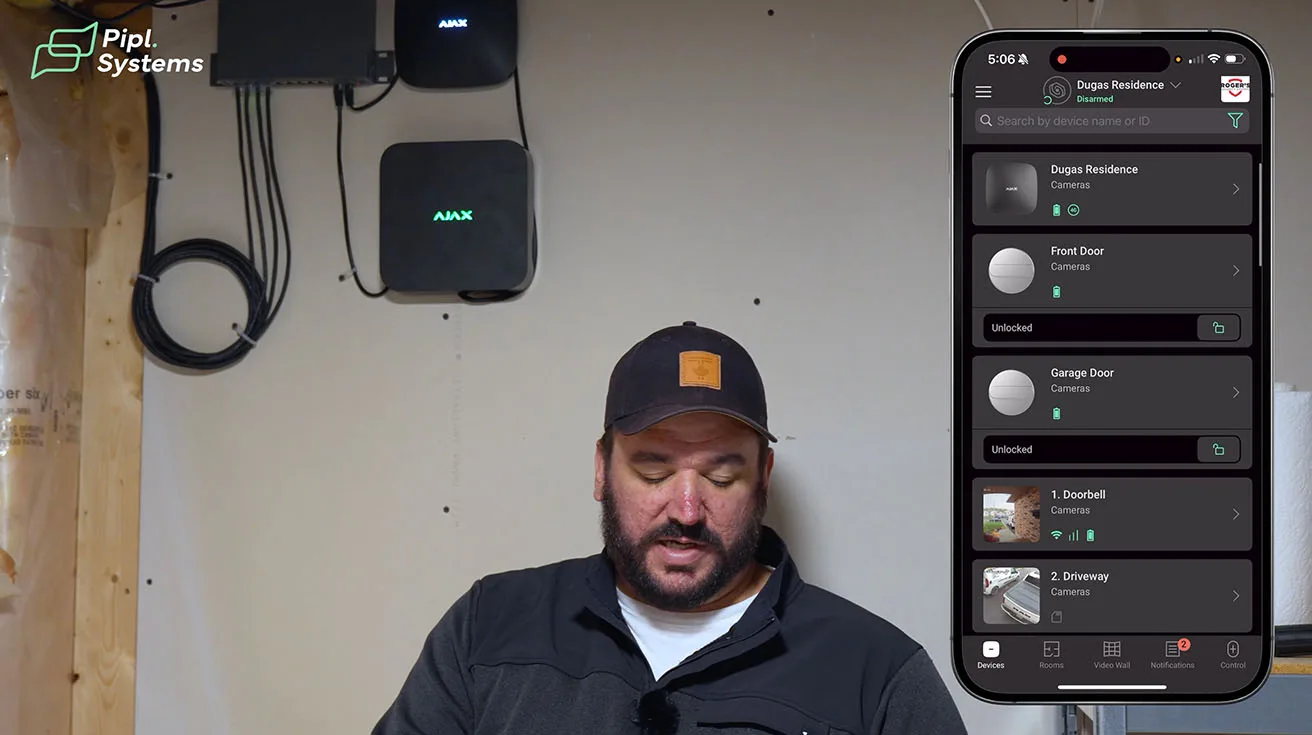
15. System Core: Ajax NVR, Hub, and Network Infrastructure
In the basement, we also have the central “brains” of the system:
- Ajax NVR - manages and records all video surveillance devices
- Ajax Hub - central alarm and automation controller
- Network switch - ties cameras, NVR, Hub, and home network together
15.1. Status Lights and Redundancy
You’ll notice:
- Cameras still record locally to the NVR even if the internet is down.
- You may temporarily lose remote access via phone, but the footage stays on site.
There’s also an NVR model with an HDMI output:
- Allows direct connection to a monitor
- Lets you review footage locally even with no remote connectivity

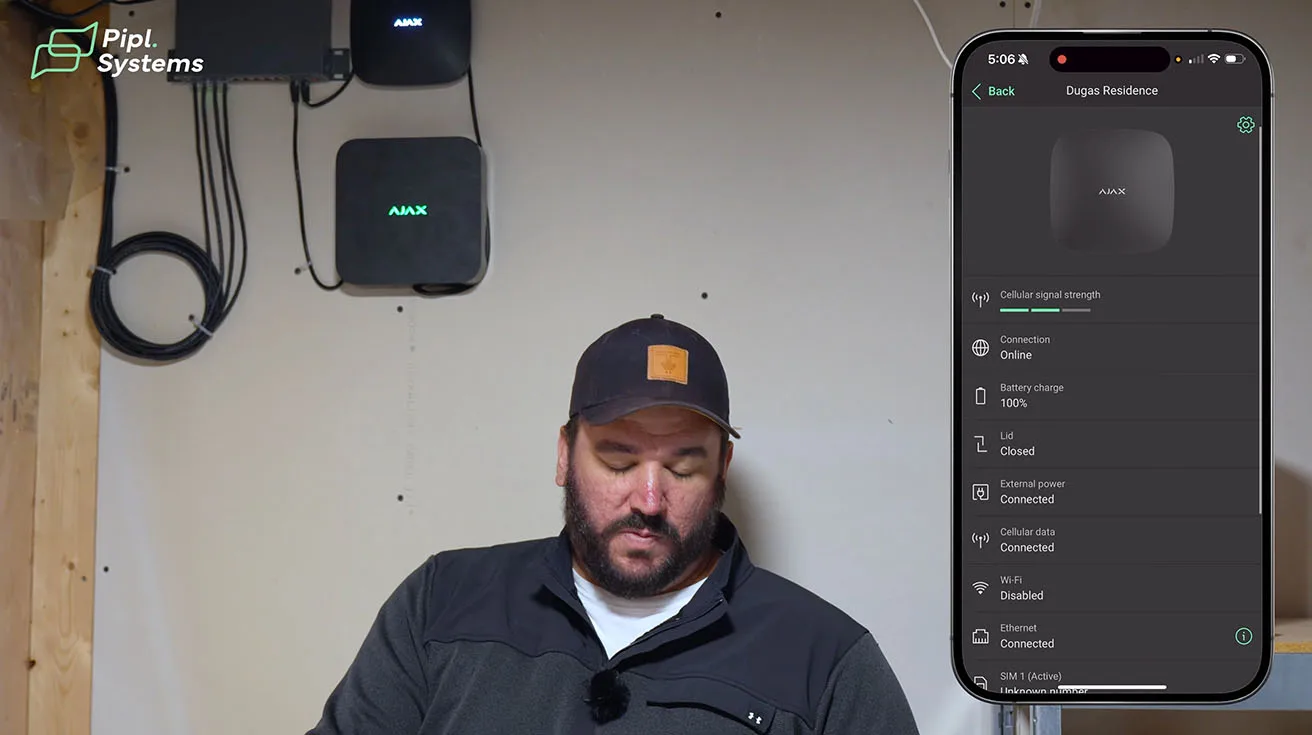
The Ajax Hub LED is white, which means:
- It’s connected to the network
- It also has a SIM card for cellular backup
- It has an internal backup battery (Ajax quotes at least 16 hours; in practice we’ve seen over 28 hours after disconnection)
This combination (network + cellular + battery) is what turns a “smart home gadget” into a properly resilient security system.
For long-term reliability and support, it also helps to understand basic maintenance tasks around the Hub. This short guide is a good reference:How to Change Battery in Ajax Hub 2 Plus - The Tutorial.
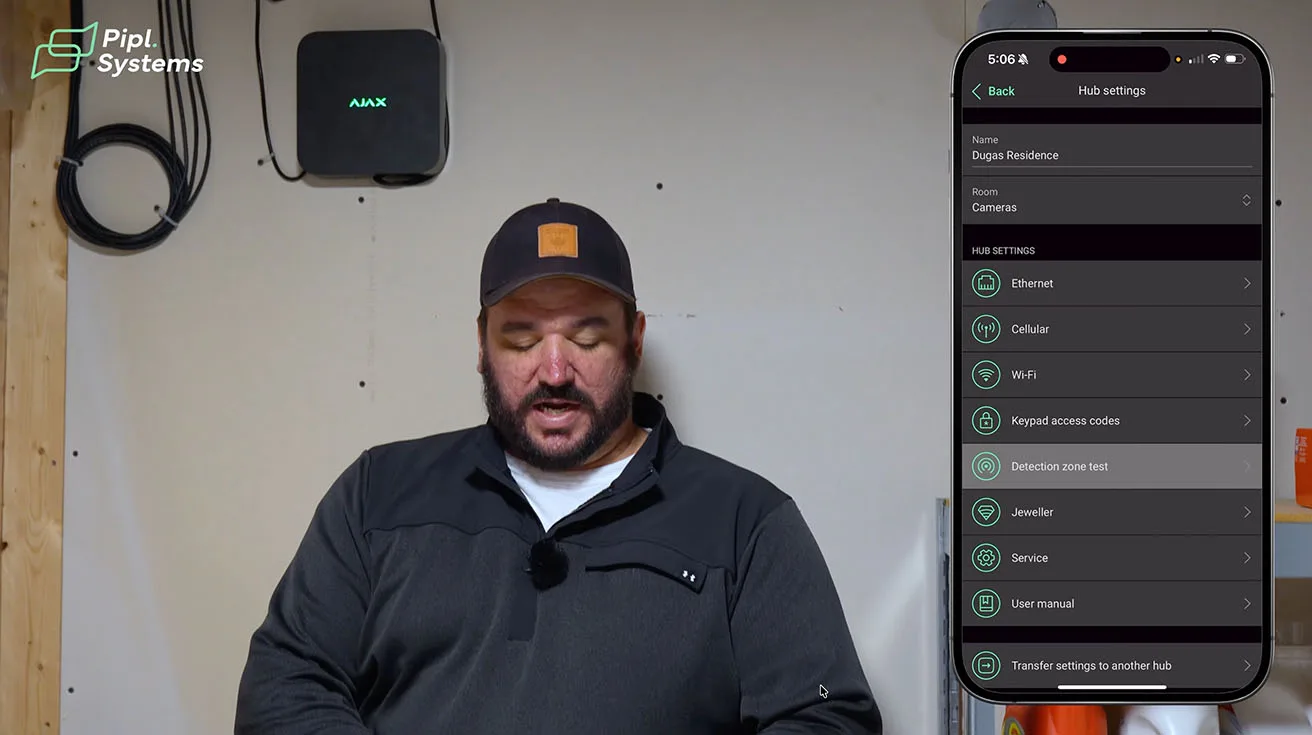
16. Ajax App: User Permissions, Alerts, and Safety Features
Most of the real power of this system lives in the Ajax mobile app, especially inside the Hub settings.
16.1. Network and Codes
From the Hub settings, we:
- Configure Wi-Fi or wired network (this project uses wired)
- Set up keypad codes
- Adjust Hub behavior and integrations
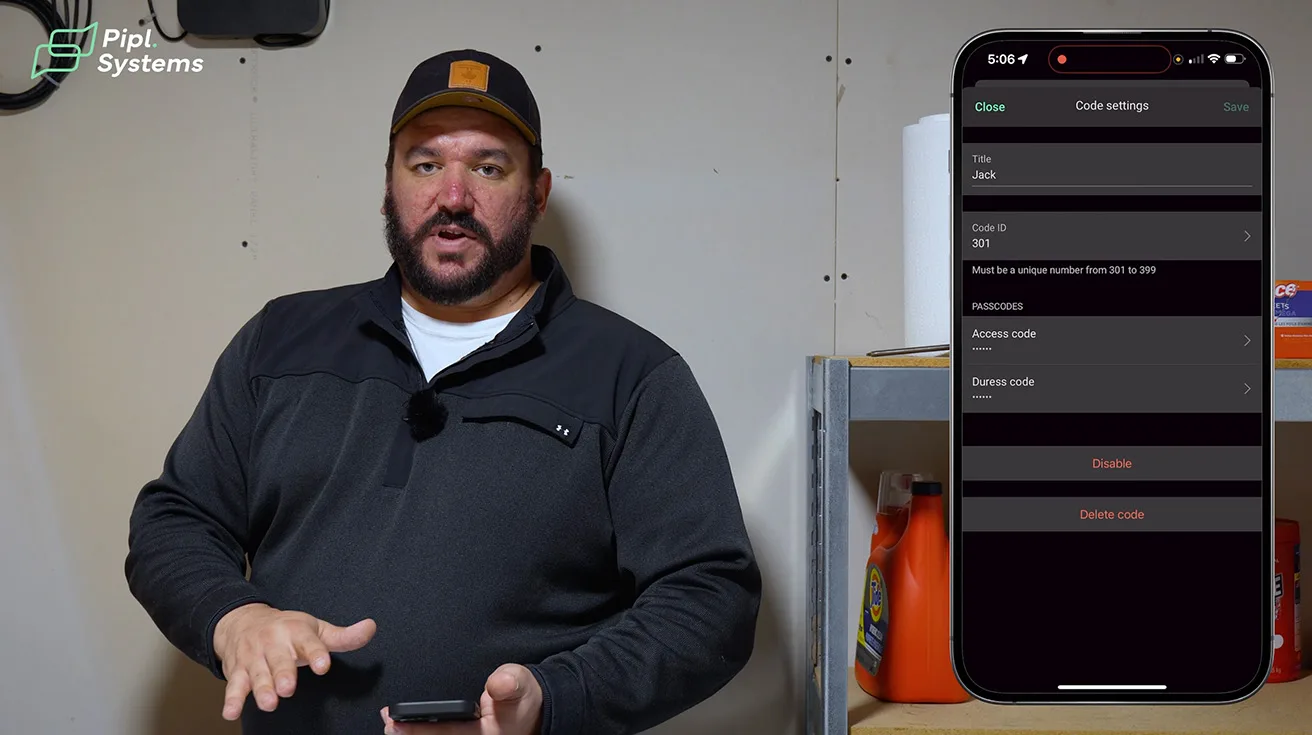
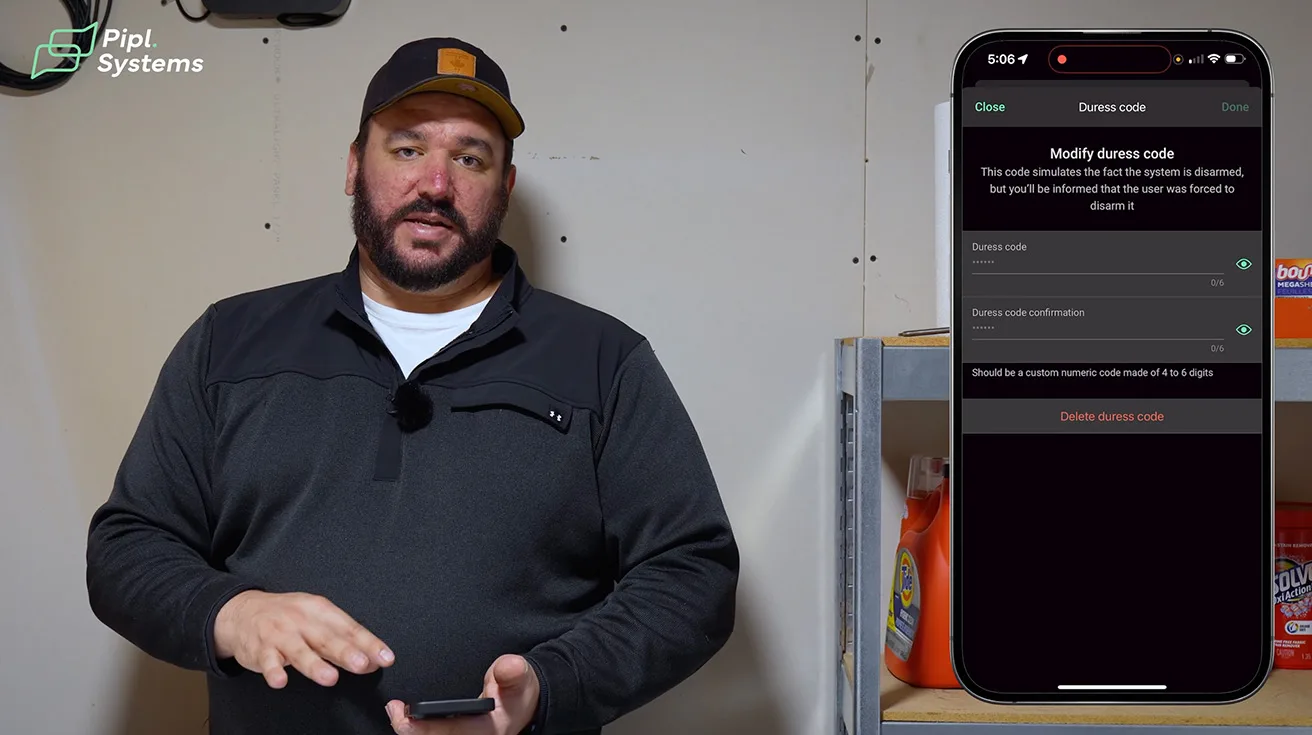
16.2. Duress Codes: Silent Panic in Real Emergencies
A feature many people overlook but I consider essential:
- Duress code - a special code you enter on the keypad if you’re being forced to disarm the system.
What happens when you use a duress code:
- System appears disarmed
- No extra beeps or alerts
- A silent panic is sent to the monitoring station
- Police can be dispatched without tipping off the intruder
This is a serious safety feature that can literally save lives and is often underestimated by end users.


1 / 7
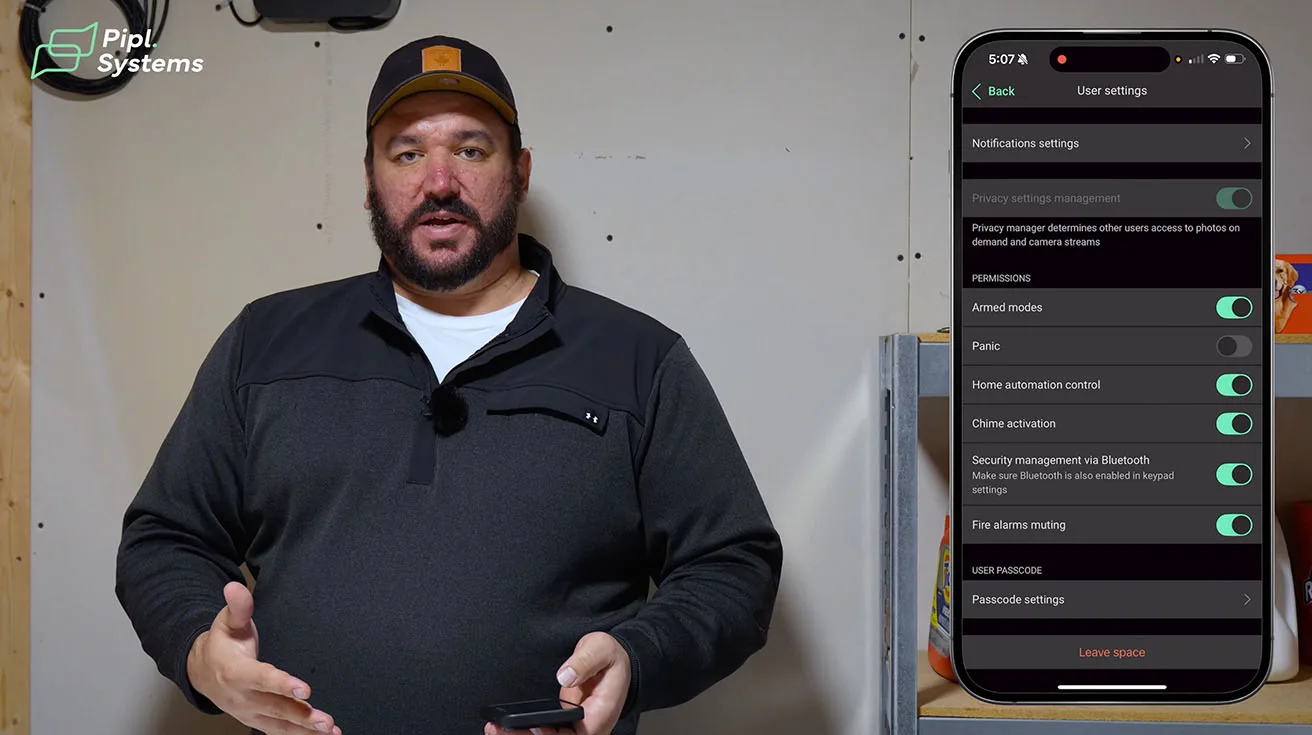
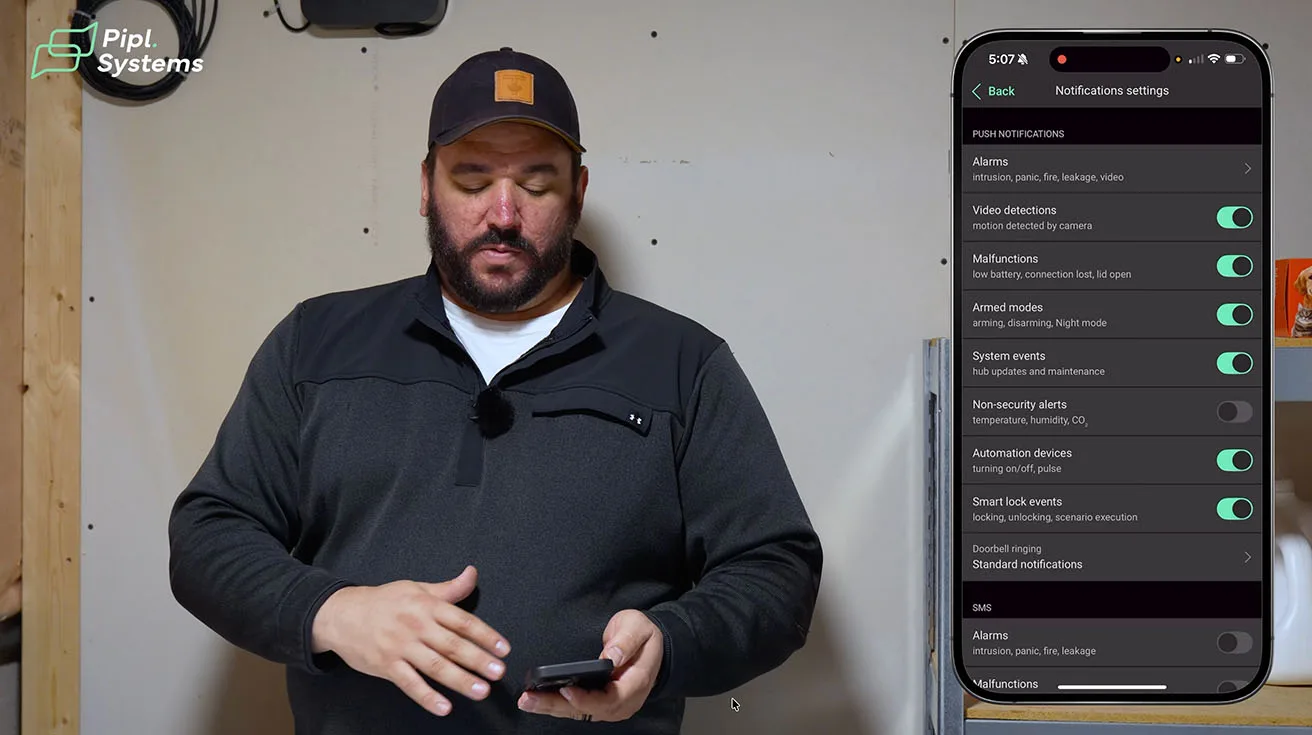
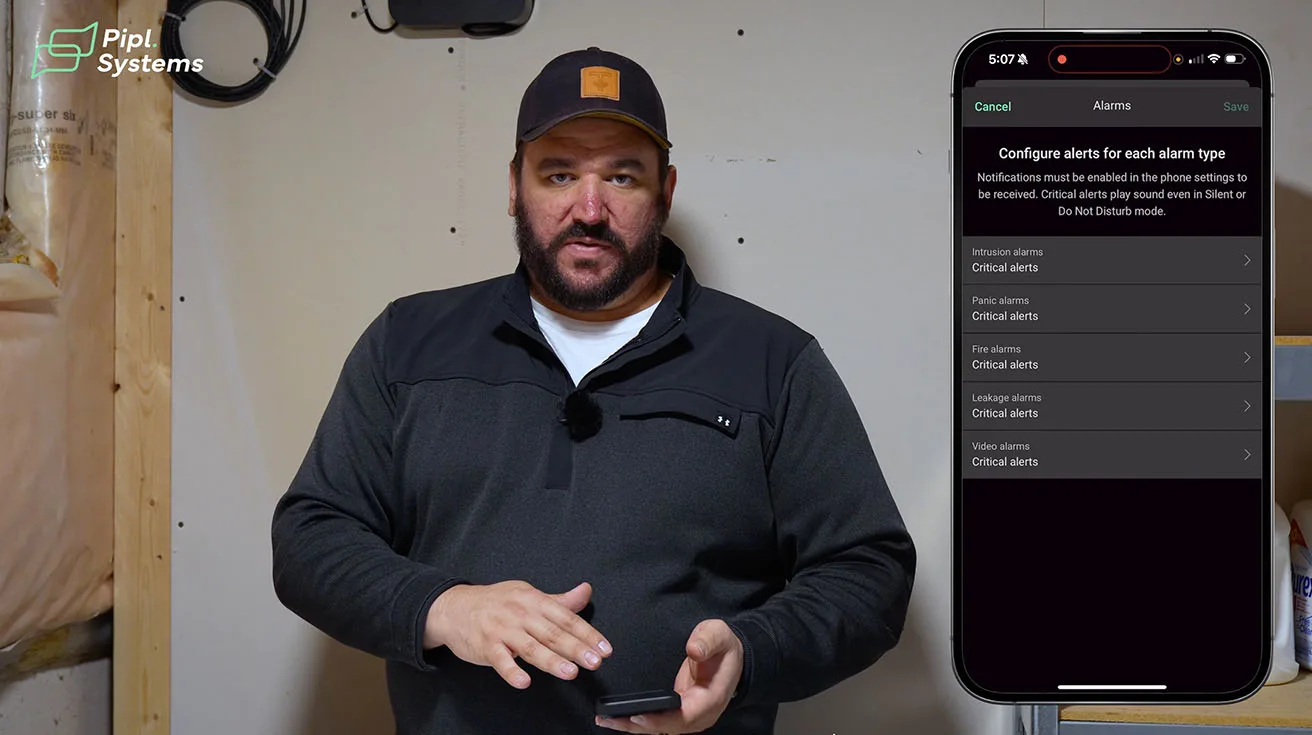
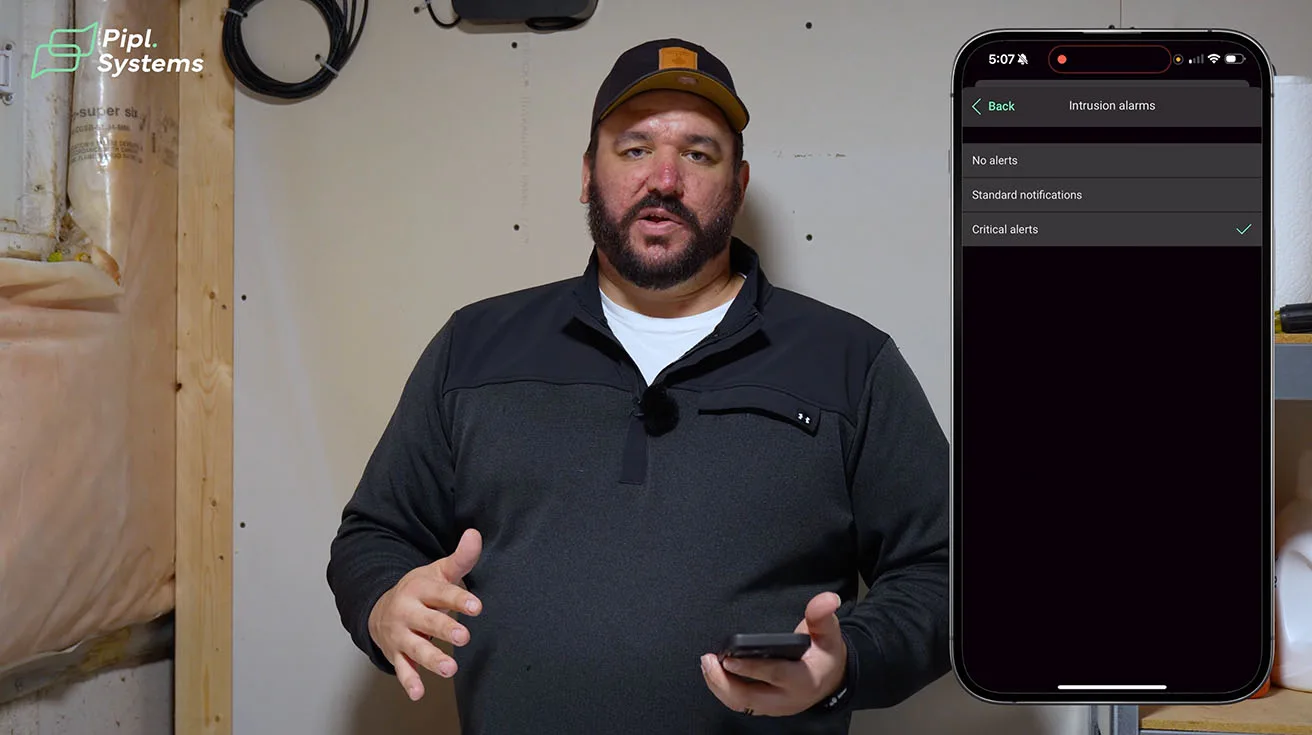
16.3. Users and Notification Settings
In the Users section, we can:
- Add and manage users for the app
- Critical alarms (bypass “Do Not Disturb” and silent modes, similar to emergency alerts)
- Regular push notifications
- SMS alerts
- Optional phone calls (more relevant in self-monitored setups)
For professionally monitored sites, we usually don’t enable voice call alerts from the system itself - the monitoring station will call, and we don’t want to tie up lines.
We can also assign granular permissions, which is especially important for:
- Commercial environments
- Homes where not everyone should control everything
Example: you might allow employees or family members to:
- Arm/disarm
- See certain events
But restrict their ability to:
- Turn off WaterStop
- Change fire alarm settings
- Modify critical automation scenarios
This prevents both accidental misconfigurations and unwanted “button-pushing experiments” in the app.


1 / 9
16.4. Panic Buttons and Chimes
In the app:
- It’s big.
- If you leave the app open and put your phone in your pocket, you can trigger it accidentally.
We strongly recommend:
- Using physical wireless panic buttons for critical panic/hold-up scenarios.
- Keeping the in-app panic as a secondary option.
We also configure door chimes:
- For example, when the front door opens or closes, the HomeSiren can beep.
- Commercial entrances
- Busy households with kids constantly in and out
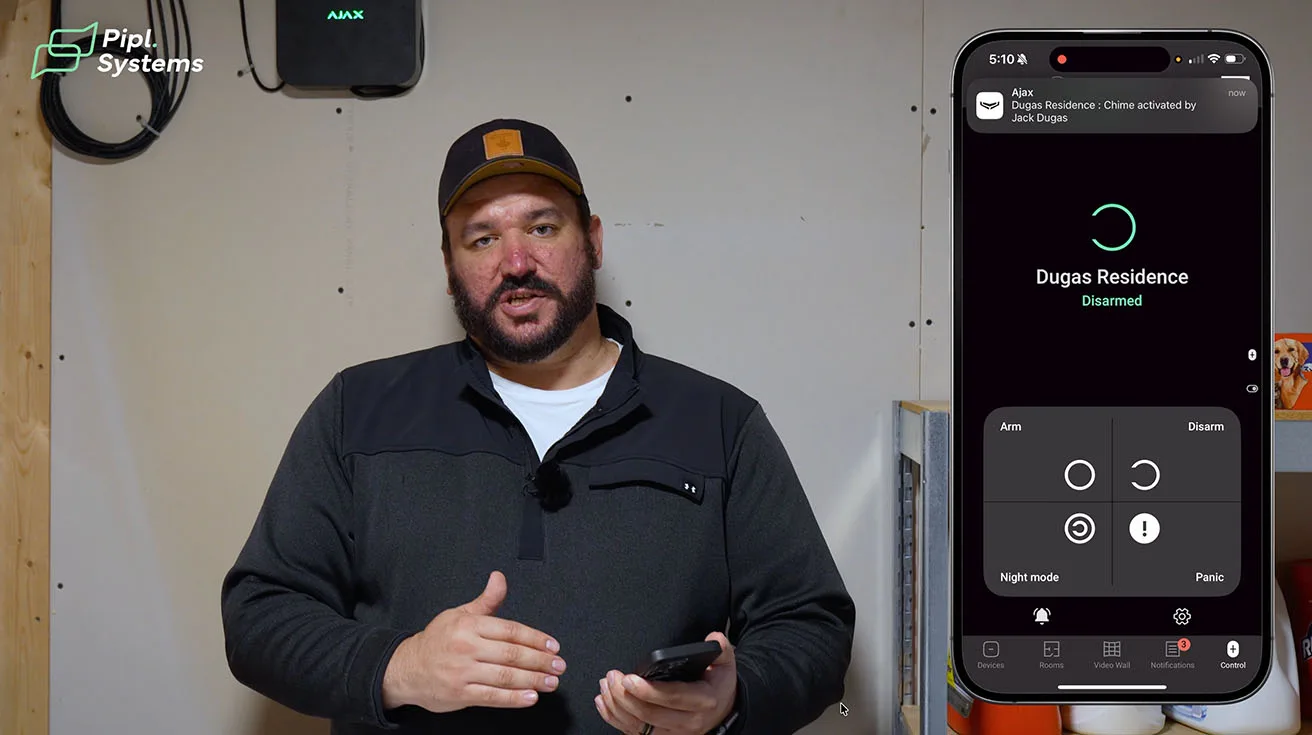
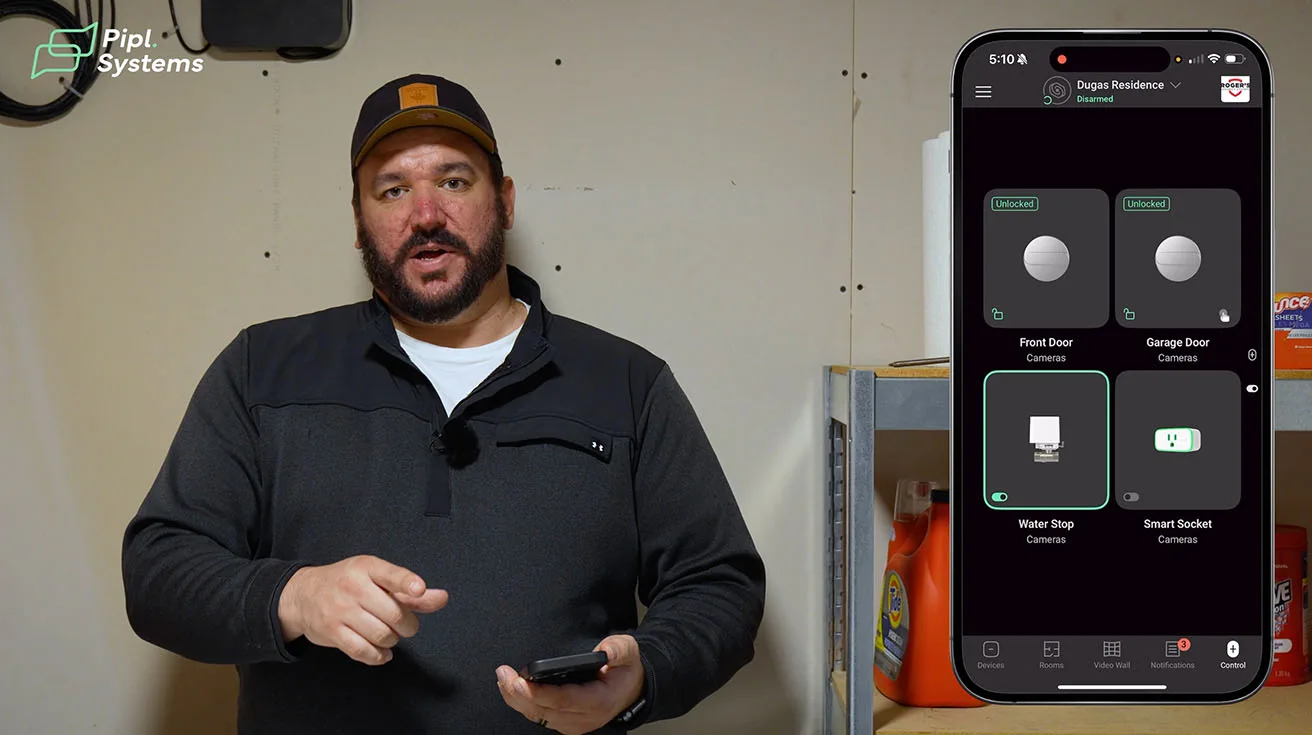
A quick swipe up on the control screen in the app brings you to home automation shortcuts, letting you:
- Turn sockets on and off
- Lock/unlock doors
- Turn water on/off
- Control other integrated devices
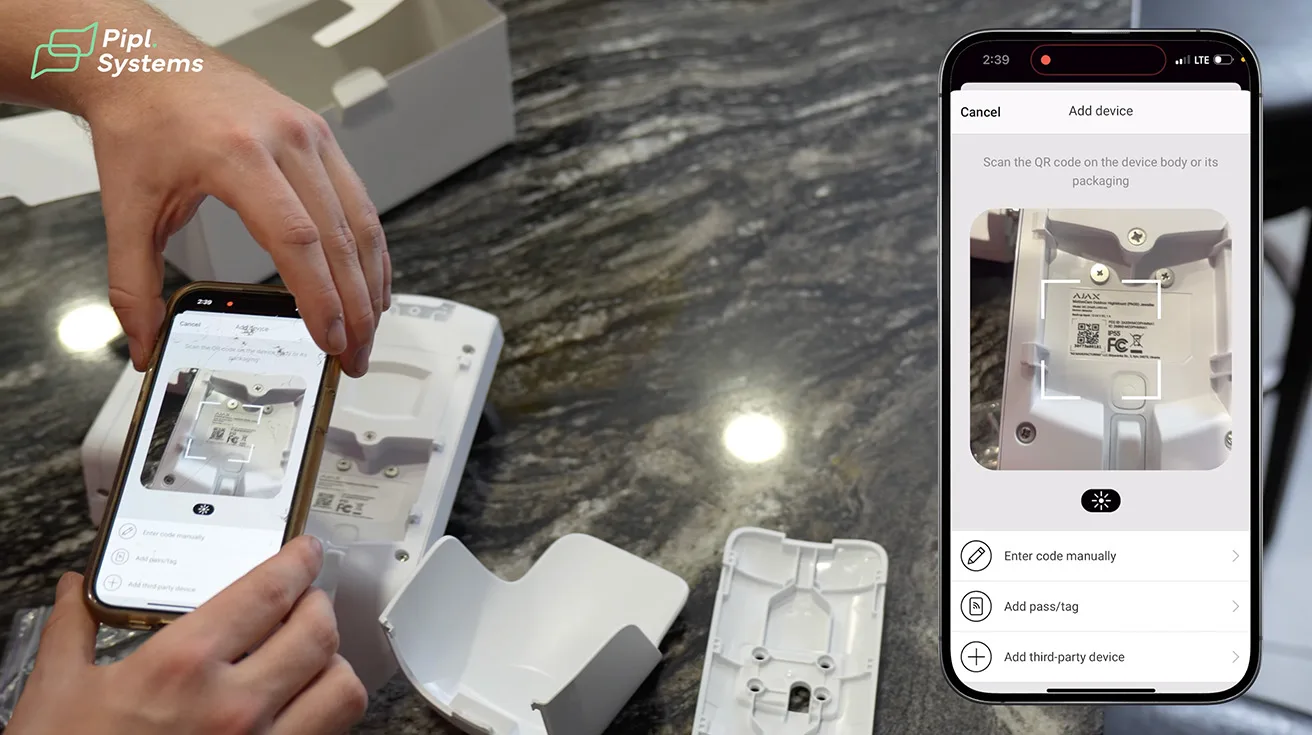
17. Collaboration with Pipl Systems: How This Case Study Was Created
This project was filmed and produced together with Pipl Systems, who joined us on a live residential installation - no studio, no pre-staged wiring.
Oleg Bordiian, founder of Pipl Systems, described this project in a LinkedIn post that sums it up well. You can find the original post here.
From the post:
Probably one of the most detailed real-world reviews of an Ajax Systems security setup you can find on the internet.
One week ago, Jack Dugas from Roger's Security Systems invited our Pipl Systems team to a real residential project in Southern Ontario, Canada. No staged demos, no polished studio setups – just a real installation day, exactly as it happens on site.
Over two days, we recorded the full setup of an Ajax Systems security system with more than thirty devices. We followed every step: unboxing, mounting, wiring the cameras to the NVR, connecting each device through the Ajax mobile app, and walking through how the system is tuned to match the daily routine of the family living in the home.
One of the highlights was the new Ajax AI Video DoorBell, along with several Ajax Cameras HL with hybrid illumination. The system also included intrusion sensors, fire and water protection, automation modules, and a complete video surveillance setup - all working together as one ecosystem.
Throughout the installation, Jack shared practical insights from his real engineering experience: why certain devices fit better in specific areas, how he adjusts detection settings, and what details actually matter when you’re securing a real home. These are the kinds of things you’ll never see in a brochure.
That’s exactly what we wanted this case study to be: a full picture of a real project, not a marketing slide deck.
If you want to see how Ajax is used not only in homes, but also in larger environments and industry events, this broader ecosystem view is also useful:Ajax Alarm System @ ISC West.
18. Want Help Designing or Installing a System Like This?
I’m Jack with Roger’s Security Systems, and this project was filmed in partnership with Pipl Systems. Big credit to their team for capturing what real install days actually look like (cables, ladders, and all). If you’ve got questions about anything you saw in the walkthrough (devices, placement, settings, or how to build a system that fits your routine), feel free to reach out.
Roger’s Security has been protecting homes and businesses across Southern Ontario for over 30 years. We’re a family-run company based in Burlington, and we’ve grown the old-fashioned way, through referrals and long-term customer relationships. We also offer a wide range of solutions beyond intrusion, including video surveillance, access control, and monitoring.
One thing we take seriously is life safety. Roger’s Security received a Life Safety Award (Honeywell First Alert Dealer convention) tied to a real incident where monitoring response helped save lives. We use ULC-listed monitoring stations in Ontario and focus on systems that work reliably in the real world, not just on paper.


1 / 3
If you’re in Southern Ontario, we’re local. If you’re elsewhere (Alberta, Saskatchewan, or out East), we can still talk. We’ve supported clients beyond our core region as well. We handle everything from assessments and security design to installation and 24/7 monitoring. You can reach us at 905-319-3244 or visit https://www.rogers-security.com/.
19. Closing Thoughts: Why We Build Ajax Systems This Way
For me as an integrator, Ajax is not just hardware - it’s a platform I can use to build:
- Multi-layered protection (perimeter, interior, vertical entry, utilities)
- Combined video + alarms + automation
- Systems that are usable for real families, not just technically impressive
This residential project shows how:
- A modern home can be secured with more than 20 Ajax devices, all working together
- You can manage intrusion, fire, water, access, and video from one ecosystem
- Professional design and installation turn a collection of products into a coherent security solution
If you’re an integrator or security professional, I hope this walkthrough gives you concrete ideas for your own projects.If you’re a homeowner or decision-maker, I hope it shows what’s realistically possible today - and why involving a professional can make all the difference.
20. FAQ: Common Questions About This Residential Ajax Setup
Q1. Is this level of protection overkill for a typical home?
It depends on the home and the risk profile. In this project, the owners wanted:
- True perimeter security (doors, windows, garage, yard)
- Video coverage
- Fire and CO detection
- Water leak detection with automatic shutoff
- Remote control and automation
If you care about avoiding large insurance claims and maximizing safety, this level of design is very reasonable - and easier to manage than separate, unconnected systems.
Q2. Can a homeowner install this themselves?
Some pieces, maybe. But:
- When you start combining DoorBell + locks + garage + NVR + WaterStop + multiple zones, design errors can become expensive or dangerous.
- Proper detector placement
- Clean wiring
- Correct scenarios and user permissions
- Compliance with local codes where applicable
That’s why we position this as a solution, not just a pile of devices.
Q3. What happens if the internet goes down?
In this project:
- Cameras still record to the NVR.
- The Hub stays online via cellular backup.
- The Hub’s battery keeps it running during power outages.
You might temporarily lose remote app access for video if the WAN link is down, but local recording and alarm signaling to the monitoring station can still function, depending on the exact path and configuration.
Q4. How do you decide which devices to use where?
We always start with:
- Risk assessment: Where are the real entry points and vulnerabilities?
- Lifestyle: How the family actually uses doors, windows, garage, and outdoor spaces.
- Infrastructure: Power, network, and construction realities.
From there, we:
- Use cameras where continuous video makes sense
- Use MotionCam where photo verification is enough
- Add specialized devices (WaterStop, LeakProtect, FireProtect 2) where non-burglary risks exist