

Intro to the Dnake IPK05 Kit
Why Smart Intercoms Are Becoming Mainstream
Dnake is helping redefine how homeowners think about access and security. Home protection today goes far beyond traditional alarms - smart intercoms now enable real-time video calls, mobile unlocking, and integration with modern home automation systems. In North America, this shift is no longer optional. It's the new standard.
Smart intercoms let residents answer calls, see visitors, and open doors remotely. Whether you're managing a single-family home or a small office, the right intercom system simplifies access and adds peace of mind. That’s where Dnake steps in with their latest release.
What’s Inside the Box – Meet the IP Video Intercom Kit
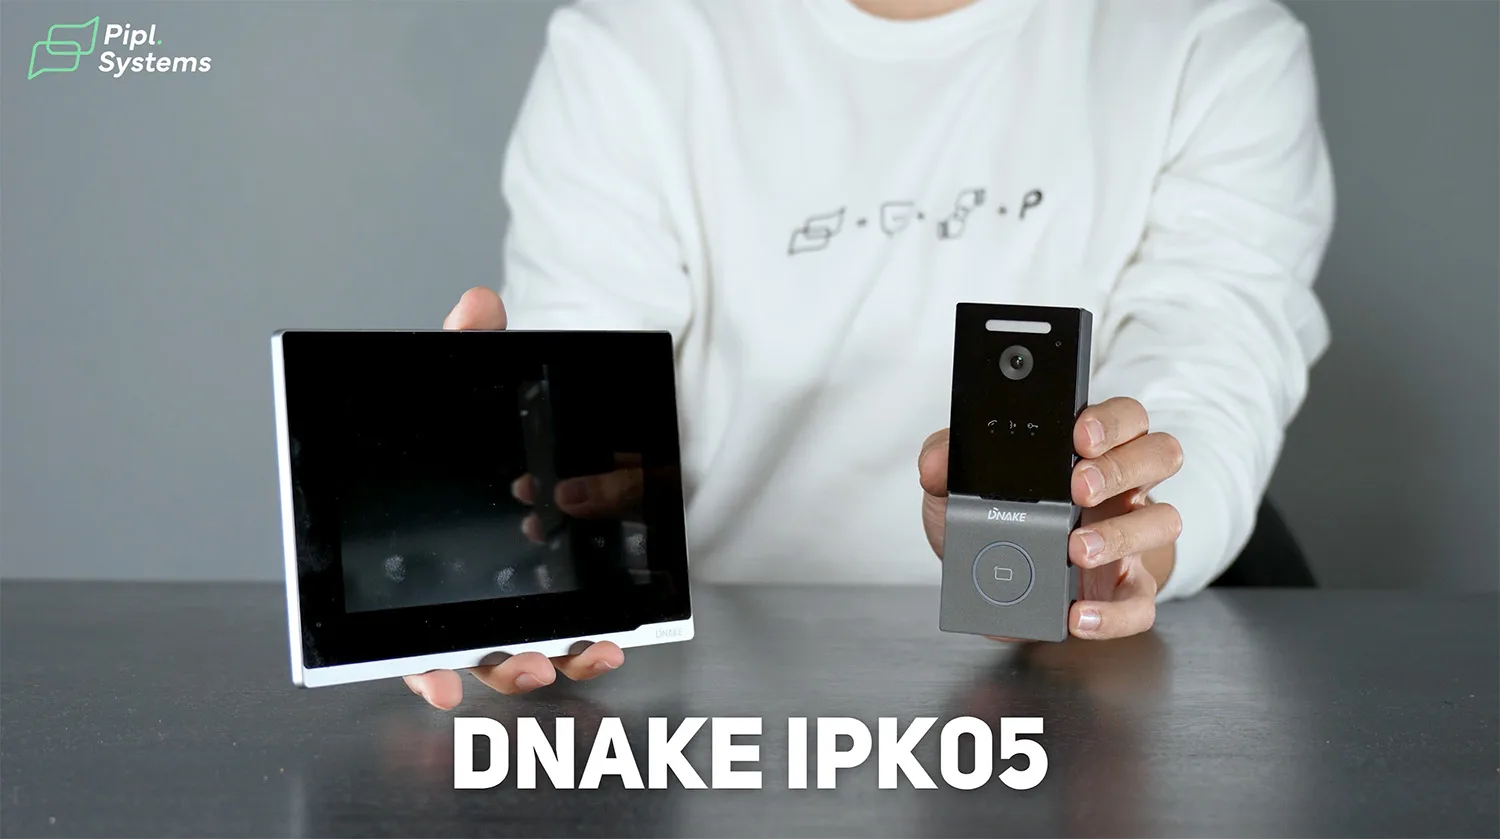
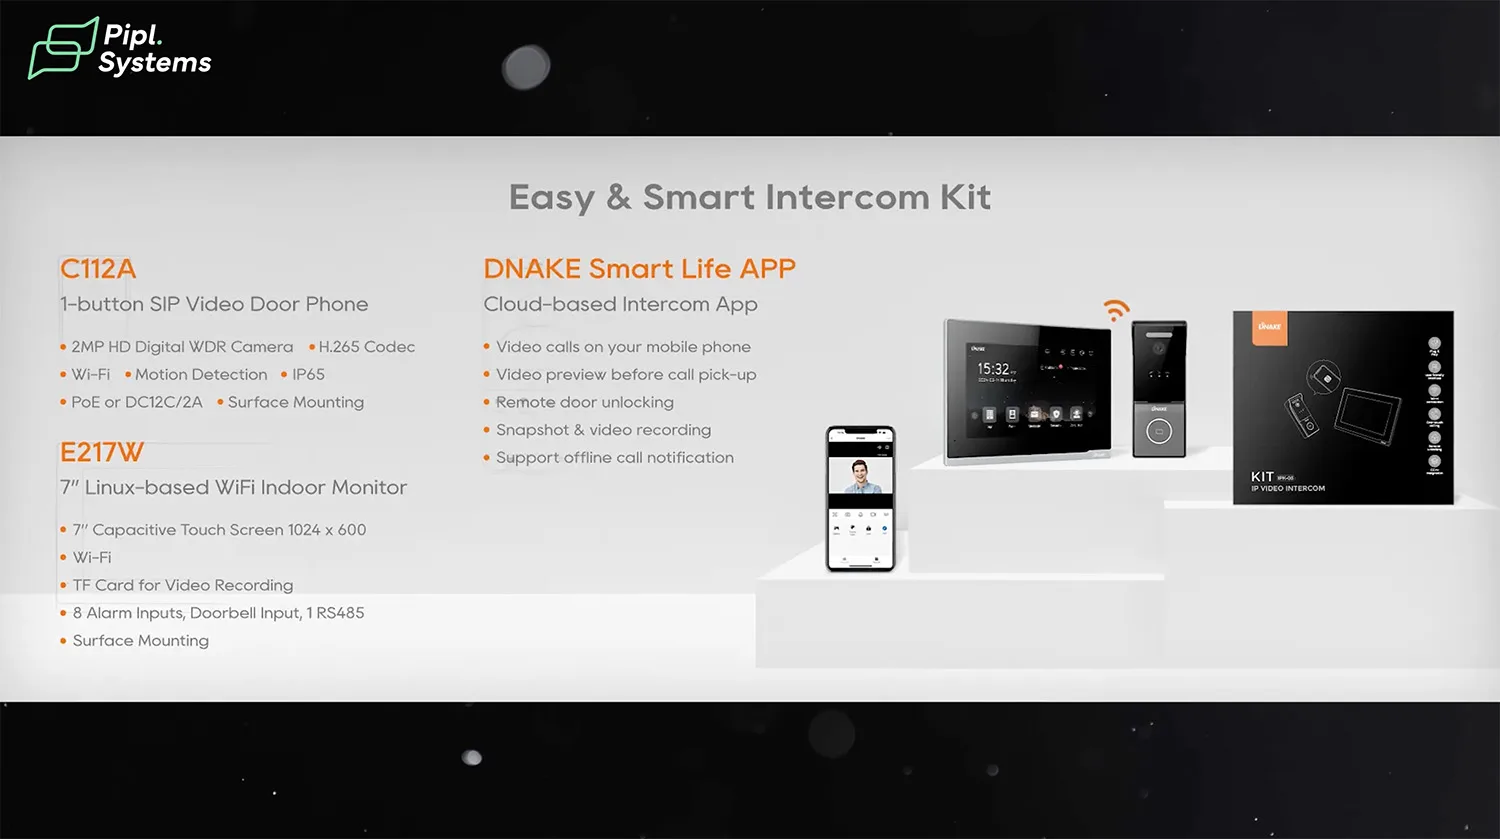
The DNAKE IPK05 kit is a plug-and-play IP Video Intercom Kit designed for residential and light commercial use. It includes the E217W indoor monitor and the compact C112A door station. Both devices connect over Wi-Fi or PoE and are pre-configured to work out of the box.
You’ll also get a mounting plate, screws, and power options - standard PoE or 12V DC. Setup is quick, and the UI is responsive with clean, simple menus. From a user experience perspective, the system doesn’t overcomplicate what should be straightforward: see, talk, and open the door.
Hardware Overview – Indoor Monitor and Door Station
E217W Monitor: Touchscreen and Connectivity Options
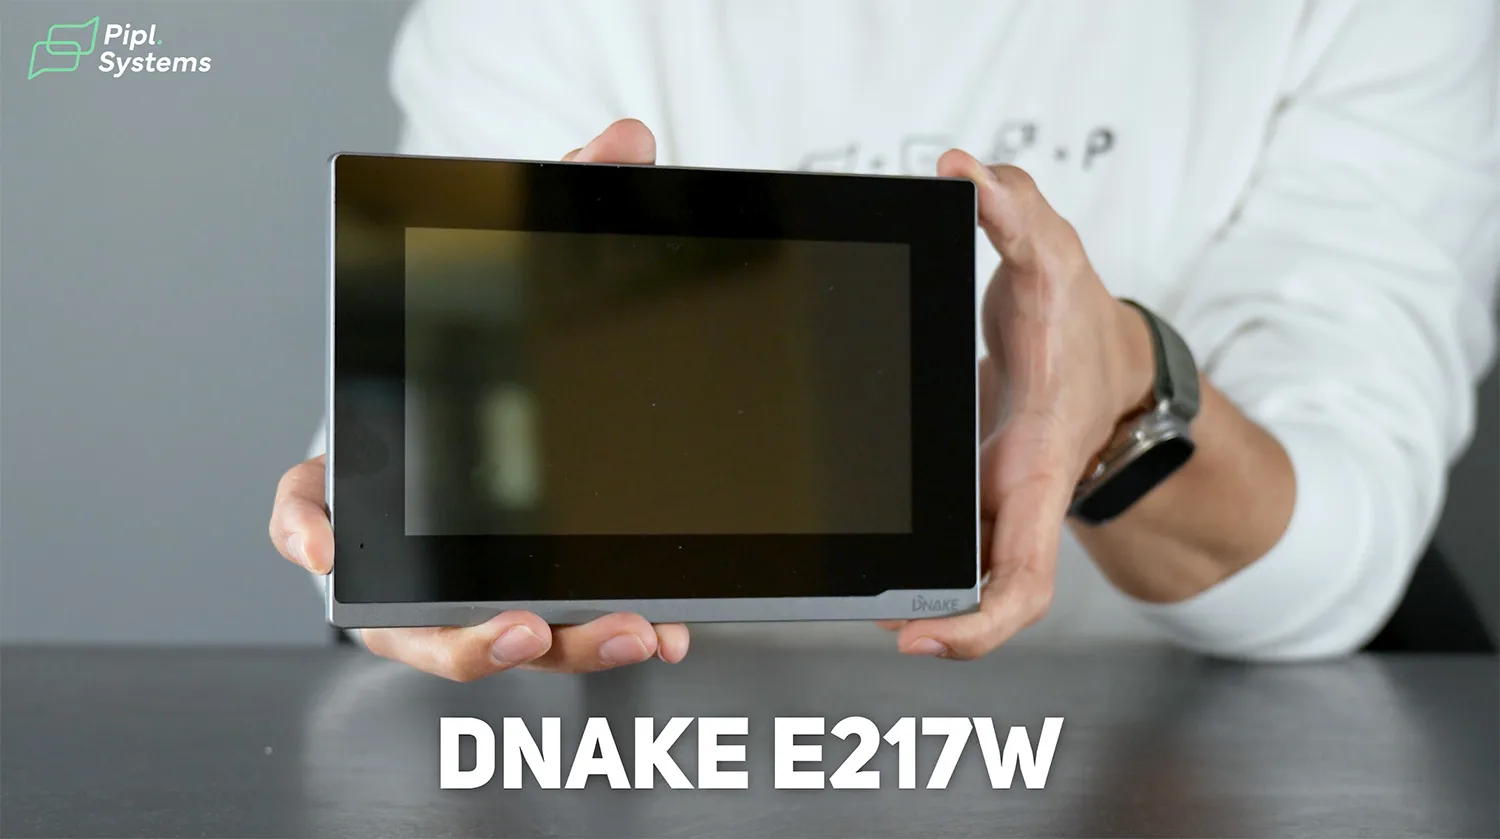
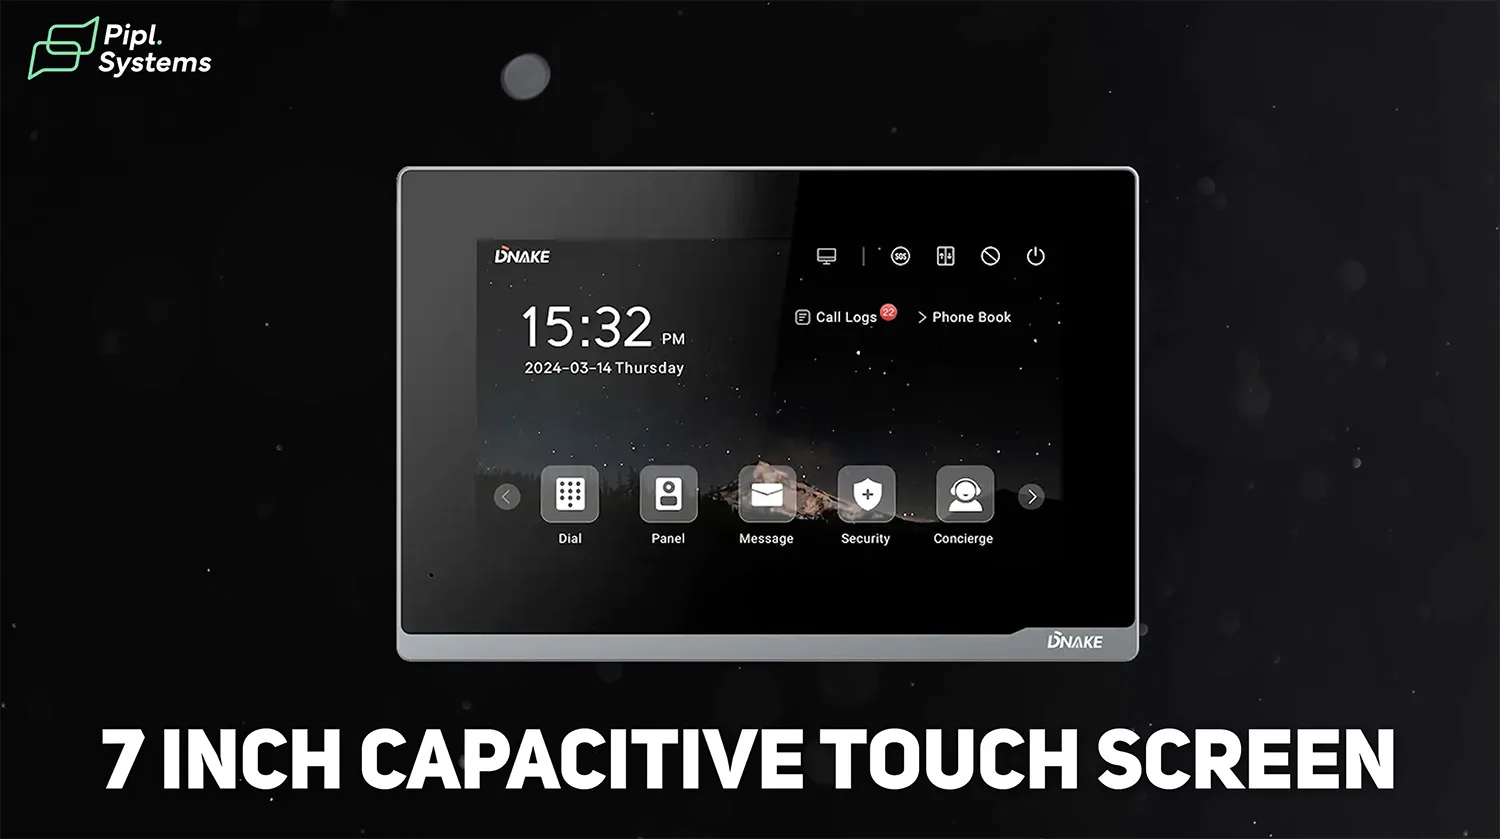
The E217W is a 7-inch indoor monitor running a Linux-based OS. The capacitive touch display offers a resolution of 1024 × 600, and its layout feels familiar to anyone who’s used a modern smartphone.
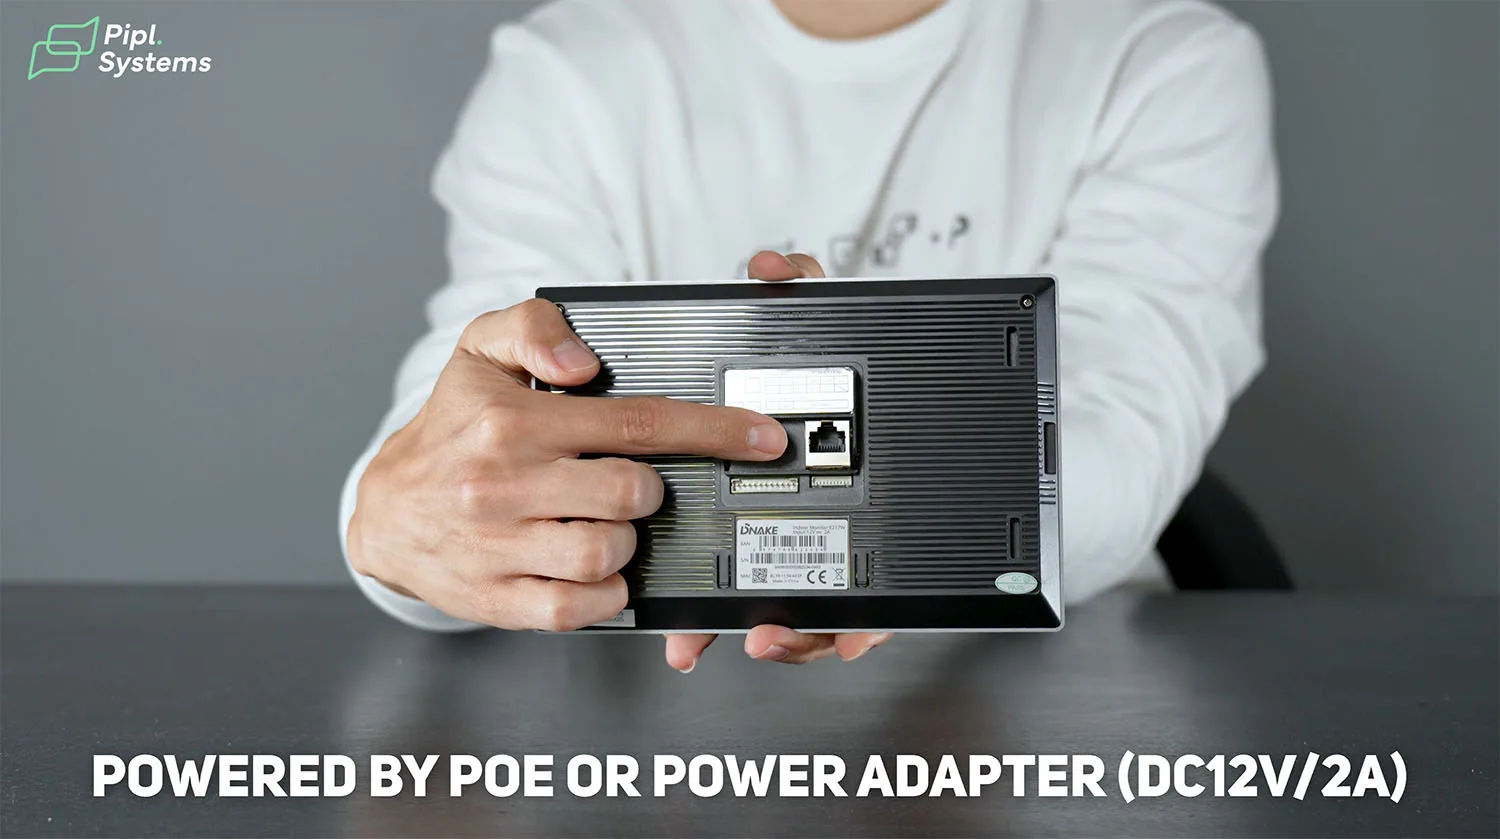
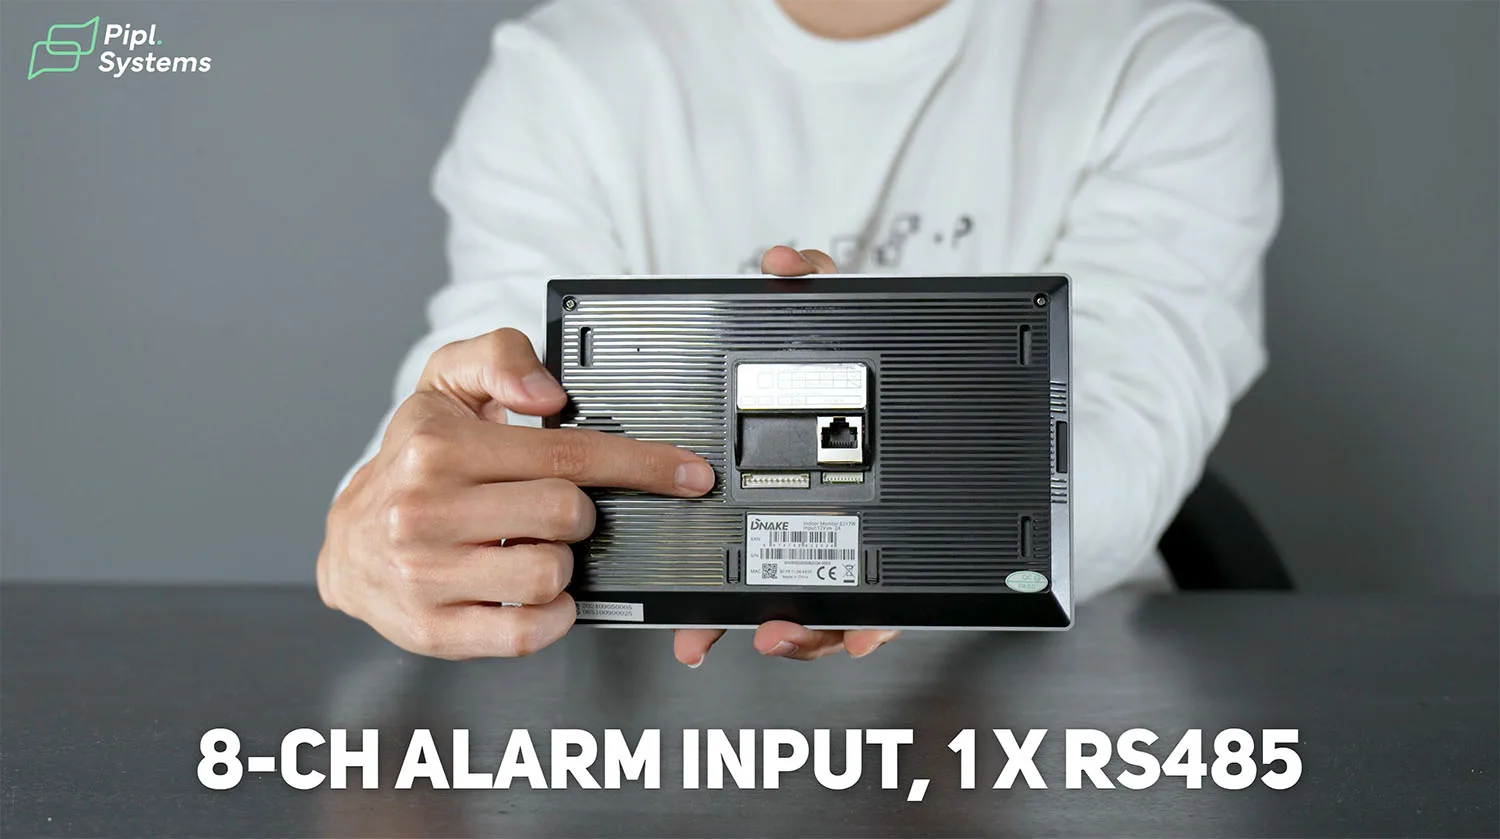
On the back, it features an Ethernet port with PoE support, power input (DC12V/2A), and Wi-Fi capability on the 2.4GHz band. It also includes a TF card slot for local video recording and multiple alarm input ports (up to 8 zones). This makes it more than just a screen - it can serve as a small control hub for your smart intercom setup.
The UI is responsive and fast. Navigation is intuitive, and live previews from the door station or additional IP cameras load quickly. You can also access past call logs and snapshots directly from the interface.


1 / 7
C112A Door Station: Camera, RFID, and Relay Control
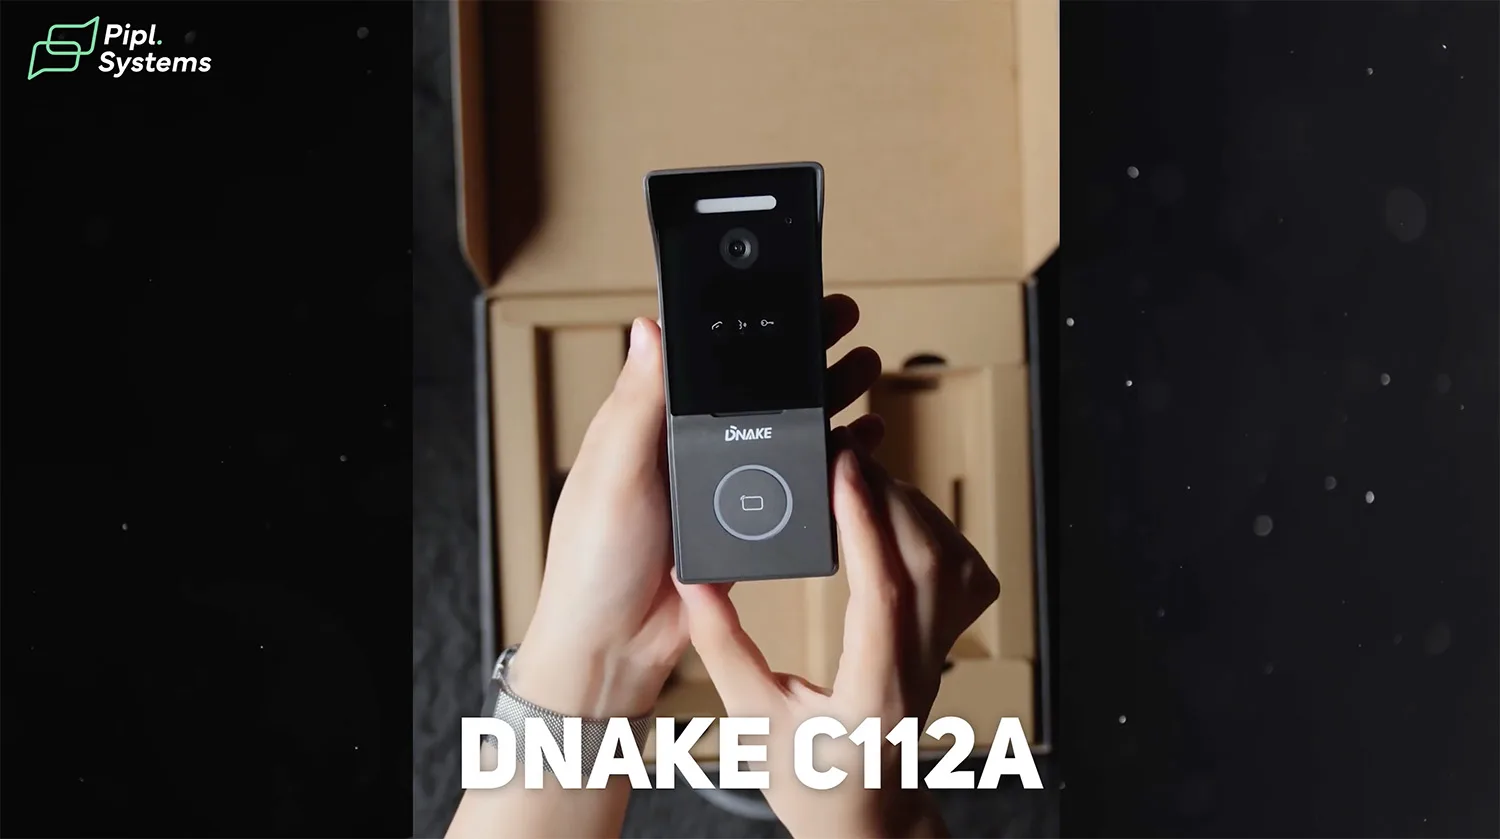
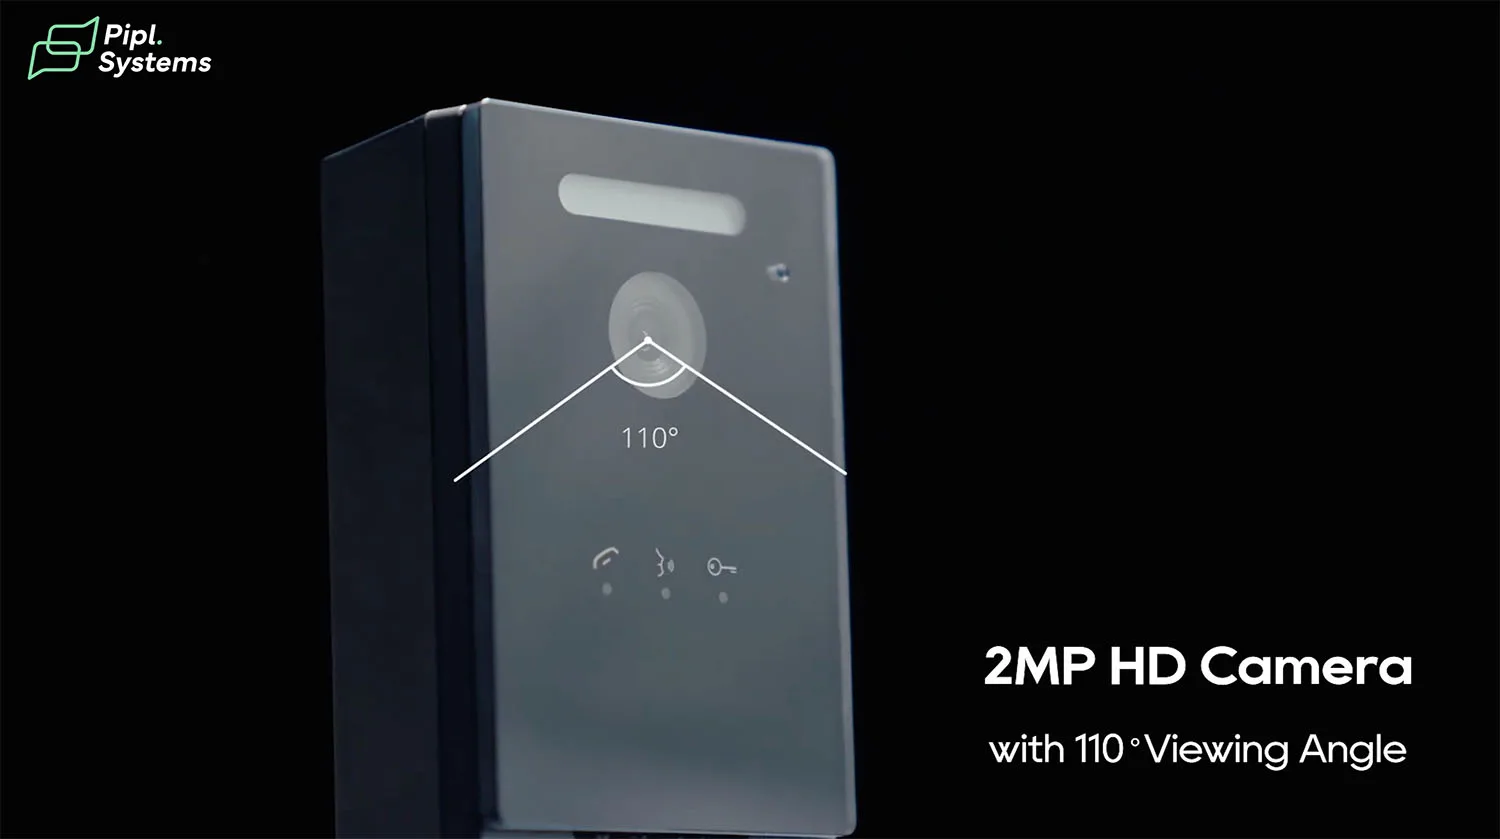
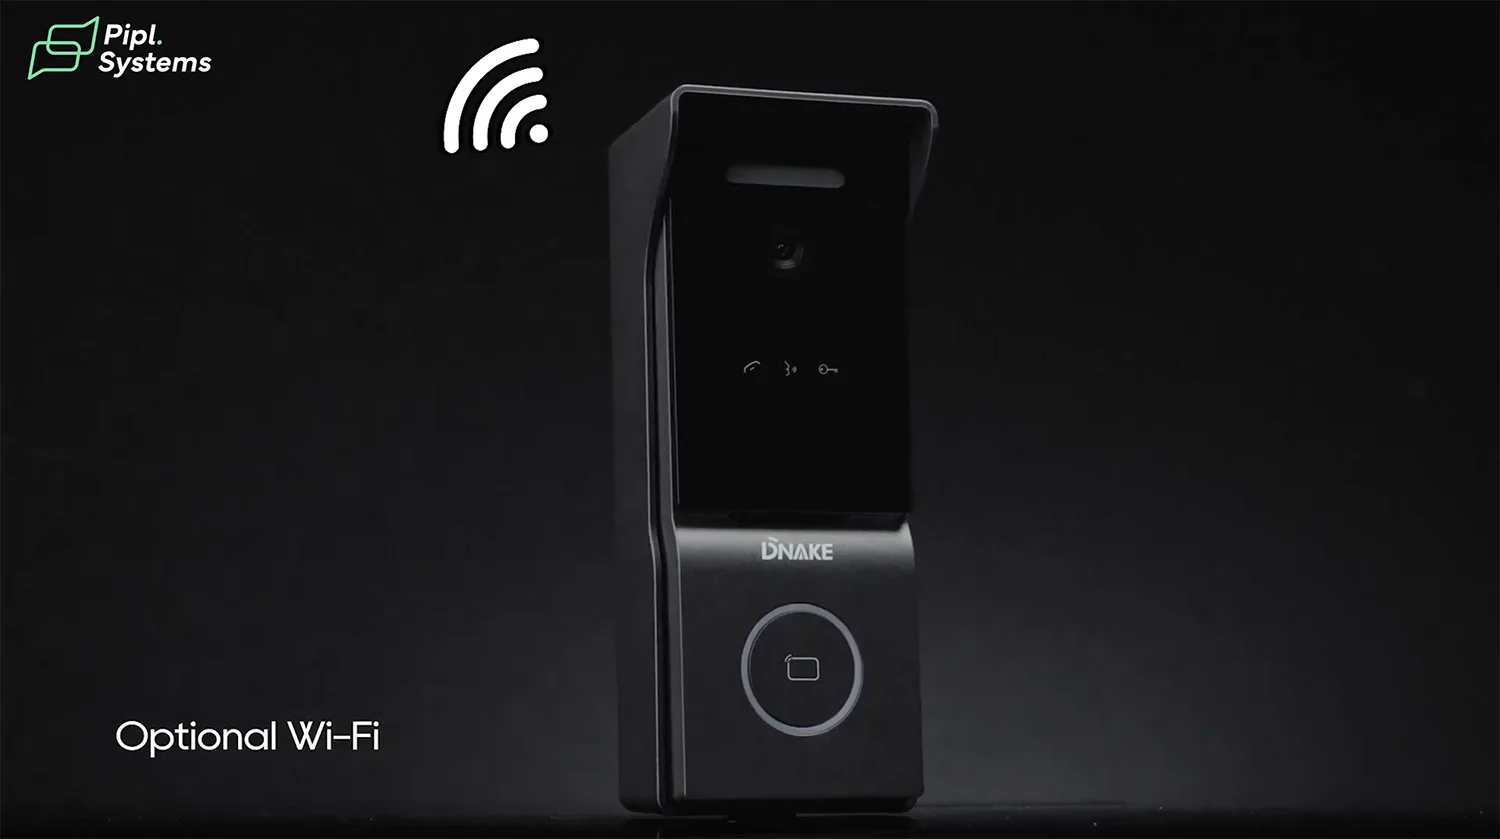
The C112A is a single-button SIP video door phone with an HD 2MP WDR camera. Its field of view is a wide 110°, which minimizes blind spots at the entrance. The H.265 video codec ensures efficient streaming without draining bandwidth or storage space.
There’s a built-in RFID reader supporting 13.56MHz cards (MIFARE), ideal for quick, contactless access. The unit includes a relay output for door strike control and supports motion detection, tamper alarms, and SIP calls.
Want to see how the Dnake C112 performs in real-world conditions? This quick video demonstrates its five access methods, SIP functionality, and how it fits into smart intercom setups. A great starting point if you're considering an upgrade:
Designed for surface mounting, it carries an IP65 rating: suitable for outdoor installations in varying North American climates. You can power it through PoE or 12V DC, and initial pairing with the monitor is automatic if you’re using the factory-configured IP range.


1 / 12
Step-by-Step Installation and Setup
Powering Up: PoE vs. 12V Setup Options
You have two ways to power the Dnake IPK05 components: Standard PoE or 12V DC. The flexibility makes it ideal for both new deployments and retrofits.
In this walkthrough, we’re using a PoE switch. One cable powers the monitor and the door station while also delivering network connectivity. If PoE isn't available, you can use a 12V/2A power adapter (not included in the box). Both units clearly indicate polarity and port designations to simplify wiring.
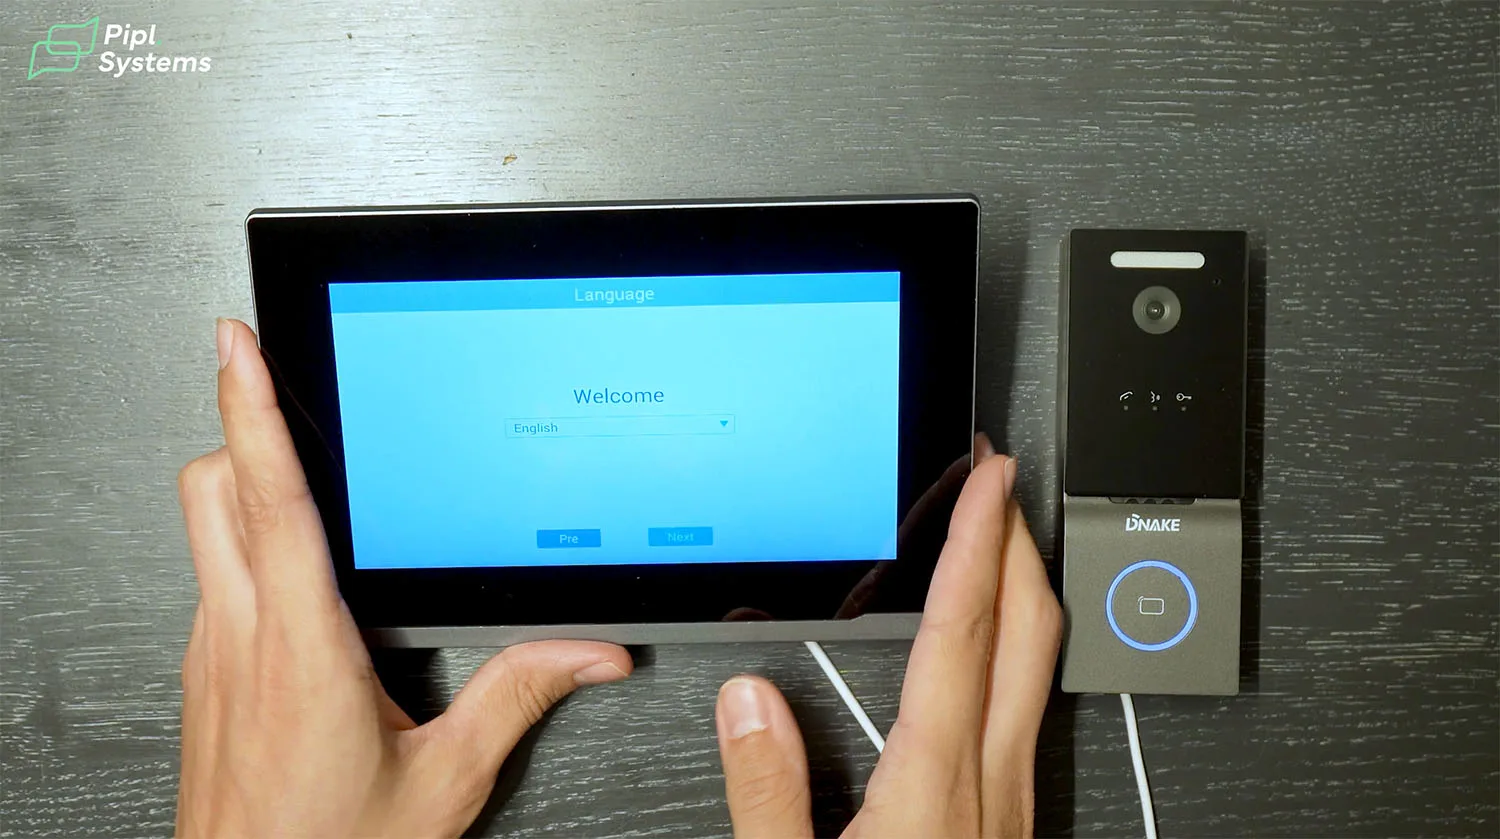
Before powering on, connect the monitor (E217W) and the door station (C112A) via Ethernet to the same PoE switch. Once connected, both devices boot automatically. No configuration is needed at this stage - they’re plug-and-play.

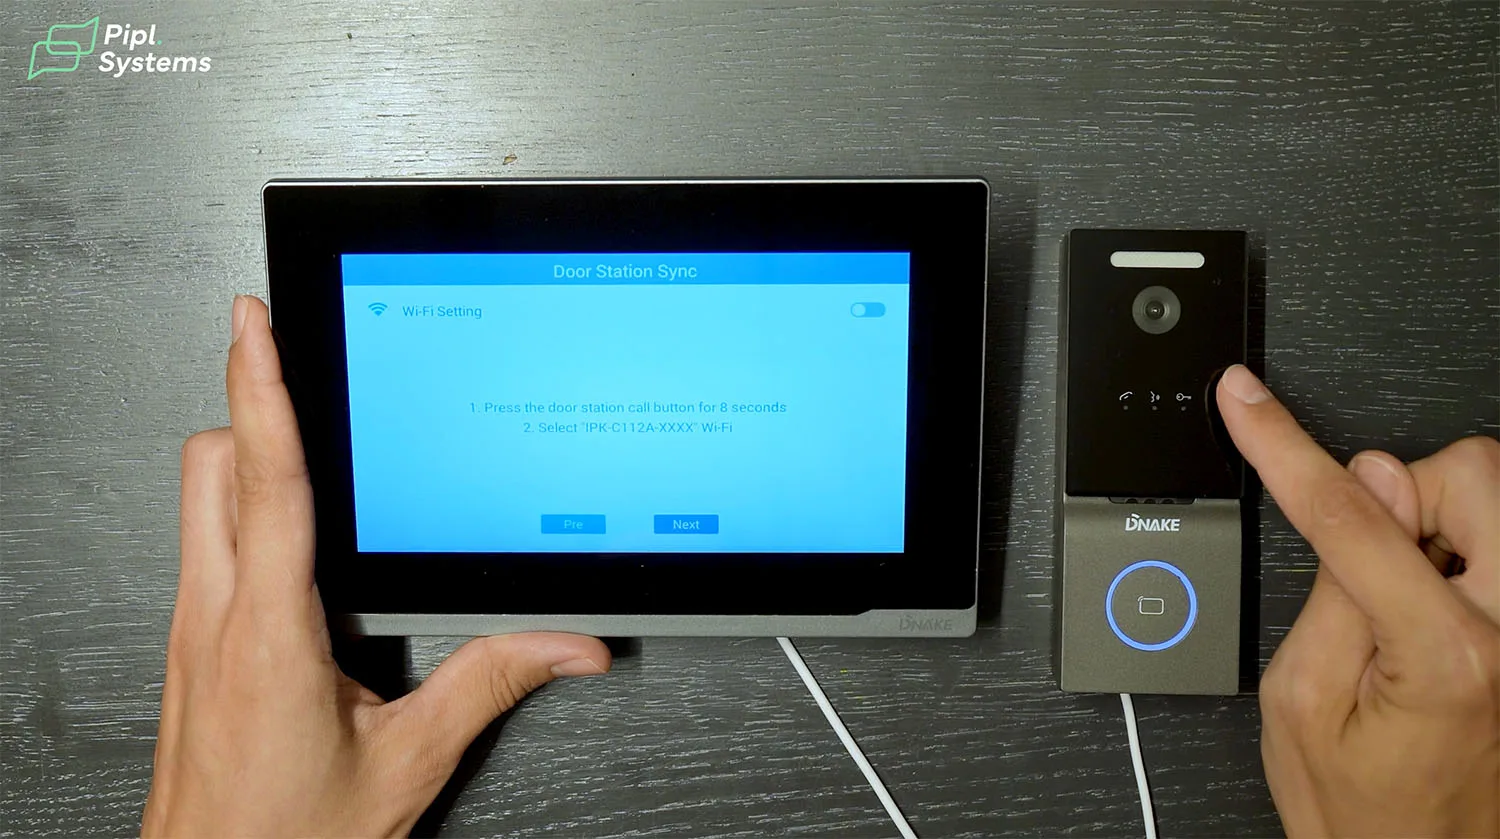
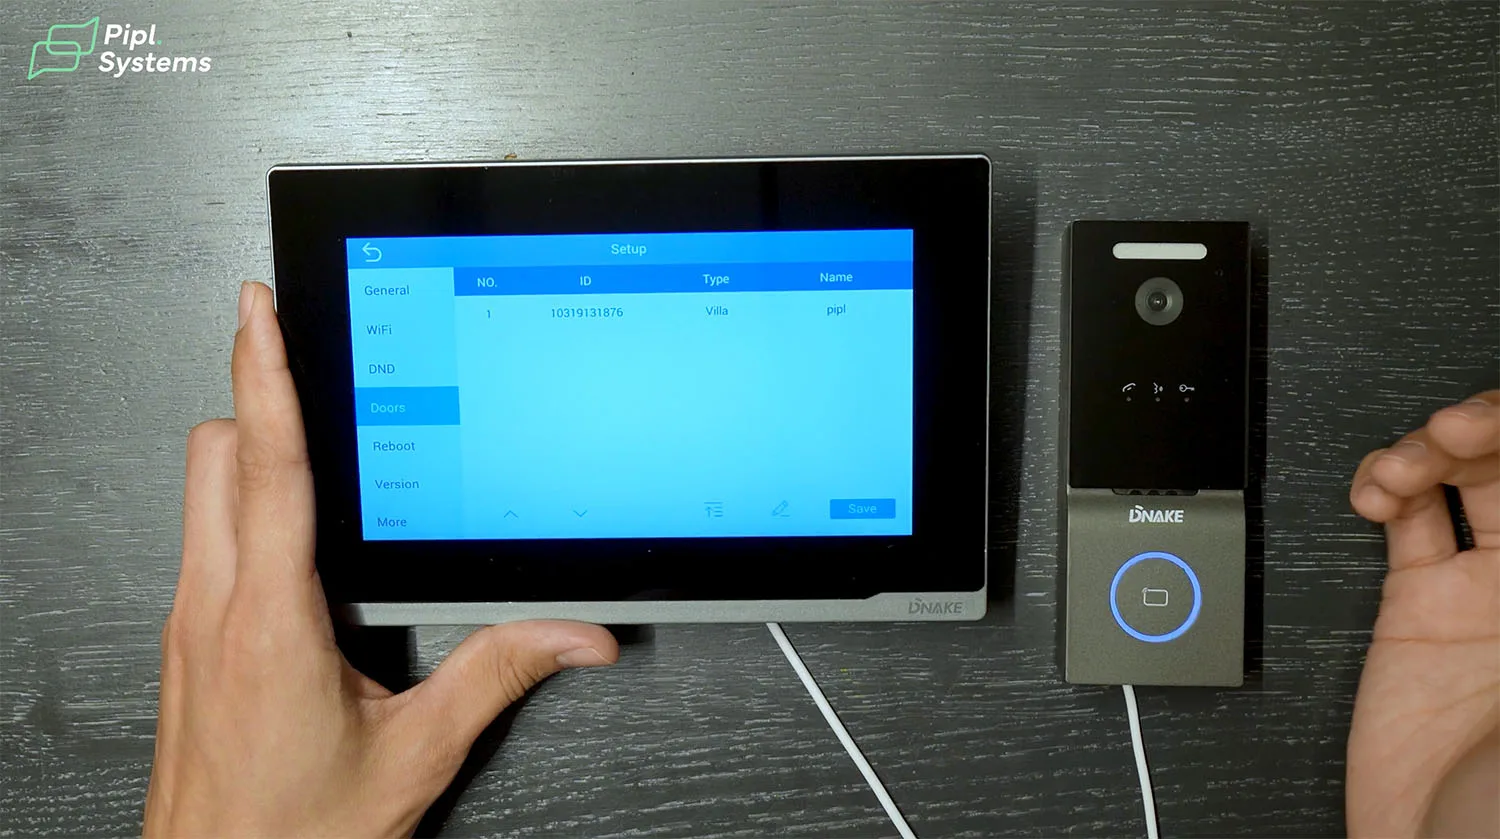
Pairing the Monitor and Door Station via Wi-Fi
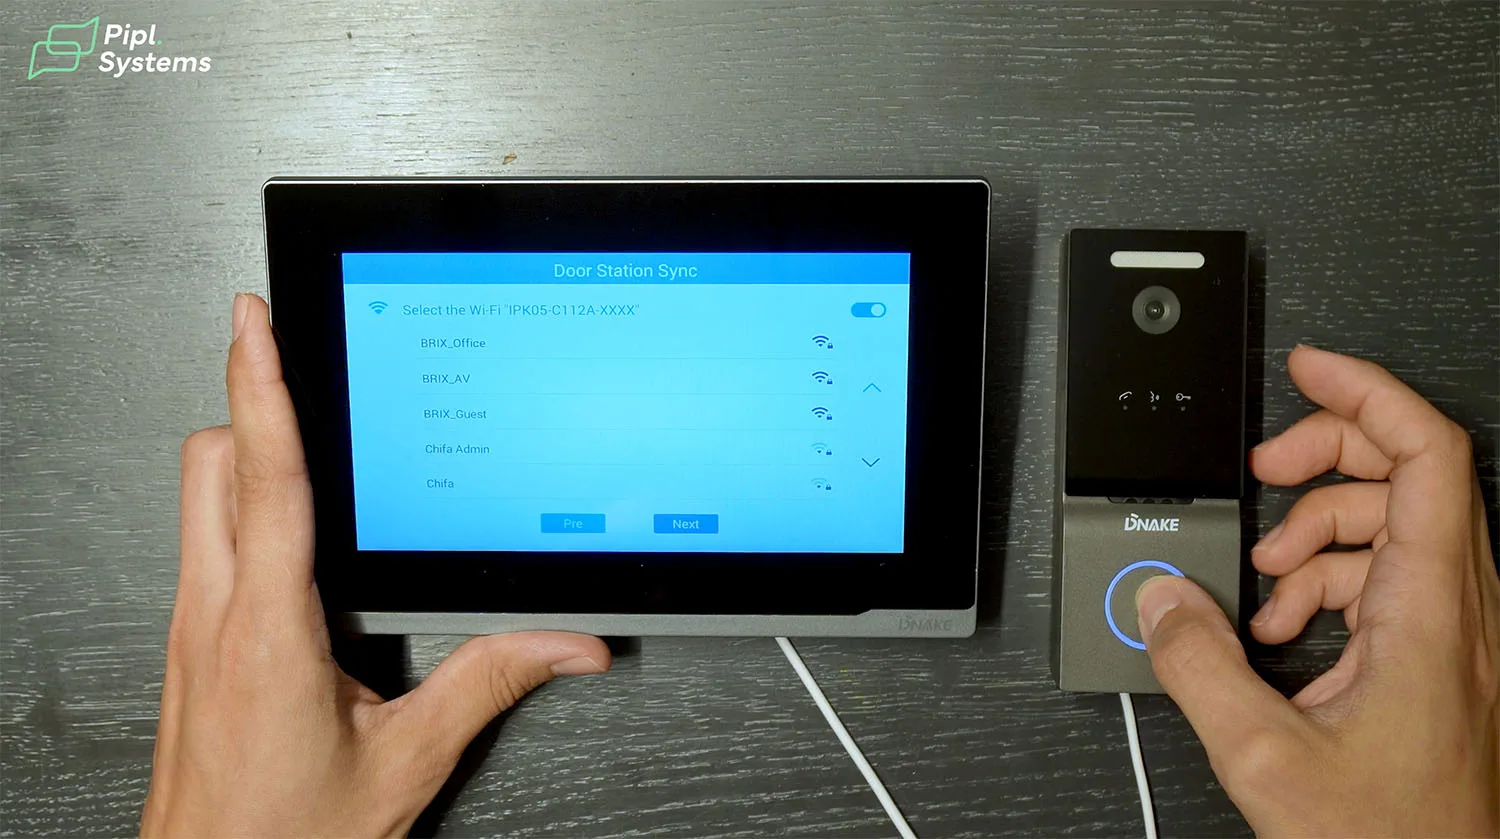
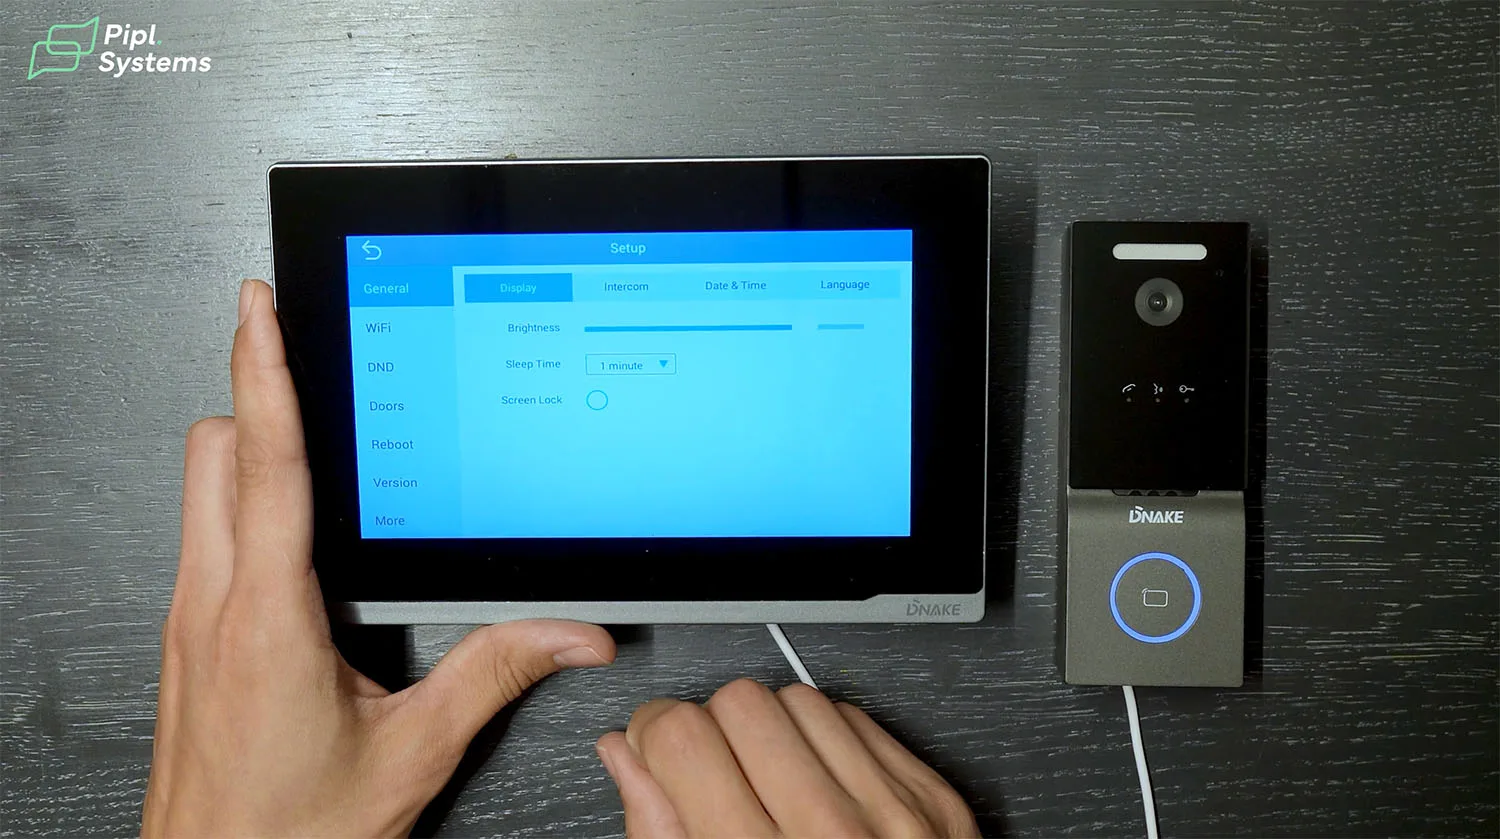
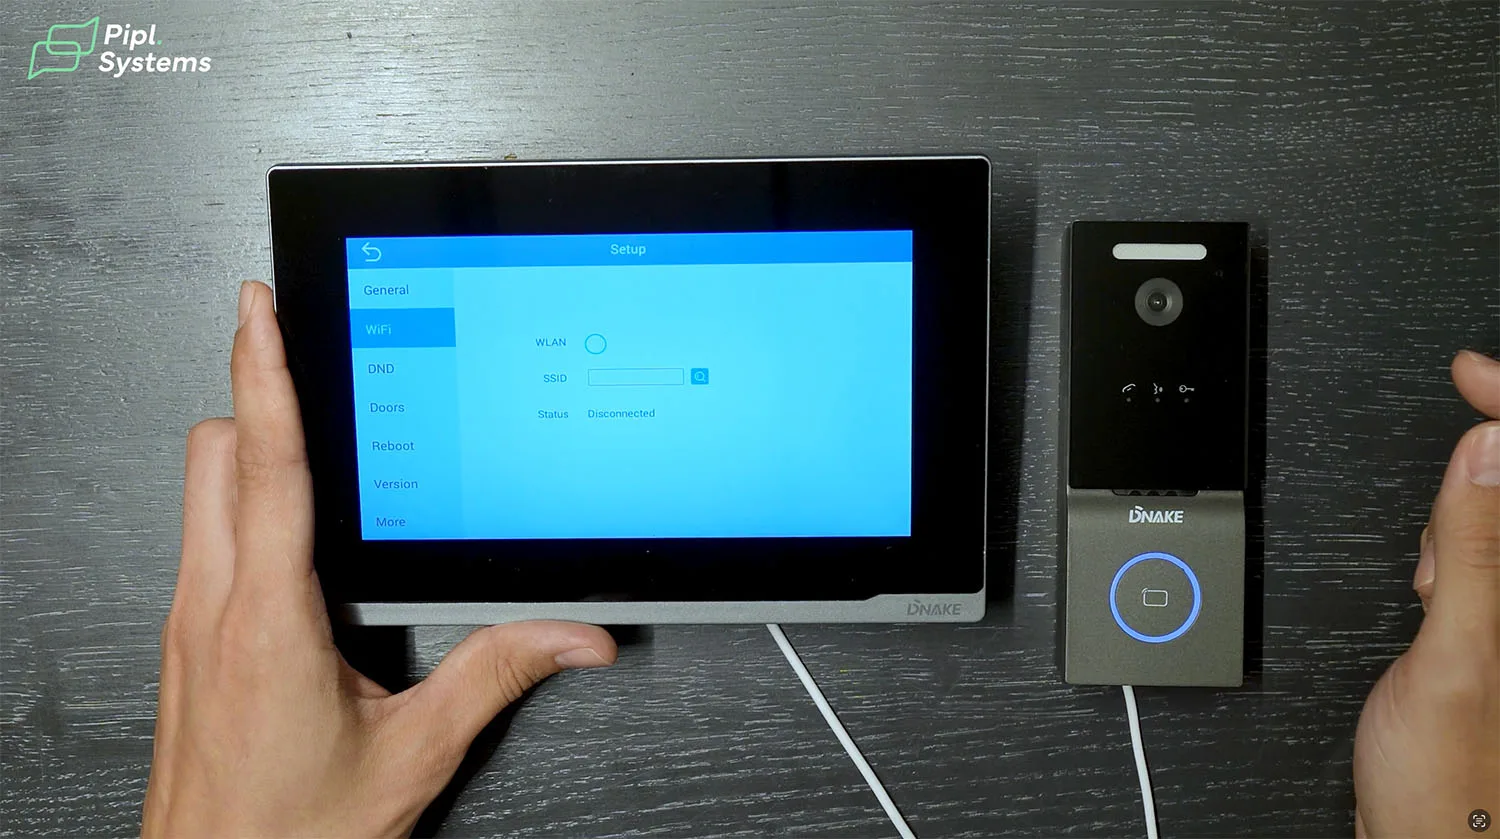
After booting up, the next step is pairing the devices over Wi-Fi. Tap the Setup icon on the indoor monitor, then navigate to the Wi-Fi menu. Enter your local network credentials. Once connected, the device confirms IP assignment.
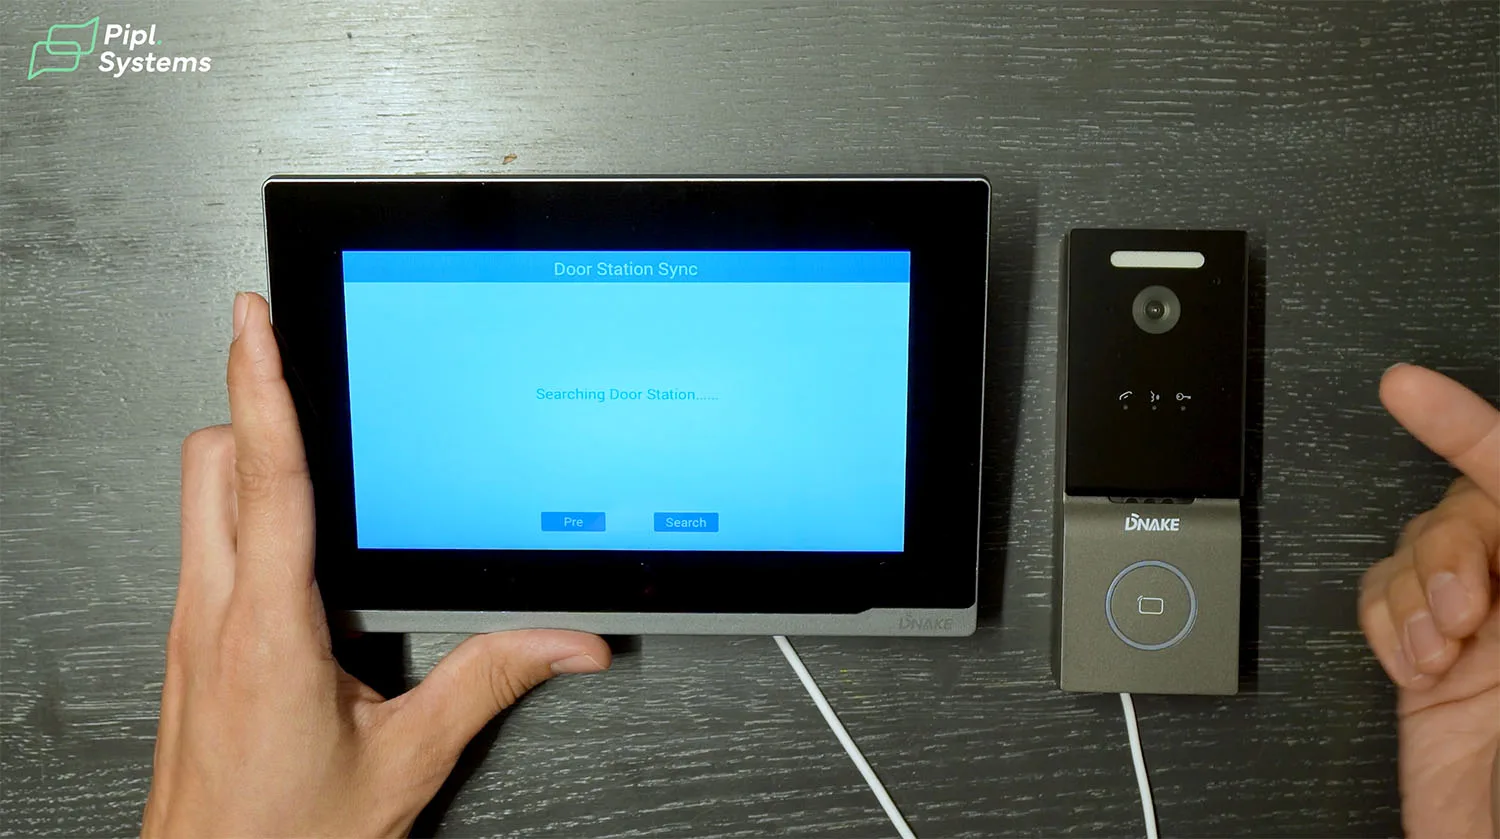
From here, head to the SIP settings. Assign the monitor and door station to the same room or unit. In our case, both were configured to “Room 1”. The devices discover each other automatically once on the same network and in the same SIP group.
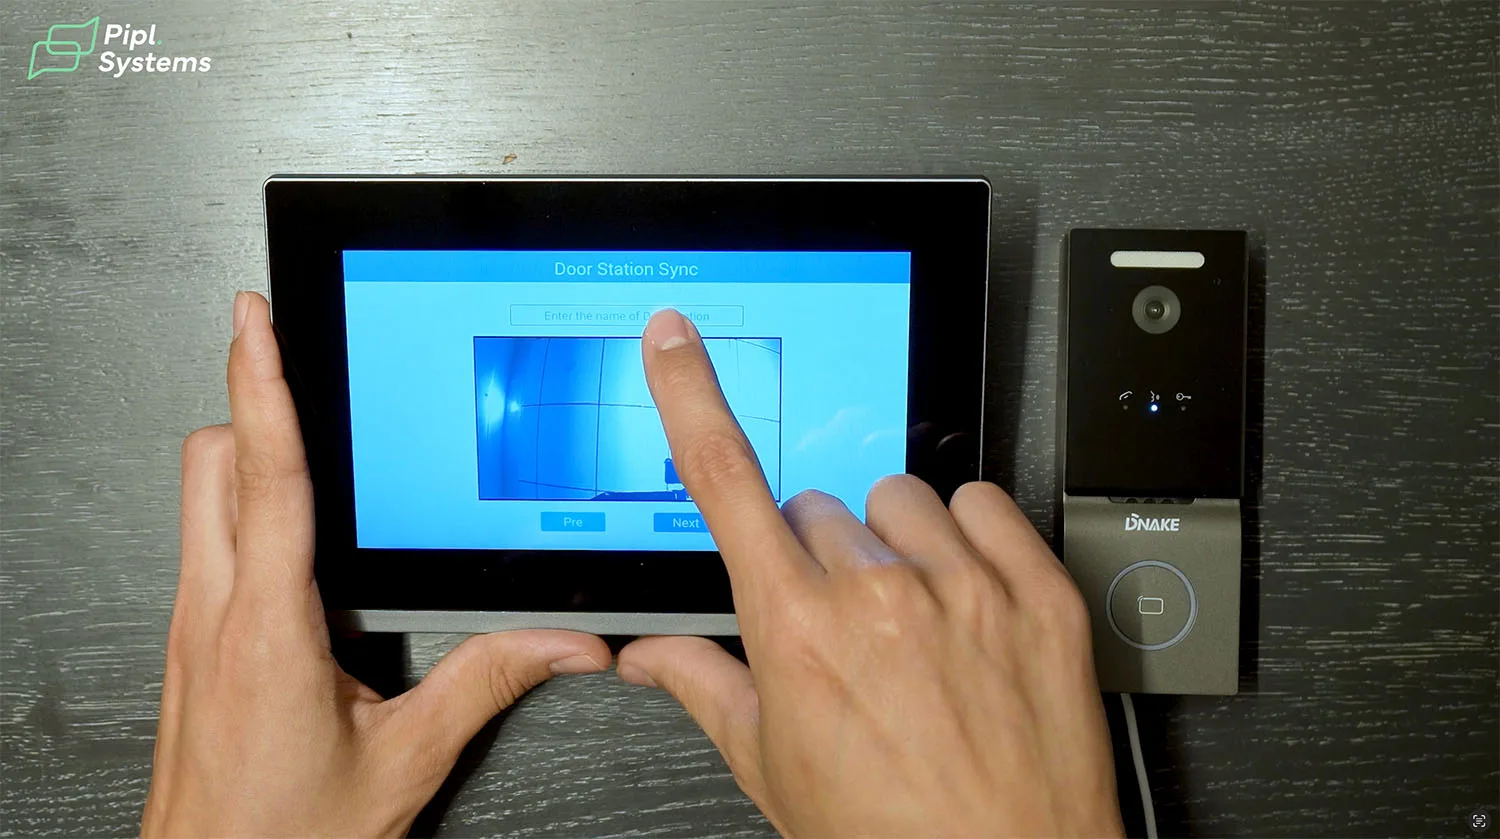
The pairing process is fast - the two devices establish video and audio communication within seconds. No additional software or cloud account is needed at this stage.
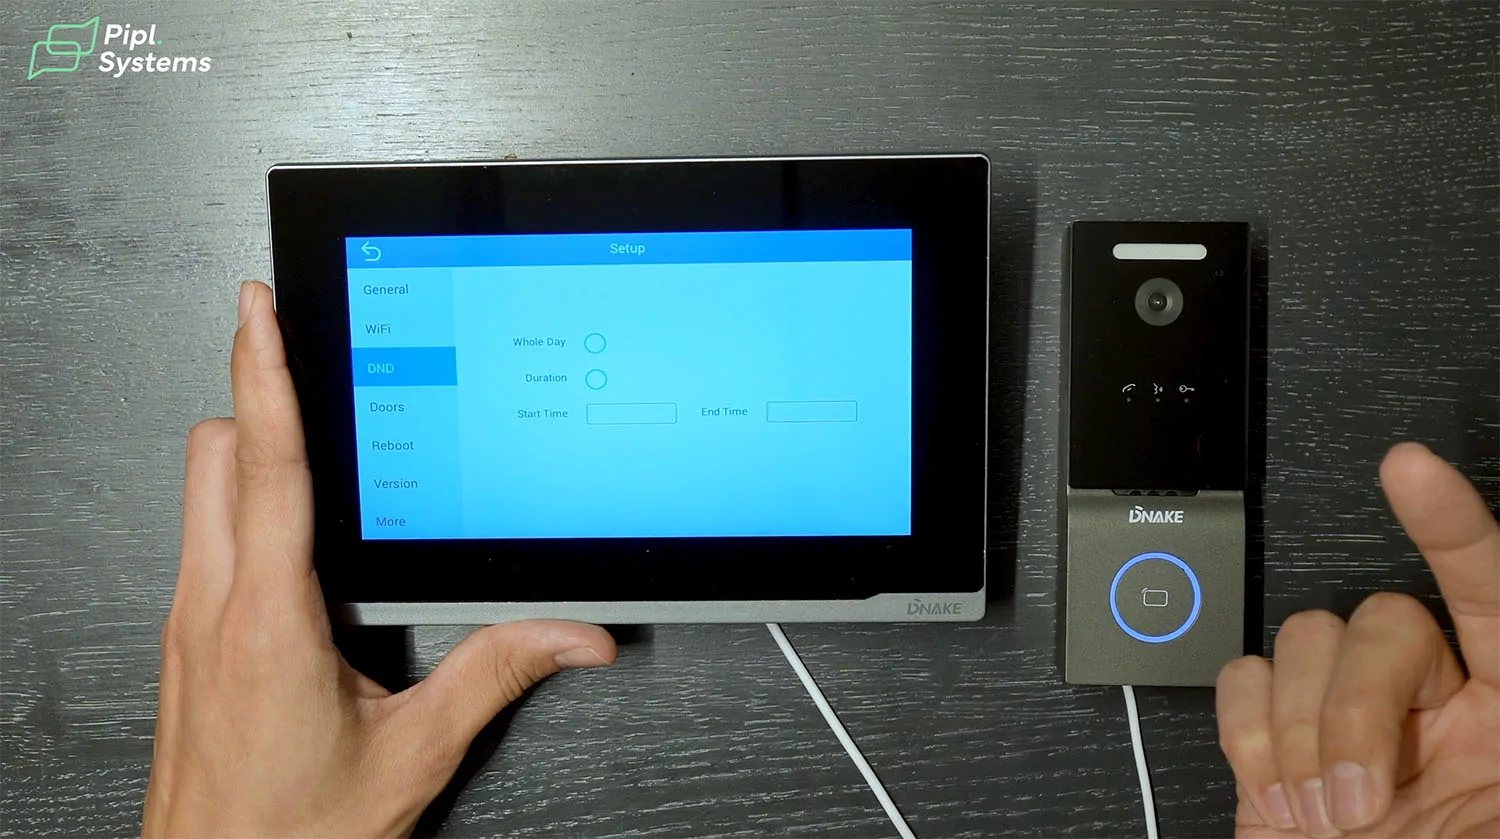
On-Screen Configuration and First-Time Setup
Language, Networking, and Device Sync
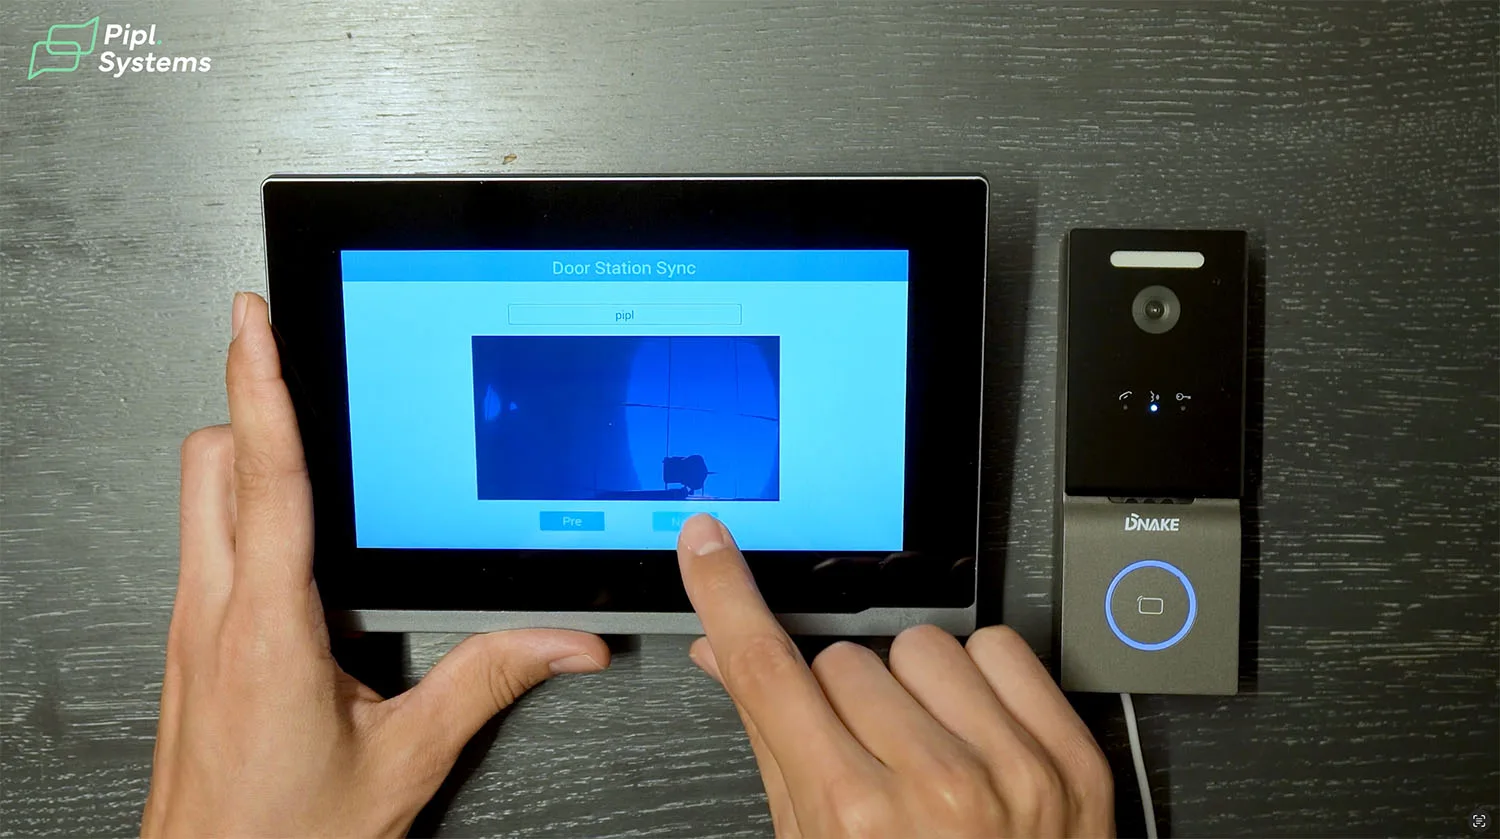
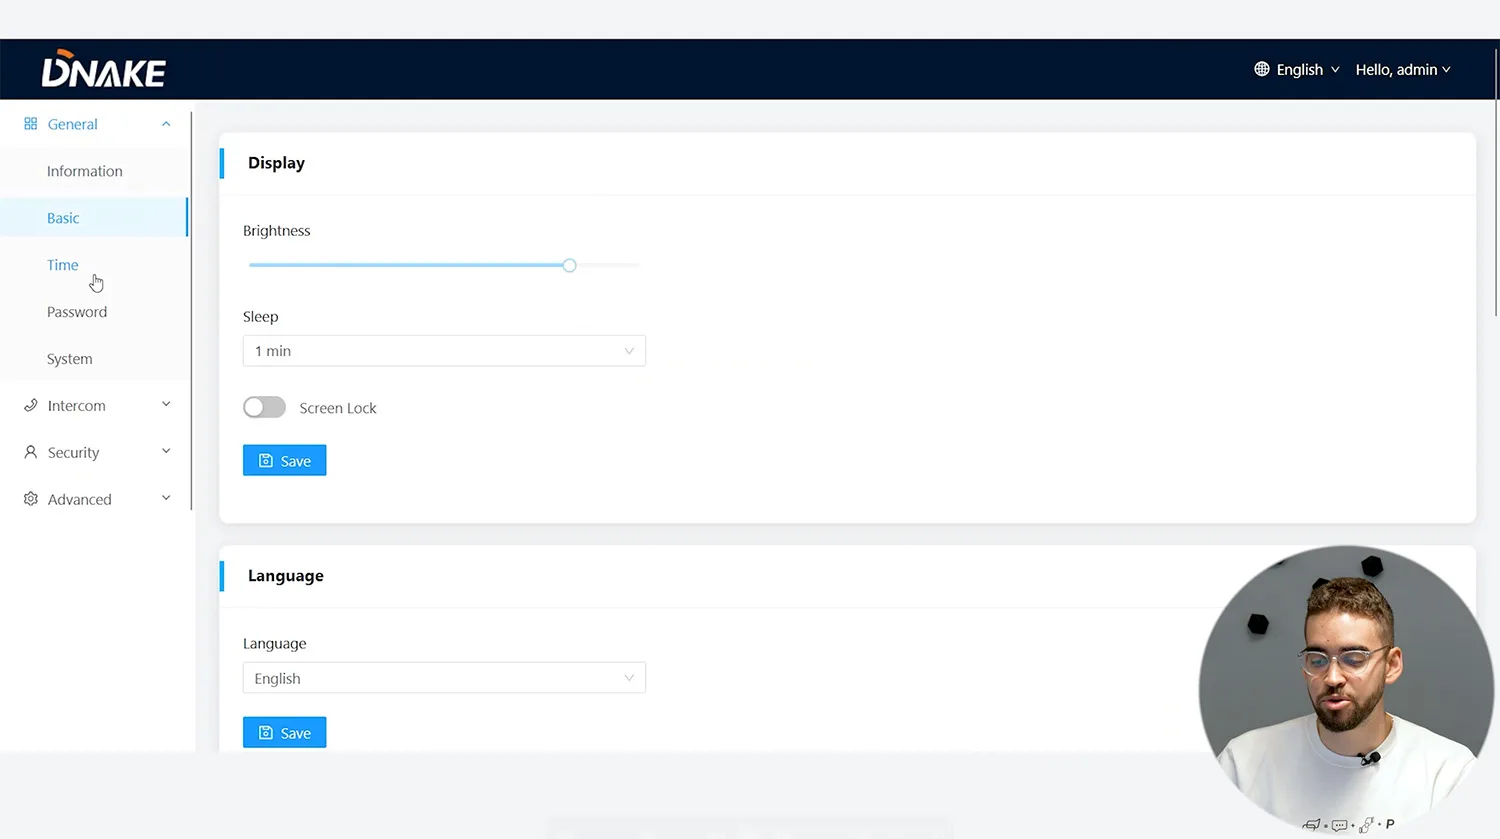
Right after the initial pairing, you’ll be taken to the language and region setup screen. The interface defaults to English but supports multiple languages. Tap “Save” once your preferences are set.
Under System > Information, you can verify firmware versions, MAC addresses, and UI builds. Both devices we tested were running firmware version 160M.1.1.0.8_IPK_GA_20240928, with UI version 1.1.0 and framework 1.6.0.
You can sync time either manually or via NTP. The default server is pool.ntp.org, and you can choose your preferred time zone and date format (e.g., DD-MM-YYYY). The monitor supports both 12-hour and 24-hour display formats.
This screen also allows syncing with other intercom or CCTV devices later. The menu layout is intuitive and uncluttered - clearly designed for residential installers and end-users alike.


1 / 12
Using Static or DHCP IP Addresses
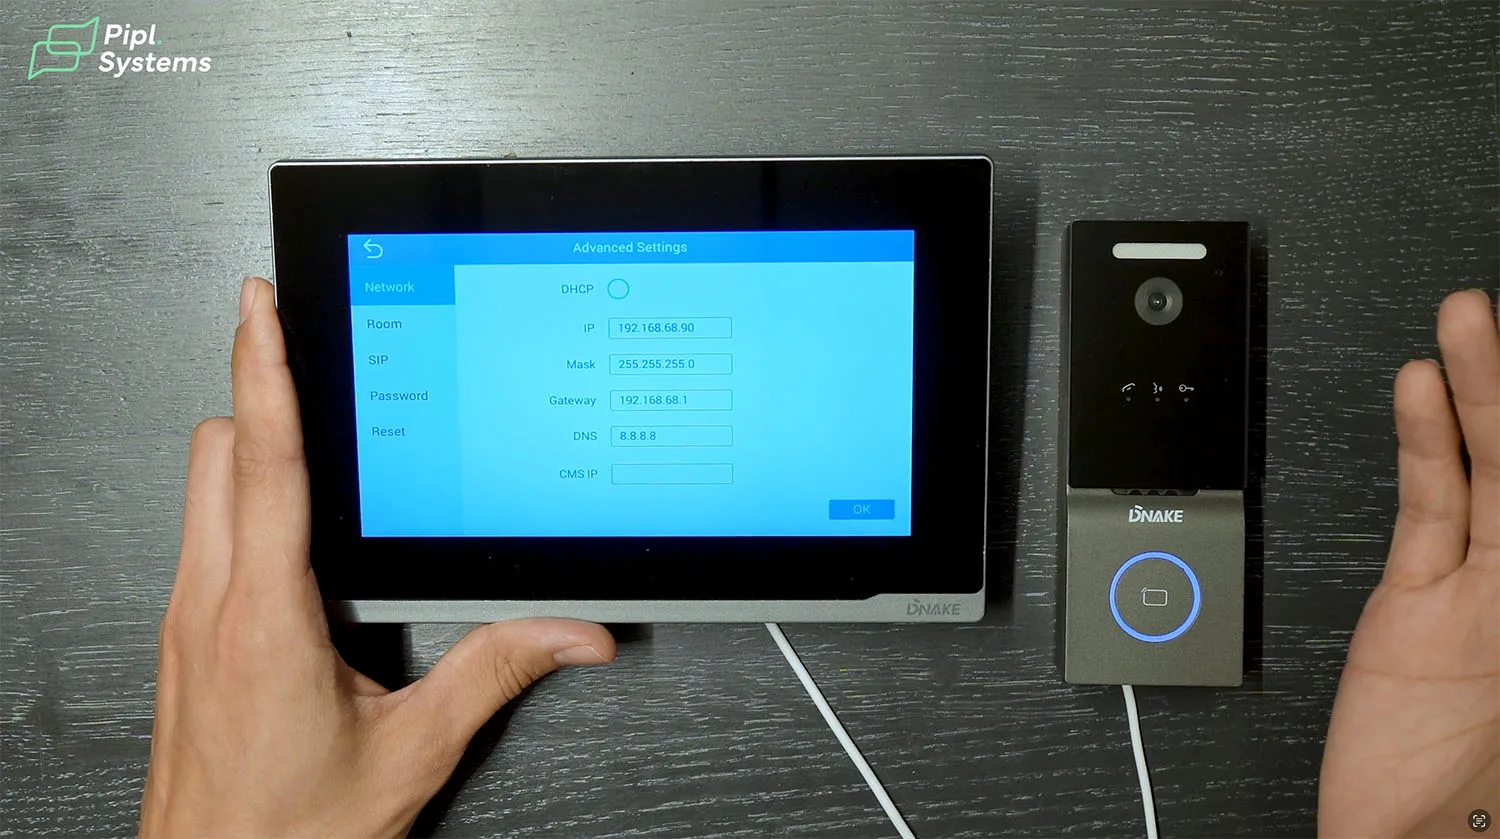
The Dnake IPK05 supports both static IP and DHCP configurations. If you’re installing in a managed network, DHCP is enabled by default and works without issues. The system picks up a local IP (e.g., 192.168.68.90) and DNS (e.g., 8.8.8.8) from your router.
To assign a static IP, go to Advanced Settings > Network on the indoor monitor. Disable DHCP and manually input IP, subnet mask, gateway, and DNS values. This is ideal for larger deployments or where consistent addressing is required for firewall rules or remote access.
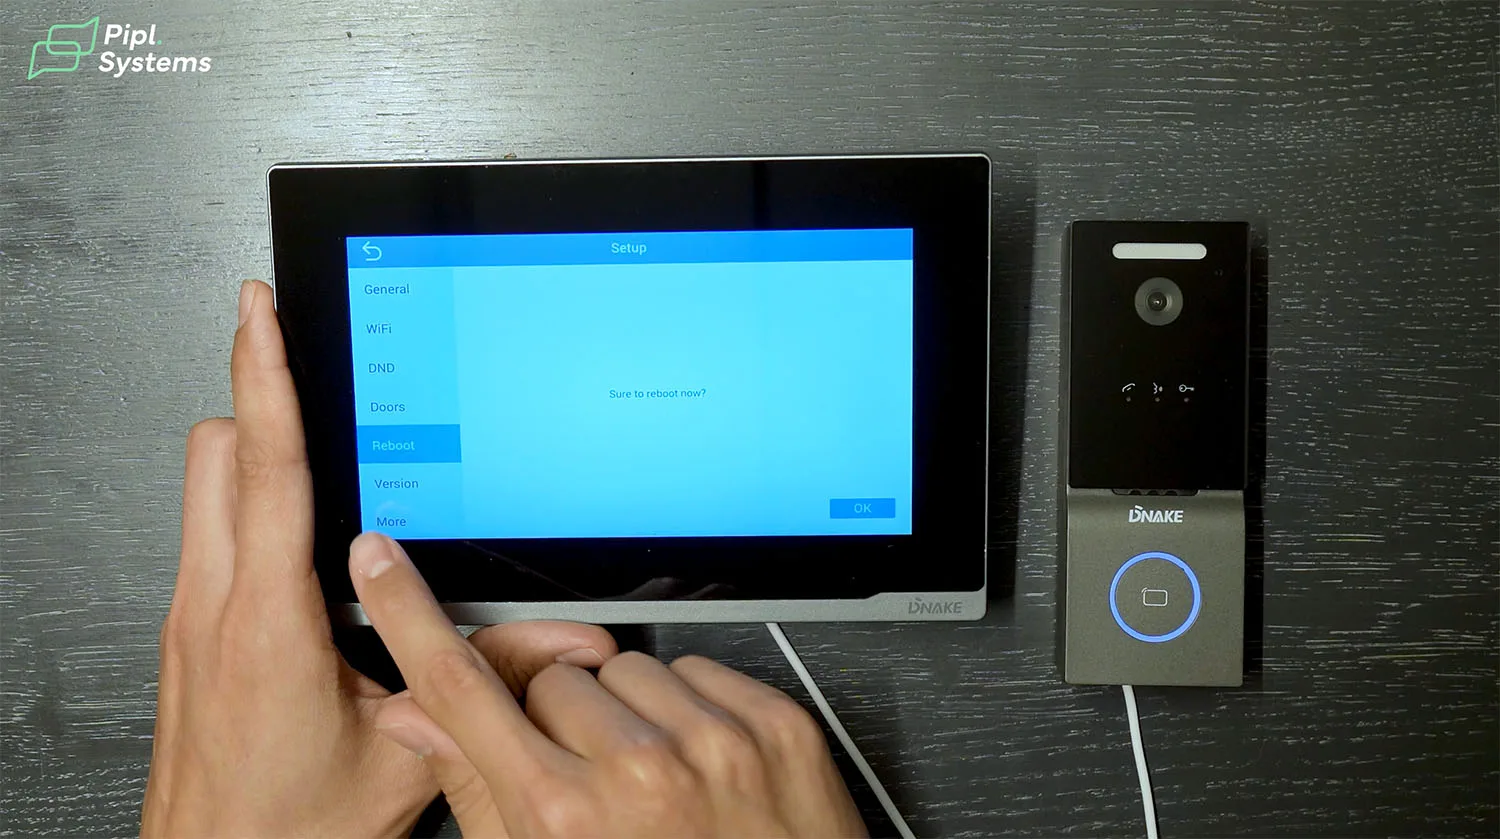
All changes apply immediately after saving - no reboot required. The UI confirms success with a green “Save Successfully” banner at the top of the screen.
Smart Features and Daily Use
Real-Time Video, Audio, and Remote Unlock
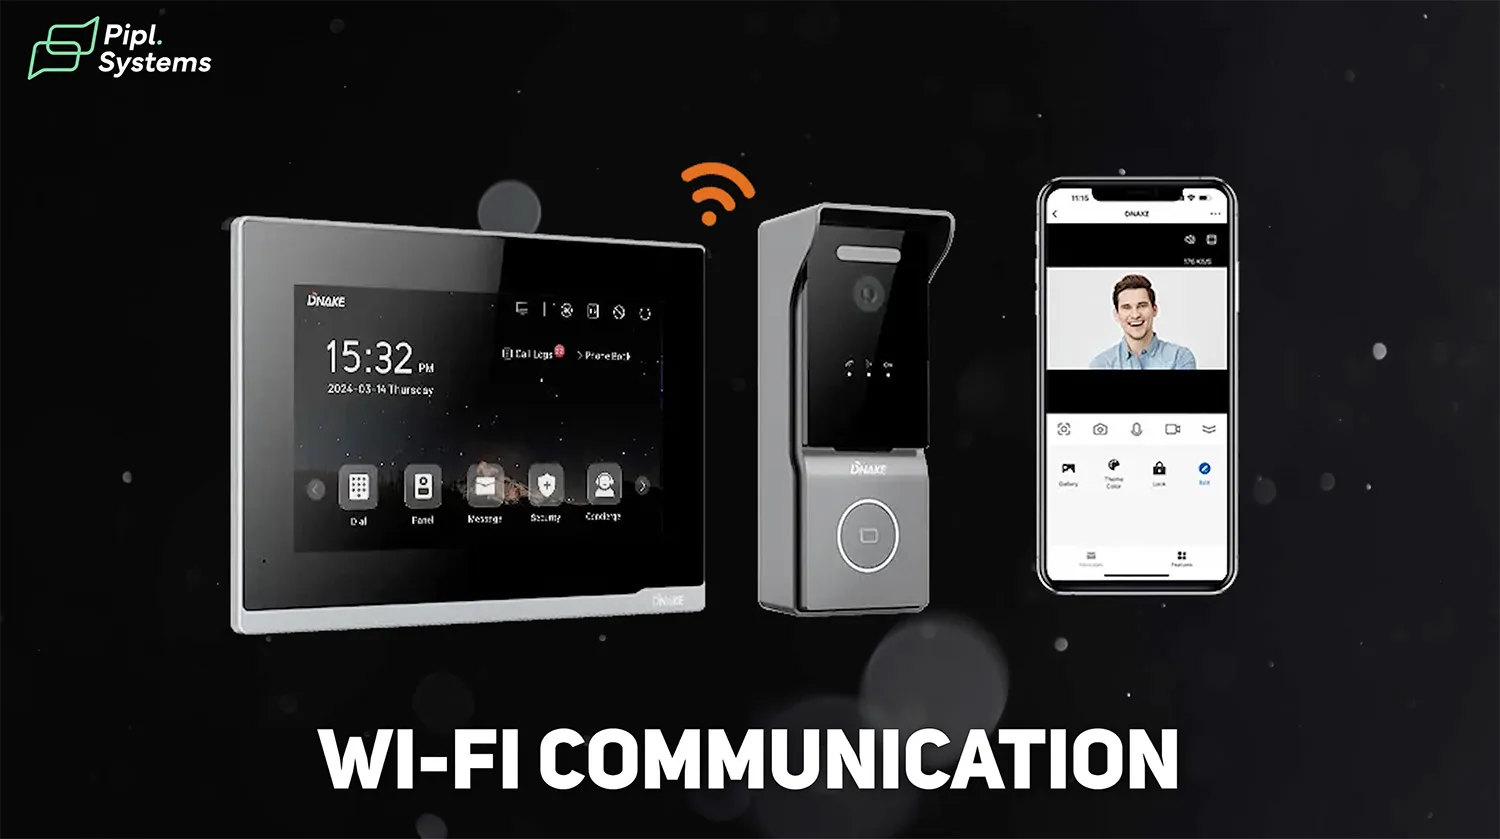
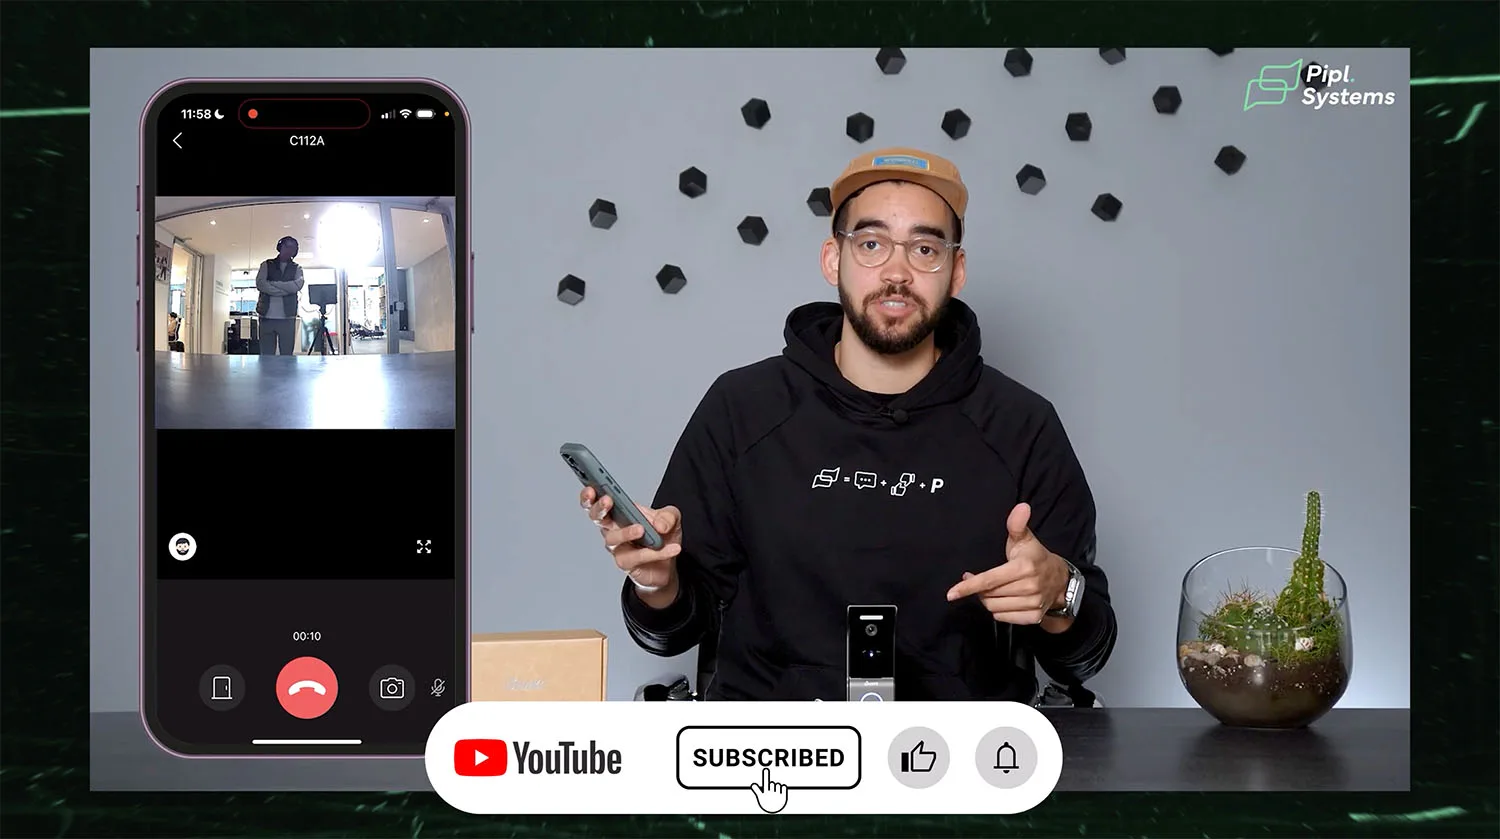
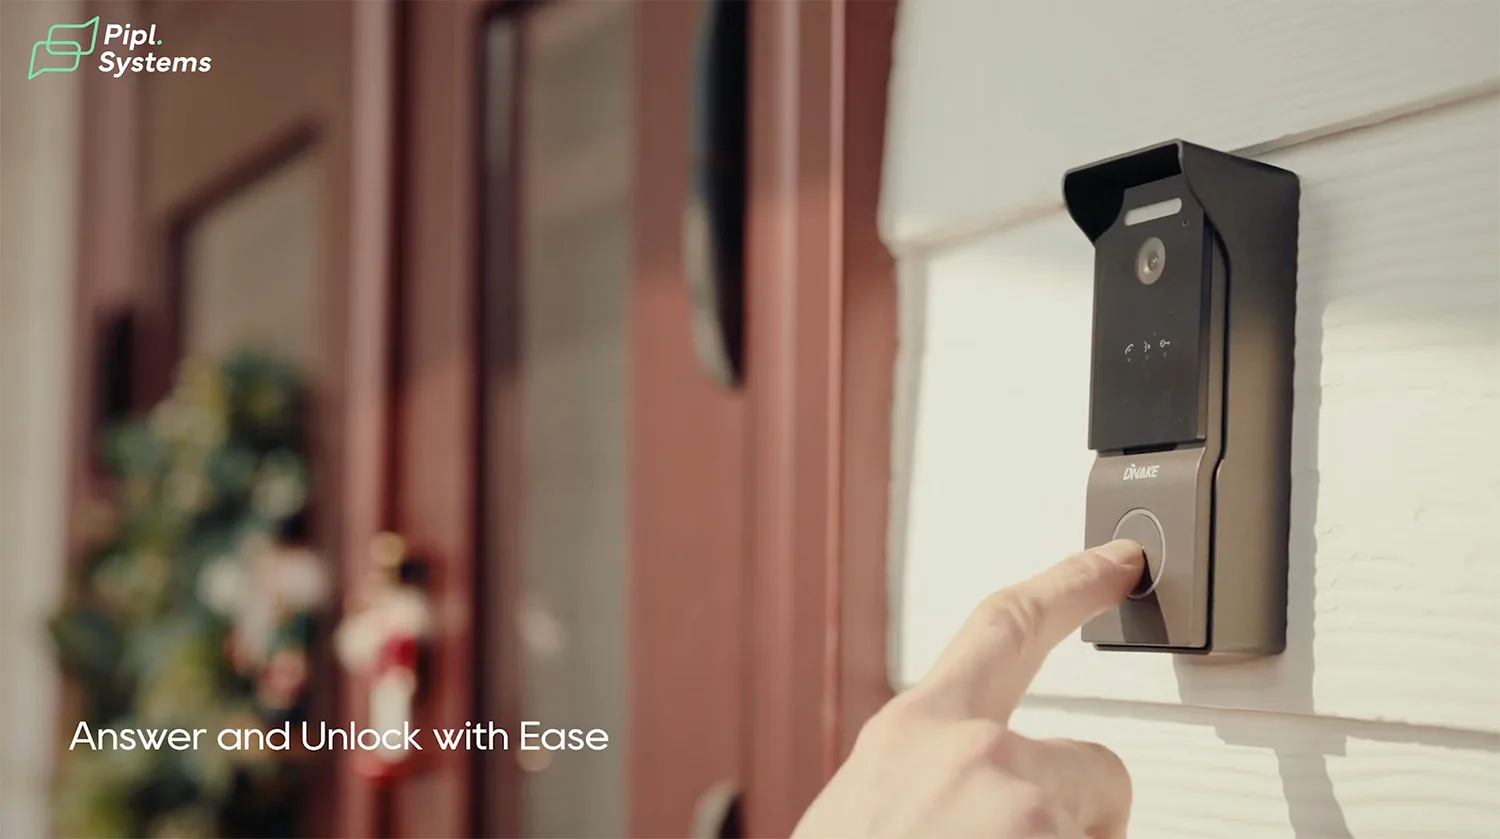
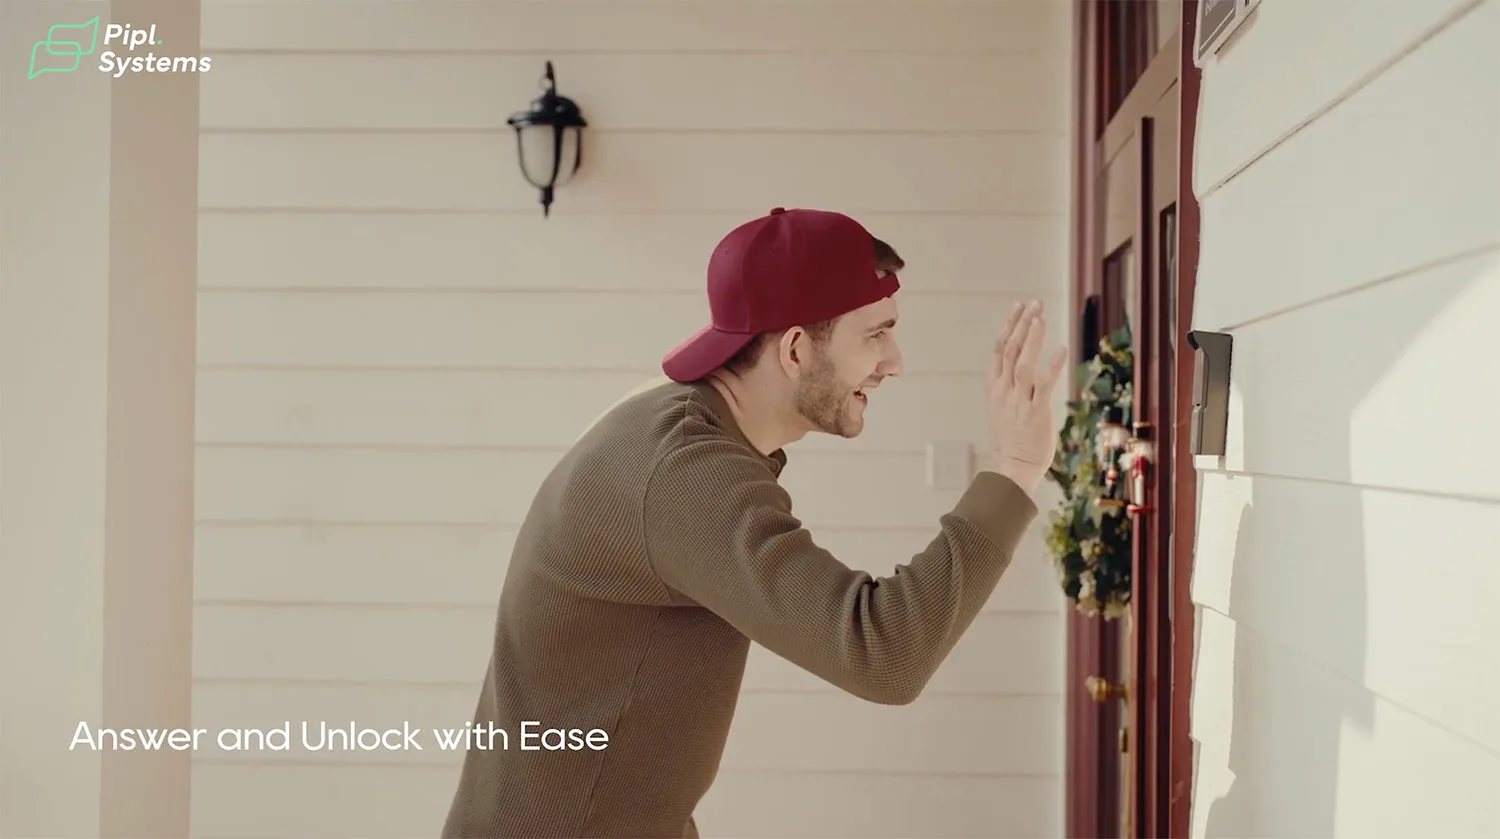
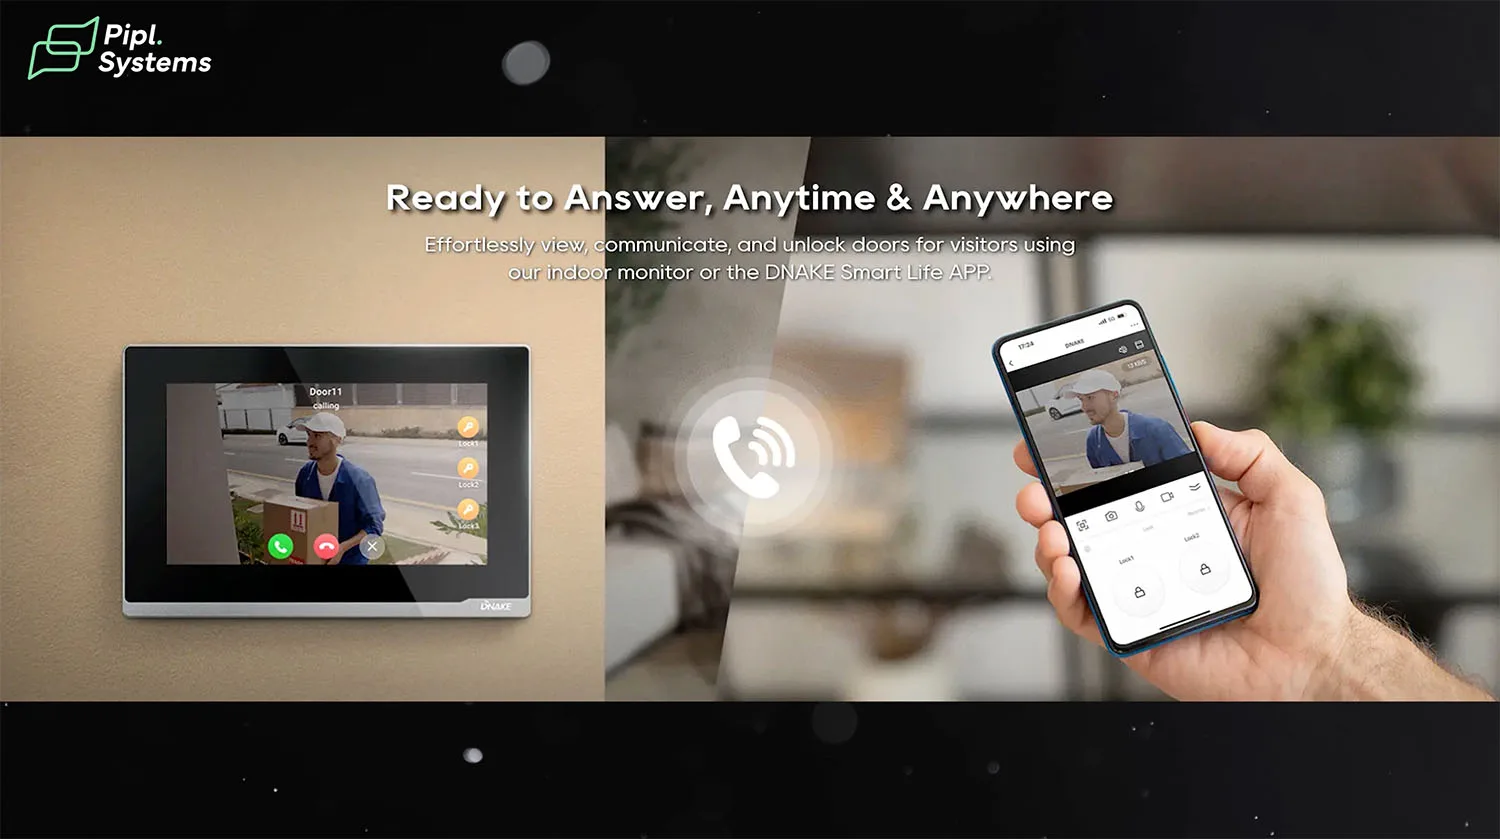
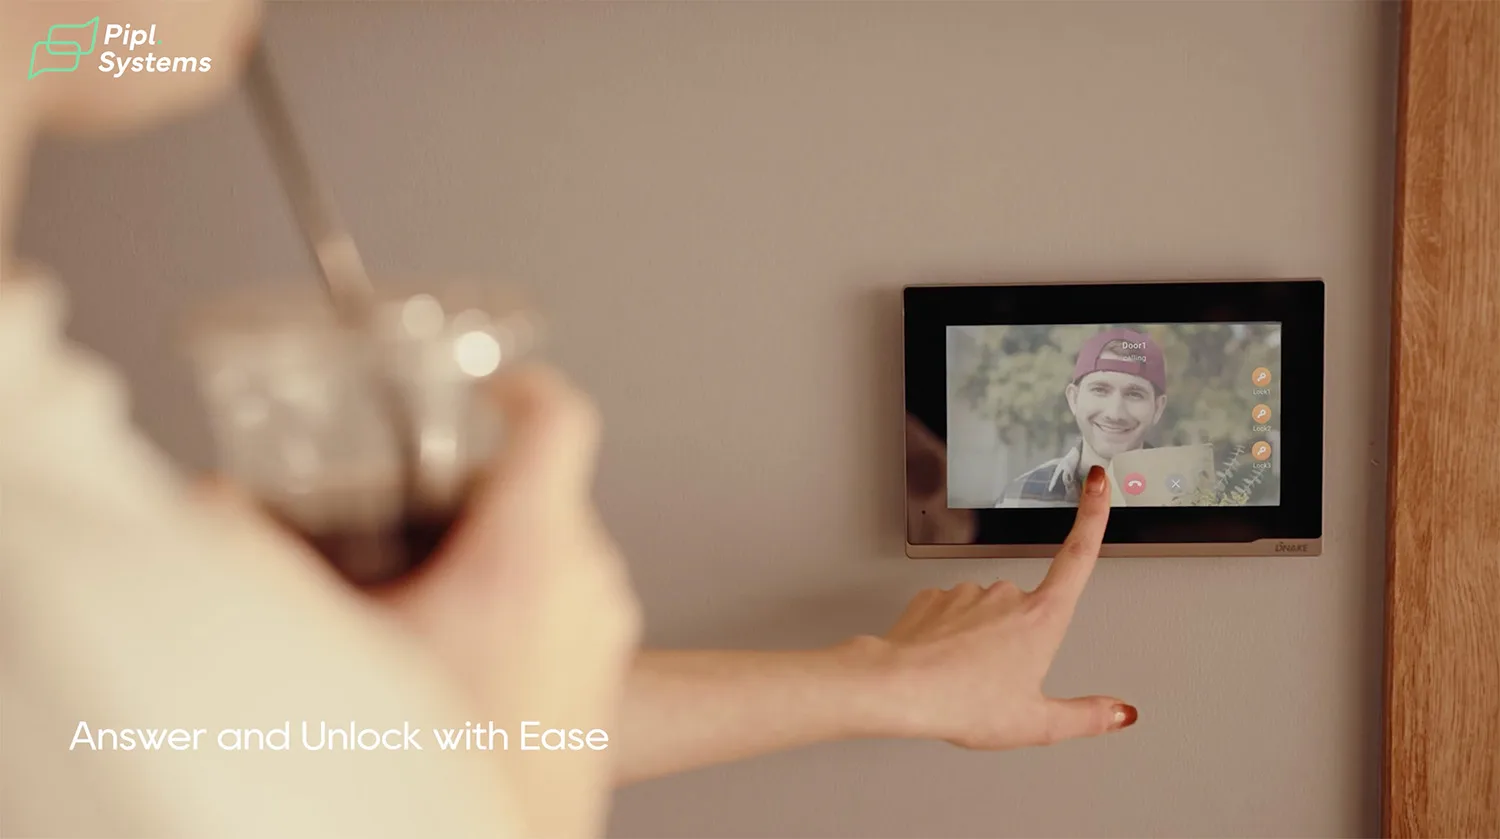
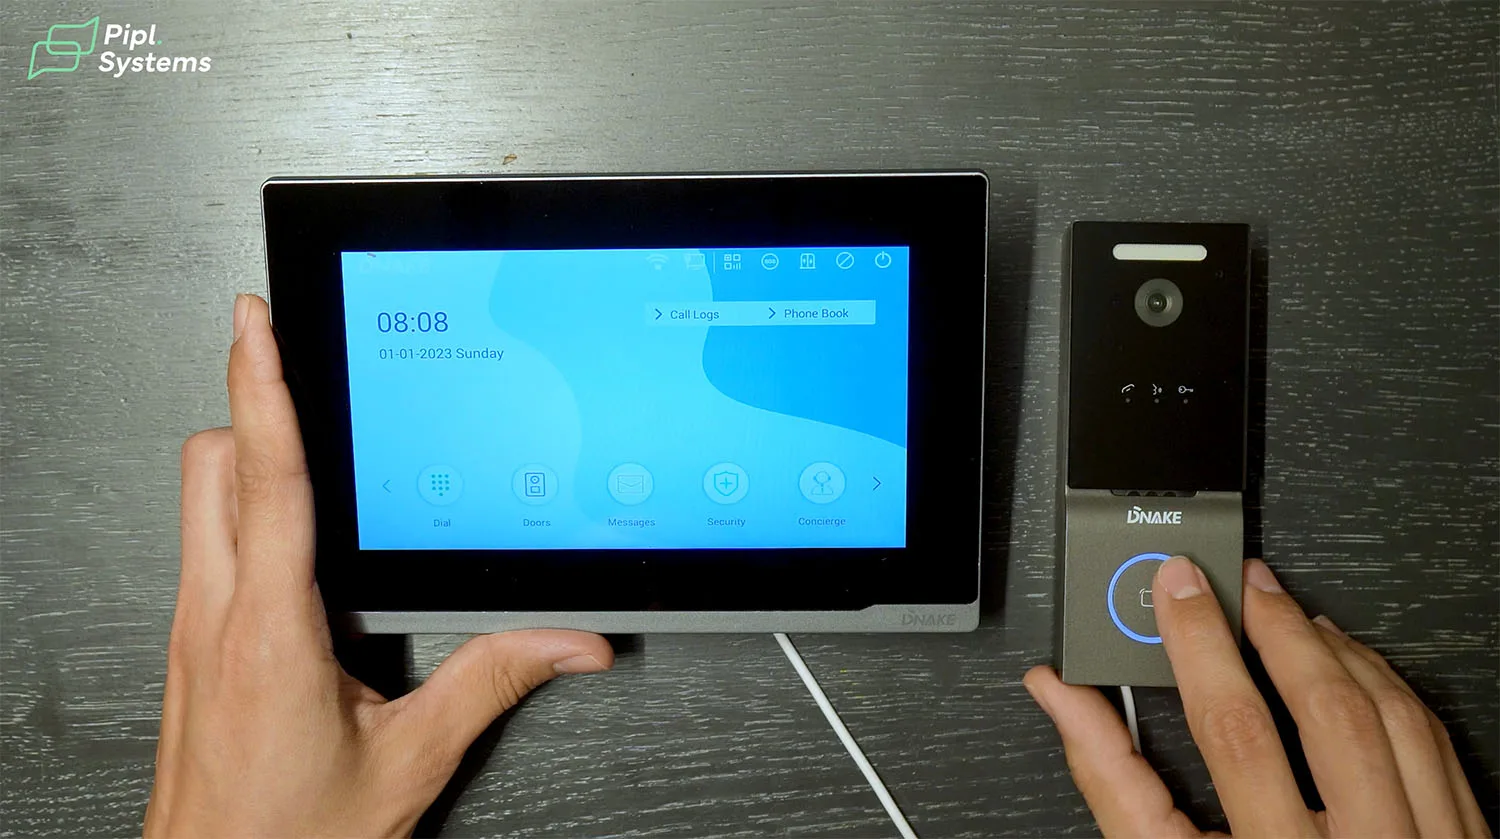
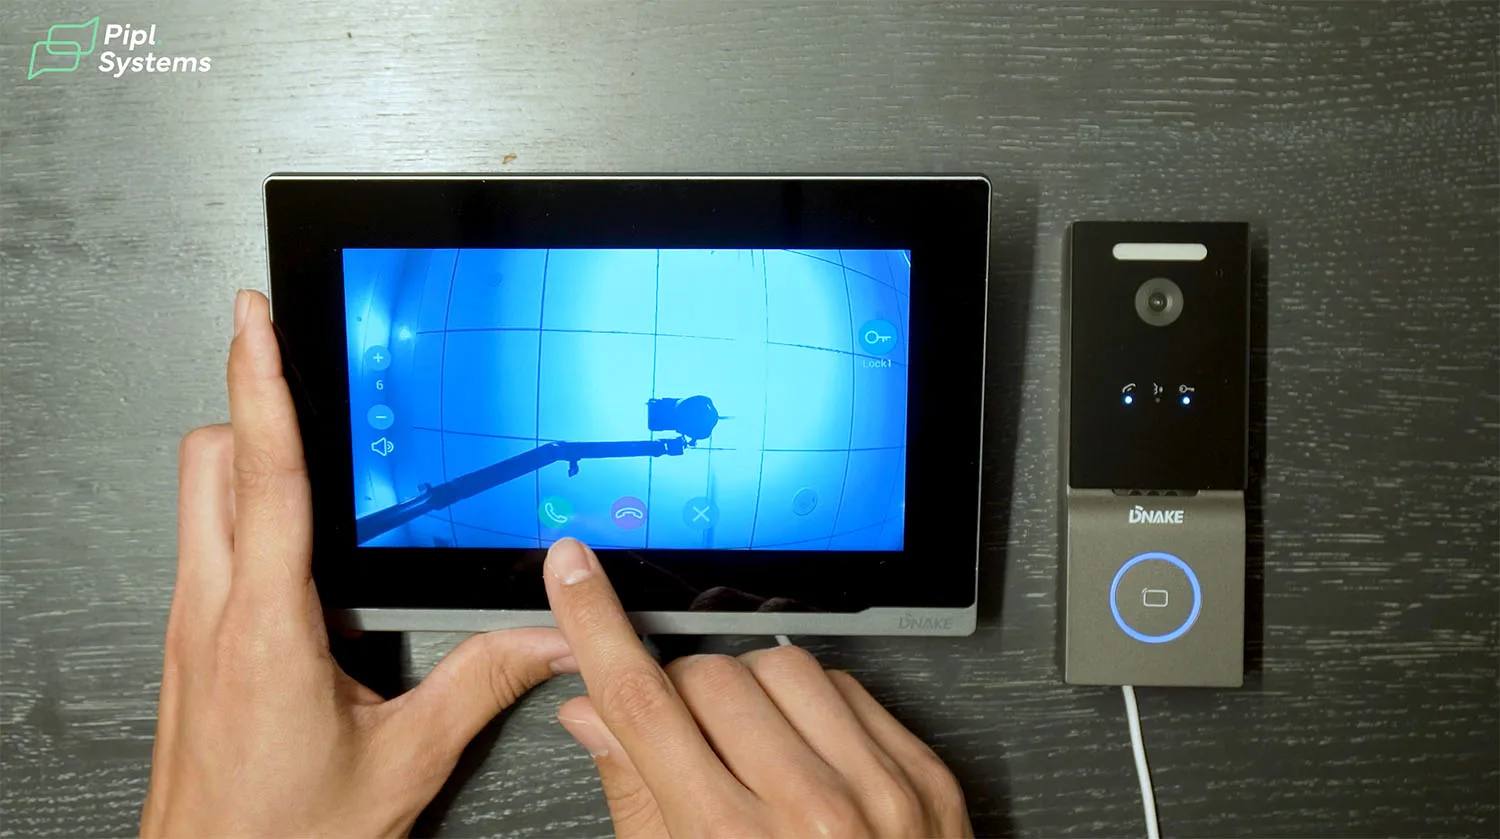
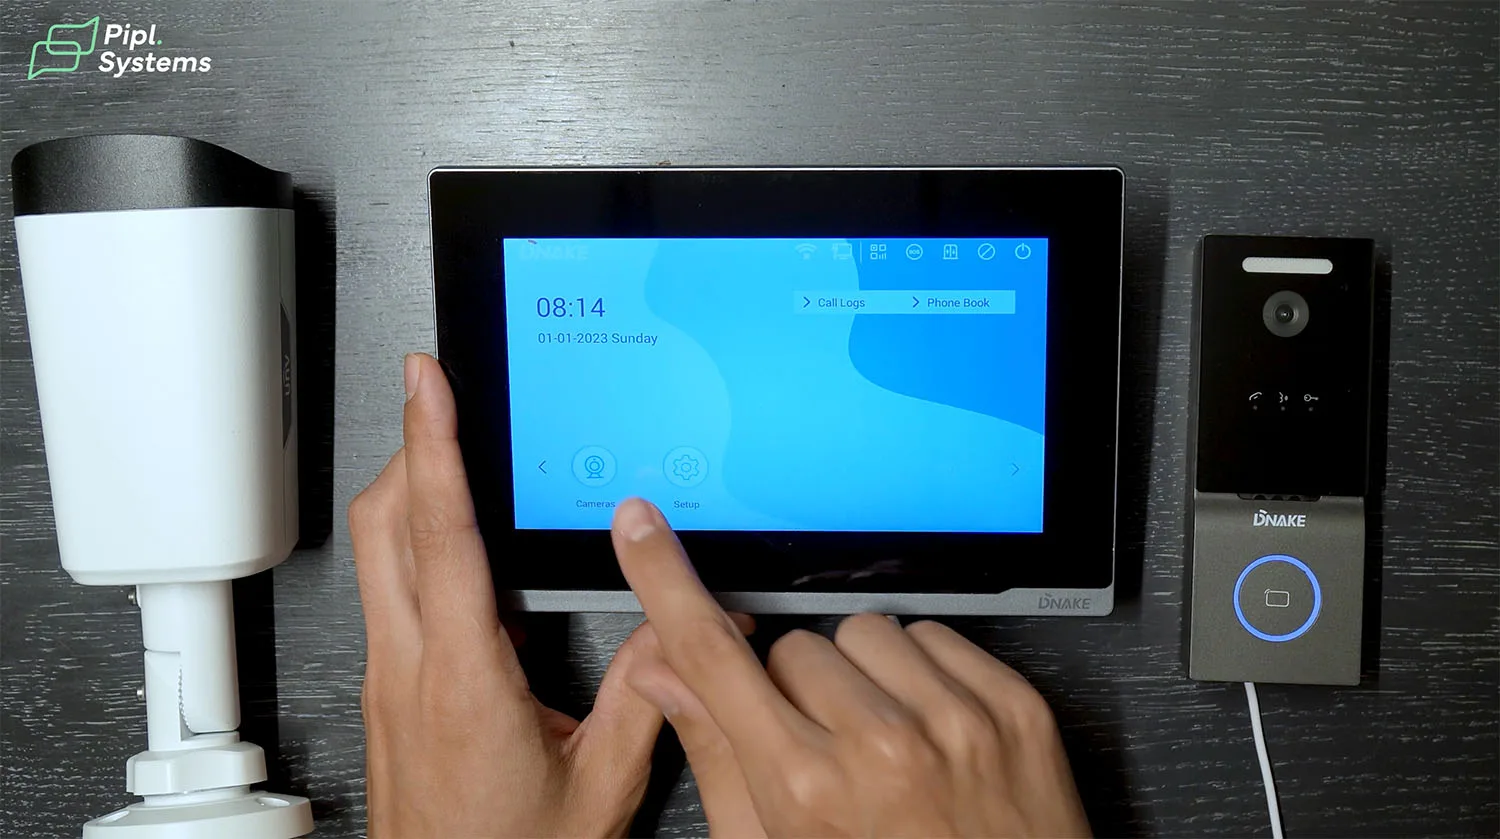
Once your Dnake IPK05 is up and running, the day-to-day experience is built around one-touch simplicity. When someone rings the doorbell, the E217W monitor instantly displays live video with two-way audio. You can talk to the visitor in real time and unlock the door remotely using the touchscreen or the DNAKE Smart Life app.
The audio clarity is consistent, and video delay is minimal, even on Wi-Fi. For added convenience, you can also receive call notifications on your phone, preview who’s at the door, and open the lock without being physically present.
The outdoor station features a built-in RFID reader for tag-based entry and motion detection alerts. For a deeper look at its capabilities, including remote control and five unlock methods, check out our full breakdown: Dnake C112 SIP Video Doorbell: 5 Types of Access, Motion Detection Notification, Remote Door Control.
This setup is ideal for single-family homes, small offices, and rental properties that need basic access control with reliable alerts.


1 / 14
Internal Features: Call Log, Messages, Security Panel
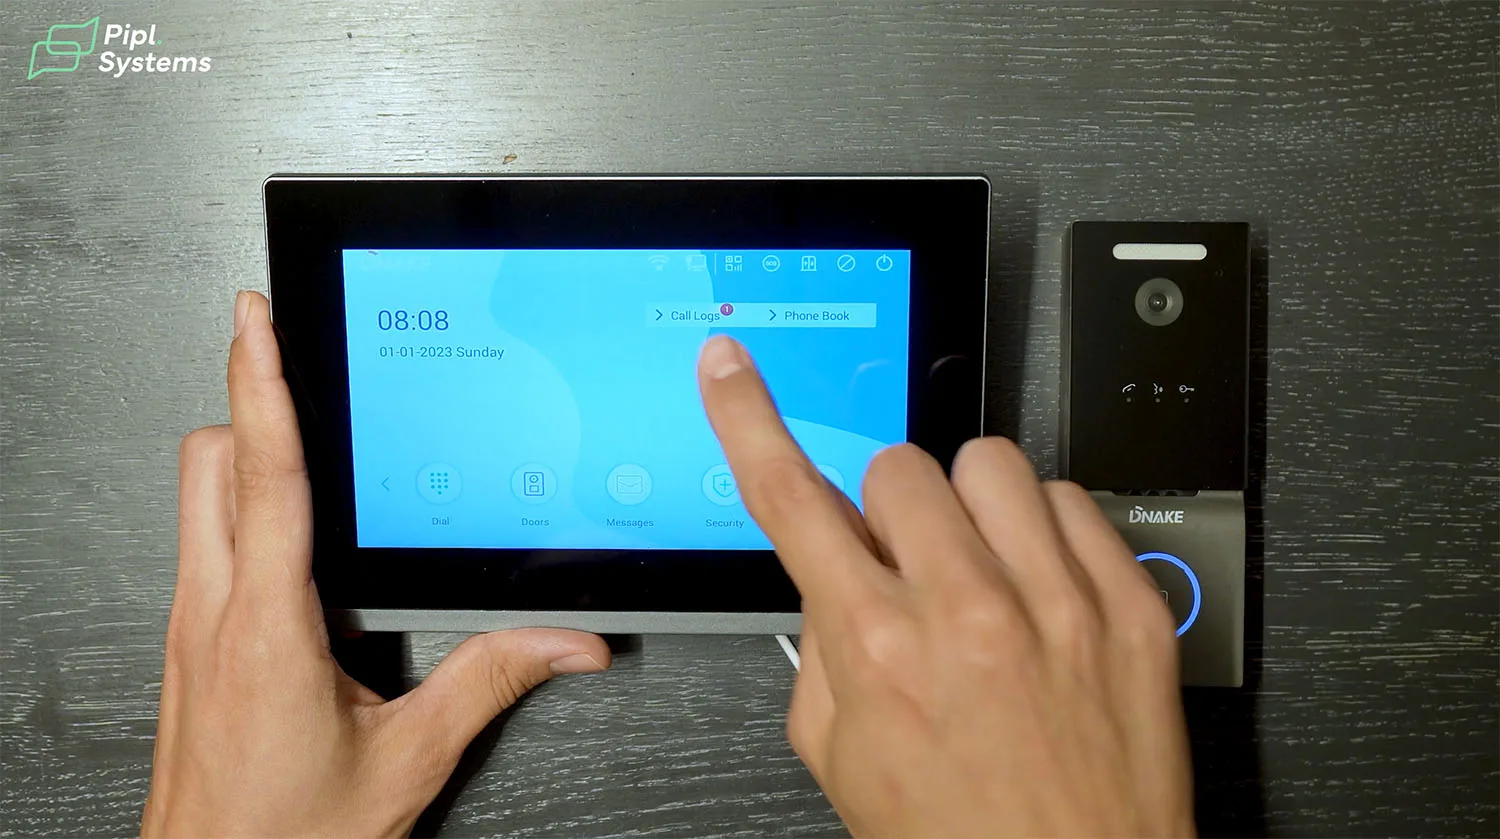
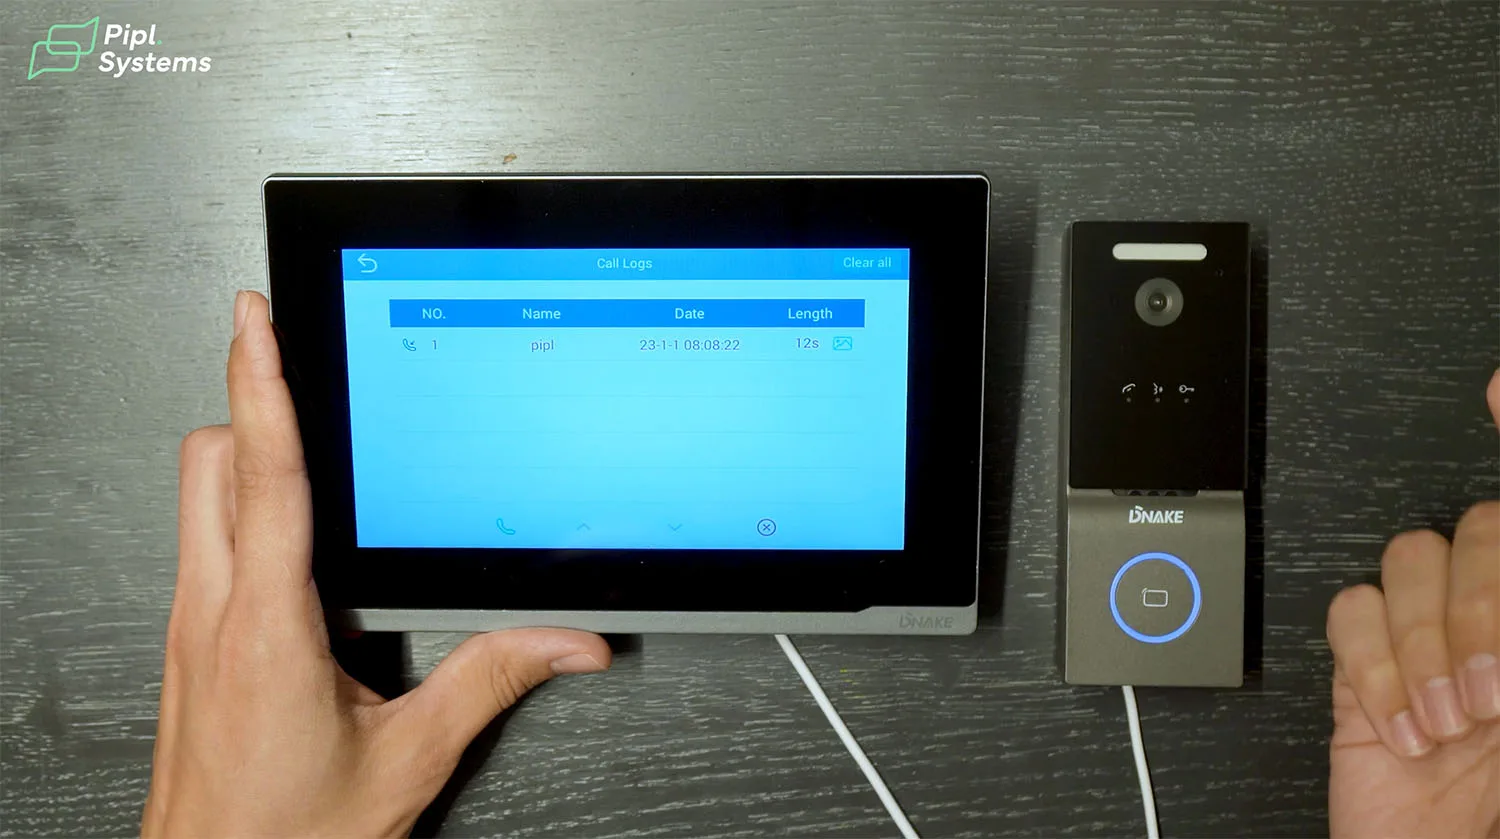
The E217W monitor keeps a full call log with date, time, and snapshot thumbnails. You can revisit unanswered calls or check the visitor history with a few taps.
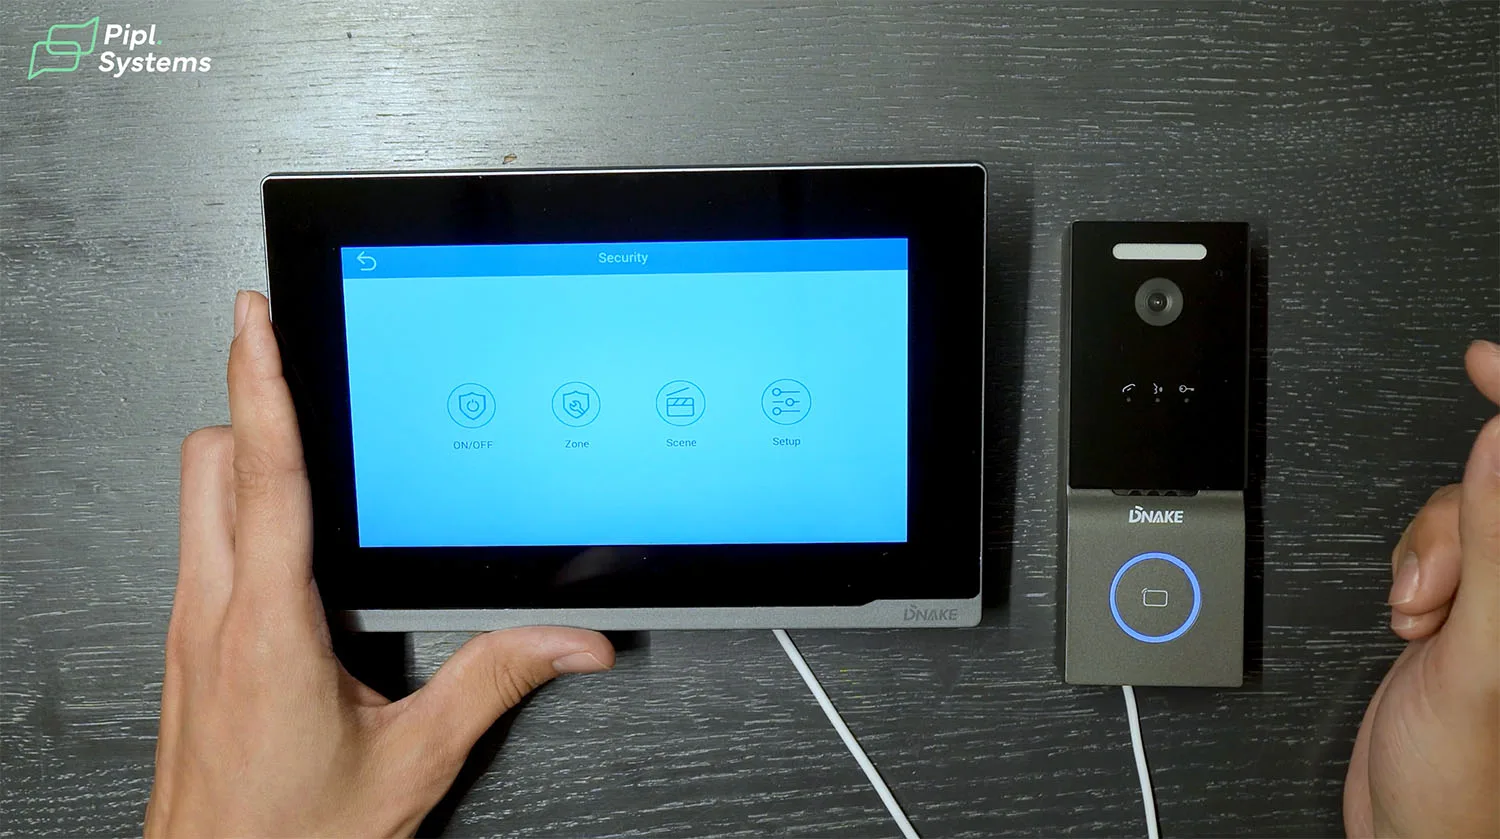
There’s also a message system for internal notes or concierge communication in multi-unit setups. Another tab gives access to the security panel, where you can link alarm sensors via the monitor’s built-in alarm input ports.
If you’re interested in an even more advanced interface, we’ve covered an upgraded model in this review: DNAKE H616 | Is This The Most Innovative Monitor Design of 2025?. It takes the visual UI and smart integration to a new level, but the E217W already delivers strong performance for most home and SMB installations.
Scaling the System with RTSP Camera Integration
Add up to 8 CCTV Streams with Dnake Smart Pro
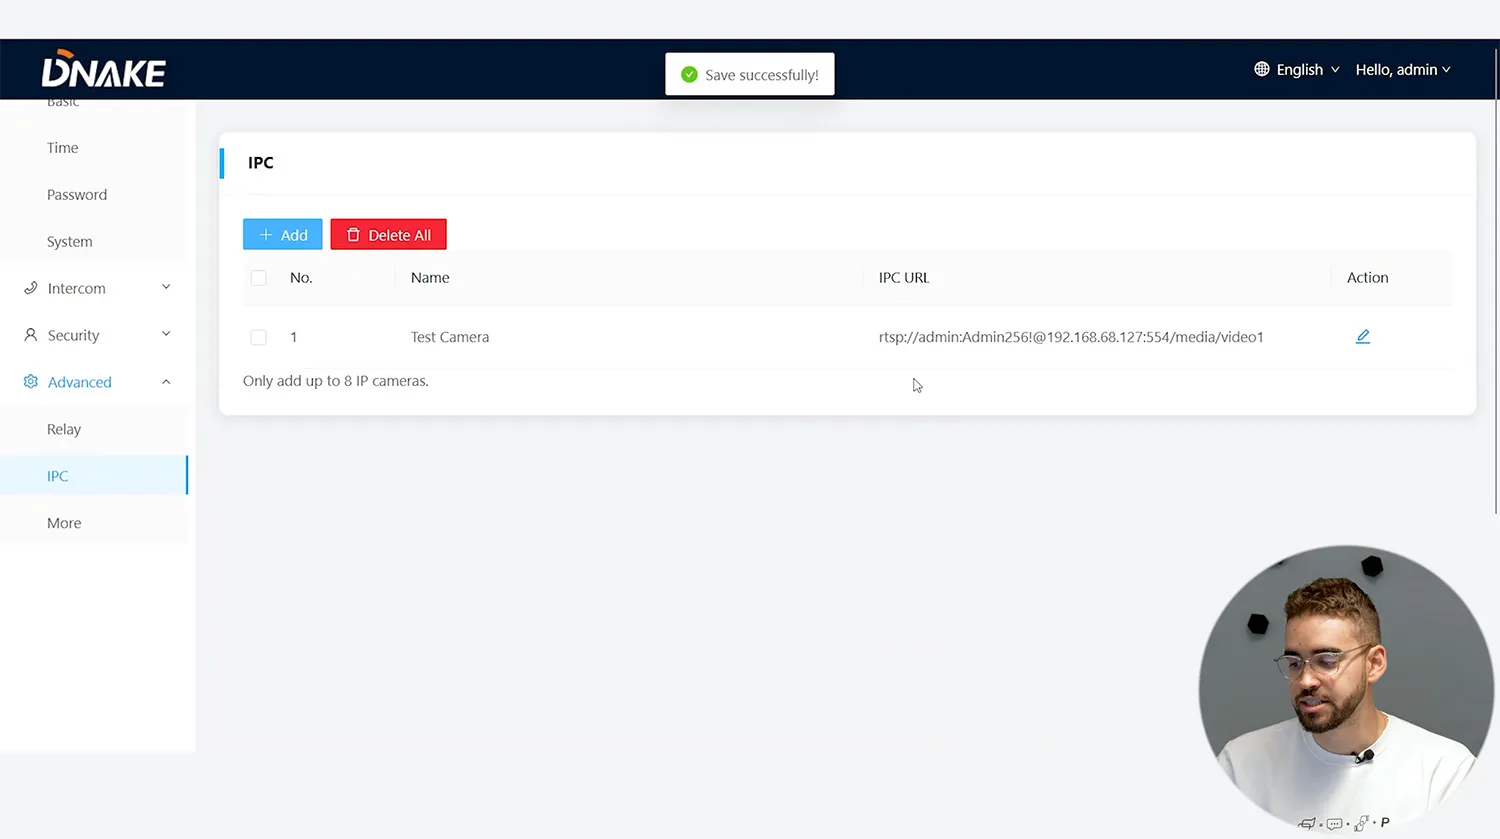
The Dnake IPK05 system can be scaled easily with third-party IP cameras. You can connect up to 8 external CCTV cameras using the Advanced > IPC menu. Each stream is added via RTSP URL, and once configured, cameras appear directly on the monitor for live view access.
This works with most standard IP surveillance cameras. You don’t need a separate NVR or software as long as the cameras support RTSP and are on the same LAN. This makes it practical for small-scale projects where you want unified video access without investing in full video management infrastructure.
The IPK05’s camera integration is built to work with Dnake Smart Pro, the central platform for device management. Camera layout, device sync, and preview logic follow the same rules as native Dnake equipment.


1 / 5
RTSP Compatibility Tips and Camera Settings
When adding cameras, use the correct RTSP format. For most brands, it looks something like this:
rtsp://admin:password@192.168.1.100:554/media/video1
Replace the IP, credentials, and port accordingly. The system supports multiple authentication methods, and some models may need specific video channels enabled in the camera firmware.
Pay attention to resolution and compression settings. The monitor can handle streams encoded with H.264 or H.265, but you’ll get better performance with H.265 if your cameras support it.
In commercial projects or more complex networks, set static IPs for each camera to avoid reconfiguration after router restarts. This is especially useful if you’re integrating additional Dnake intercoms or planning long-term system expansion.
Web Interface and Advanced Configuration
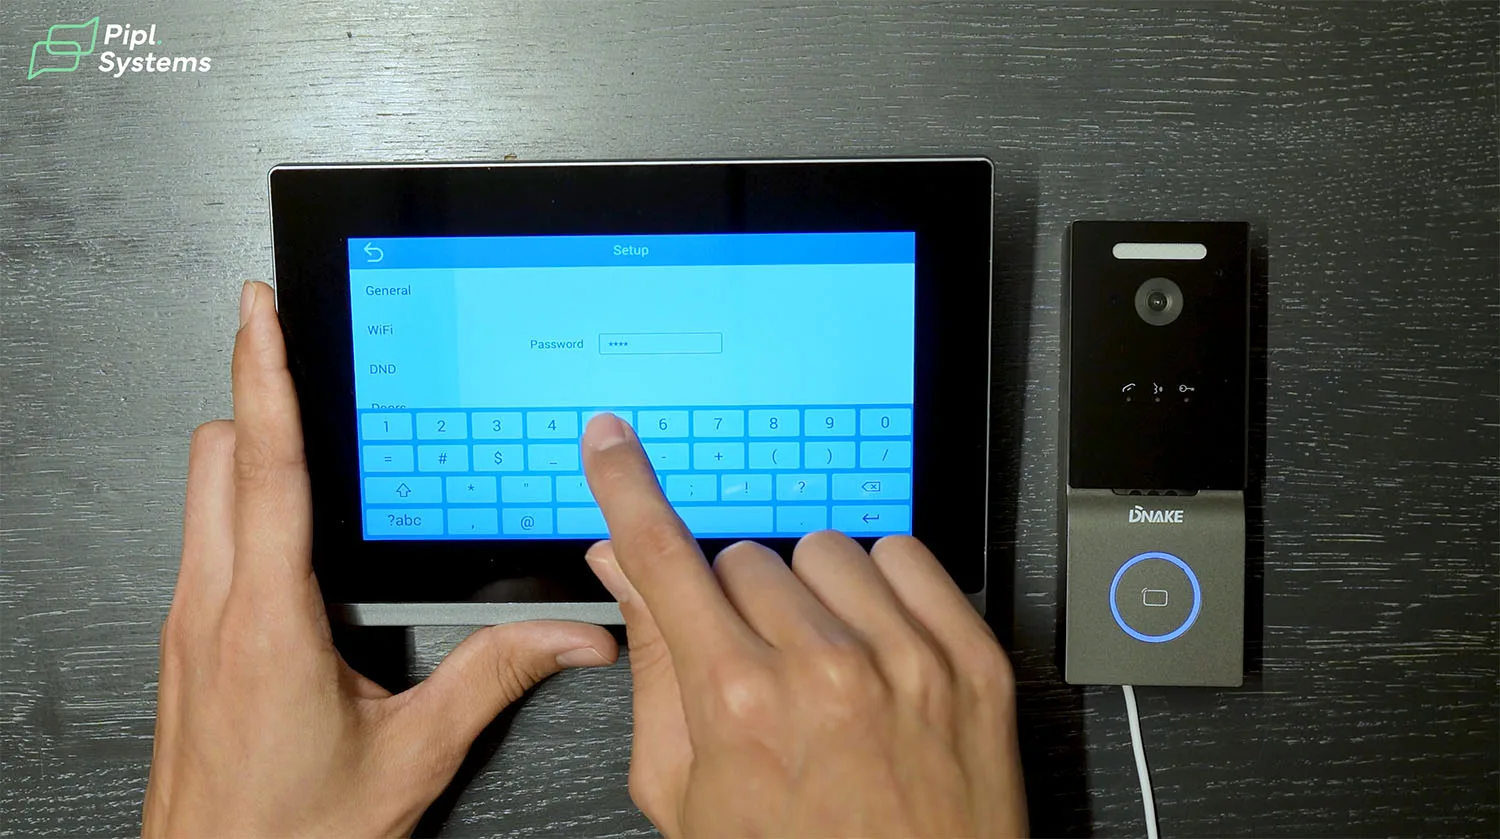
Access via IP Address and Change Admin Credentials
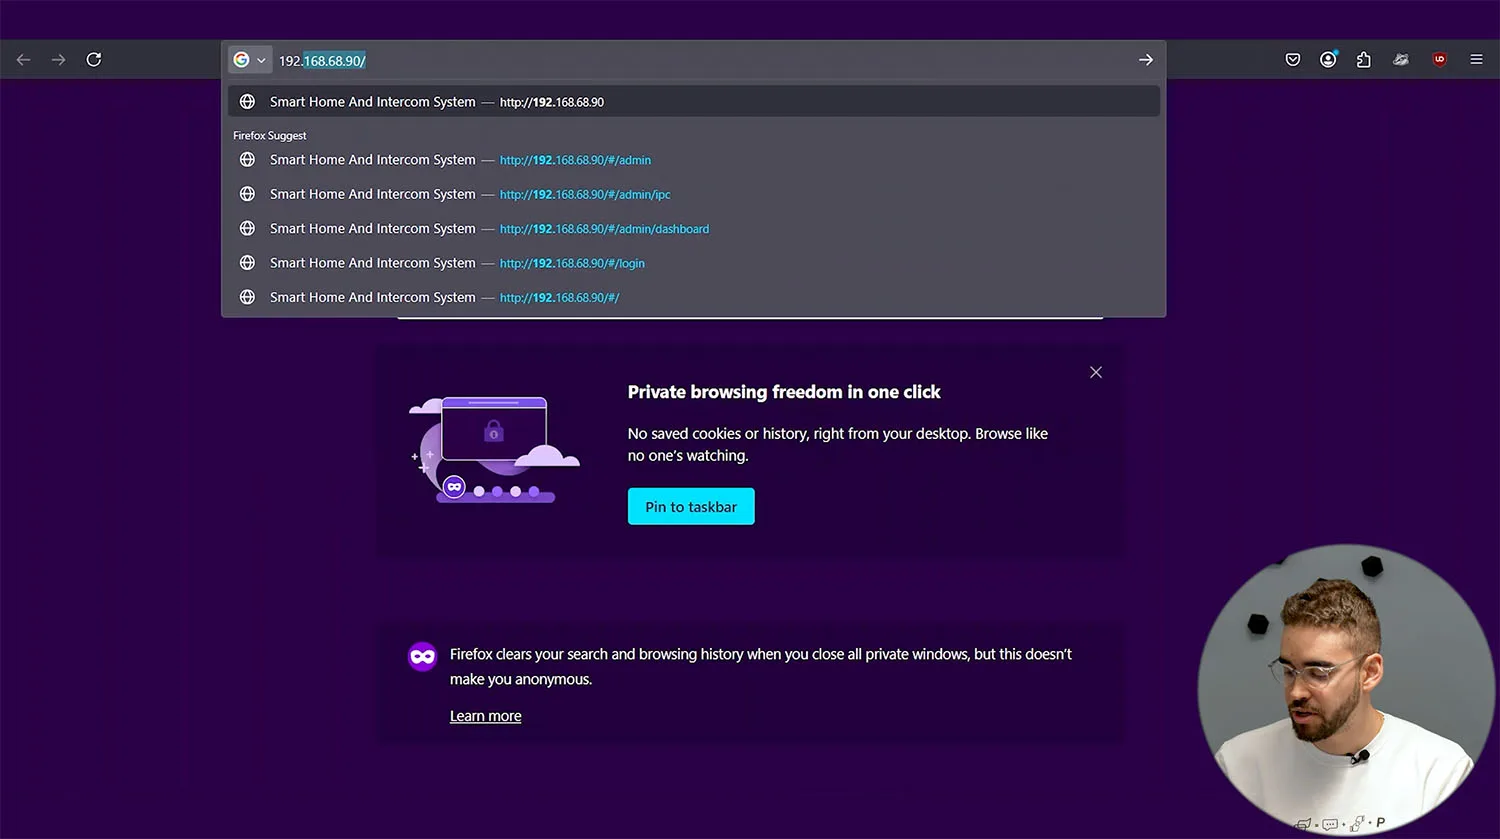
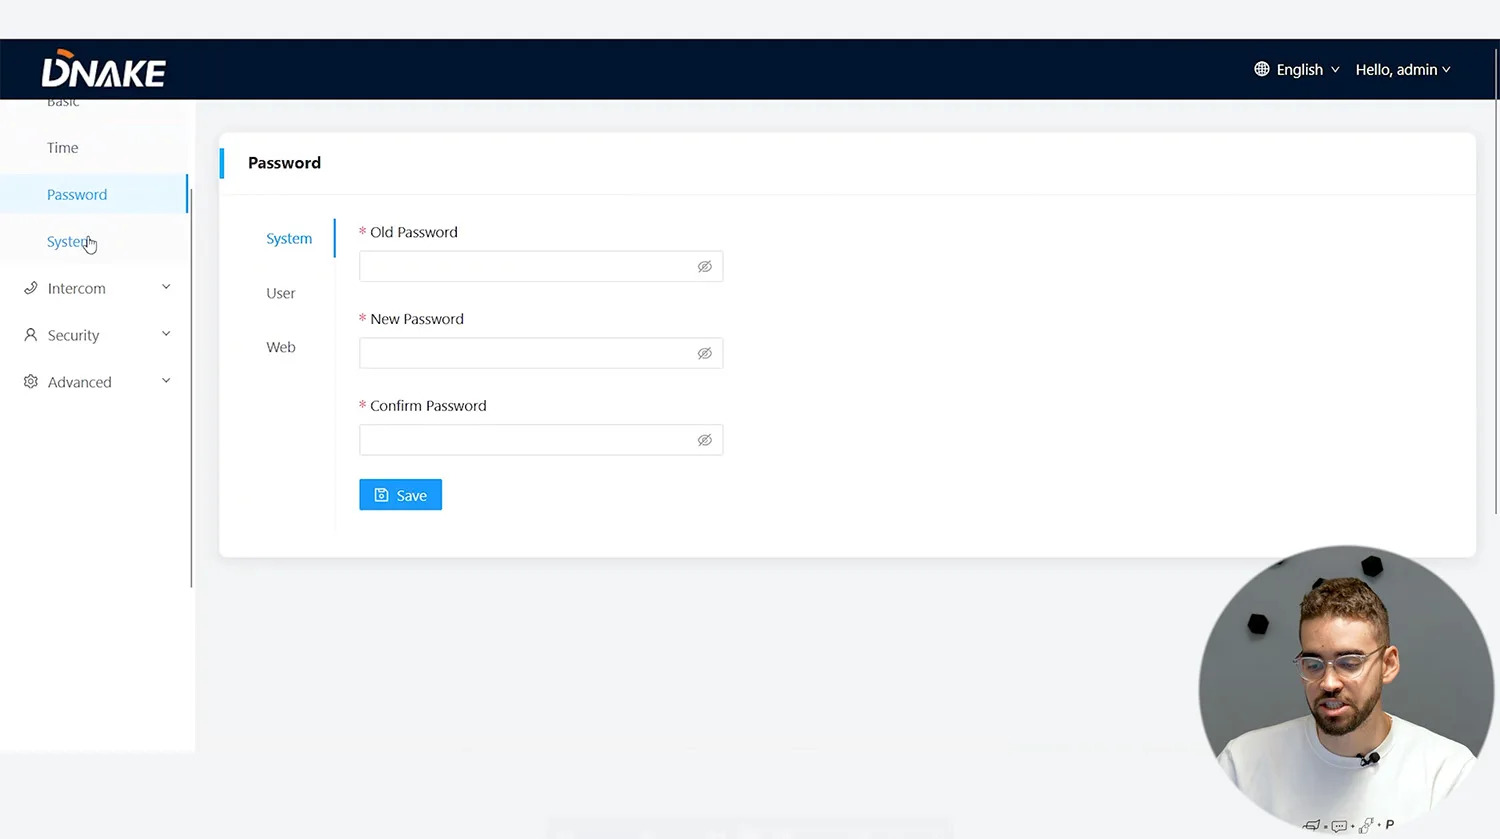
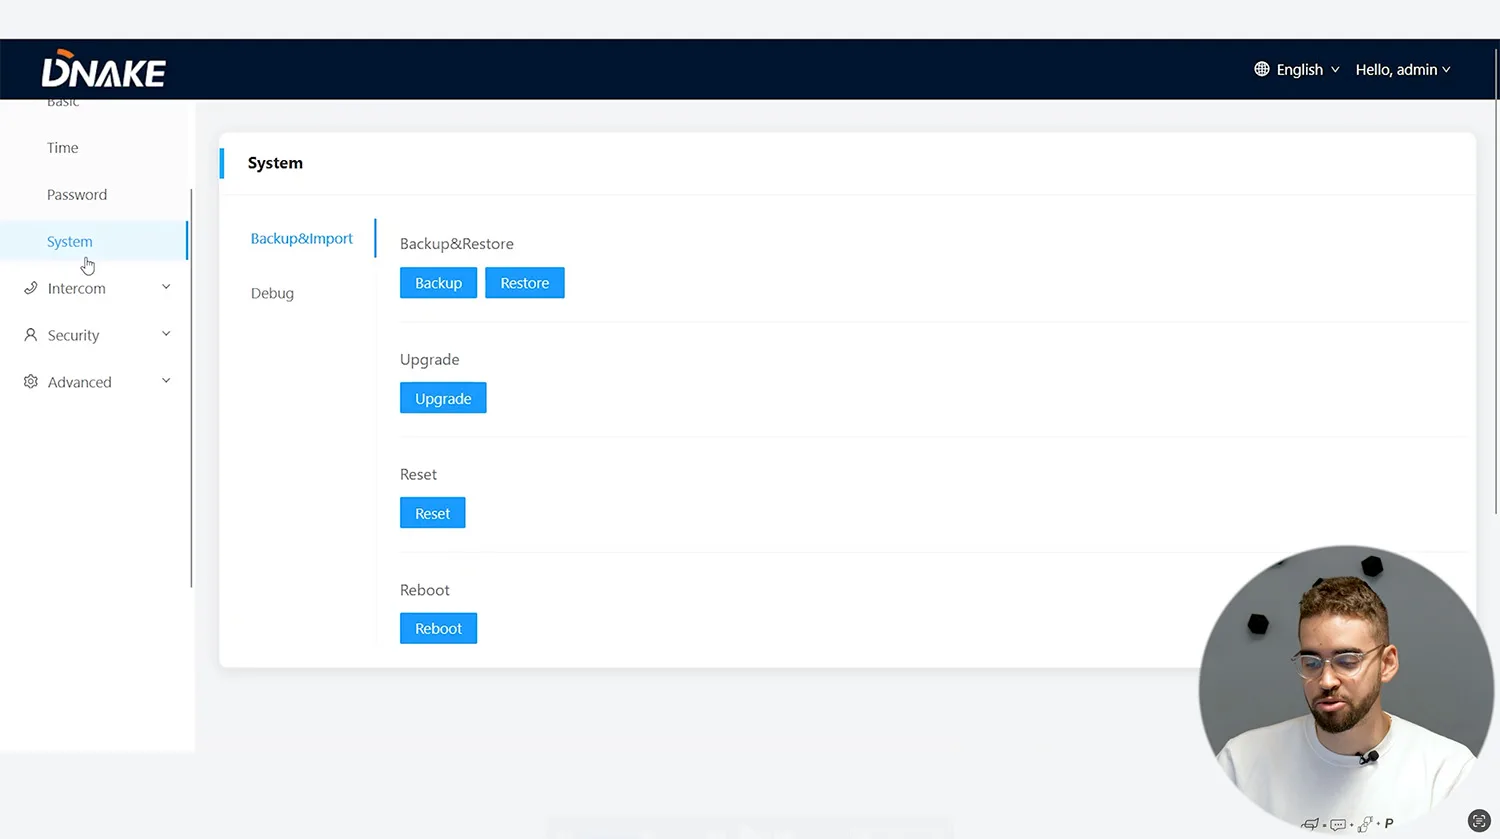
Once the devices are set up, users can access the indoor monitor's configuration panel through a standard browser. Simply input the static IP address previously assigned during the setup. The default login credentials are typically "admin" and "123456," but it's highly recommended to change the password immediately for security purposes.
The web interface mirrors most on-screen options while offering faster access to advanced menus. It's also the most efficient way to manage RTSP integration and fine-tune network settings.


1 / 9
Set Up RTSP Streams via Web GUI
From the web GUI, users can add third-party CCTV cameras using RTSP stream links. The camera tab under the "Advanced" menu allows you to paste the URL, name the stream, and save the configuration. This section supports up to eight simultaneous streams.
You can reference the specific format for RTSP from each camera vendor. For guidance on cloud management and unified control, explore the DNAKE Intercom Cloud Platform: All-in-one Management Portal for Dealer, Installer, Property Manager.
Practical Use Cases for the IPK05 Kit
Ideal for Residential Homes and Small Businesses
The DNAKE IPK05 kit is tailored for homeowners and business owners looking to boost front-door security without adding infrastructure complexity. It offers full control through the indoor monitor, app, or RFID tags, ensuring flexibility for different user types. Video and audio quality remain consistent throughout daily use, while access logs and door control history provide peace of mind.
This kit fits well within the broader DNAKE Intercom Systems at ISC West 2025: Exclusive Insights and Full Product Guide, showcasing how the brand continues to support modern security needs with smart yet practical hardware.

Suitable for Multi-Tenant Buildings with Concierge Calls
Beyond single-family homes, the IPK05 supports concierge call routing, making it viable for small apartment buildings or offices. This feature allows residents to reach a main reception desk or building manager from their indoor monitor. When paired with RTSP feeds and scalable device support, it becomes a capable entry management solution for multi-unit environments.
Additional indoor monitors can be added where needed, creating a localized network that doesn’t require central server hardware.
Common Troubleshooting Tips
Black Screen Issues from 4K Cameras
If your added IP camera displays a black screen on the indoor monitor, it’s likely due to unsupported resolution. The E217W does not support 4K input. In this case, log into your camera settings and reduce the stream resolution to 1080p. After adjustment, the feed should appear correctly on the monitor.
How to Validate RTSP Stream URLs
If you see a “query failed” message, the issue is likely with the RTSP link format. Make sure the username, password, IP address, and port are entered correctly. Use your camera manufacturer’s guide to generate a compatible RTSP link. Testing in a standalone player like VLC can also confirm stream validity before entering it into the monitor.
Final Thoughts
Intercom Simplicity Meets Pro-Level Features
The Dnake IPK05 combines ease of installation with advanced control. While it functions as a smart video doorbell, it provides features typically reserved for enterprise intercom systems, such as access logs, multi-camera integration, and flexible authentication methods.
It’s designed to scale with your environment, whether you’re protecting a single front door or managing multiple entry points in a larger building.
Why the Dnake IPK05 Is More Than Just a Doorbell
Unlike most off-the-shelf doorbell cameras, this kit includes a full indoor interface, relay control, and built-in support for smart expansion. Users gain access to a full intercom system that delivers more than alerts - it enables interaction, automation, and deeper monitoring.
For anyone seeking a smart entry solution that grows with their needs, this is a strong alternative to traditional doorbells or basic cameras.
Frequently Asked Questions (FAQ)
Does the Dnake IPK05 require internet to work?
No. The door station and indoor monitor communicate via a direct Wi-Fi protocol. However, internet access is needed for mobile app connectivity and firmware updates.
Can I integrate my existing IP CCTV cameras?
Yes. The system supports up to 8 RTSP camera streams. You can add these through the web interface using your camera’s RTSP URL.
How many users or key fobs can the system handle?
The C112A door station supports multiple RFID tags and user profiles, making it suitable for households, small teams, or shared spaces.
What happens during a power outage?
The system stops functioning unless powered by a backup supply. If continuous operation is essential, use a UPS or battery backup for both monitor and door station.
Is the Dnake IPK05 suitable for apartment complexes?
Yes. It supports concierge calling and multi-door setups, making it viable for multi-tenant deployments. Larger buildings may benefit from combining several kits.
Can the system be installed without professional help?
Yes. Most users can install the system with minimal tools. The kit supports PoE and 12V power, and the pairing process is guided through an on-screen interface.