Today, We Are Focusing Our Attention On A Hikvision 2-lens IP camera Featuring An Artificial intelligence 3D-depth Recognition Technology That Can Count And Track People: HIKVISION DS-2CD6825G0/C-IVS
Box Internals / Looks
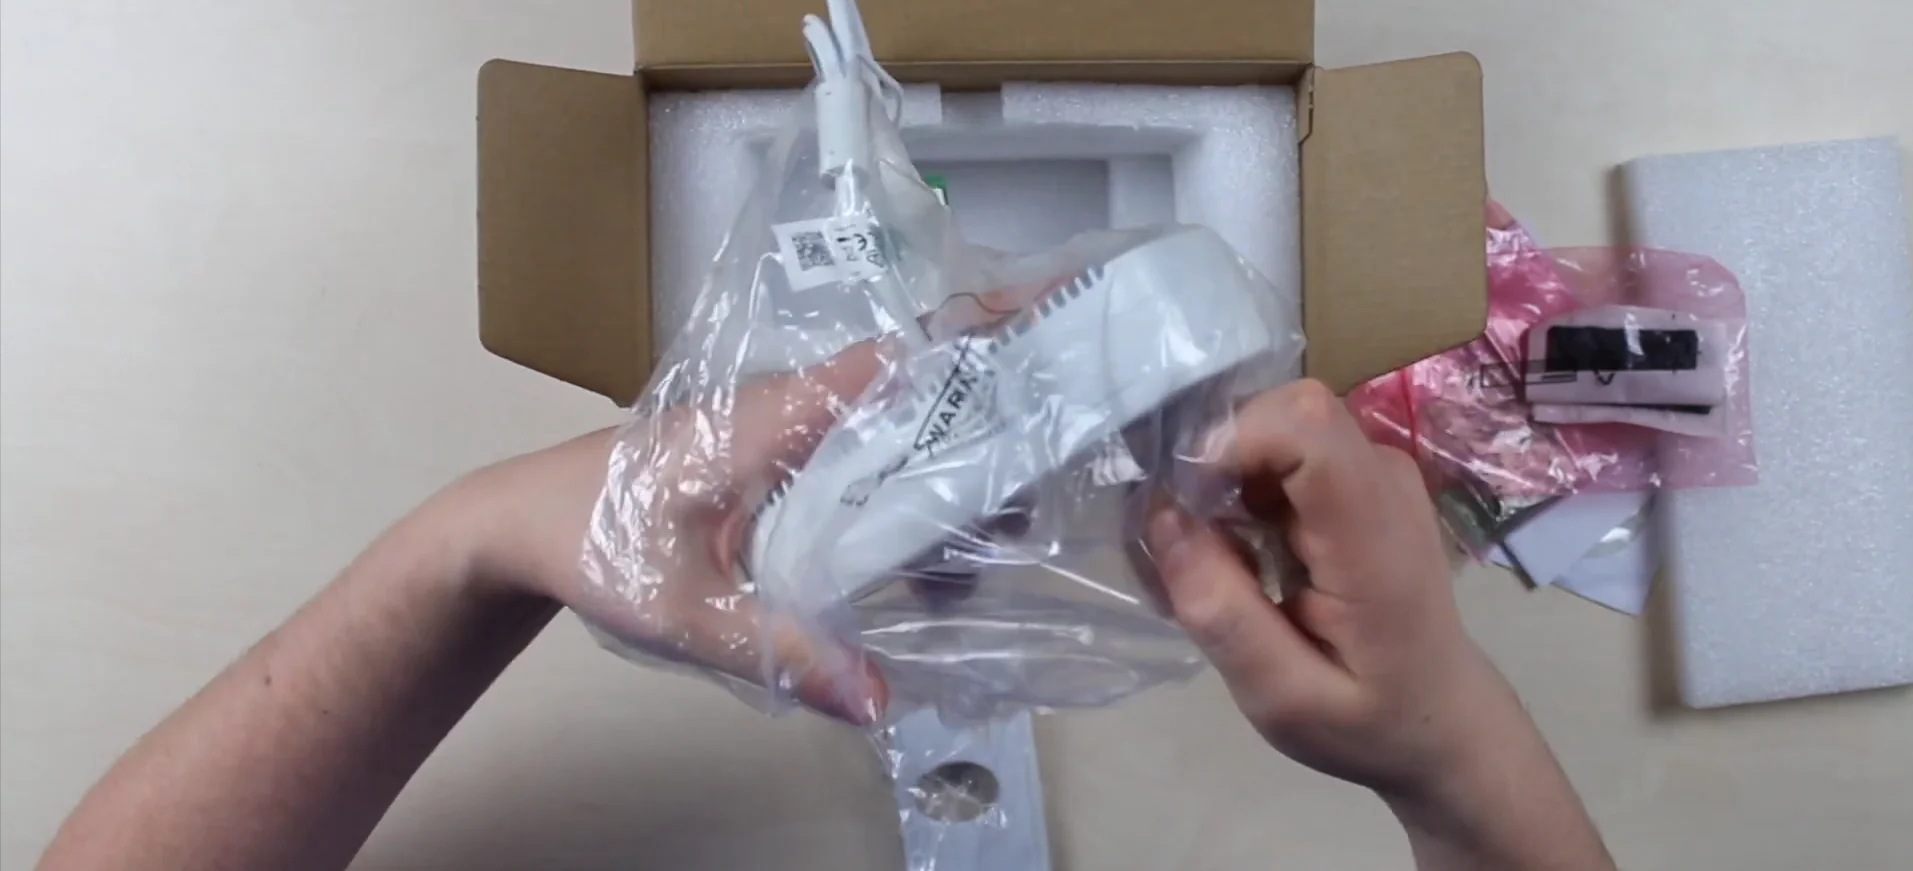
A tiny box with a very miniature camera:
- Firmware CD;
- Quick Start Guide;
- Mounting Sticker;
- Bracket;
- Hexagon Screwdriver;
- Pack with Screws and Dowels;
- 4 Pieces of Waterproof Tape.
- The camera itself: Hikvision DS-2CD6825G0/C-IVS
The cam has a solid metal body with a plastic front panel on top. The tail consists of: 12-volt power input, RJ-45 for the LAN cable, camera supports PoE, RS–485 interface, alarm inputs-outputs and an audio input-output, a microphone, and those intriguing colored 2-megapixel FullHD lenses, 2 mm of focal length, a view angle of 112.
The dual camera module is here, namely to implement a stereoscopic or a binocular vision, as well as how our eyes work, thanks to which we can perceive shapes, sizes, and a distance to the object – in other words, a perception of the object in 3D. So, as our brain does it in a passive mode for us, Hikvision has created some special software that calculates all this for the camera. And we have seen this a lot of times in these days smartphones with dual or more cameras. And besides the people counting feature, we are also able to filter objects in sight by their height – and so a child, let’s suppose, up to 120 cm in height won’t be counted, or they will be counted separately, and the detection height is customizable here.
Features
Infrared sensor with a detection distance of up to 6 meters, H.265+ compression rate support. Because this is an outdoor-type camera, the body was made to match an IP67 protection rate, which means that it is completely protected from dust and moisture, making it withstand almost any weather. As well as anti-vandal protection level IK08. But what we are interested in is a people-counting feature, and there’s a lot to say about it. Owing to Hikvision’s special self-learning intelligent algorithms, the calculation accuracy is very high, and you’ll see a live demo further.
That high accuracy is manifested in that if several people cross the established counting line simultaneously, even in different directions, everyone is going to be counted. For a camera to operate properly, you need to mount it at a 2-6 meters, the way where the lenses are directed 90 degrees straight down to the floor, and usually it is installed in some entrance areas and pointed at entrance doors. The typical application places are: parks, theme parks, shopping centers, cinemas, and airports – all public places with a large and constant flow of people. Moving on to a setup.
Enabling People Counting / Configuration Guide
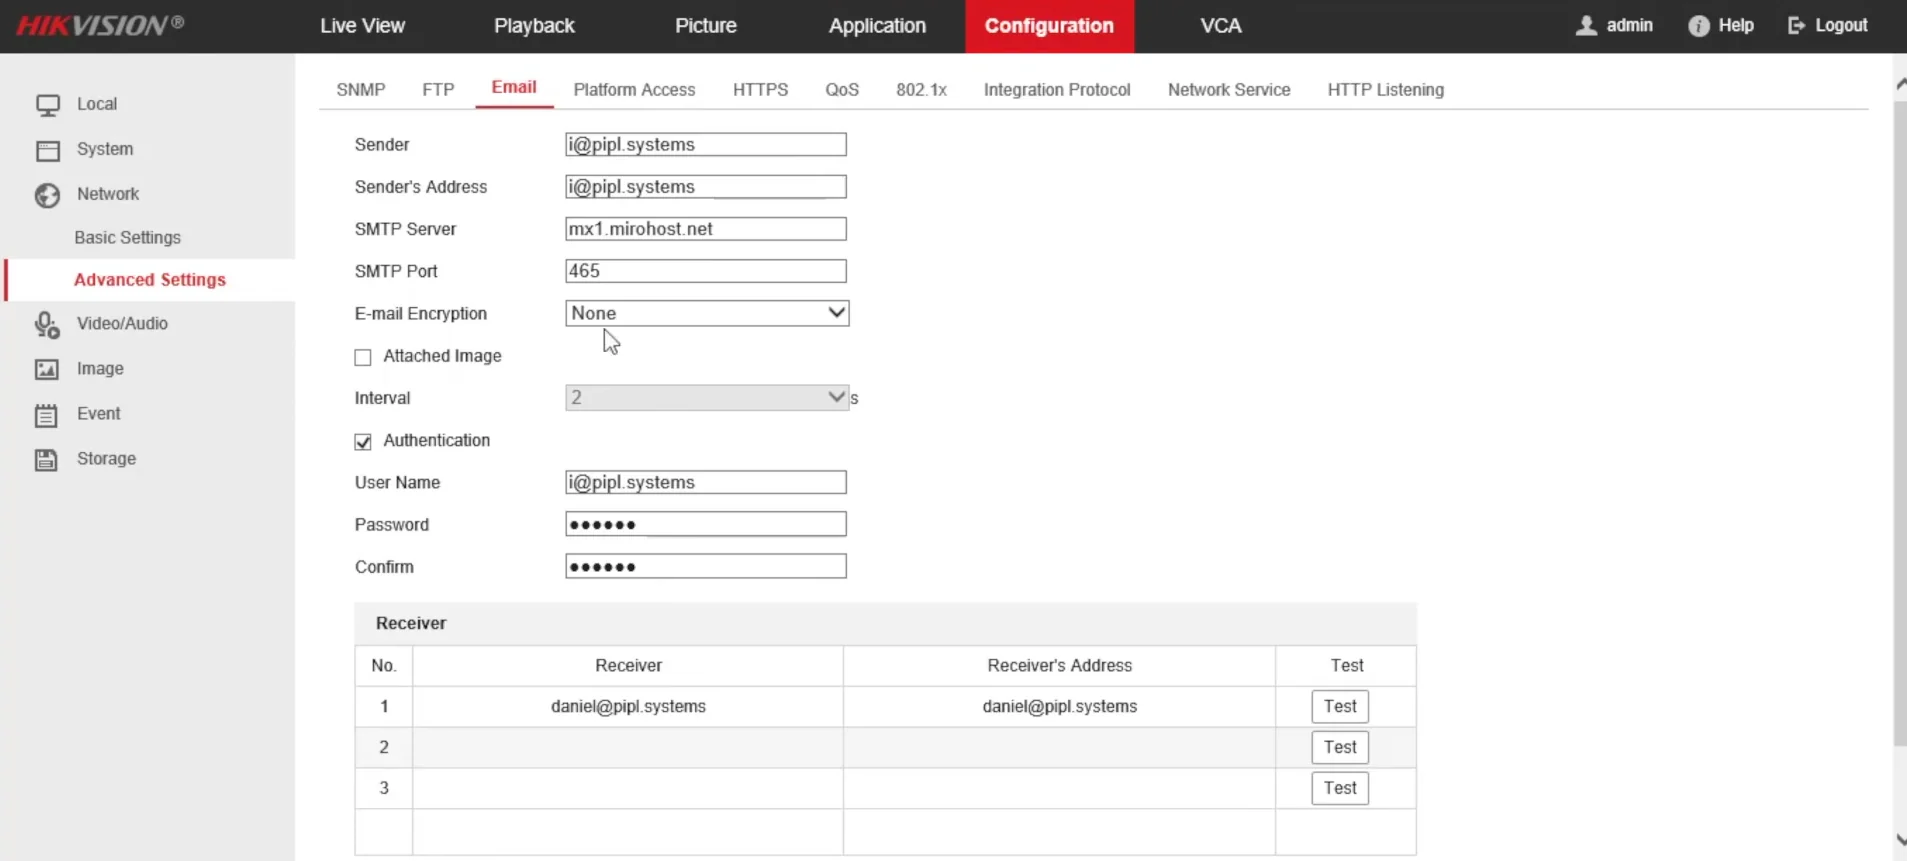
There are 2 options – the web interface and the IVMS-4200. The 1st is more familiar to me, so that’s Internet Explorer, entering the IP address of the cam in the browser search field, and going to the web control panel. The DS-2CD6825G0 camera is already activated, and the only thing I configured in it – I have entered my email address in there to receive reports. Log in, password, and instantly enter.
Settings, here we have standard system settings, service, security, etc. Network management, and here, by the way, you can specify your email address in order to receive reports, reports configuration, and their frequency are further in the article. Video and audio settings, image settings. The event – movement, tamper, alarming inputs/outputs, and here is another audio detection. That is, so far, nothing extraordinary, and you probably saw it hundreds of times. But we are interested in the VCA section – that is, setting up an intelligent video analysis functionality.
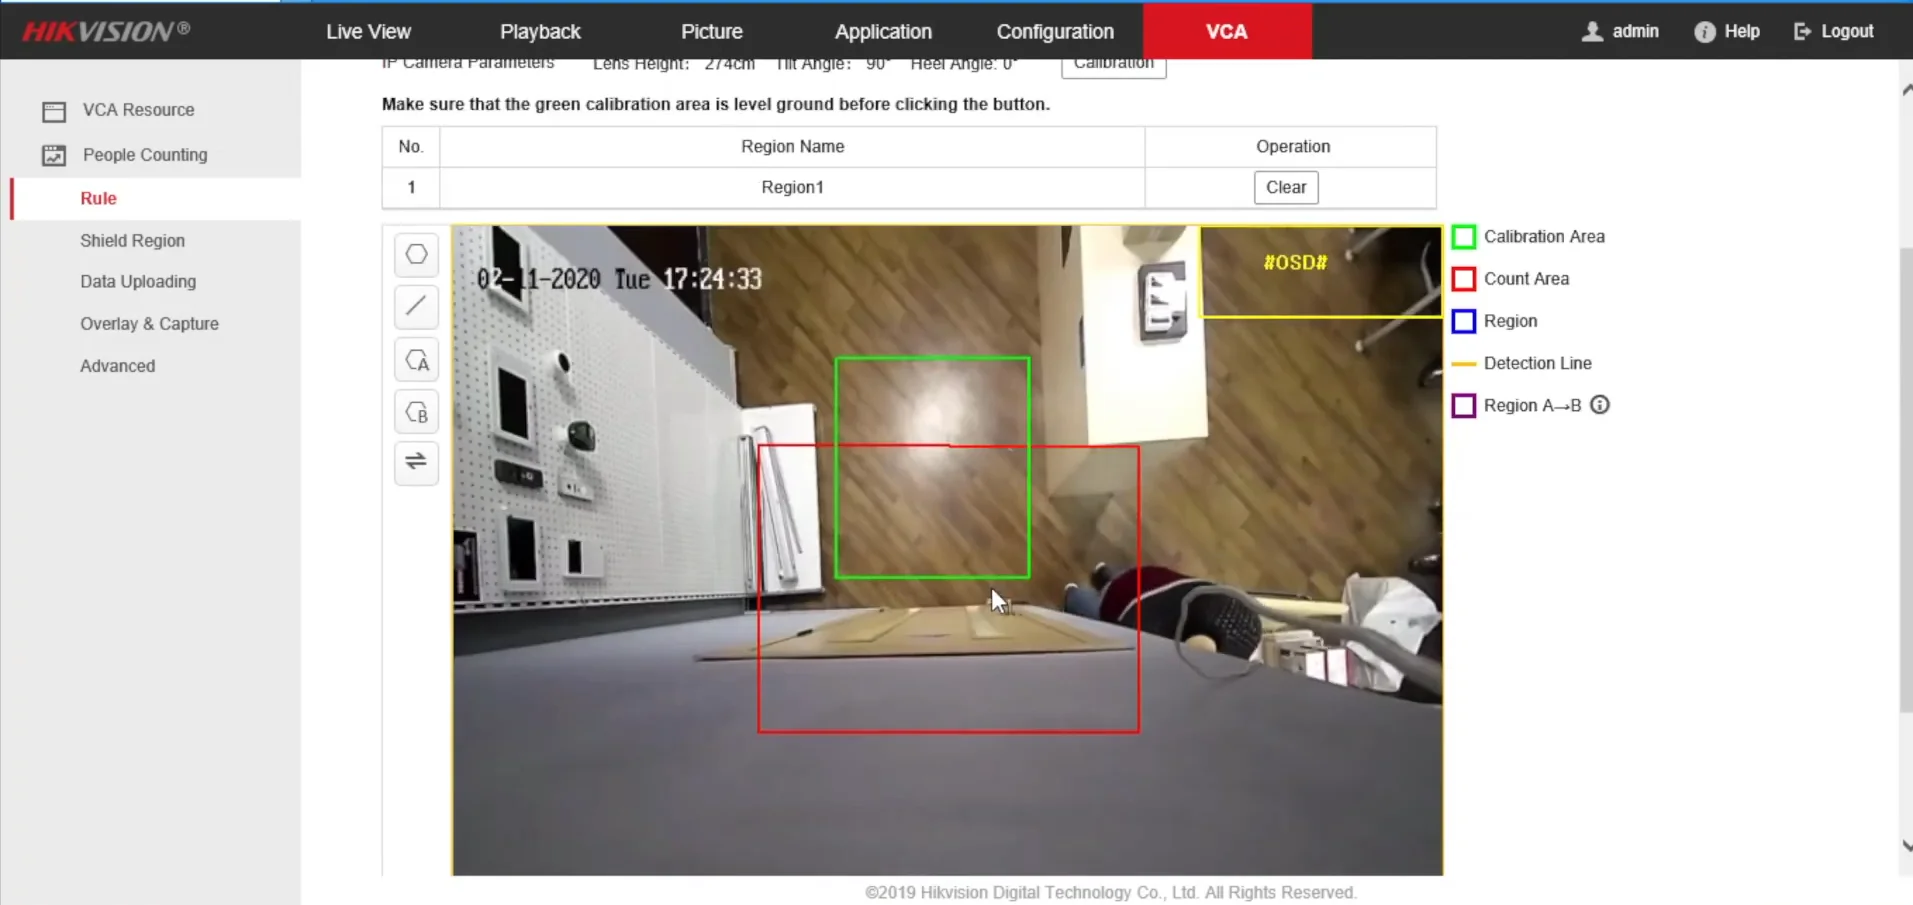
A people counting mode is selected by default, and that’s what we need; we continue to the next tab. What happens in “VCA” → “Rule” is that we create rules depending on the situation and location, it all starts with the auto green calibration zone, or a manual calibration. If that’s an auto-adjust – its size and position so that it lies straight on a flat floor, and click “Calibration” – the camera itself will determine the height and angle. And there is also a manual mode where we need to set the height and angle by ourselves. Now let’s start adjusting.
We have a door in sight, almost in the center, and we are using it as a basis. What we do – draw a blue rectangle “region 1” inside the red counting area, which is set automatically. For my entrance door, I drew region 1 along the inner contour of a red rectangle, and that was done. Now, create the detection line itself, which will do the people spotting, and set its direction, putting it inside our region. About these regions A and B buttons – A is the entry region, and B is the exit region. So, if a person crosses region A initially, and then B in a second turn, this is considered and counted as an entrance.
Conversely, if B is a first point and A is the second, then this is the way out, and it’s counted as an exit. And we can also set the schedule. And what’s really awesome – only a person who entered the zone from the outside and then completely crossed the line in this direction, and went out in the zone on the opposite side of the line will be counted. And this is how random intersections and random passers-by are excluded, because we need only those who entered the door, that is, crossed the line in its set direction.
Also, we can create a mask – a zone in which objects will not be counted, exclusions. That is – protect the region if you need it. What’s worth discussing further – reports and real-time reports. Data Uploading tab → real-time download → turn on. I set the statistics of cycles a 1 minute. I select only the report for the day, and the format is Excel. And so they will be delivered to the email that we input earlier. The overlay is, you know what it is, and here’s what else to look for – a height filter and a child count filter. Accordingly, whether you need to count children, count them separately, and whether you need to count objects by height. I’m turning it off and saving.
What I want to finish here with is the “Application” tab, where we can see statistics on the number of people. Type of time, type of statistics, turning on, and here on the right – time intervals. And this is how reports that will come to your email are going to look.
Demonstration
I asked my colleagues to come in and go out of the room to demonstrate this. Let’s see and count along with the camera. What I want to show – the camera and its algorithm are really accurate.
Conclusion
I didn’t see anything particularly complicated in setting up or working with this appliance. The standard settings first – video, audio, image, motion detection, and then setting up the intelligent people counting function – and here everything is fine, its not difficult to configure, everything is clear, and most important – great accuracy and real-time reports plus filtering objects and children by height, which only increases the output accuracy.
