
![Hikvision Door Phones Are Finally Standalone Trough New Firmware KV6113 / KV8113 / KV8213 [PREVIEW]](https://pipl.systems/wp-content/uploads/2023/04/maxresdefault-5-2.jpg)
We’ve got a new firmware update for the Hikvision Door Phones that we have anticipated so much, because this just had to happen; it just felt wrong that there was no such functionality. I mean, Wi-Fi door phones with P2P support, which are eventually displayed in the Hik-connect phone app, but only through an intercom monitor. And a lot of people asked Hikvision for this. So, thanks to the added functionality in the last firmware update, you no longer need an intercom monitor to use the full functionality of the door station and to display the device in Hik-connect on your phone – no more.

Setting Things Up

We supply the power and network to the device through a single twisted pair cable coming from a PoE switch, as the devices are PoE-enabled. Next up, we need a PC with 1 of the 3 tools. Either the manufacturer’s IVMS4200 / SADP Tool / the Batch Configurator. Personally I use the Batch Configurator. Go to “Device Management” tab → press “Online devices ” to discover all online devices under your network → Locate your door stations and activate them. Come up with the password and assign it an address in your network, because it comes under a “0” subnet from the factory. To see your subnet address for Windows, you need “View network properties”. Find your adapter in the list and locate the address of your PC, and respectively, take the number from there and the subnet number. Then update the device’s IP address with a new subnet number.
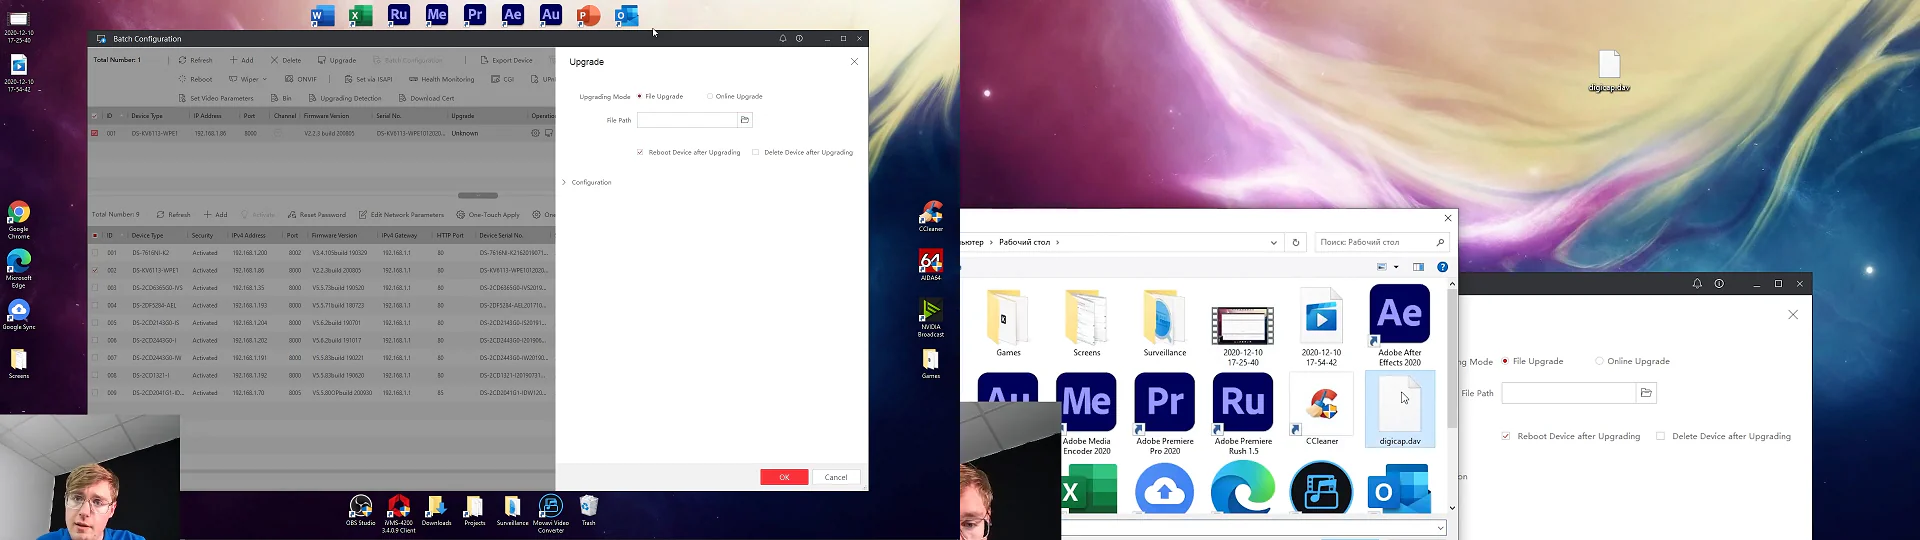
Now the firmware upgrade. For this purpose, I am using the device’s web interface. Go to the browser and enter the door phone’s IP address into the search bar → log in with the data you have created on the activation stage → go straight to the configuration tab → System → Maintenance → last item there is the update → click on it and locate a previously downloaded digicap.dav firmware file. After it reaches 100%, it will prompt that it needs to restart – agree with that, it’s important, and it’s done. Since the calling panel is now updated, activated, and online, go directly to the Demo on the phone with the Hik-connect app on it

Demonstration (Available on YouTube)
All that we’ve done is we activated the panel, assign it the correct address in our network, and updated the firmware. Then we add it to the Hik-connect app on the phone with a light hand movement, and what’s awesome – no extra actions. You just scan the QR code, OK, and that’s it – the door station is now in your account. The thing is that earlier, it literally didn’t work. Neither the code scanning nor the manual adding of a device did anything. It could have only been added via the intercom monitor. And now boom – and that’s all. And well, inside the app, everything is common and classic: live view, opening the door, taking a screenshot, recording a video, and so on. And what’s left to be done – go to settings and turn on the notifications. This is actually the final and most important step that will make everything work. So what does it? Full autonomy and independence from the monitor. Everything you need is now here on the phone – press the button on the doorbell to call, and the door is opened from the phone as well. 2-way communication from here, like, everything, but with no monitor.
What’s left is to wait for the release of this firmware, because now this is a preview, it’s not public yet. It will be soon, and as soon as this “Soon” comes, you will be notified about that on our YouTube channel and on our website’s blog.