Welcome to the Pipl Systems Media Portal – Your Guide to Expert Security Solutions!
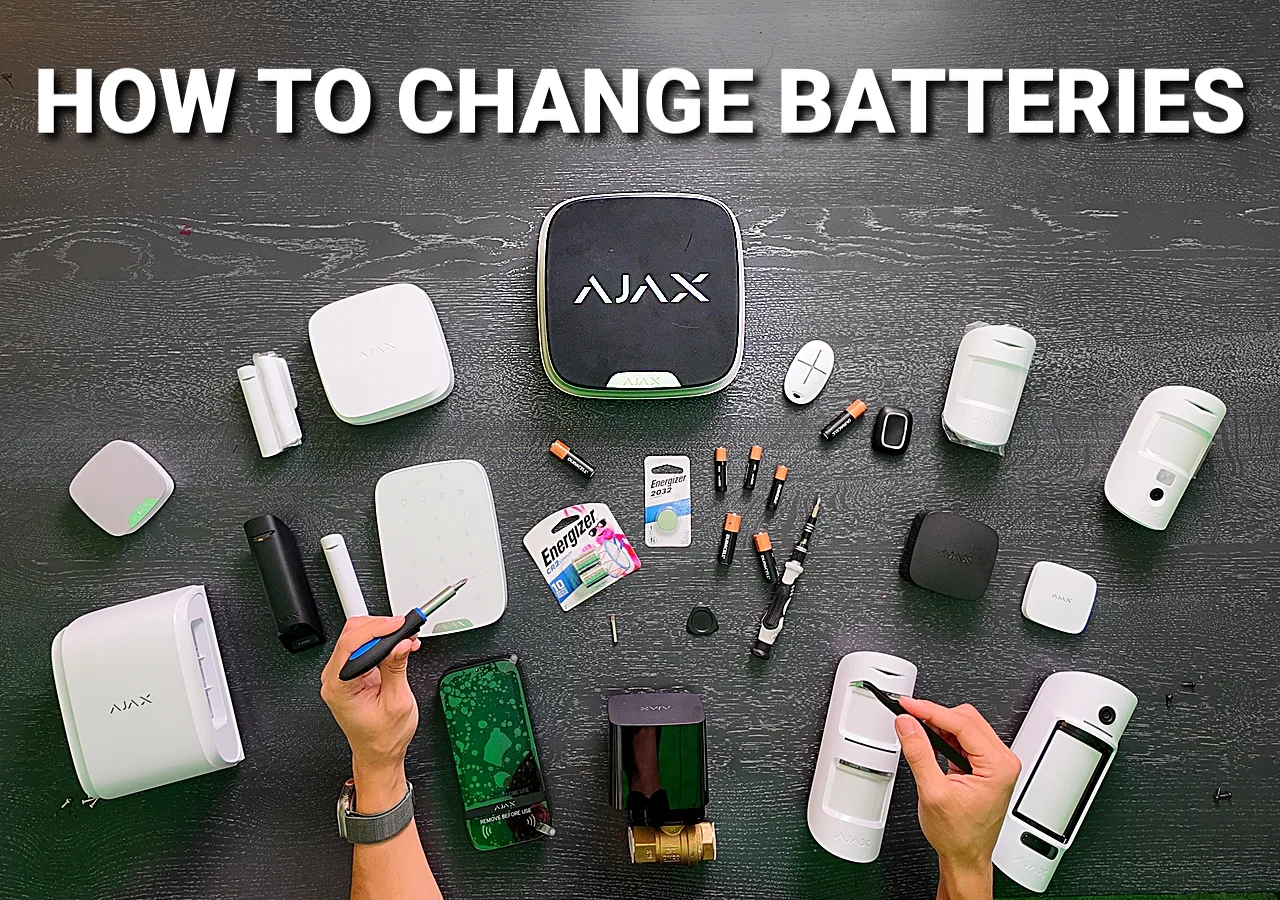
In the world of security systems, maintaining operational integrity is paramount. This is especially true for wireless systems where battery management is crucial to system upkeep. Today, we delve into a comprehensive guide on replacing batteries in Ajax Alarm Sensors, ensuring your security apparatus remains in peak condition.
Battery Replacement Guidelines for Ajax Devices
The Ajax system monitors the battery levels in its devices and notifies users in advance when replacements are necessary. When the battery level drops to approximately 10%, users receive notifications via the app, and the security company’s control panel receives alerts upon arming the system, indicating battery malfunction. Depending on settings and usage conditions, users have up to 2 months from the notification to replace the batteries.
Avoid mixing different battery models, brands, or charge levels if a sensor uses multiple batteries. Cross-charging between batteries can significantly reduce the overall set’s lifespan.
For optimal performance and longevity of your Ajax device, we recommend using the following batteries:
- Panasonic CR123A Industrial Lithium Battery, 3 V (product model number 4330203048, manufacturer: Indonesia)
- Huiderui CR123A, 3 V, 1600 mAh, LiMnO2
- Renata CR2032
- Panasonic CR2032 (BAT487)
- Panasonic CR2032BS
- Huiderui CR-2, 3 V, 850 mAh, LiMnO2
- Huiderui AA, 1.5 V, 2900 mAh, LiFeS2
- Energizer AA Ultimate Lithium, L91
- Huiderui AAA, 1.5 V, 1200 mAh, LiFeS2
- Energizer AAA, 1.5 V, 1200 mAh, LiFeS2 Lithium bulk
Using different batteries may result in varying lifespans from the calculated estimates.
Number, Type, and Expected Battery Life in Ajax Devices
(Device Name, Battery Type, Expected Lifespan)
- GlassProtect: 1 × CR123A, up to 7 years
- DoorProtect: 1 × CR123A, up to 7 years
- DoorProtect Plus: 1 × CR123A, up to 5 years
- MotionProtect: 1 × CR123A, up to 5 years
- MotionProtect Plus: 1 × CR123A, up to 5 years
- CombiProtect: 1 × CR123A, up to 5 years
- MotionProtect Curtain: 1 × CR123A, up to 3 years
- MotionProtect Outdoor: 2 × CR123A, up to 5 years
- DualCurtain Outdoor: 2 × CR123A, up to 4 years
- MotionCam: 2 × CR123A, up to 4 years
- MotionCam (PhOD): 2 × CR123A, up to 4 years (photo on demand disabled), up to 3 years (photo on demand enabled)
- MotionCam Outdoor: 4 × CR123A, up to 3 years
- MotionCam Outdoor (PhOD): 4 × CR123A, up to 3 years
- HomeSiren: 2 × CR123A, up to 5 years
- StreetSiren: 4 × CR123A, up to 5 years
- StreetSiren DoubleDeck: 4 × CR123A, up to 5 years
- FireProtect: 2 × CR2, 1 × CR2032, up to 4 years
- FireProtect Plus: 2 × CR2, 1 × CR2032, up to 4 years
- FireProtect 2 RB: 2 × CR123A, up to 7 years
- Button/DoubleButton/SpaceControl: 1 × CR2032, up to 5 years
- KeyPad: 4 × AAA, up to 2 years
- KeyPad Plus: 4 × AA, up to 4.5 years
- KeyPad TouchScreen: 6 × AA, up to 1.5 years
- Transmitter: 3 × CR123A, up to 5 years
- LeaksProtect: 2 × AAA, up to 5 years
- WaterStop: 4 × CR123A, up to 3 years
- LifeQuality: 2 × CR123A, up to 4 years
Battery Life Calculation for Ajax Devices
The battery life of a device is influenced by several factors. Use the battery life calculator to estimate the autonomous operation time of your device, taking these factors into account.
Key Points to Remember about Ajax Device Batteries
- Battery life is affected by multiple factors, making calculations approximate.
- Consider temperature fluctuations at installation locations.
- Avoid activating settings that frequently engage the sensor’s radio module unnecessarily, particularly the Always Active mode and shortening the hub-sensor polling interval.
- Use only recommended batteries. Replace batteries with a set of the same type and brand.
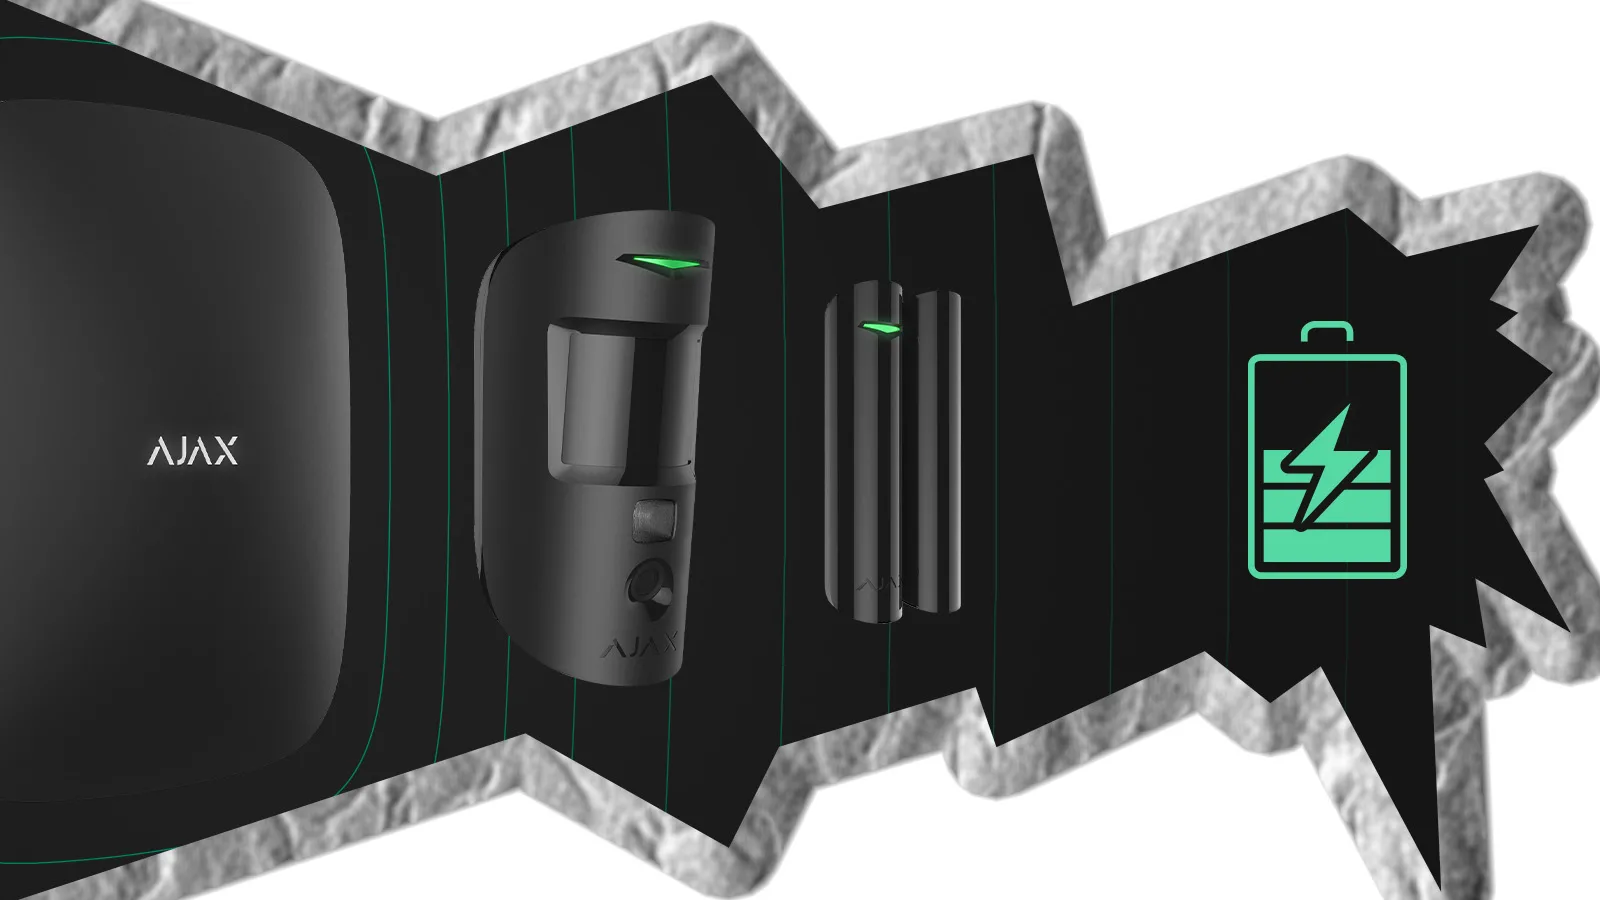
Ajax Systems, a frontrunner in wireless security solutions, designs its devices with longevity and reliability in mind. However, battery replacements are inevitable due to natural wear and periodic intense communications with the Ajax Hub, and the environmental conditions in which devices operate. Understanding the nuances of battery replacement can greatly enhance the lifespan and effectiveness of your Ajax security devices.
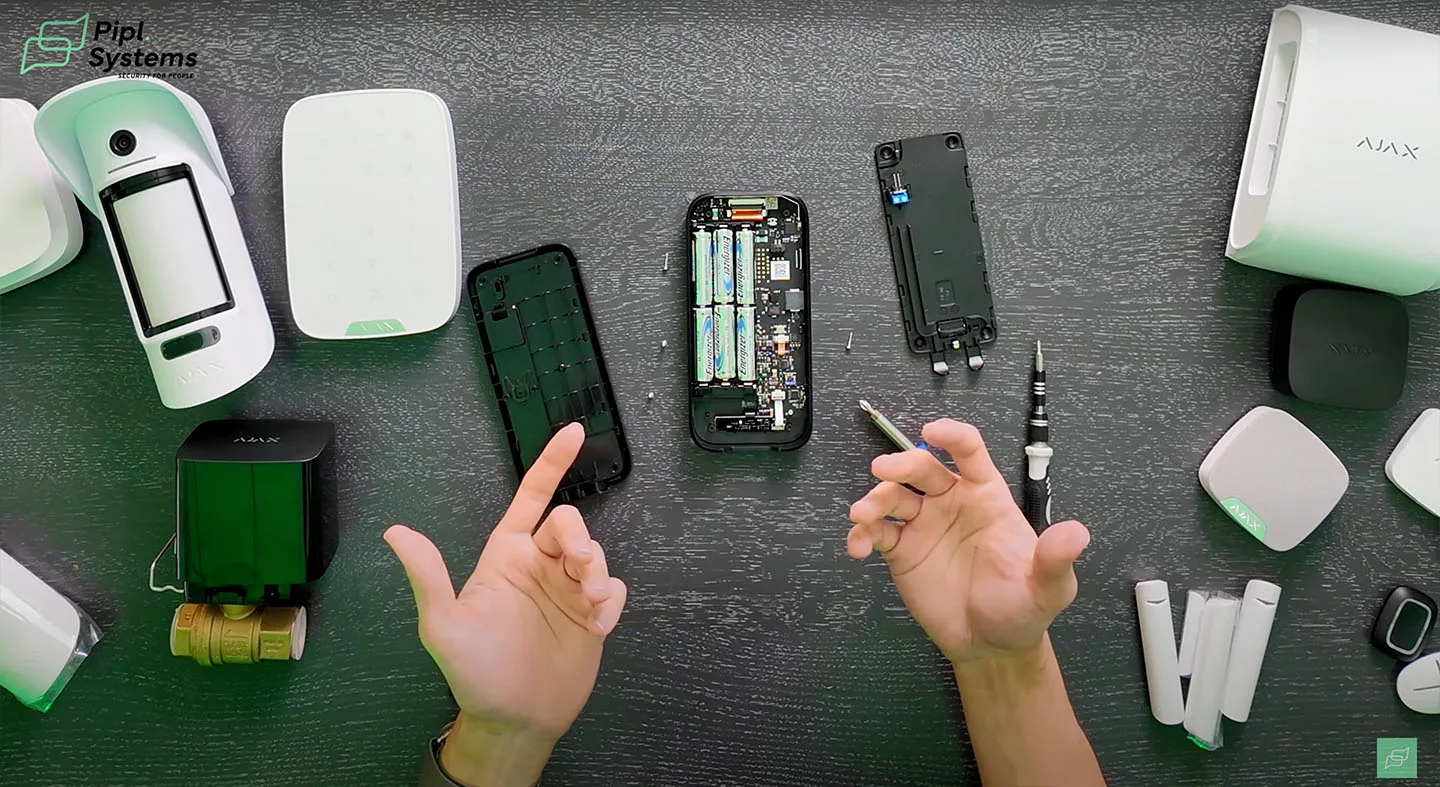
Necessary Tools for Replacing Batteries in Ajax Devices
To undertake battery replacement on Ajax devices, you will need the following tools:
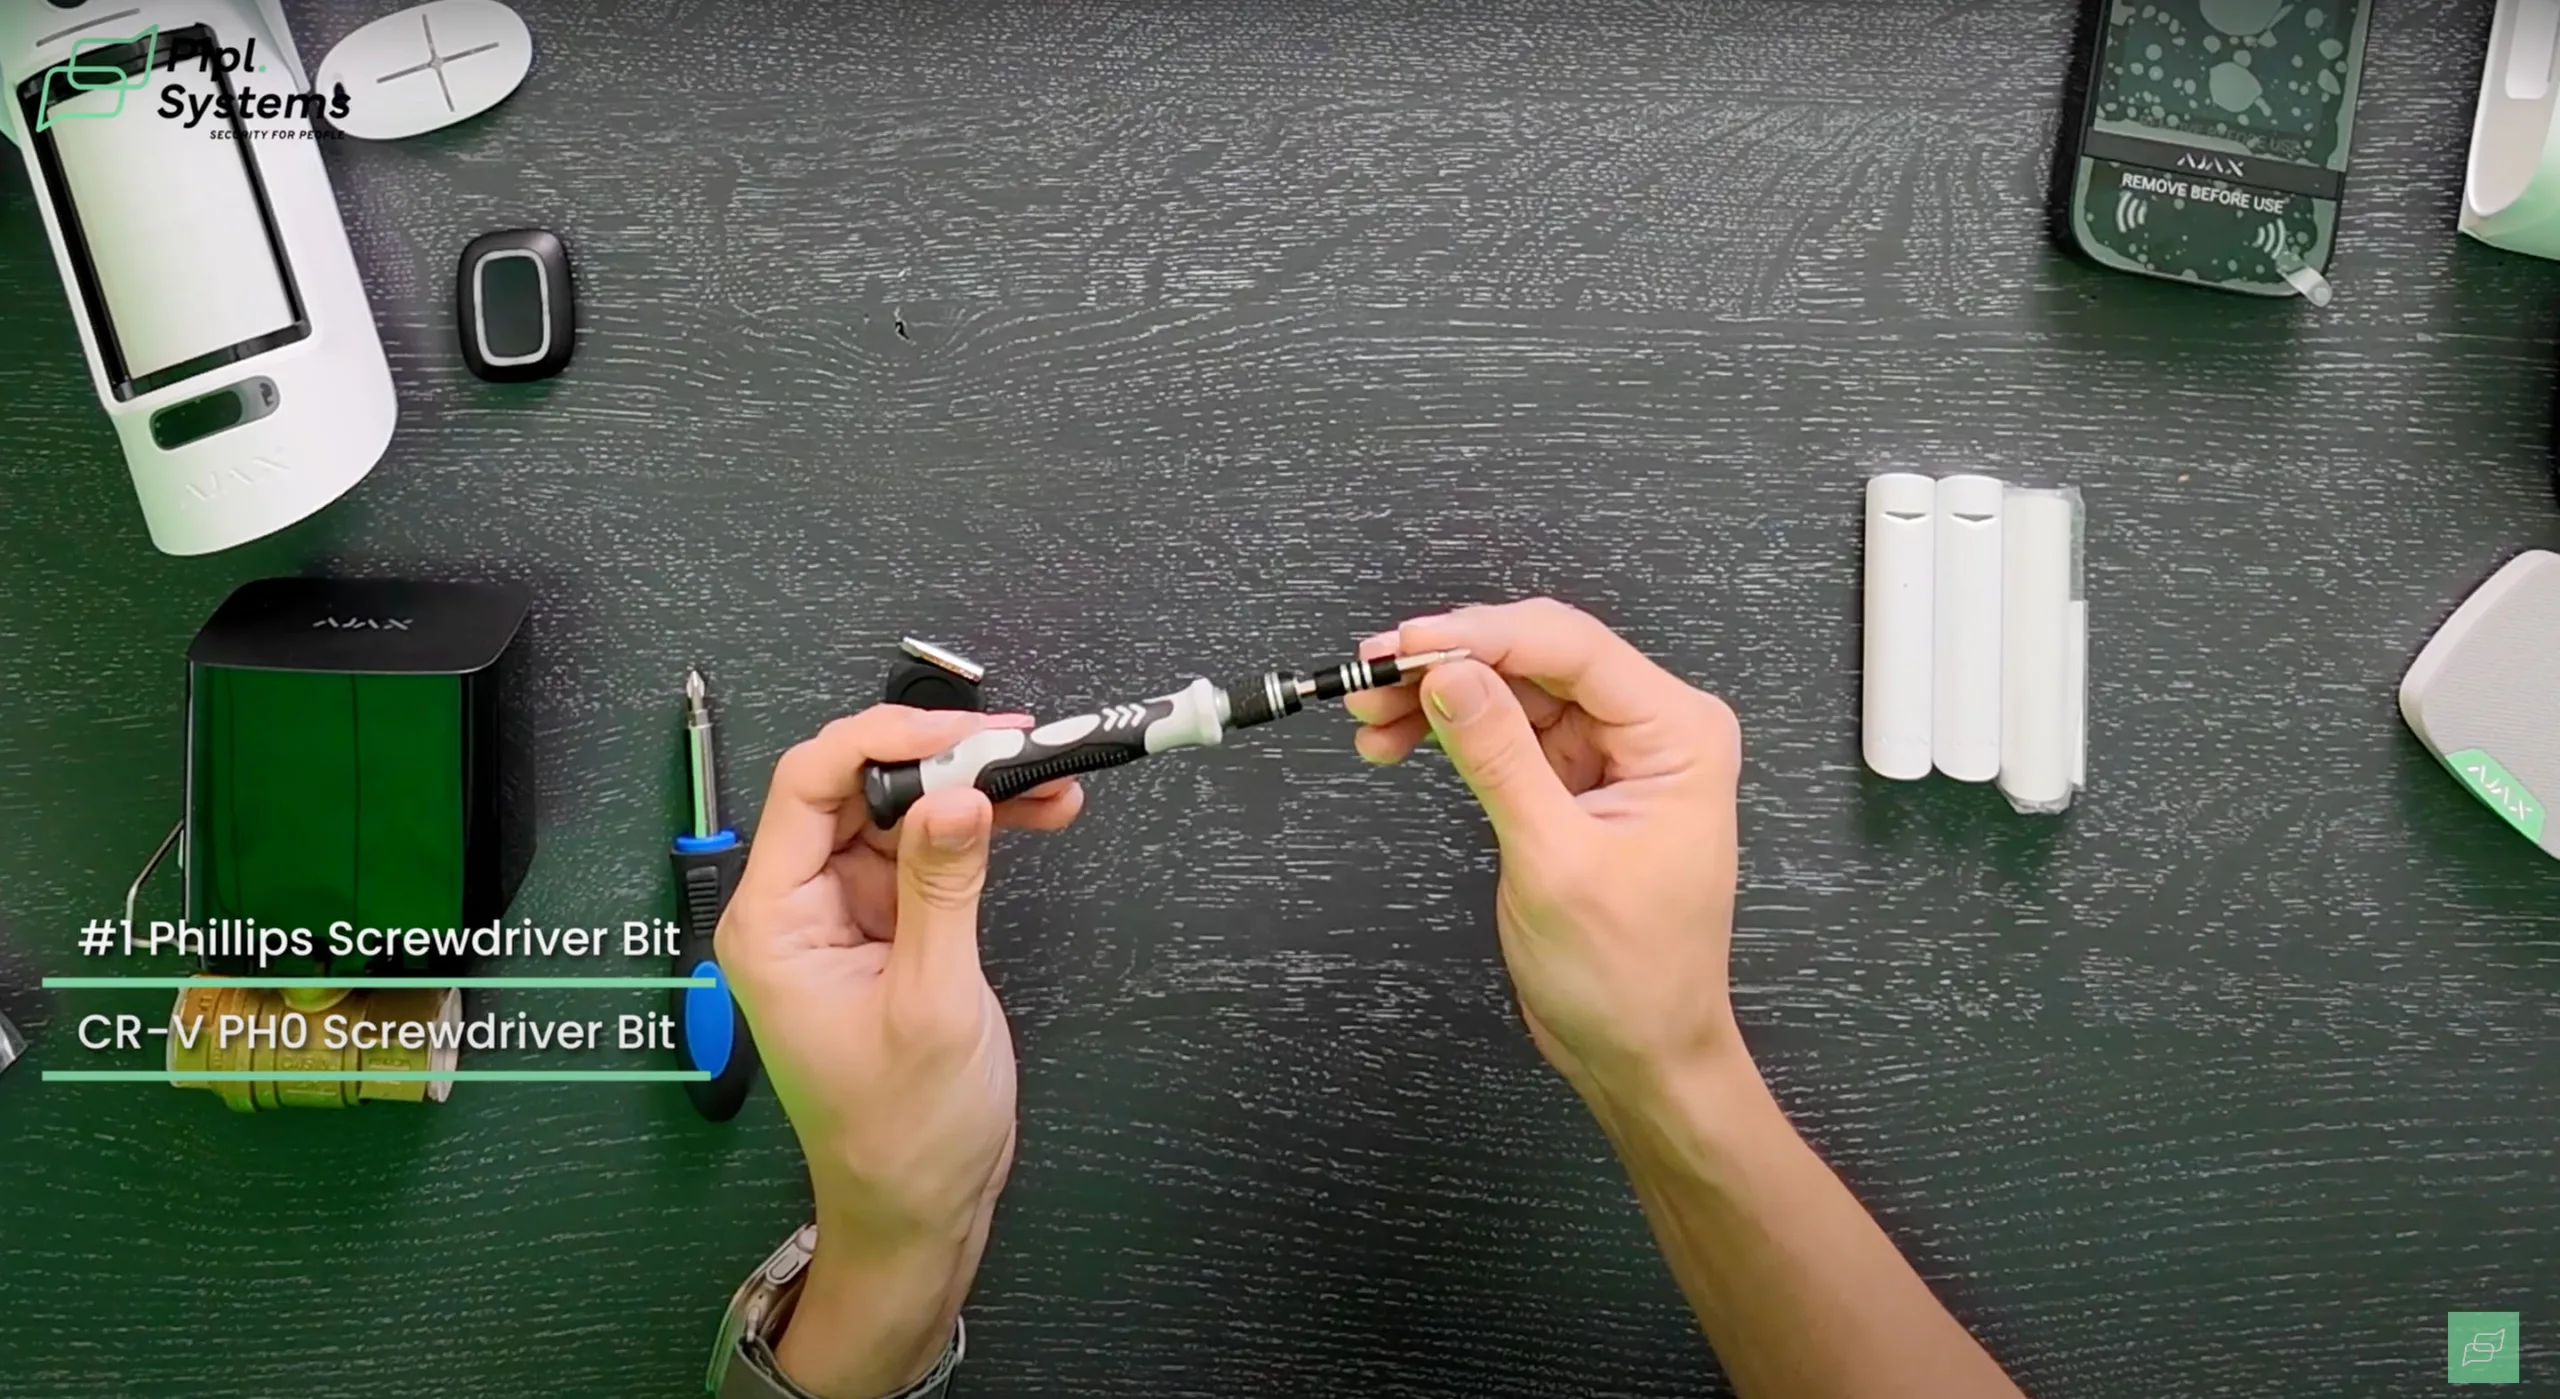
- #1 Phillips Screwdriver Bit
- #0 Phillips CR-V PH0 Screwdriver Bit
- 4mm Flat Head Screwdriver
- Opening Pry Tool (plastic recommended to avoid device damage)
These tools cater to different devices within the Ajax suite, ensuring you can address each component’s specific construction without causing damage.
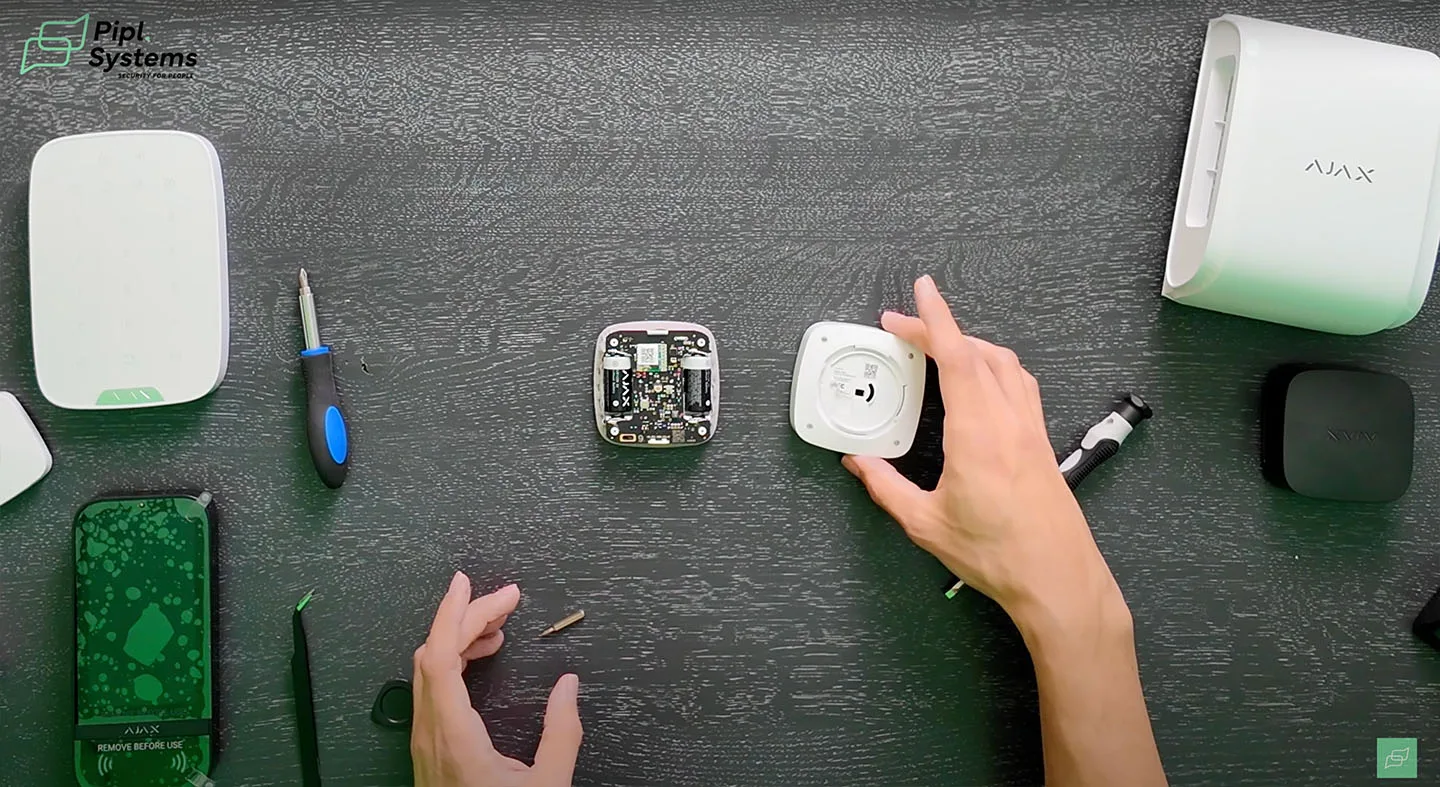
Battery Replacement in Ajax DoorProtect and GlassProtect
Ajax DoorProtect, DoorProtect Plus, and GlassProtect share a similar construction making the battery replacement process uniform:
- Slide down the smart bracket to detach it.
- Push the small trigger on top to release the front part of the device.
- Use the flat screwdriver to gently remove the battery.
- Insert the new battery ensuring correct polarity alignment.
- Reassemble by aligning the front part with the smart bracket and snapping it into place.
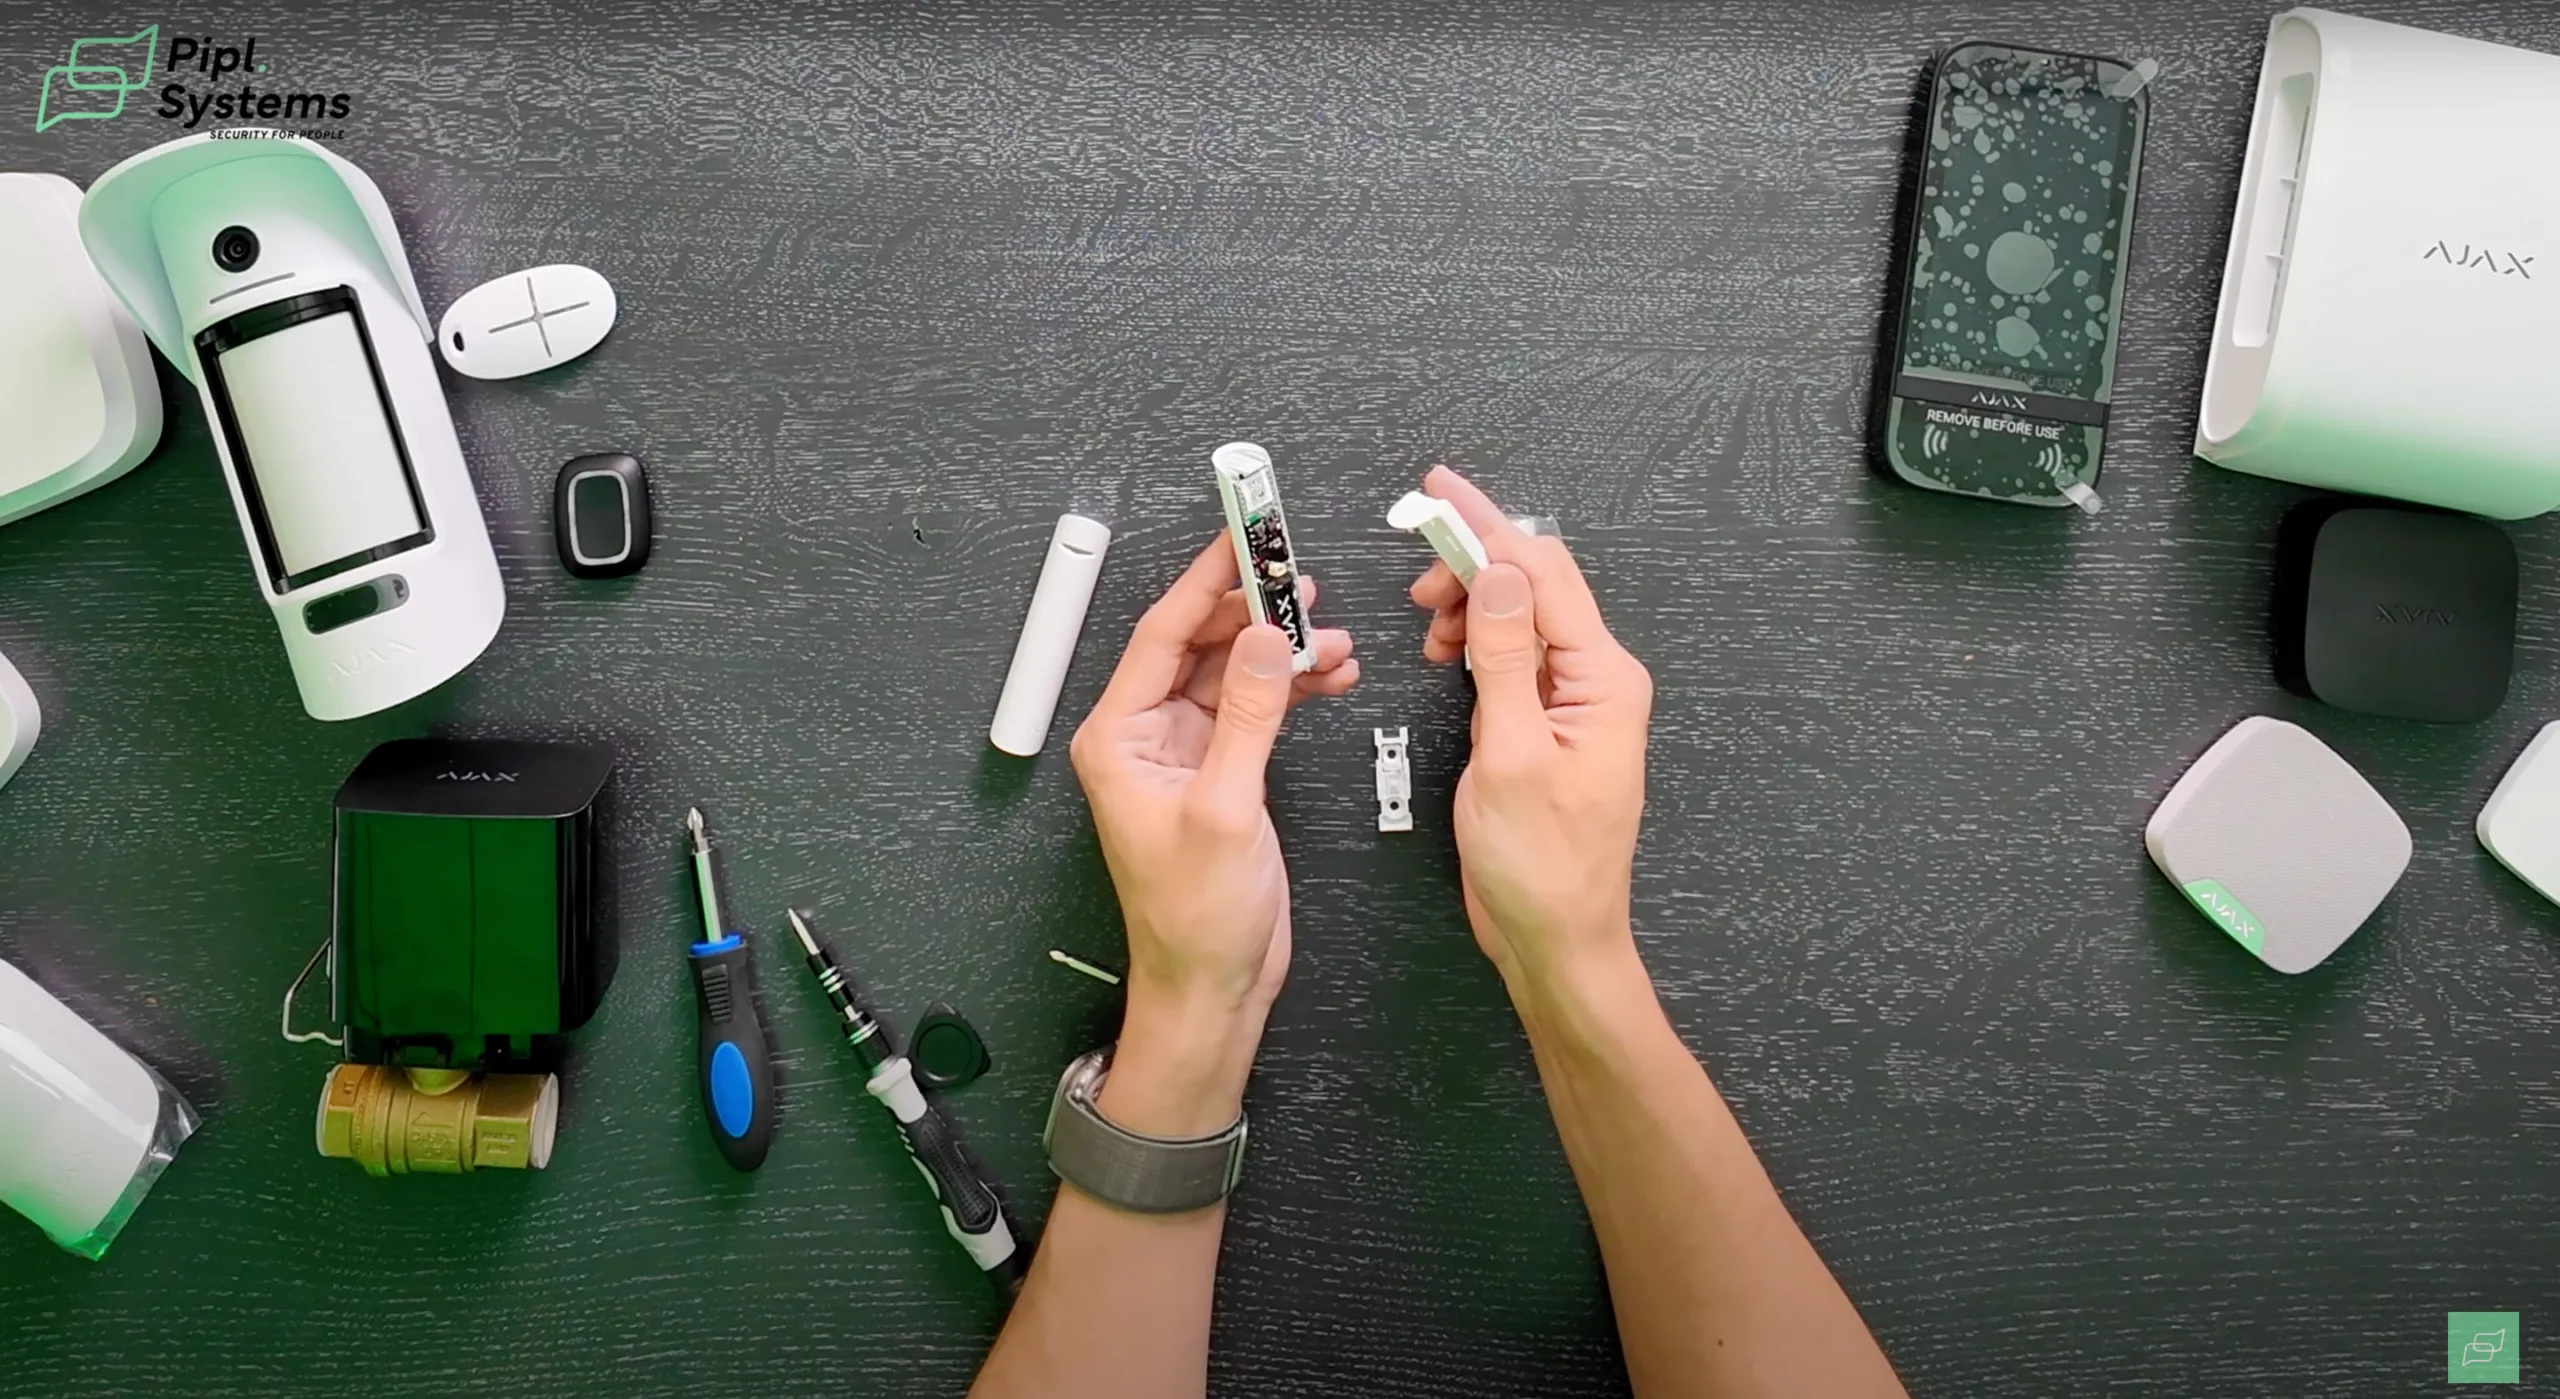
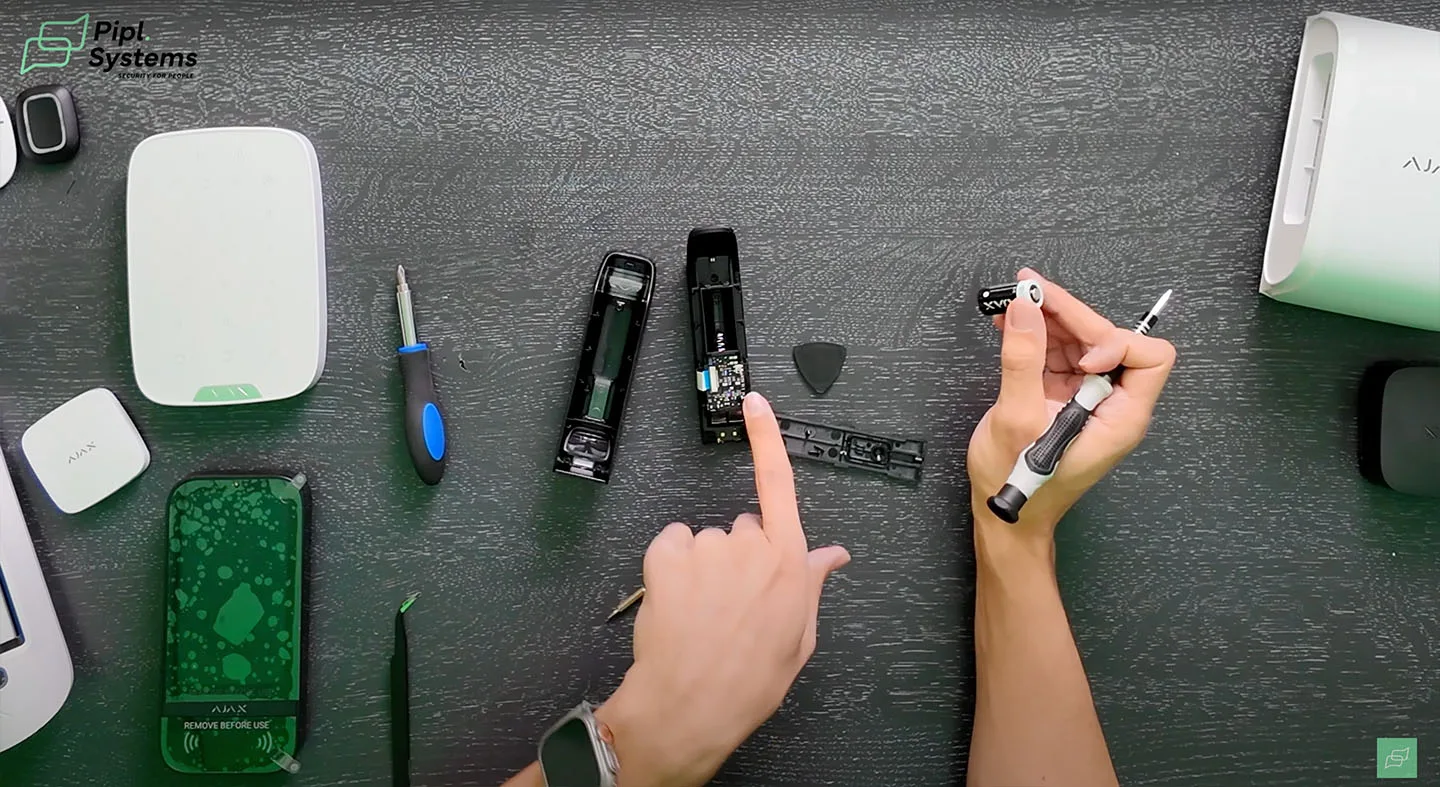
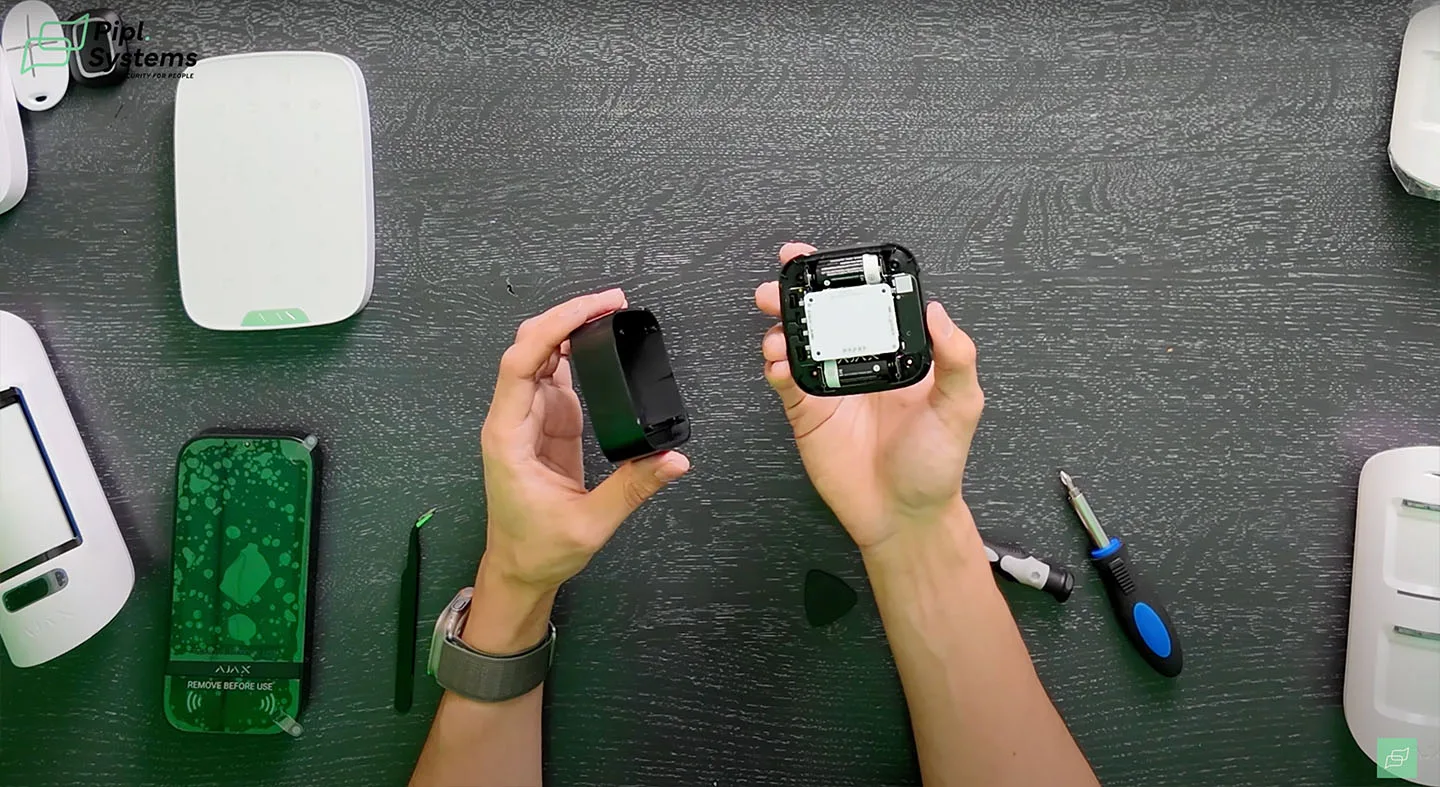
Changing Batteries in Ajax SpaceControl and Ajax Button
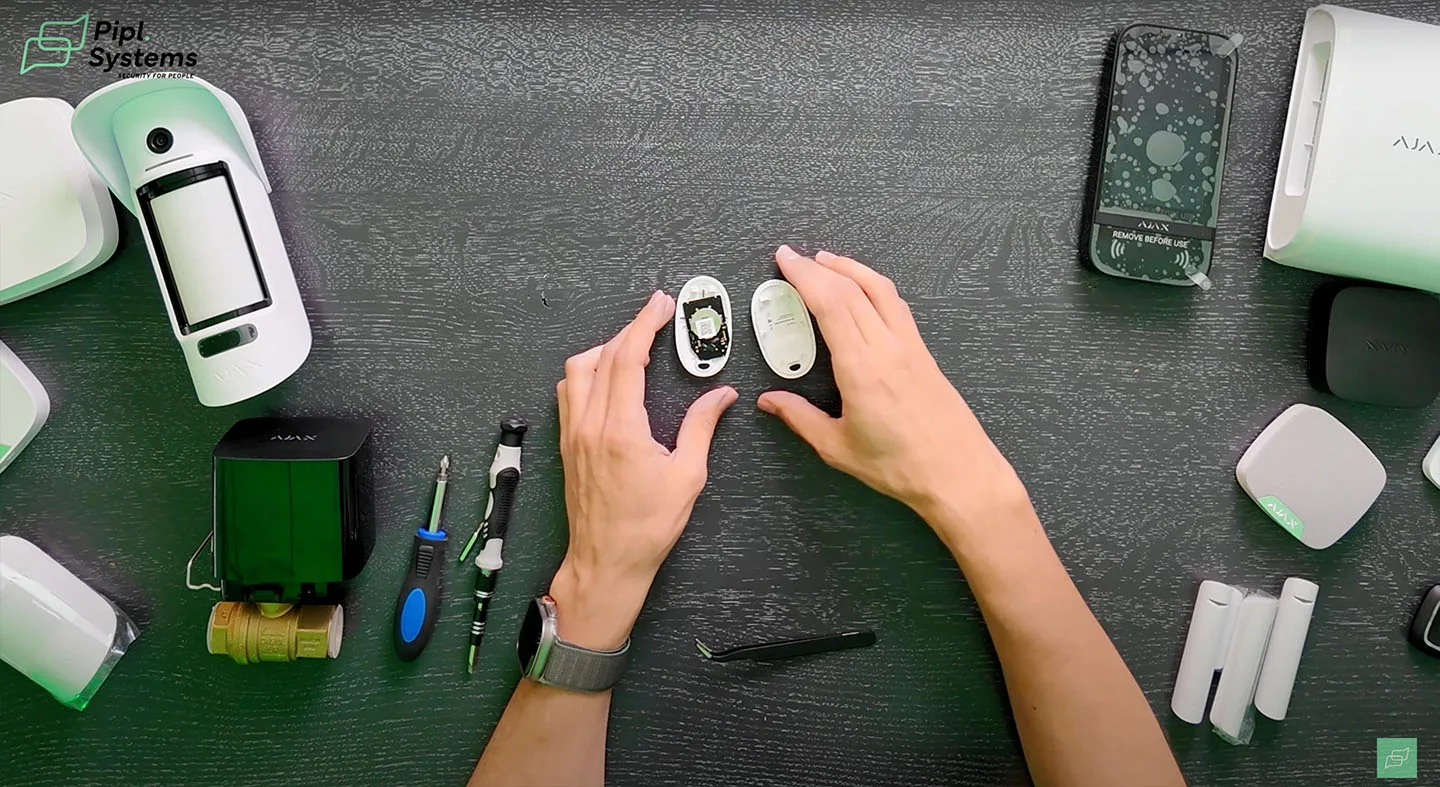
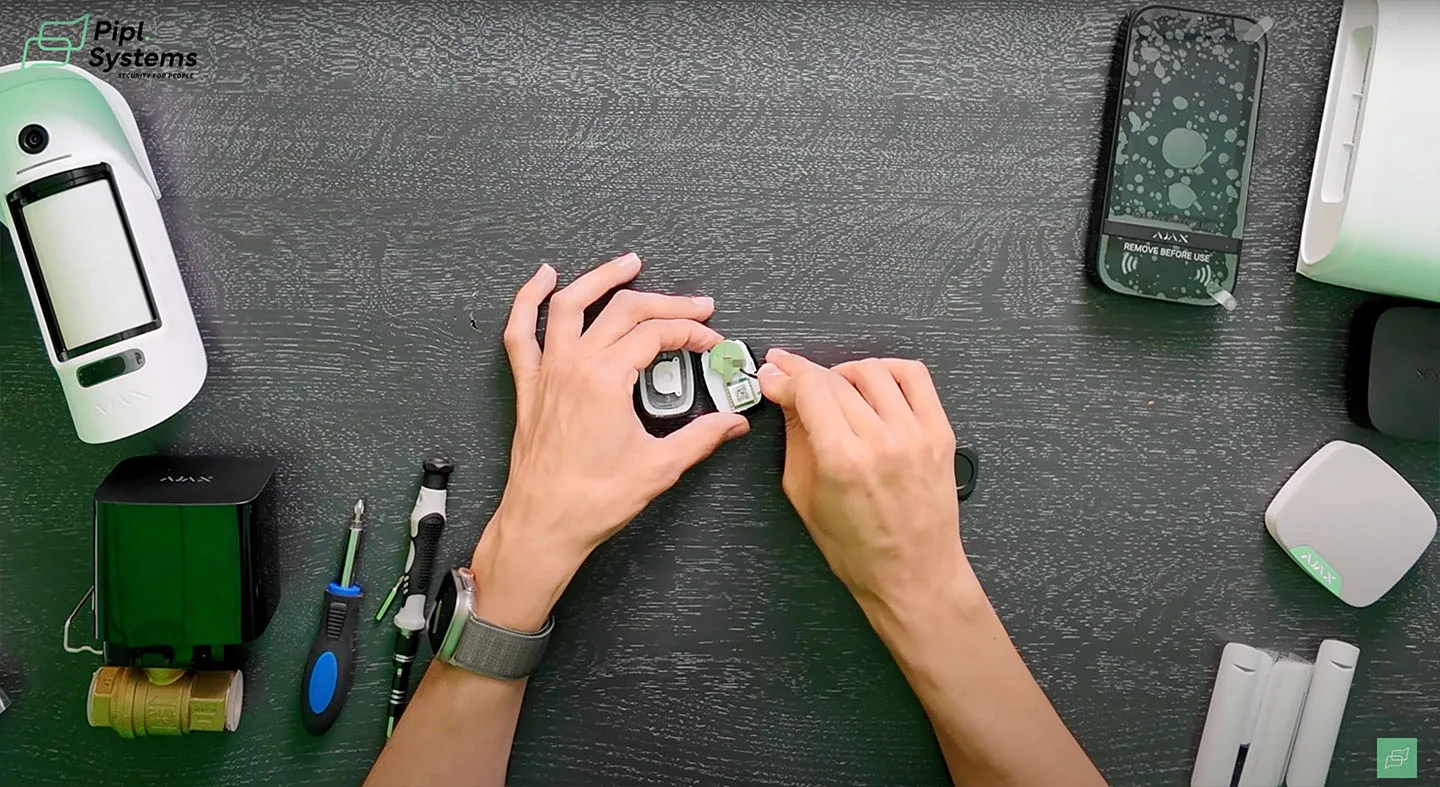
These devices require minimal tool intervention:
- Use the small, round-cornered Opening Pry Tool to gently pry open the device.
- Replace the flat batteries, ensuring correct orientation.
- Reclip the cover back on ensuring it snaps securely.
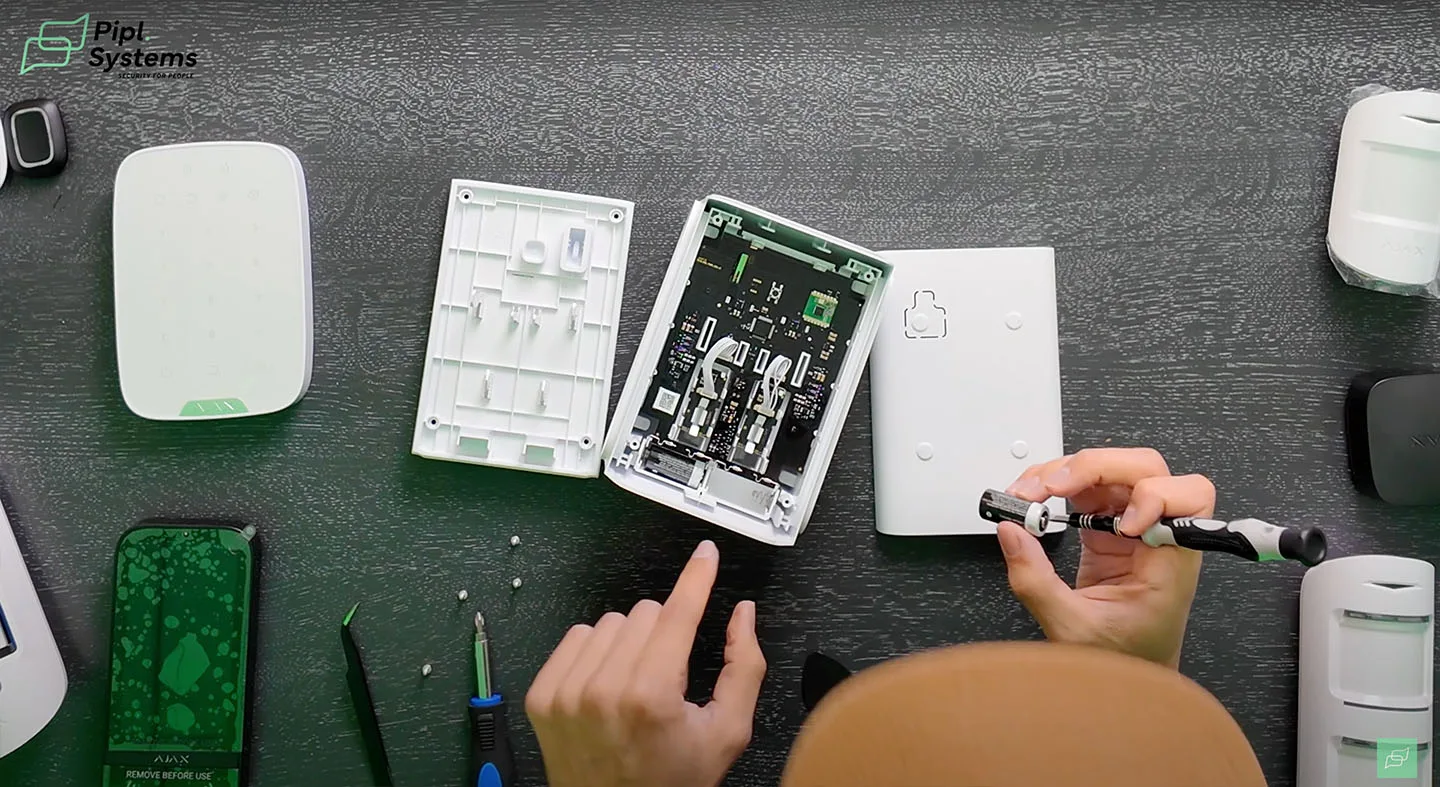
Replacing Batteries in Ajax KeyPad Plus and KeyPad TouchScreen
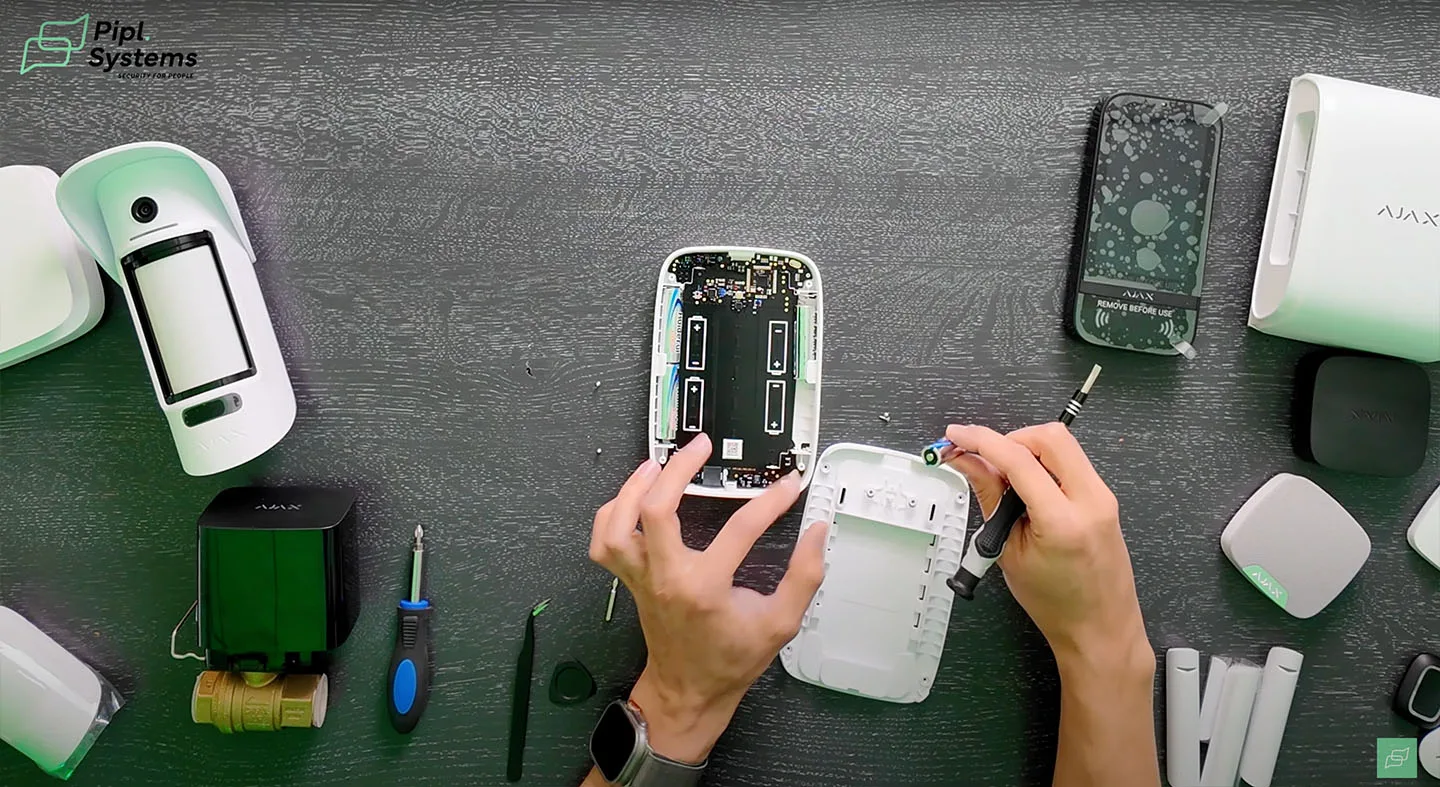
For both the Ajax KeyPad Plus and the TouchScreen model, the process involves more steps but remains straightforward:
- Remove the smart bracket and unscrew the back using the appropriate Phillips bit.
- Gently pry open the back cover.
- Replace the AA or AAA batteries (depending on the model) observing the correct polarity.
- Reattach the back cover, screw it securely, and then slide the smart bracket back into place.
Why This Matters
Regular maintenance, like changing the battery, makes sure your Ajax system works well and keeps your property safe all the time. This is very important not only for how it works but also for keeping the areas you’re protecting safe.
This guide ensures that you can handle battery replacements with ease. It also emphasizes the importance of regular maintenance for the reliable operation of security systems.
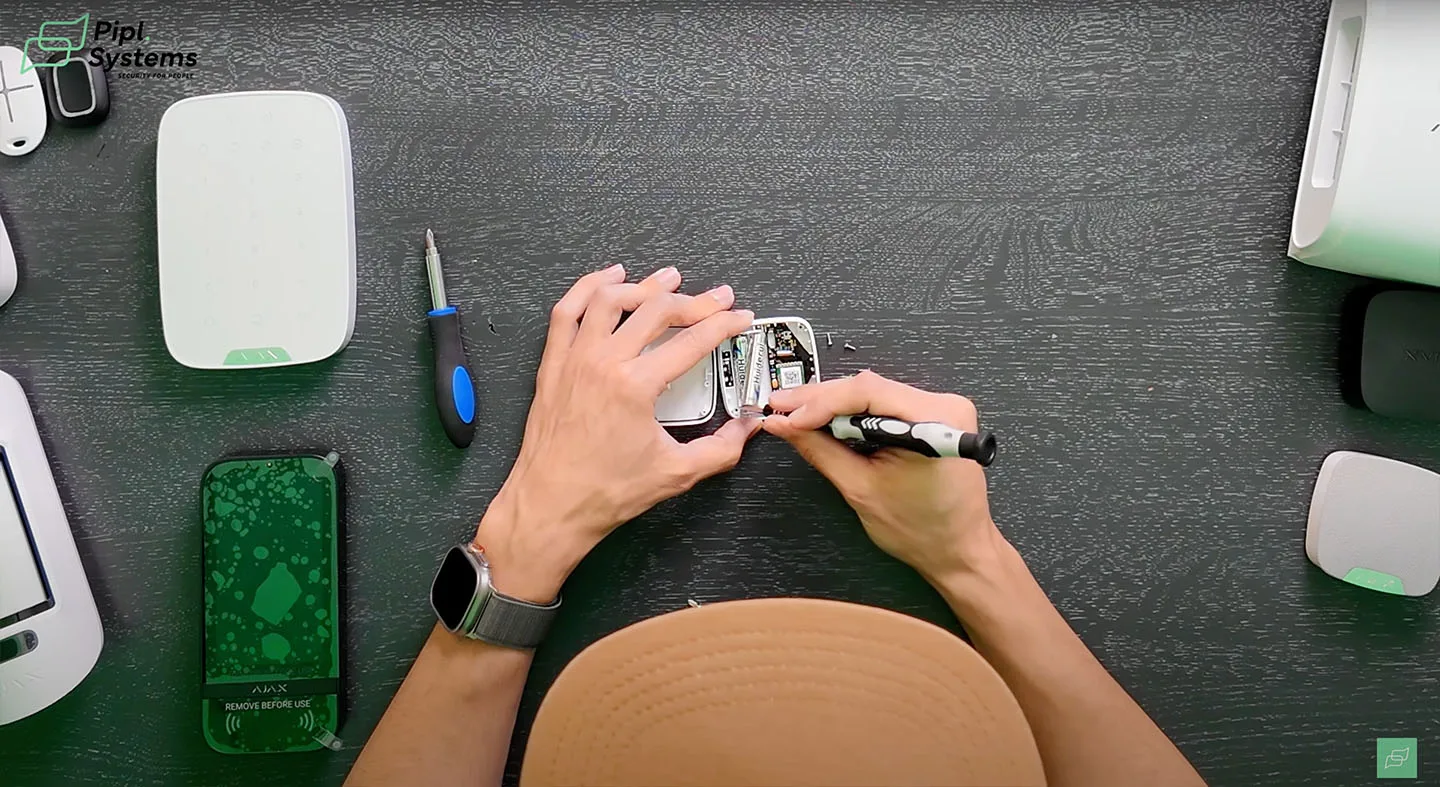
Replacing Batteries in MotionProtect Plus
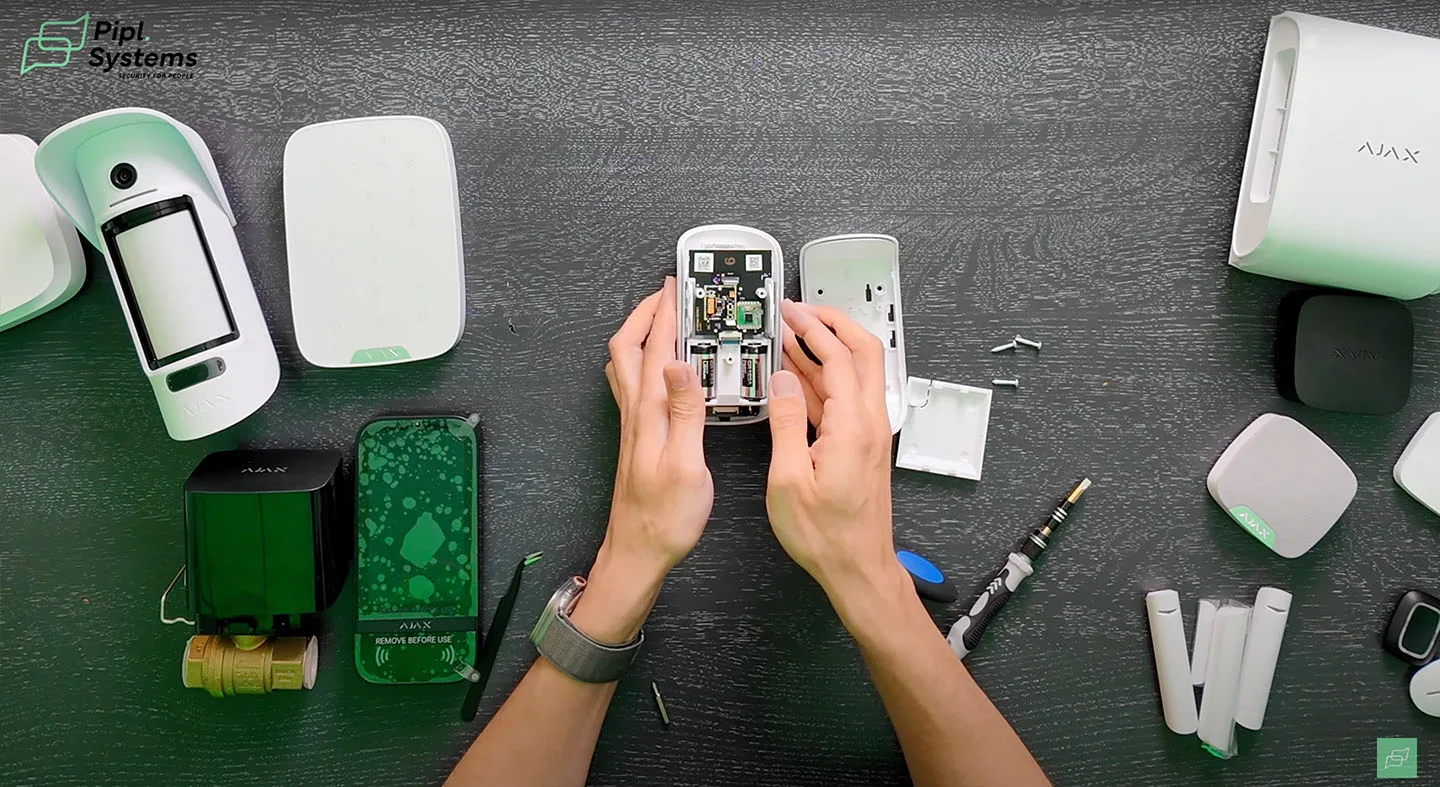
MotionProtect Plus, as well as its counterparts MotionProtect and CombiProtect, utilize the CR123A battery. To replace the battery:
- Disconnect the Device: Ensure the device is powered down. Use the power button located on the back of the device.
- Remove the Bracket: Slide down the smart bracket to access the screws.
- Unscrew: Use a Phillips screwdriver to remove the screw.
- Access the Battery: Use a small disc or flat screwdriver to pry open the battery compartment gently.
- Replace the Battery: Follow the orientation indicated inside the compartment. Insert the new CR123A battery, ensuring correct polarity alignment.
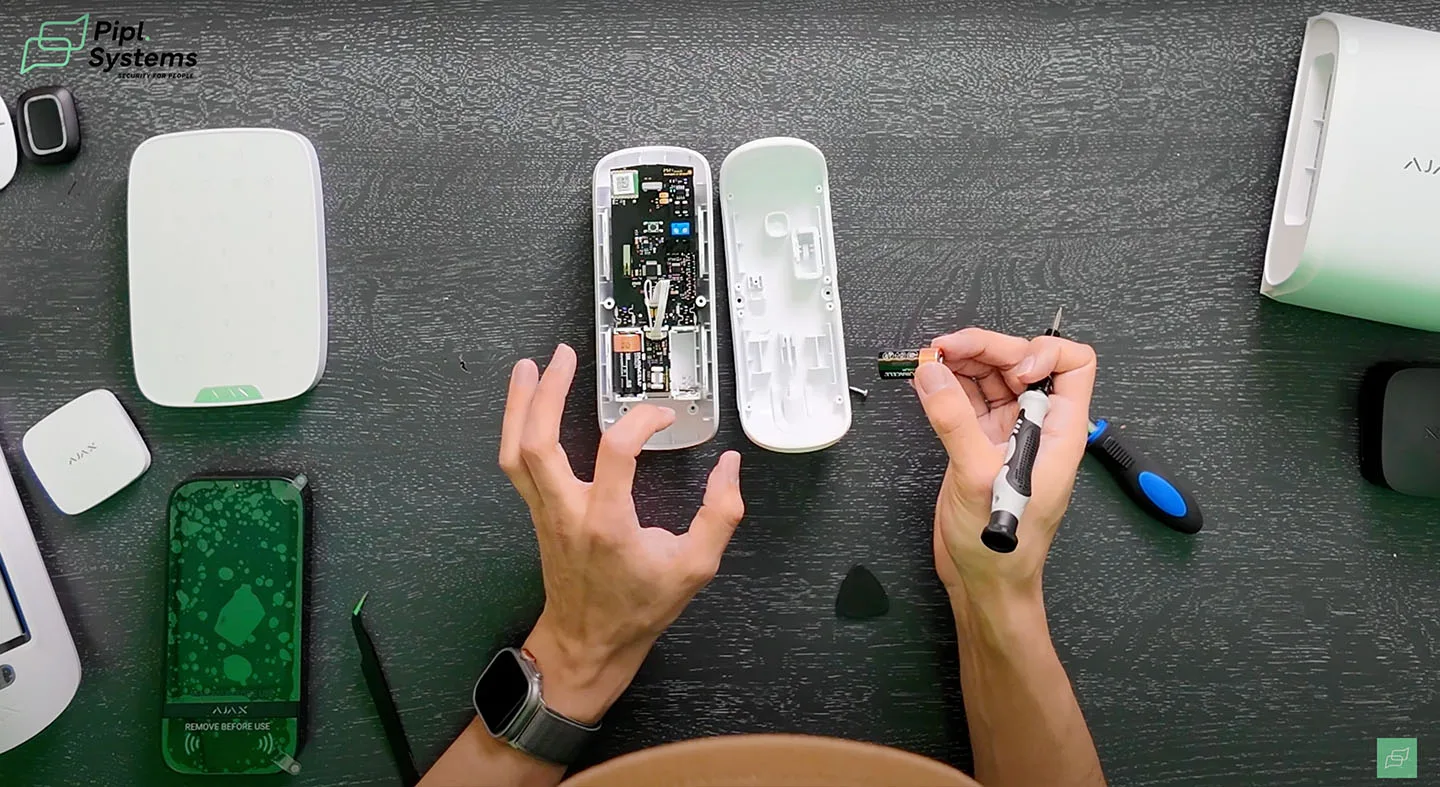
Replacing Battery in MotionCam and MotionCam Outdoor
For both MotionCam and MotionCam Outdoor (PhoD), the battery replacement process is similar:
- Power Down: Hold the power button for three seconds to turn off the device.
- Open the Casing: Remove the screws and use a small disc to pry open the casing.
- Battery Replacement: These models require two CR123A lithium batteries. Remove the old batteries with a flat screwdriver, paying attention to the polarity as indicated.
- Reassembly: Place the new batteries, ensuring they fit securely. Reattach the casing and screw it closed.
How to Change Battery in Ajax WaterStop
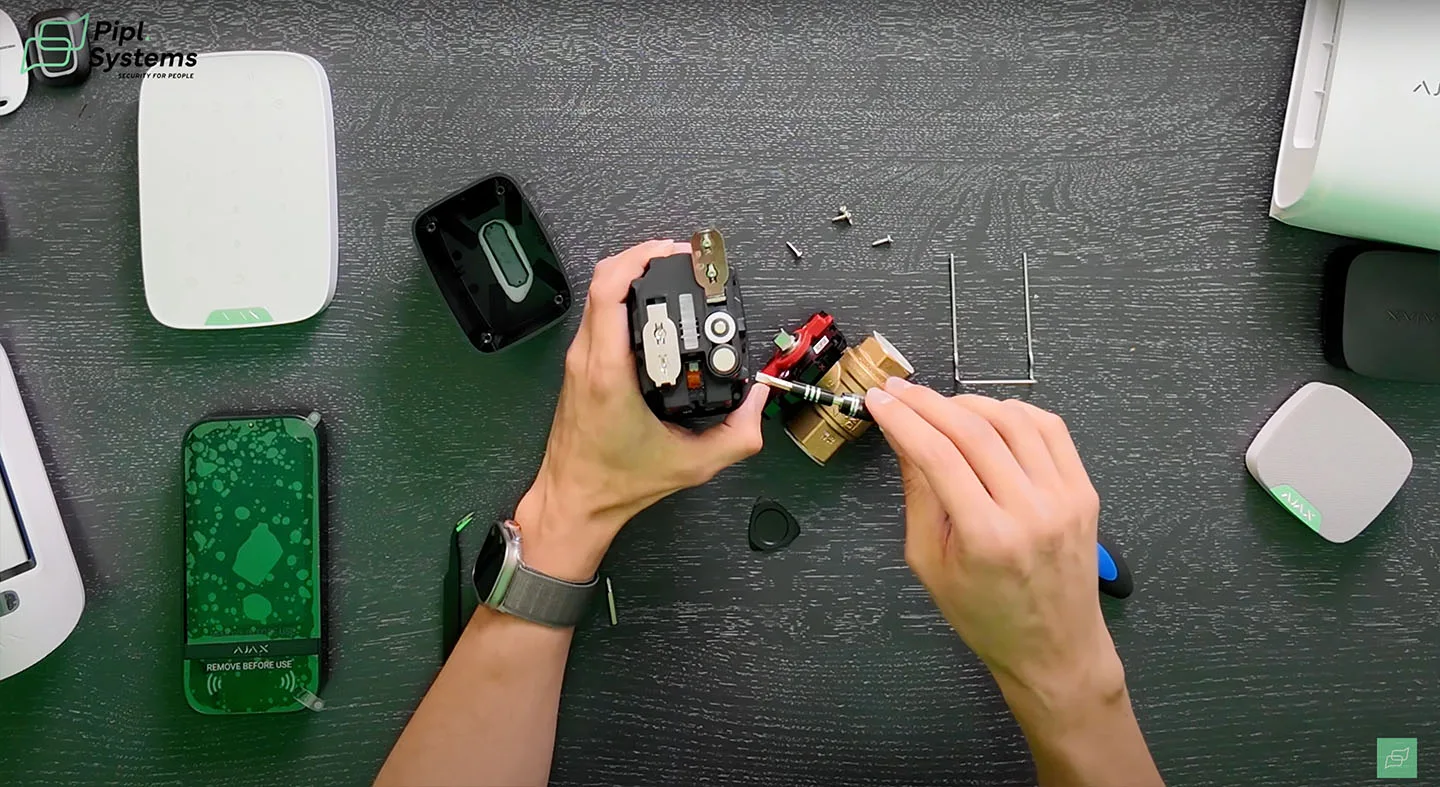
The Ajax WaterStop sensor is a critical tool for preventing water damage. Replacing its battery involves:
- Safety First: Disconnect the device by holding the power button for three seconds.
- Remove the Bracket: This is a safety bracket, ensure it’s removed first.
- Unscrew and Open: Remove all visible screws and carefully separate the housing.
- Replace Batteries: It uses four CR123A batteries. Follow the graphical instructions inside the battery enclosure for correct placement.
- Seal and Secure: Ensure the enclosure is properly sealed to prevent water ingress. Screw the housing back together.
How to Change the Battery in LeaksProtect
LeaksProtect requires careful handling given its role in detecting leaks:
- Turn Off Power: Ensure the device is deactivated.
- Unscrew: Remove the small screws from the device’s corners.
- Replace Batteries: Insert two AAA batteries, referring to the internal diagram for correct orientation.
- Reassemble: Make sure the protective gel is intact for water resistance, then screw the device back together.
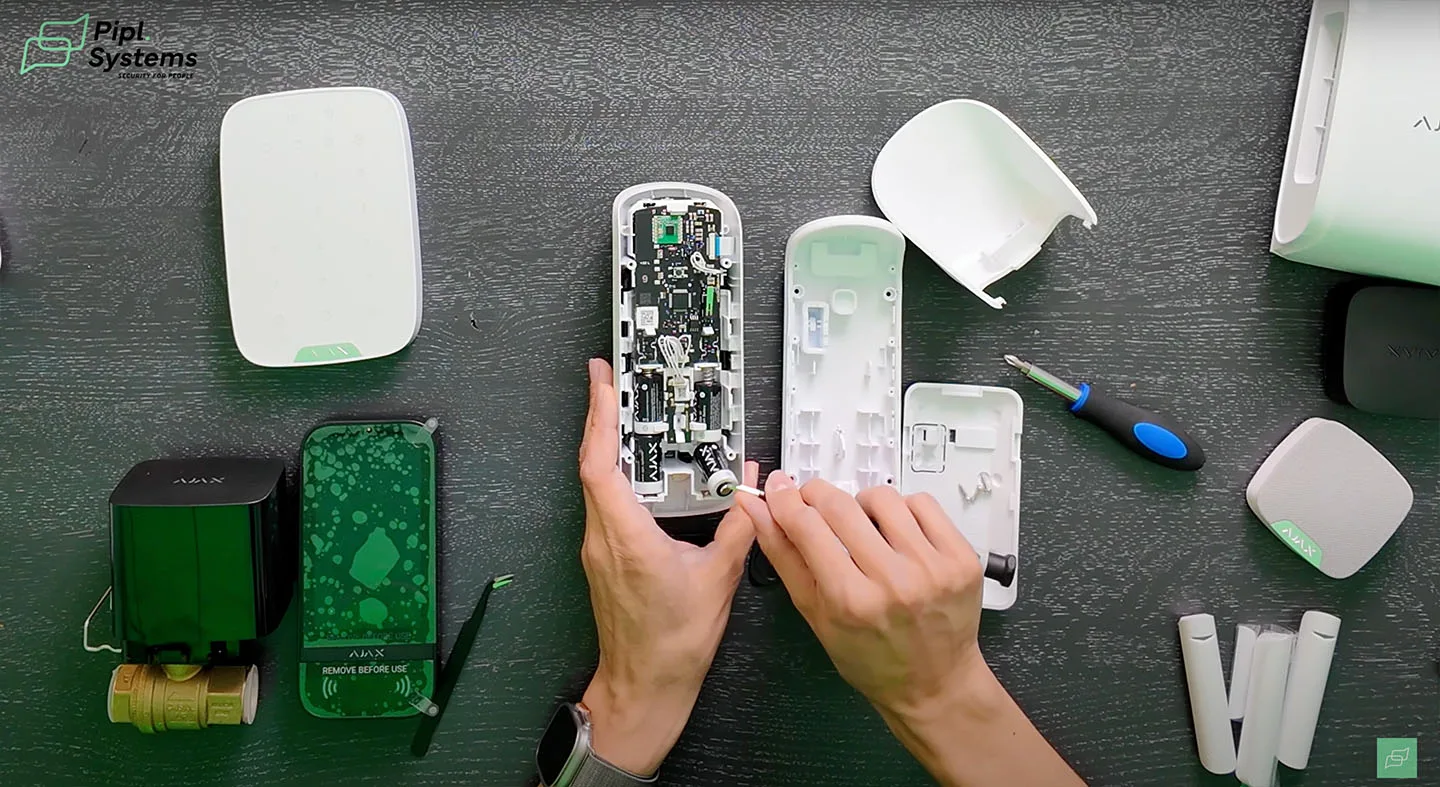
How to Replace Battery in Ajax HomeSiren and MotionProtect Curtain
For both Ajax HomeSiren and MotionProtect Curtain, the steps are quite similar:
- Deactivation: Press the power button to turn off the device.
- Access: Slide down the smart bracket and unscrew the device using a Phillips screwdriver.
- Battery Replacement: These devices use CR123A batteries. Replace by ensuring correct alignment as per the internal graphics.
- Reassemble: Secure all parts back together, ensuring all seals are intact to prevent environmental damage.
Maintaining your Ajax alarm sensors through timely battery replacements ensures uninterrupted security coverage and efficiency. Familiarize yourself with the specific needs of each device to provide expert maintenance.
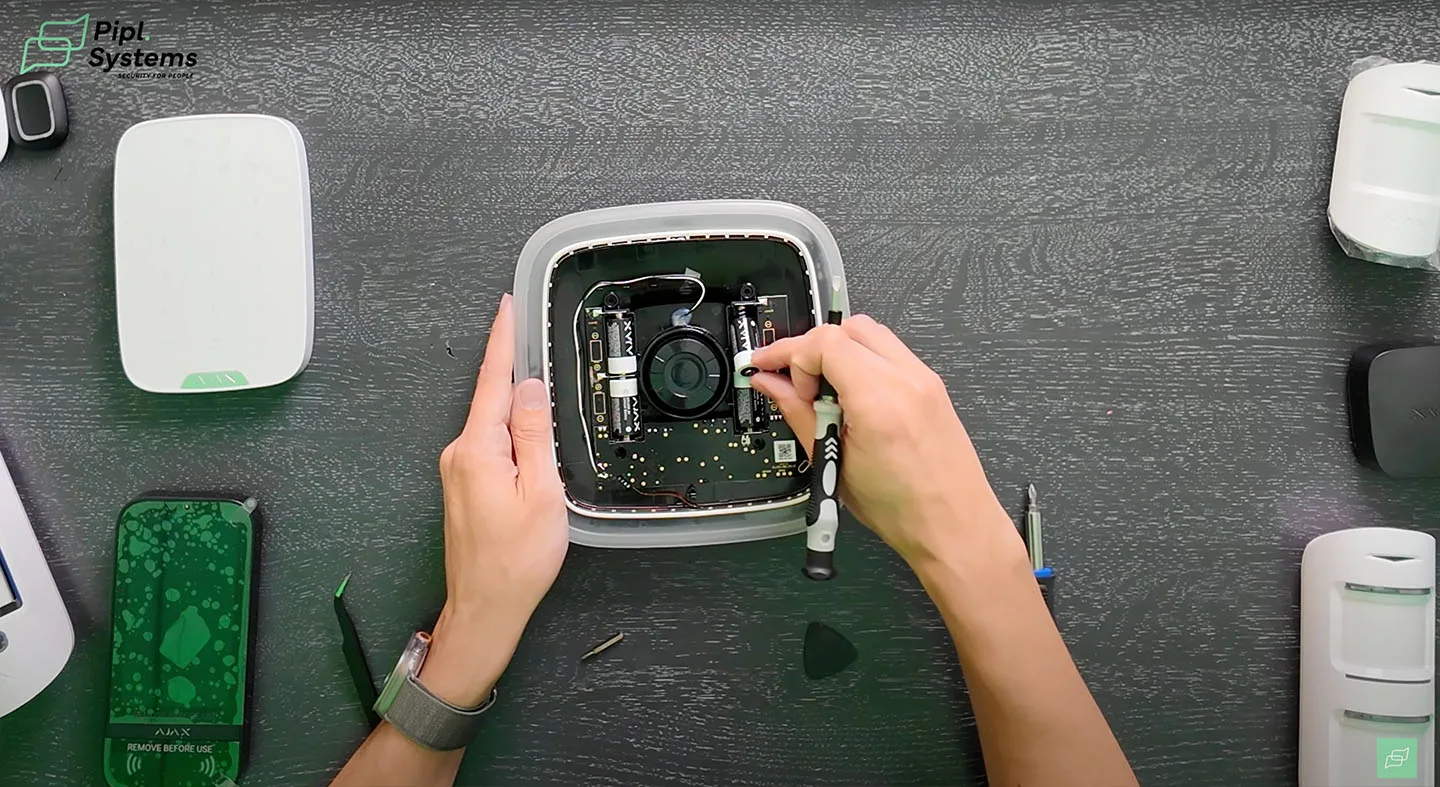
How to Change the Batteries in MotionProtect Outdoor Jeweller
- Easy Removal Process: Using a Philips screwdriver, remove the two screws securing the device.
- Overcoming Resistance: For outdoor devices, employ a flat disc to create a gap, facilitating easier removal.
- Battery Replacement: Utilize two CR123A batteries, ensuring correct polarity alignment.
- Waterproofing: Reinsert the device, ensuring proper silicone adjustment to prevent water ingress.
How to Replace the Batteries in StreetSiren DoubleDeck
- Efficient Access: Flip the device upside down and remove the screws located on the back panel.
- LED Strip Awareness: Remove the enclosure from the top to avoid disrupting the LED strip.
- Battery Type: Install four CR123A lithium batteries, aligning with the graphics for polarity guidance.
- Secure Installation: Reassemble the device, ensuring a snug fit for outdoor installation.
How to Change Batteries in DualCurtain Outdoor Jeweller
- Smart Bracket Removal: Slide the smart bracket to access the device’s interior.
- Delicate Extraction: Remove four screws using a Philips screwdriver and gently detach the enclosure.
- Battery Replacement: Utilize two CR123A batteries, aligning them carefully with the device’s layout.
- Waterproofing Measures: Reinsert the device and ensure proper sealing against water and dust.
How to Replace Batteries in LifeQuality Jeweller
- Power Shutdown: Turn off the device before proceeding to battery replacement.
- Smart Bracket Removal: Rotate the smart bracket counterclockwise to access the screws.
- Battery Removal: Use a Philips screwdriver to remove the screws and gently detach the enclosure.
- Battery Installation: Insert two CR123A batteries, adhering to polarity markings for correct orientation.
- Secure Reassembly: Reassemble the device, ensuring a snug fit and alignment before securing the screws.
You may also be interested in previous articles about solutions from Ajax Systems:
How Important is a Control Panel for your Security? / Review of Ajax Hub 2 Plus
The Ultimate Guide to Ajax KeyPad TouchScreen Jeweller / FULL REVIEW
How to Change Batteries in FireProtect 2
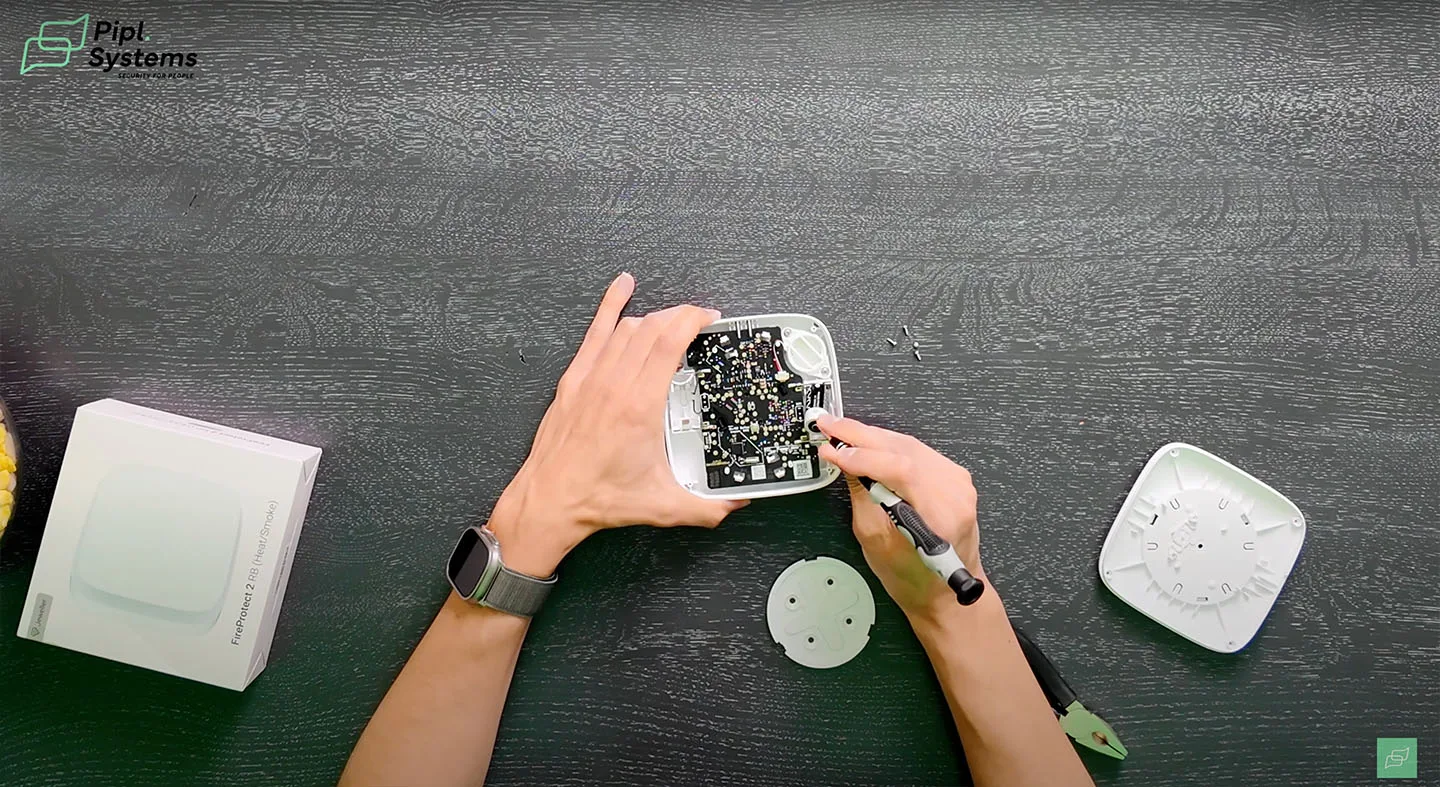
- Smart Bracket Removal: Rotate the smart bracket counterclockwise and remove it from the slot.
- Screw Removal: Unscrew the device’s corners to detach the back panel.
- Gentle Battery Extraction: Use a flat screwdriver to carefully remove the batteries, following polarity markings.
- Battery Replacement: Insert new batteries, ensuring correct polarity alignment as indicated.
- Secure Reassembly: Reattach the back panel and smart bracket, ensuring a secure fit for optimal performance.
Conclusion: Mastering Battery Replacement for Ajax Alarm Sensors
In this comprehensive guide, we’ve delved into the intricate process of replacing batteries in various Ajax alarm sensors, catering to both indoor and outdoor installations. By adhering to the detailed instructions provided for each device, you can ensure seamless functionality and extended battery life for your security system.
From the MotionProtect Outdoor Jeweller to the StreetSiren DoubleDeck, and from the DualCurtain Outdoor Jeweller to the LifeQuality Jeweller and FireProtect 2, we’ve covered the spectrum of Ajax devices, offering expert insights and practical tips for efficient battery replacement.
Remember, proactive battery management is crucial for maintaining the integrity of your security system. By following the step-by-step procedures outlined in this guide and adhering to manufacturer recommendations, you can safeguard your property against potential threats and ensure uninterrupted protection.
As you embark on your journey to optimize the performance of your Ajax alarm sensors, we encourage you to stay informed and prepared. Subscribe to Pipl Systems email newsletter to receive regular updates and valuable insights into the latest developments in the security industry.
Thank you for entrusting us with your security needs. Together, we’ll continue to elevate safety standards and empower individuals and businesses with cutting-edge solutions.
Stay vigilant, stay protected, and stay connected with Pipl Systems.

To access a special offer on Ajax Systems products, simply visit the Ajax Systems page on the Pipl Systems website and make a request. Our team will connect you with an Ajax Systems representative in your region, who will assist you in obtaining an offer on favorable conditions tailored to your requirements. Take advantage of this opportunity to enhance your security systems with cutting-edge Ajax Systems products. Visit our website and submit your request today to unlock exclusive benefits and secure your organization’s assets.