

Welcome to Pipl Systems Media Portal
Welcome to the Pipl Systems media portal! As third-party experts on behalf of Pipl Systems, we are here to guide you through the ins and outs of maintaining your Ajax security devices. Today, we dive into the Ajax Hub 2 Plus, focusing on how to change battery to ensure your system runs smoothly and effectively.
Does your Ajax Hub notify you that it needs a battery change, and you don't have time to figure it out? This article is for you!
Replacing the battery in your Ajax Hub 2 Plus is crucial for maintaining the integrity of your security system. Over time, batteries can degrade due to various factors such as temperature fluctuations and prolonged use. This guide will walk you through the process of disassembling your Hub, replacing the battery, and reassembling it with precision. By following these steps, you'll ensure your security system remains reliable and effective.
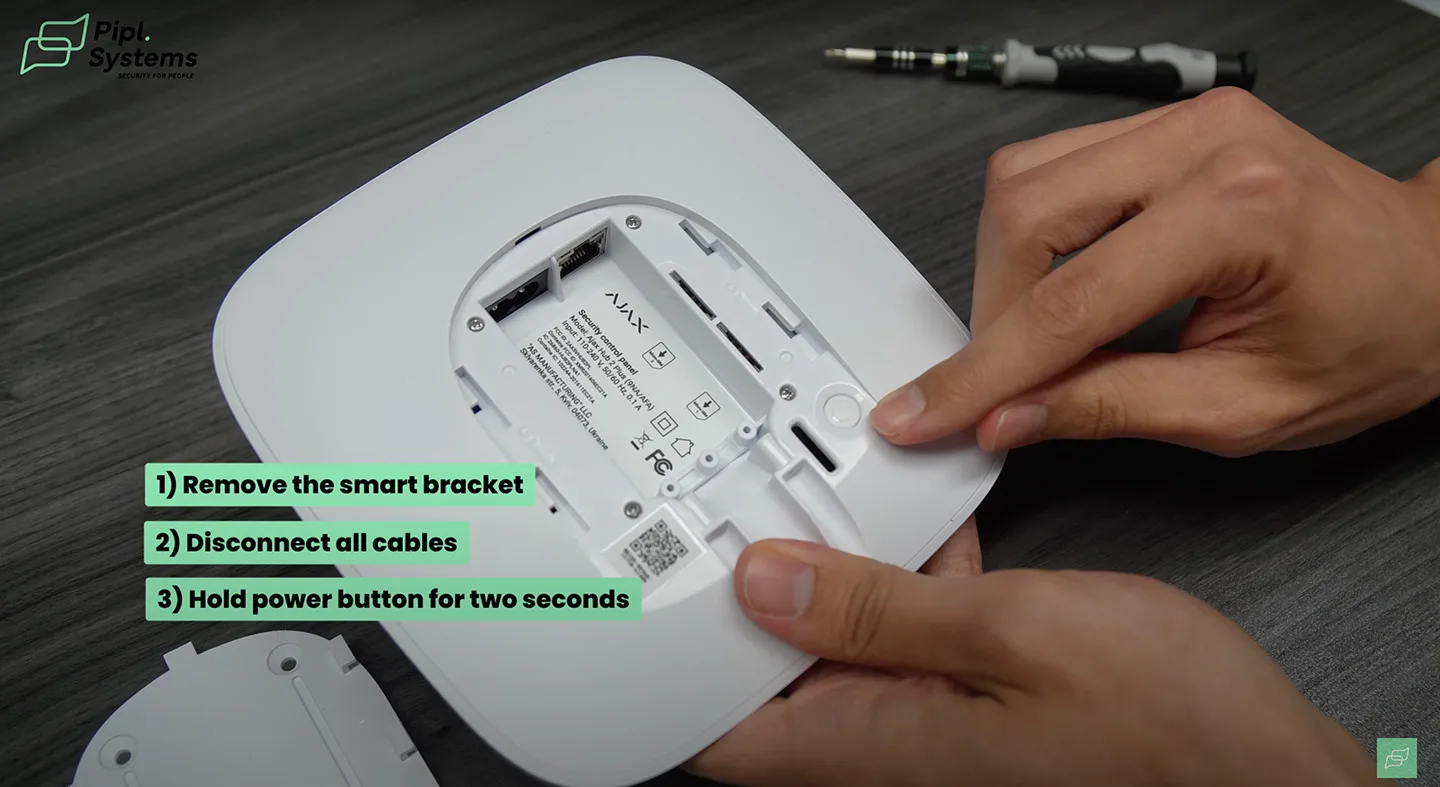
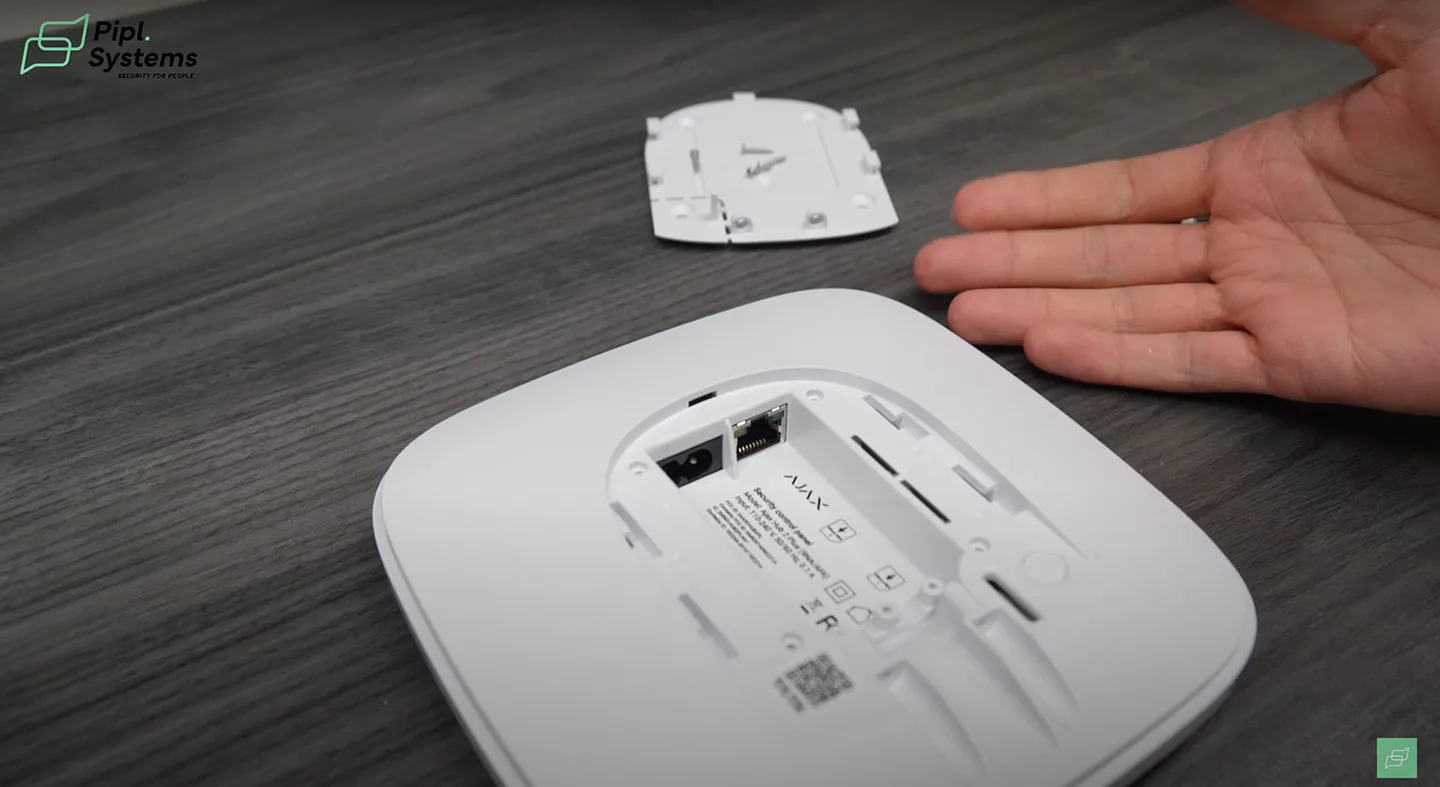
Remove the Smart Bracket and Disconnect All Cables

To start, make sure your Ajax Hub 2 Plus is completely powered down. This ensures safety and prevents any electrical shorts during the process. Here's how to begin:
- Turn off the power: Disconnect the power supply and Ethernet cables from the back of the device.
- Remove the Smart Bracket: Turn the hub around and slide the smart bracket downward to detach it. This step exposes the internal screws and components you'll need to access.
- Disconnect Cables: Unplug any connected CAT 5 cables and the power cable from the device.
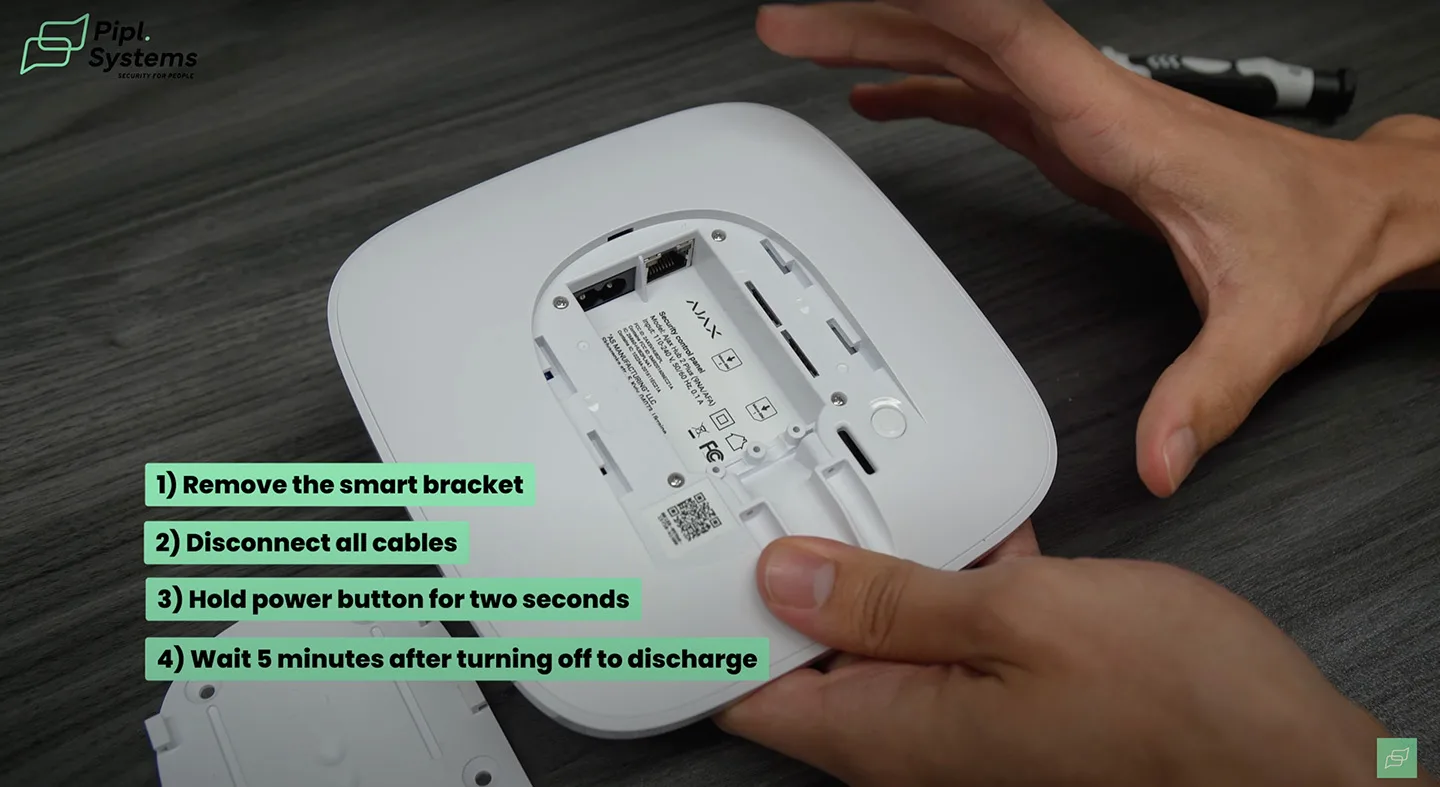
Hold the Power Button
1 / 2
Before you proceed with opening the device, you must ensure it is fully discharged:
- Press the Power Button: Hold the power button located on the device for about 2 seconds.
- Wait: After pressing the button, wait for at least 5 minutes. This delay ensures that any residual charge in the internal components dissipates, making it safe to handle.
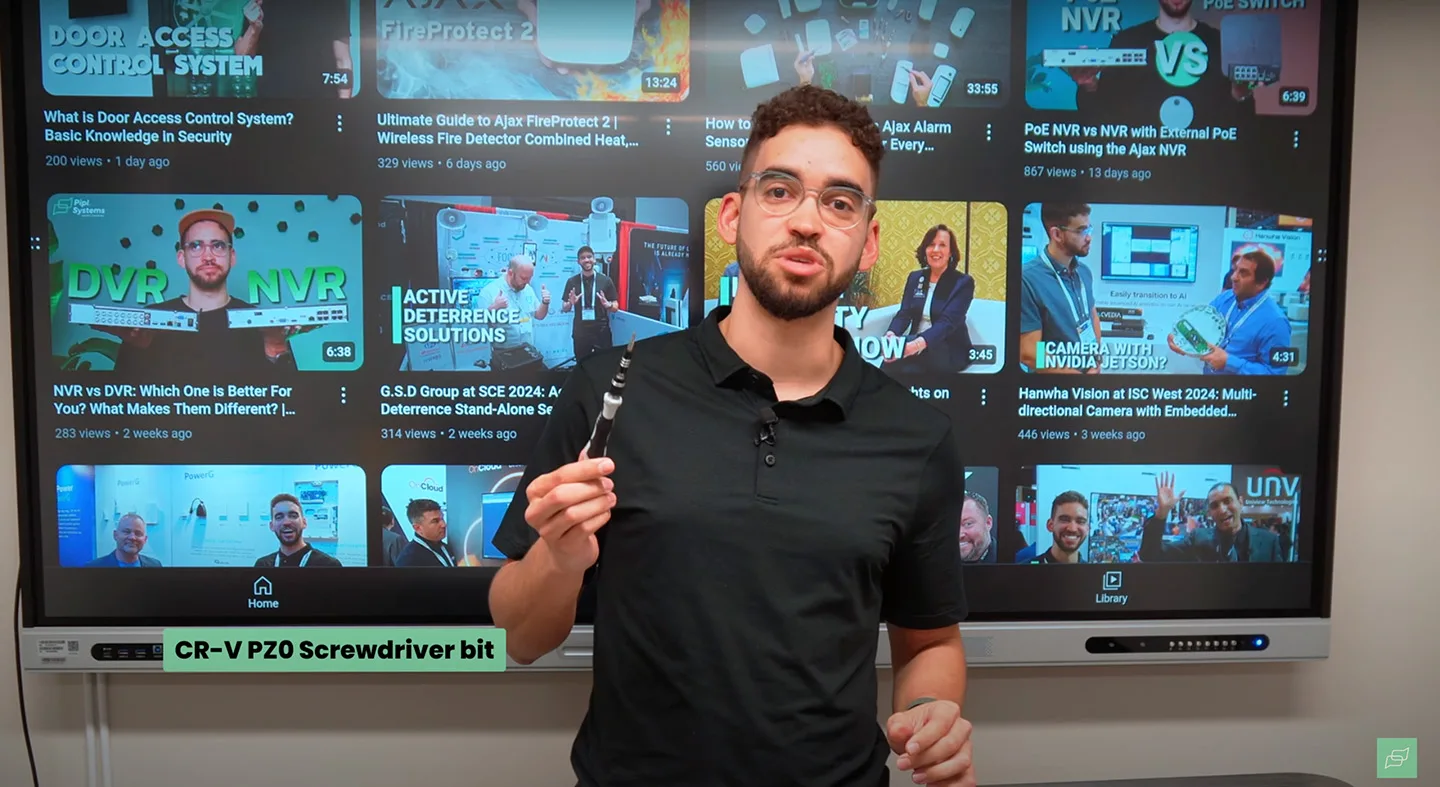
Unscrew the Outer Four Bits and Remove the Front Panel
1 / 2
With the device fully discharged, it's time to open it up:
- Locate the Screws: Identify the four outer screws that secure the front panel.
- Unscrew the Bits: Using a suitable screwdriver (a CR-V PZ0 bit is recommended), remove these four screws.
- Detach the Front Panel: Gently wiggle the front panel to loosen it, then lift it away to reveal the internal components.
Unscrew the Internal Bits and Turn the Board Over
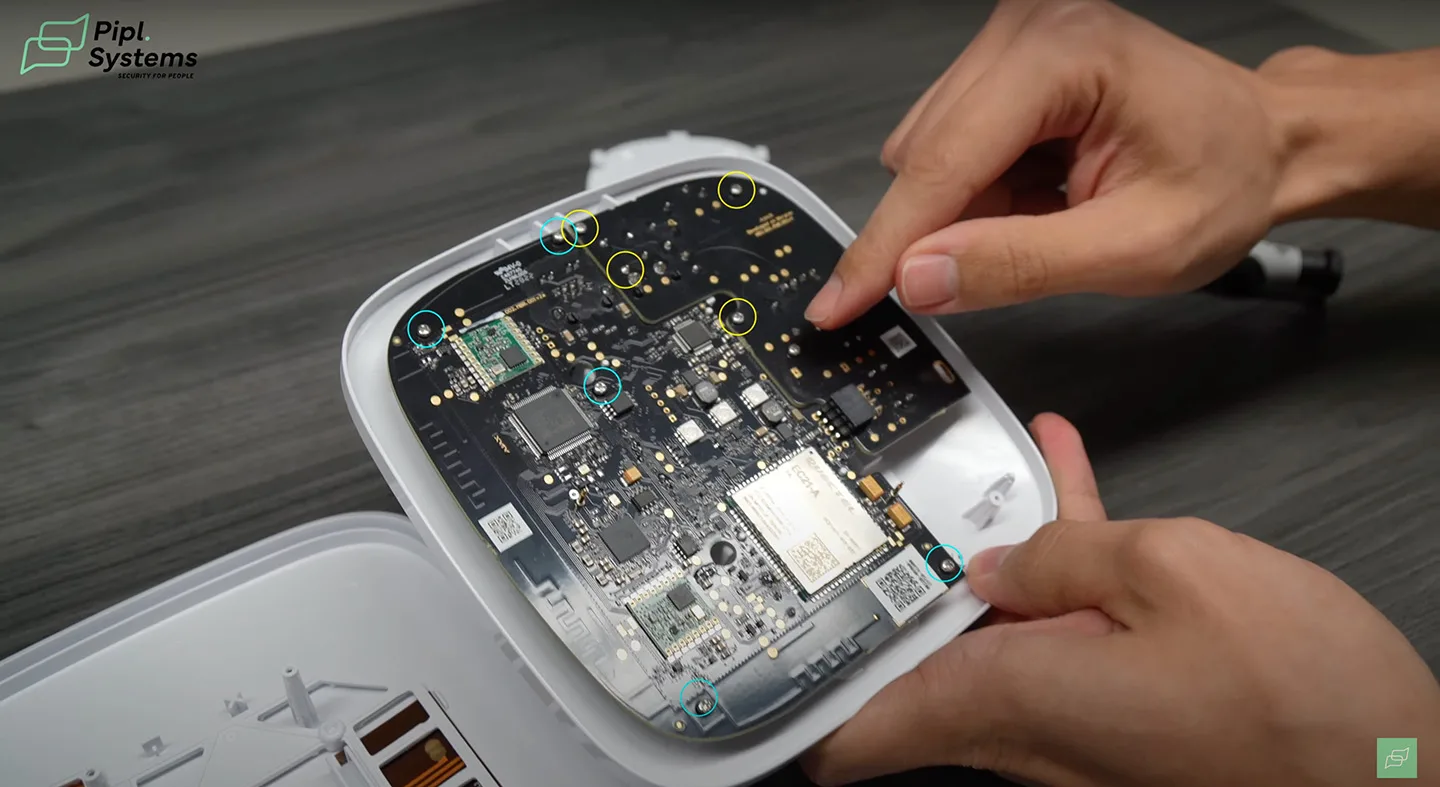
Now, you'll access the battery by removing the internal components:
- Four on one side.
- Five on the other side.
- Remove Screws: Use the same screwdriver to remove these nine screws.
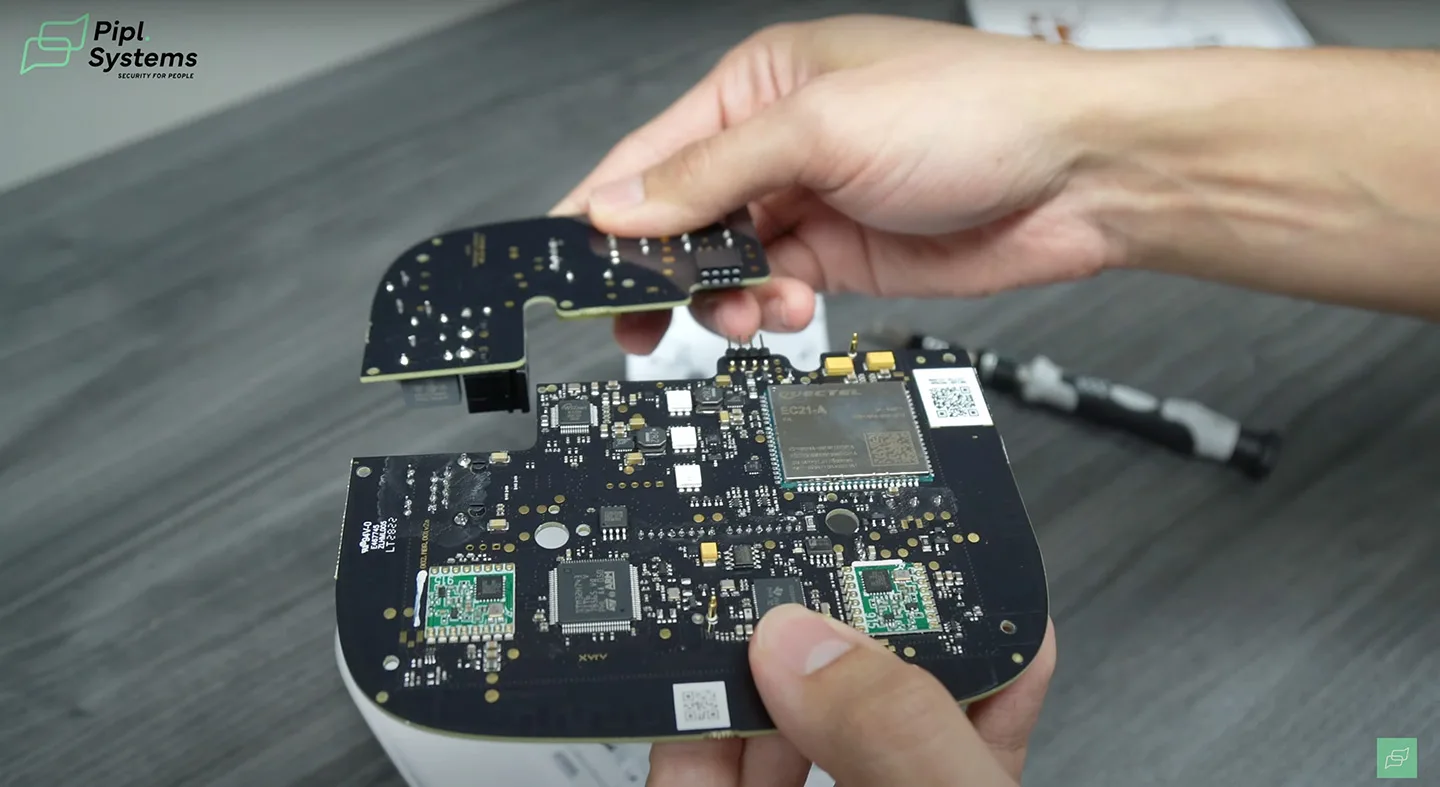
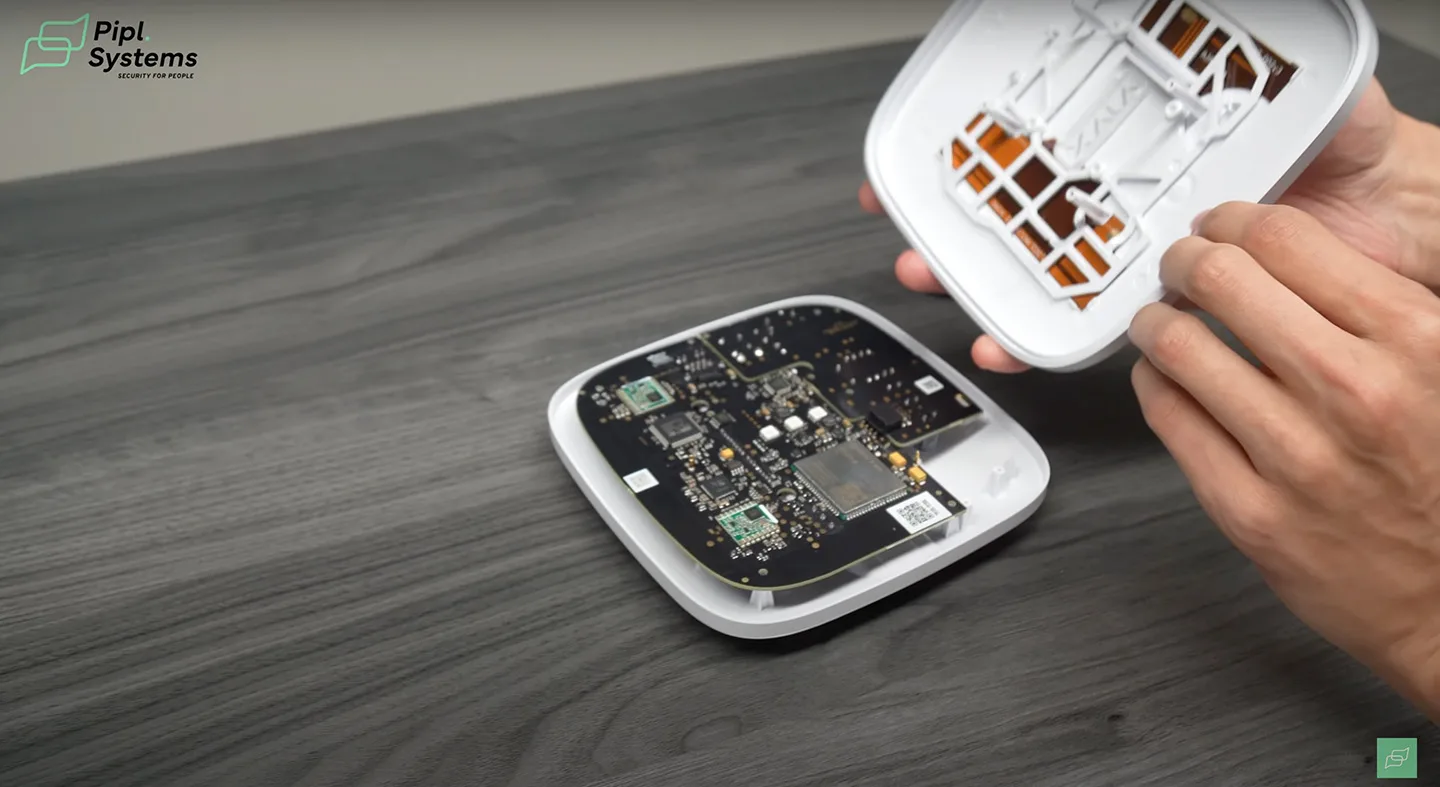
- Flip the Board: Carefully flip the main board to expose the battery compartment. Take care not to damage any components or connectors during this process.
Expert Tips for Professional Installers and Integrators
Professional installers and integrators can benefit from a few expert tips to streamline the battery replacement process:
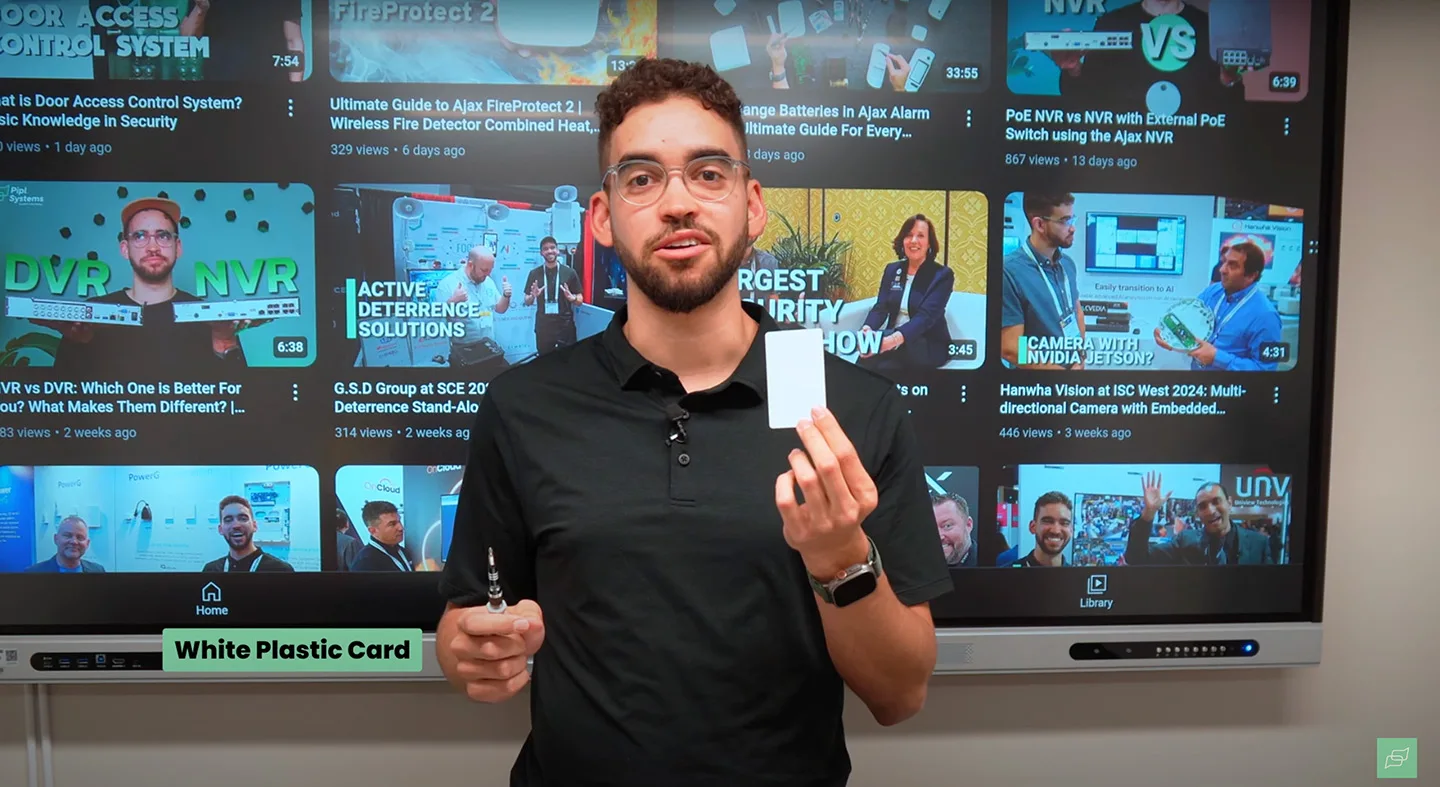
- Use Proper Tools: Ensure you have the right screwdriver bits and a non-conductive tool, like a plastic card, to handle sensitive components.
- Handle with Care: When flipping the board, handle it gently to avoid damaging the delicate electronic parts.
- Document the Process: For future reference, document each step with photos or notes, especially if you manage multiple installations.
Regular maintenance, including timely battery replacement, is essential for the reliable performance of your Ajax Hub 2 Plus. By following these steps, you ensure that your security system remains operational and dependable.
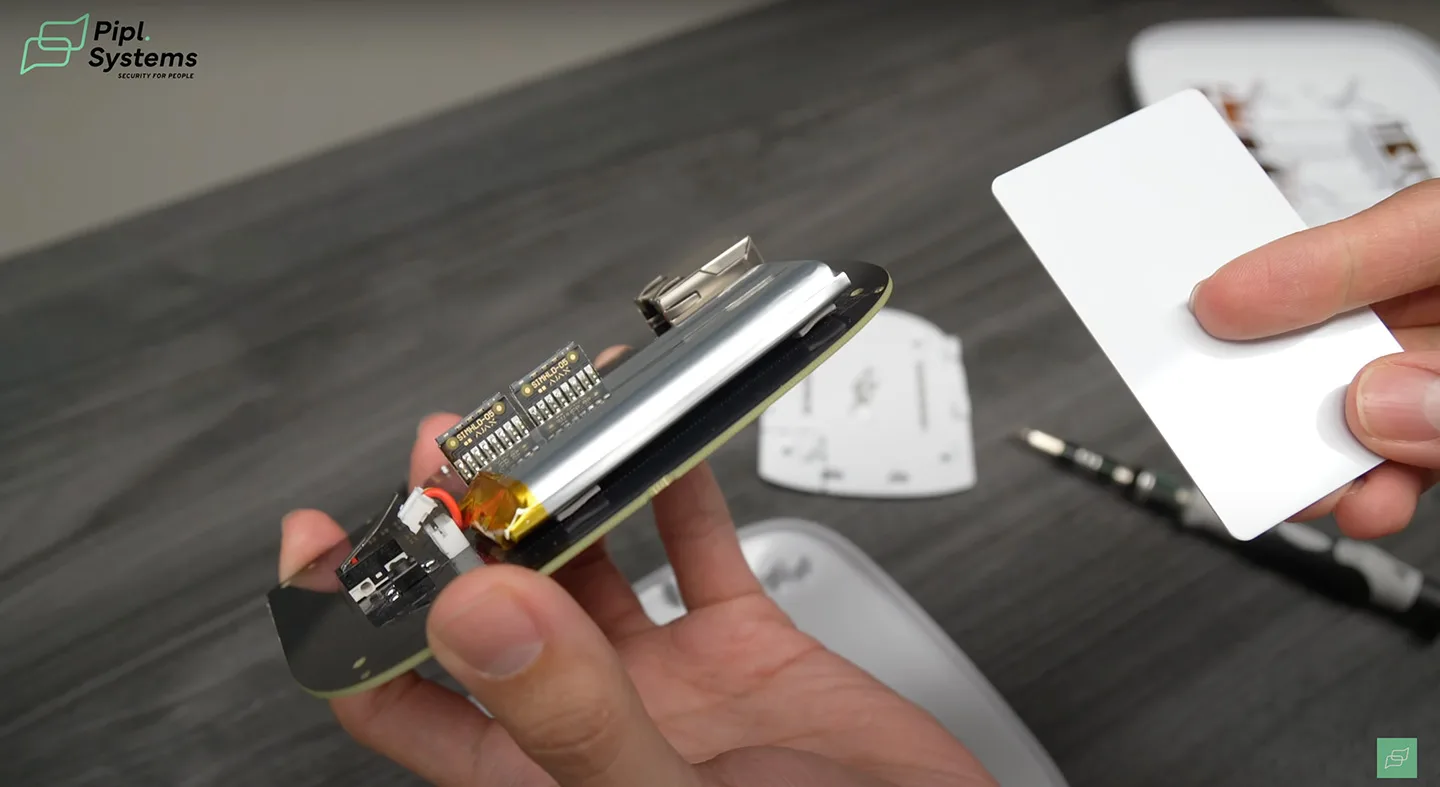
Disconnecting the Battery in Ajax Hub
1 / 2
Before you can replace the old battery, it needs to be safely disconnected:
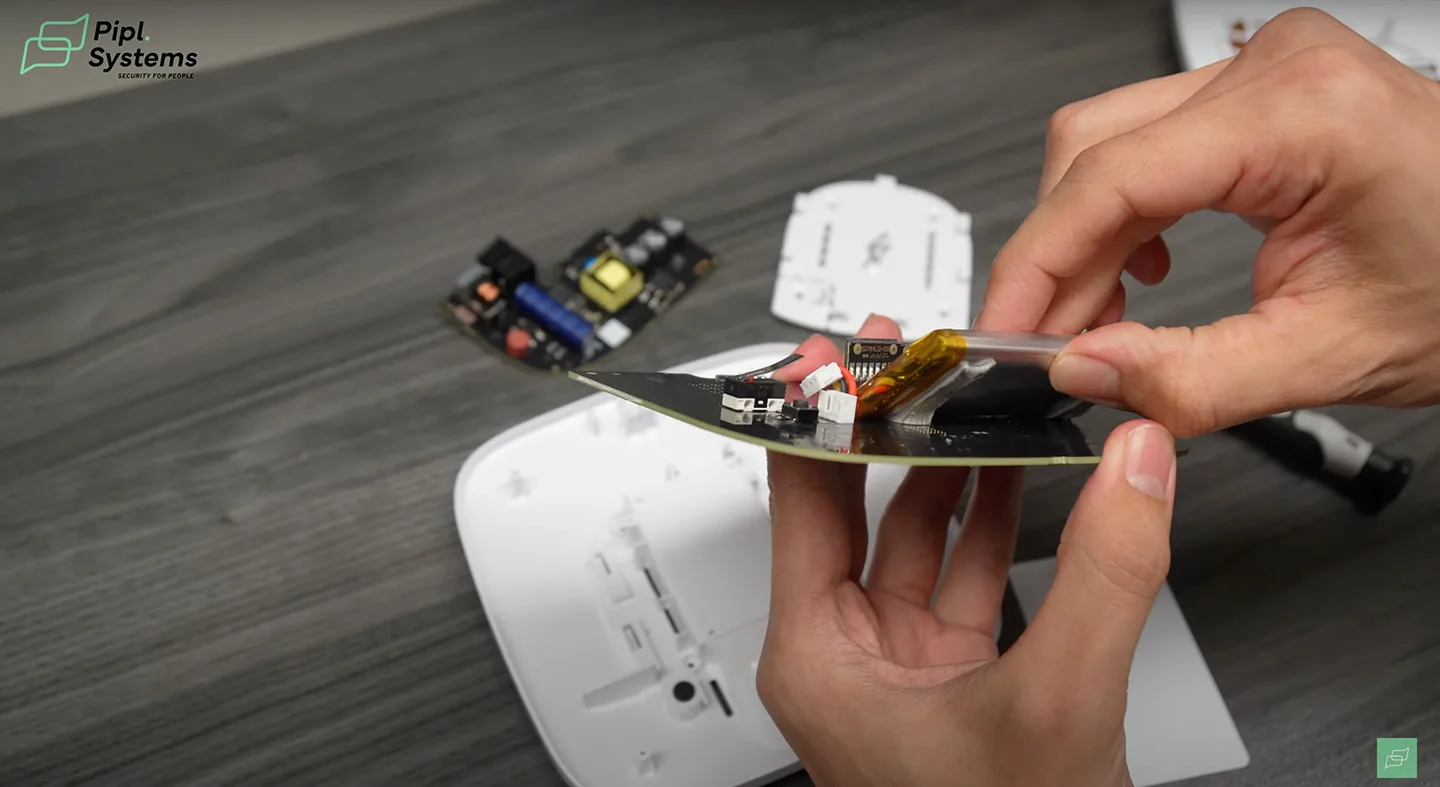
- Locate the Battery Clip: Inside the hub, you'll find a small clip securing the battery.
- Toggle the Clip: Carefully toggle the clip up to disconnect the battery. This step is crucial for ensuring safety and avoiding any potential damage to the board.
Now, you'll face the challenge of removing the battery, which is adhered with double-sided tape. Avoid using metal tools to prevent scratching the main board. Instead, use a plastic card.
1 / 3
Steps to Remove the Battery
- Insert the Plastic Card: Slide a plastic card under the battery, working gently to loosen the adhesive.
- Work Slowly: This process requires patience. Jiggle the card to slowly detach the battery from the tape without applying excessive force.
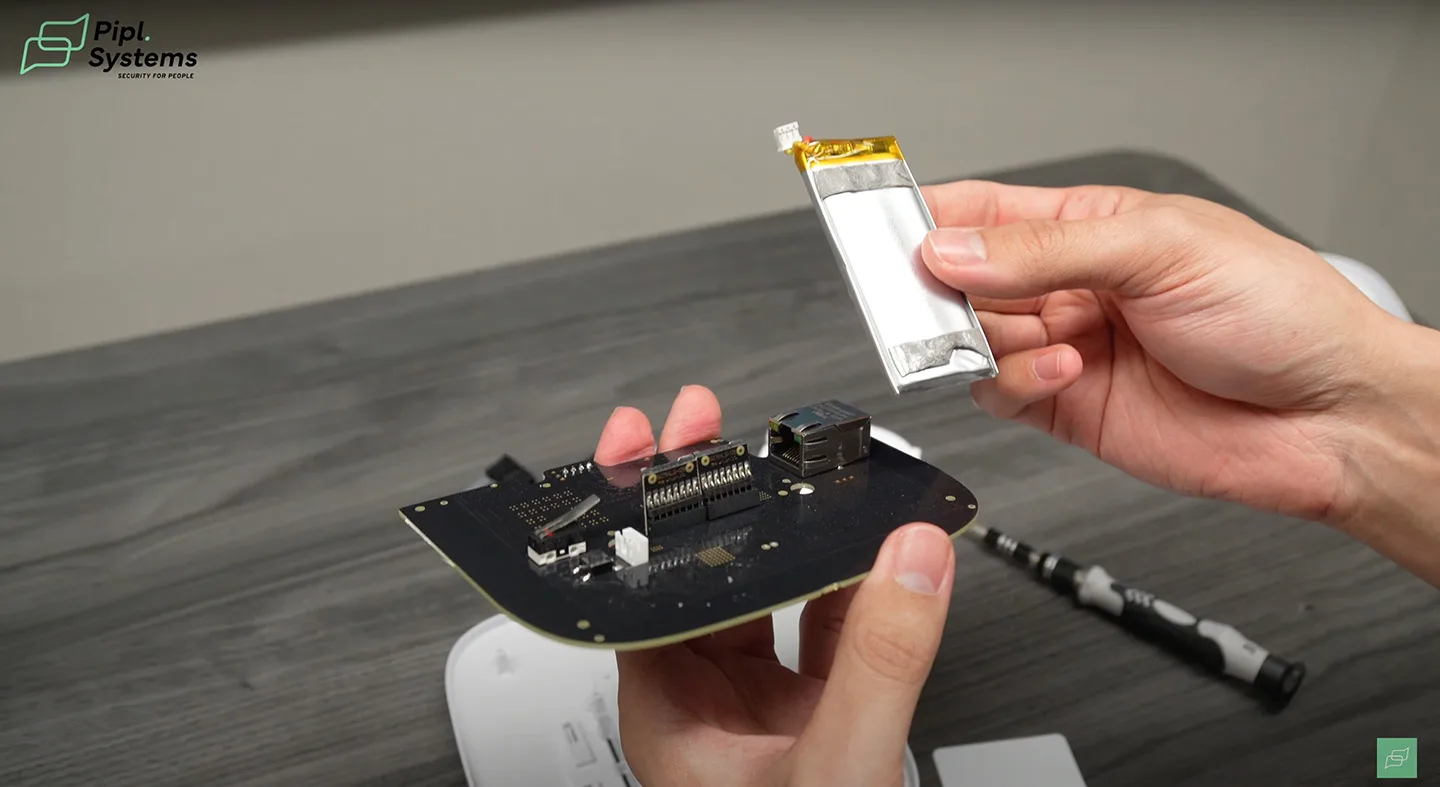
- Remove the Battery: Once the tape is sufficiently loosened, lift the battery out carefully.
How to Connect a New Battery to Ajax Hub

With the old battery removed, it's time to install the new one:
- Prepare the New Battery: Attach a fresh piece of double-sided tape to the new battery.
- Position the Battery: Place the new battery in the same location as the old one, ensuring the connectors are aligned correctly with the clip.
- Connect the Battery: Secure the new battery by reconnecting the clip. Ensure it is firmly in place to avoid any loose connections.
Step-by-Step Build of the Ajax Hub Boards and Enclosure
Reassembling the hub correctly is crucial for its functionality:
- Reconnect the Bridge: Reconnect the bridge to the connector on the lower board. This step is essential for ensuring all internal components communicate effectively.
- Secure the Boards: Place the boards back into their original positions. Align them carefully with the connectors and screw holes.
- Replace the Screws: Use the previously removed screws to secure the boards. Ensure each screw is tightened properly but not overly tight to avoid damaging the board.
- Reattach the Front Panel: Align the four small sticks on the front panel with the corresponding holes on the board. Secure the front panel with the outer four screws.
- Reconnect All Cables: Plug in the CAT 5 cable and power cable.
You may also be interested in previous articles about solutions from Ajax Systems:
Ultimate Guide to Ajax FireProtect 2 | Wireless Fire Detector Combined Heat, Smoke, and CO Detector
How to Change Batteries in Ajax Alarm Sensors | Ultimate Guide For Every Jeweller Device
How Important is a Control Panel for your Security? / Review of Ajax Hub 2 Plus
The Ultimate Guide to Ajax KeyPad TouchScreen Jeweller / FULL REVIEW
Conclusion
Congratulations! You've successfully change battery in your Ajax Hub 2 Plus. This process, while detailed, ensures your security system continues to operate reliably. Regular maintenance, including timely battery replacements, is essential for maintaining the efficacy of your security system.
To stay informed about all events in the security industry and to receive more detailed tutorials like this one, subscribe to the Pipl Systems email newsletter. Join our community of professional installers and integrators and stay ahead with the latest updates in security technology.
Thank you for following along, and we look forward to seeing you in our next tutorial where we delve deeper into the features and configurations of Ajax security systems. Stay safe and secure!

To access a special offer on Ajax Systems products, simply visit the Ajax Systems page on the Pipl Systems website and make a request. Our team will connect you with an Ajax Systems representative in your region, who will assist you in obtaining an offer on favorable conditions tailored to your requirements. Take advantage of this opportunity to enhance your security systems with cutting-edge Ajax Systems products. Visit our website and submit your request today to unlock exclusive benefits and secure your organization's assets.