Part 1: Welcome and Introduction
1. Welcome to Pipl Systems Media Portal
Greetings, security enthusiasts, installers, and industry experts! As a third-party security professional closely affiliated with Pipl Systems, I am thrilled to share valuable insights and expertise through this exclusive article. Today, we delve into a crucial aspect of security projects – documentation.
1.1 Expert Insights on Security Project Documentation
In the realm of security systems, the importance of comprehensive project documentation cannot be overstated. In our discussions with security installers, consultants, and specialists, an intriguing pattern emerged. Many practitioners perform project documentation only upon specific requests. However, we aim to illustrate that creating meticulous project documentation holds intrinsic value. This documentation serves not only as a case study for personal growth but also as a valuable asset for end-users, offering insights for future scalability and system upgrades.
Part 2: Enhancing Security Projects – A Guide for Installers
As security professionals, we understand the pivotal role documentation plays in the success and scalability of security projects. Let’s explore a comprehensive guide on how project documentation can be the cornerstone of a robust security system.
2.1 The Significance of Project Documentation
In the dynamic field of security installations, project documentation serves as more than just a record. It becomes a strategic tool for understanding, troubleshooting, and upgrading security systems. Through meticulous documentation, installers can showcase their professionalism and competence.
2.2 A Template for Success
To aid fellow security experts in their documentation endeavors, Pipl Systems offers a comprehensive template. Accessible on our website, this template streamlines the documentation process. Let’s now embark on a step-by-step exploration of each section within the template.
Part 3: Unveiling the Template – A Step-by-Step Guide
3.1 Cover Page
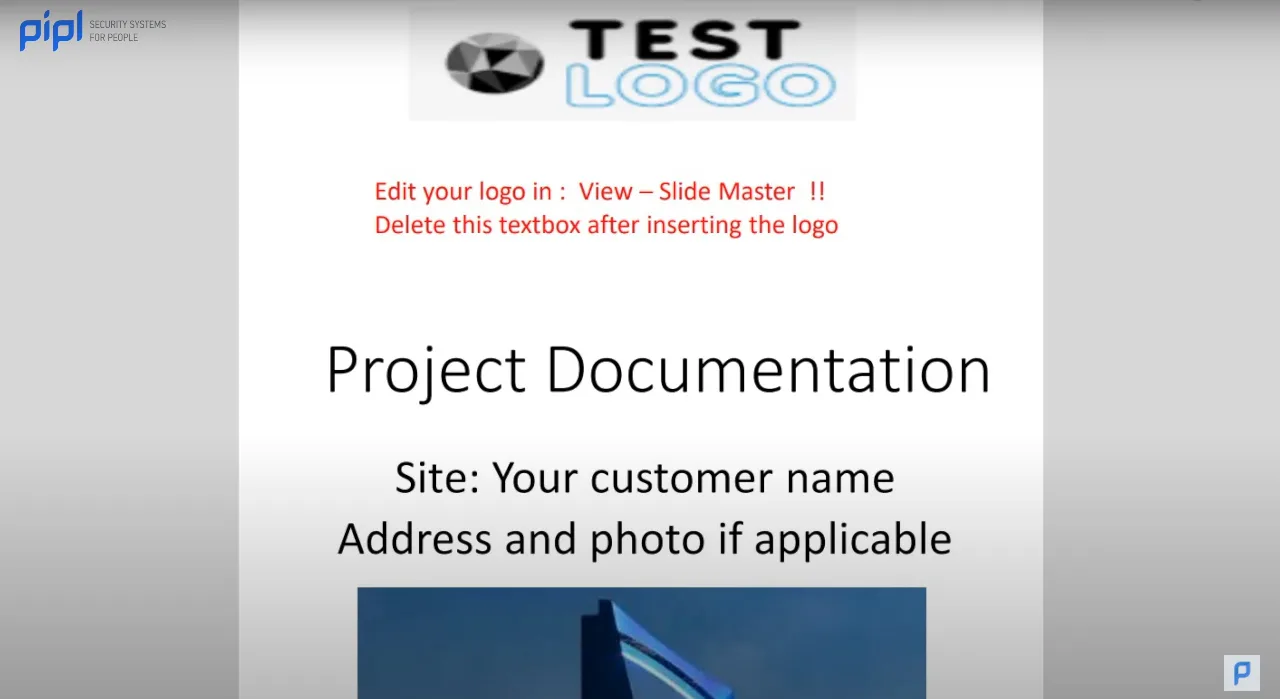
The cover page is not merely a formality but a visual representation of the project. Featuring your logo, customer details, and an image of the project site, it sets the tone for a professional and visually appealing document.
3.2 Table of Contents
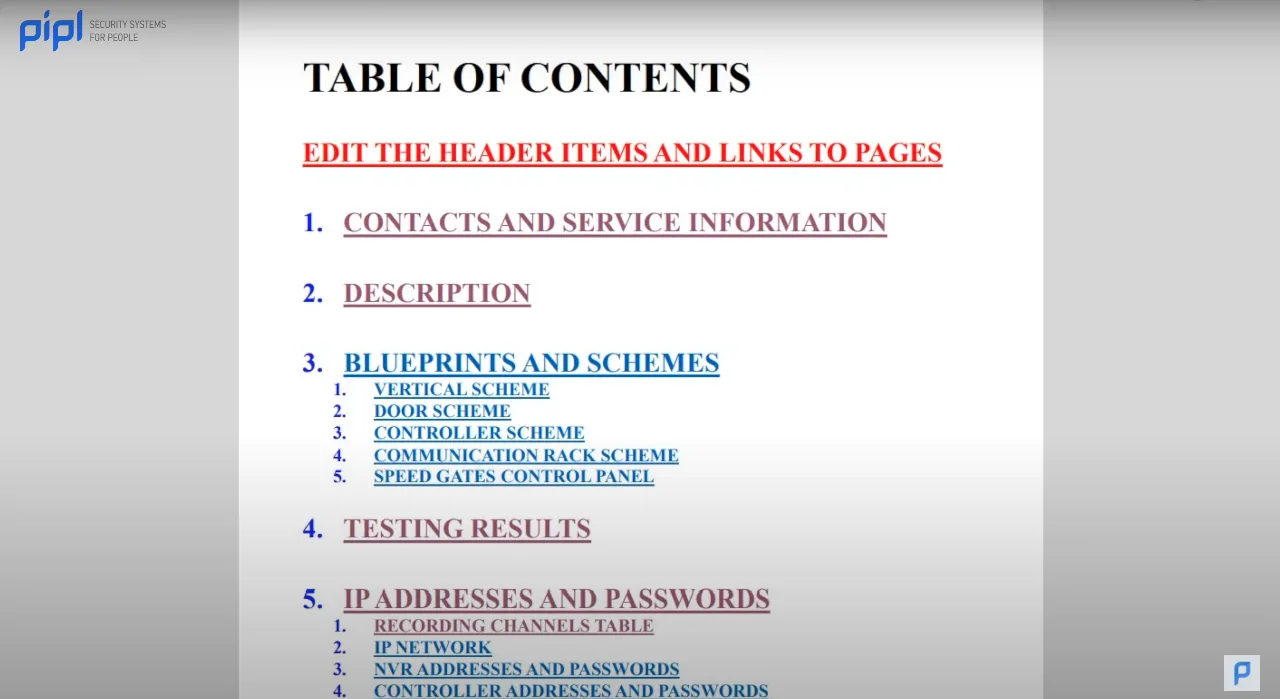
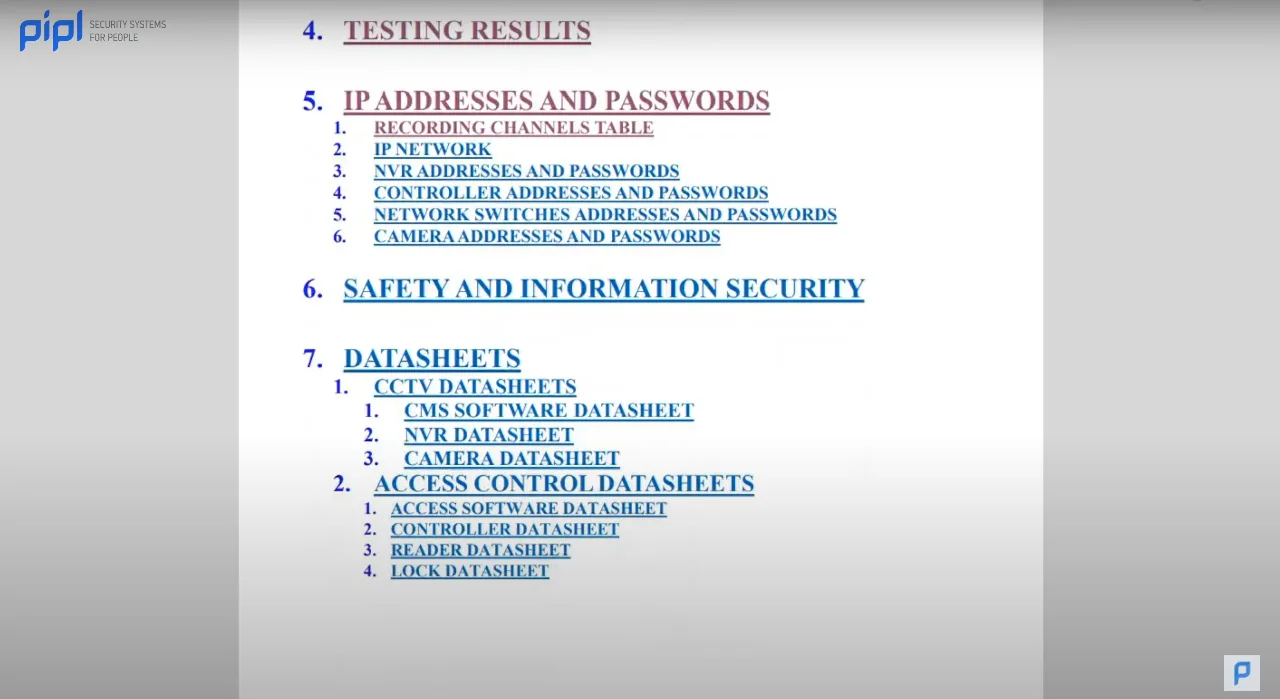
Often overlooked, the table of contents is a navigator for the reader. In a world where attention spans vary, this section provides a quick overview, allowing users to jump to specific sections of interest.
3.3 Contact and Services
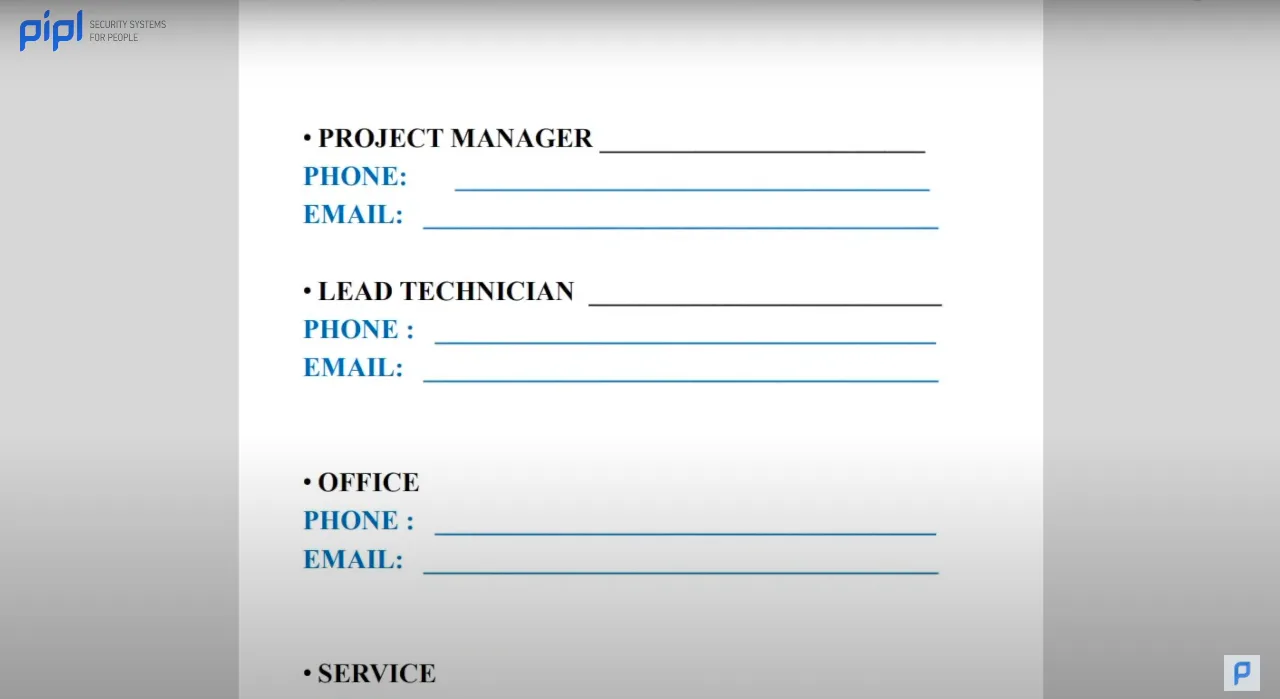
The first practical section offers vital contact information. Project managers, lead technicians, and office details are presented, ensuring that end-users know exactly who to reach out to for queries or future upgrades.
3.4 Project Description
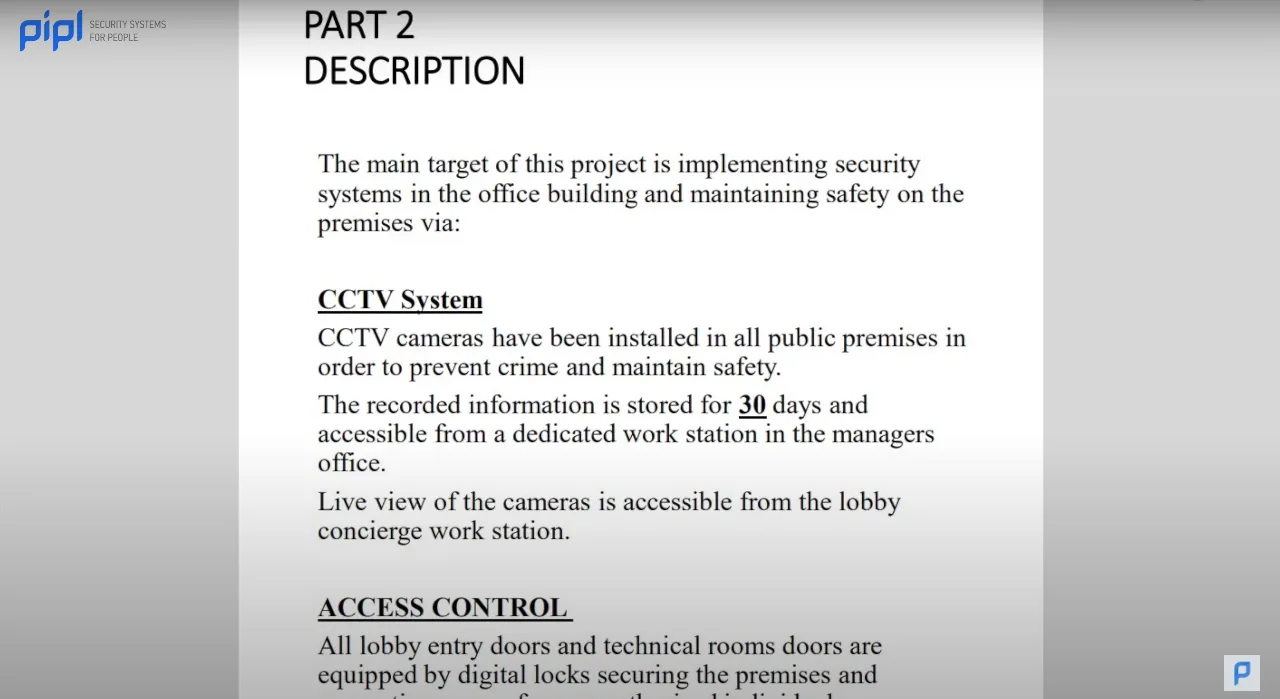
This section offers a deep dive into the specifics of the project. Details on the CCTV system, Access Control integration, and other technologies employed provide a comprehensive overview.
3.5 Blueprints and Charts
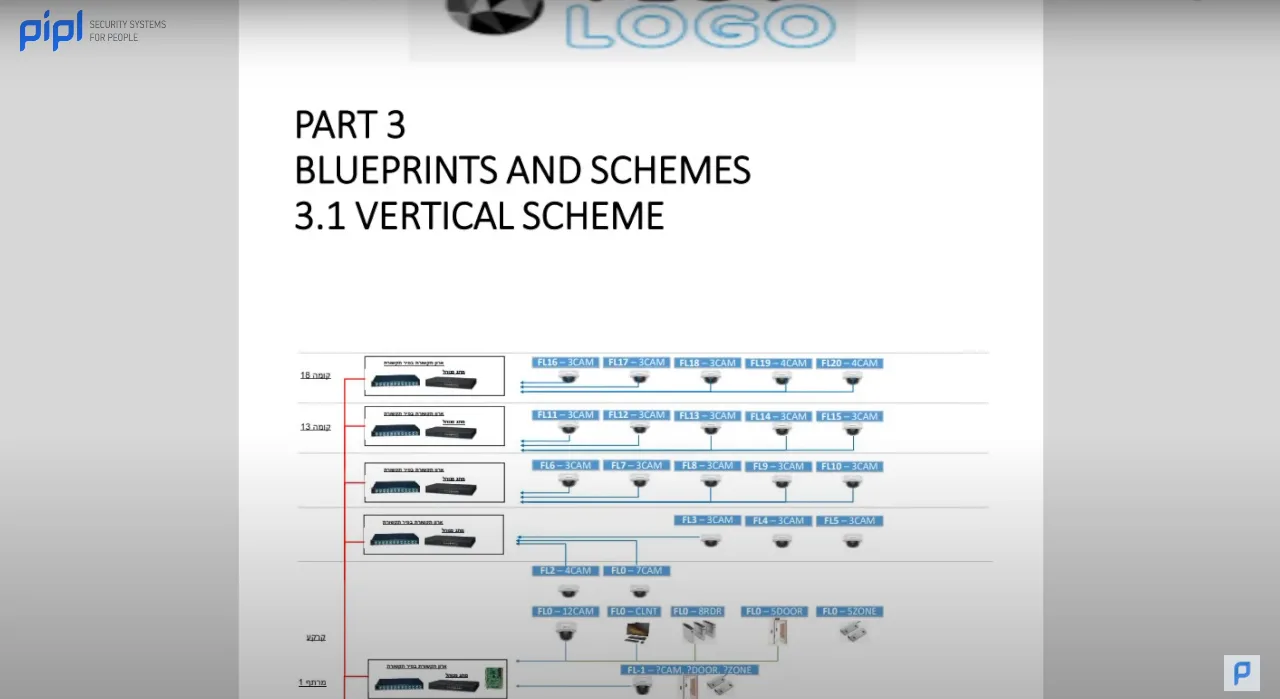
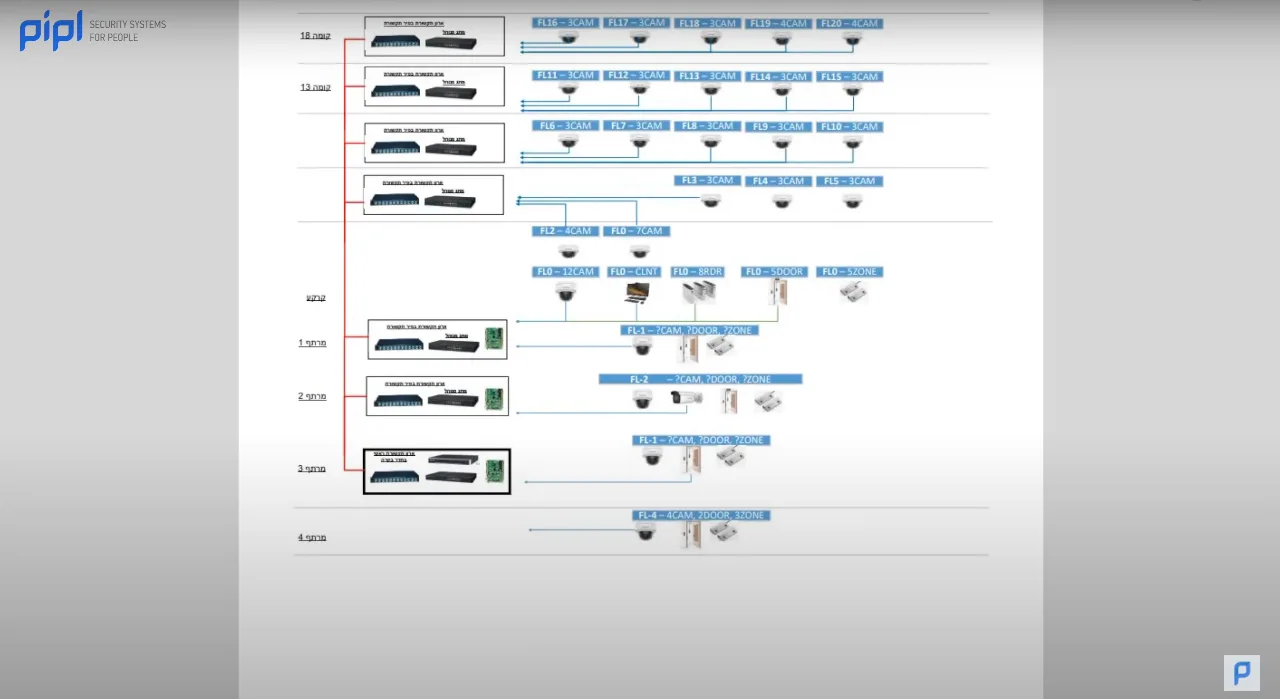
Arguably the heart of the documentation, blueprints, and charts visually represent the system’s layout. Separated by building levels, these blueprints detail camera locations, communication cabinets, and switch configurations, offering an invaluable global view.
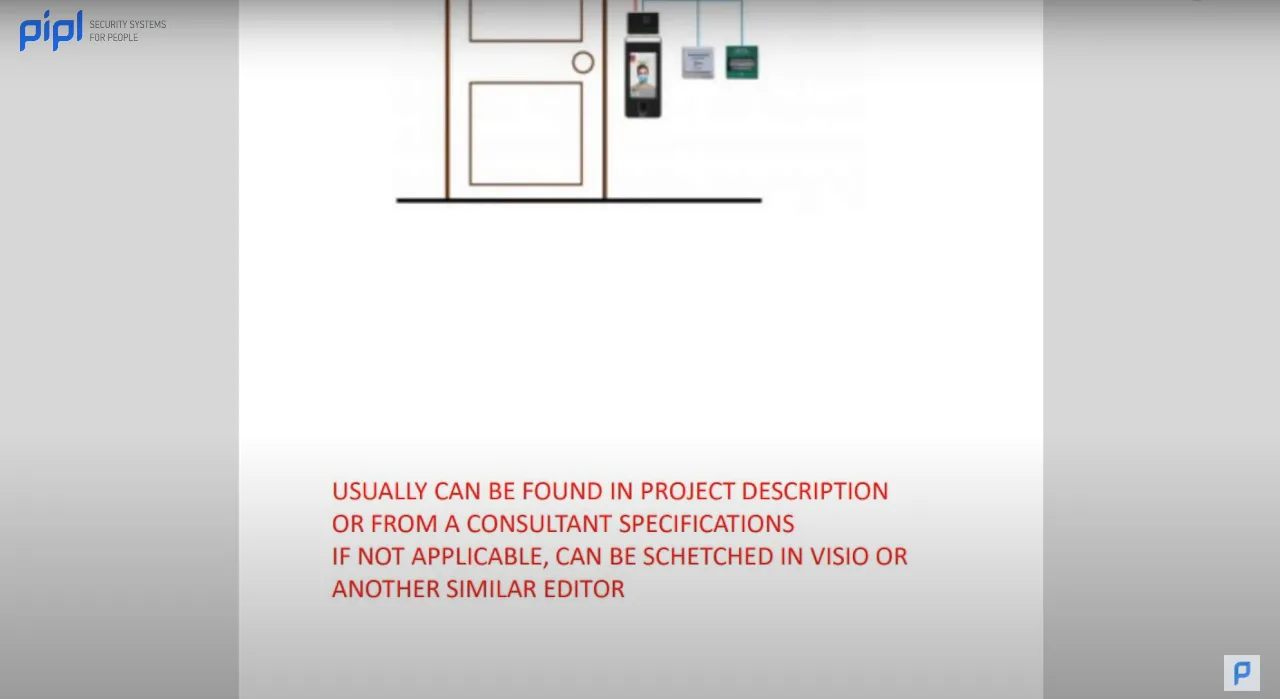
3.6 Access Control Diagrams
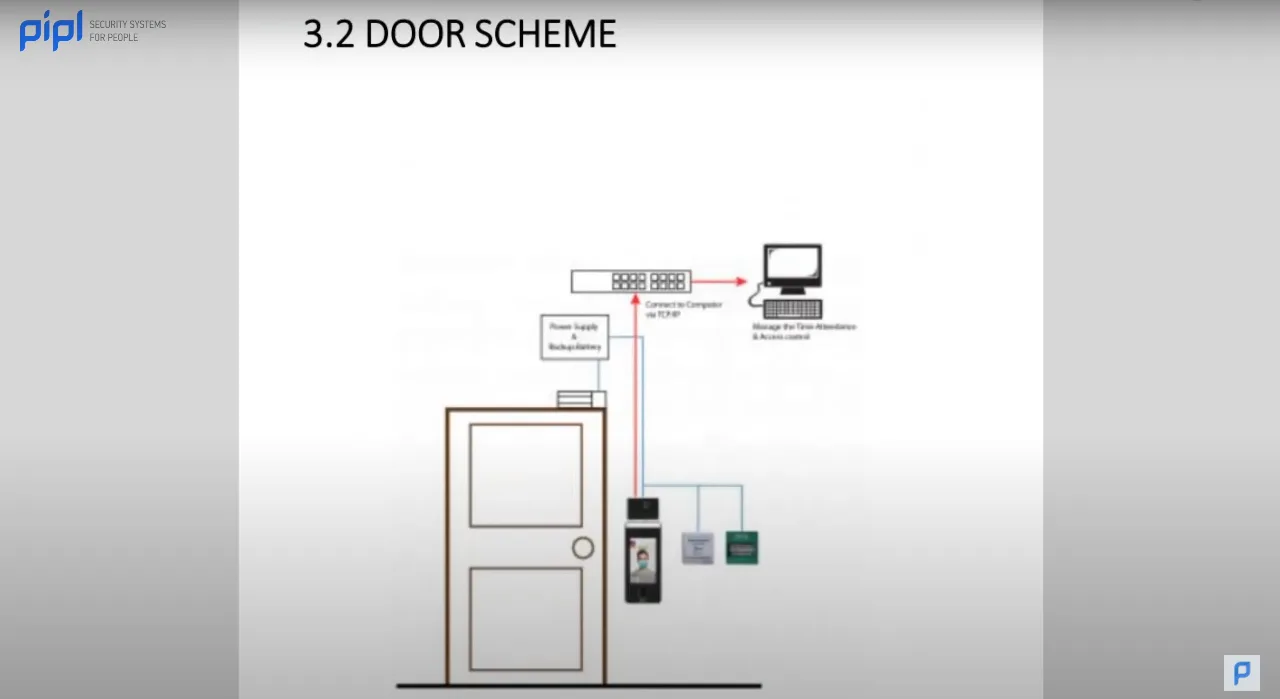
Complementing the visual representation of cameras, access control diagrams illustrate how the access control system functions. This aids in understanding the intricacies of door controllers, readers, and other components.
3.7 Additional Notes and Tips
Our template includes thoughtful notes and tips from experienced professionals. These insights guide users in creating their documentation efficiently.
3.8 Access Control Diagrams 2
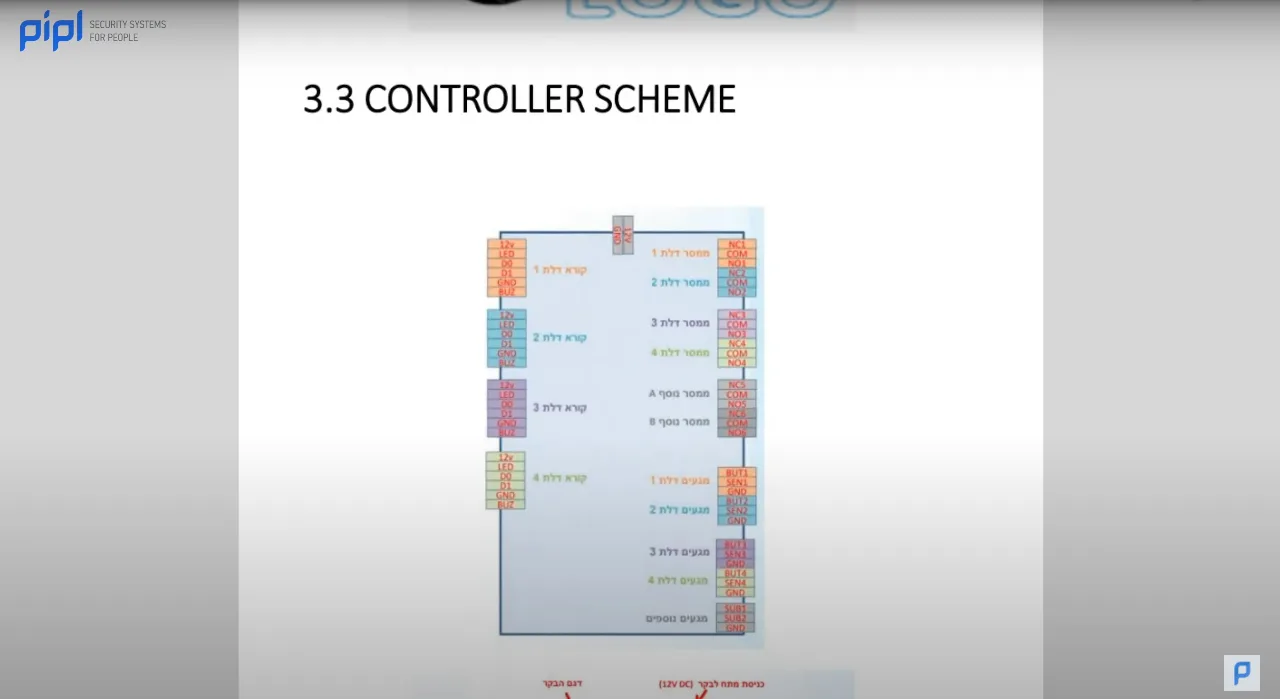
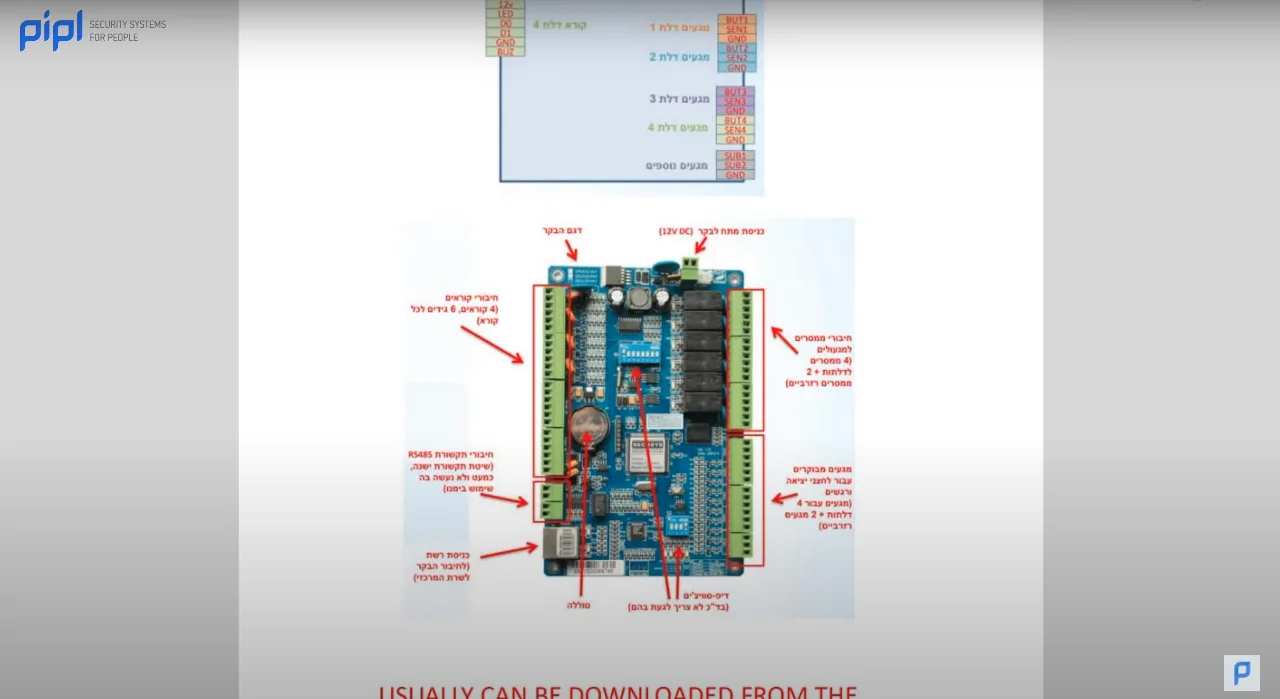
Continuing with our exploration of the project documentation template, we now delve into the intricacies of access control diagrams. Here, we meticulously detail the main controller, with arrows pointing towards the expanders, battery dip switches, and all relevant information about the access control system.
The primary utility of this section lies in its role as a reference point. Imagine the scenario where an end user wishes to make modifications to the access control system. By consulting this document, one can seamlessly navigate through the installed components. For new technicians stepping onto the site, this serves as an invaluable guide, eliminating the need for extensive searches to gather information. All these details can usually be downloaded from the manufacturer’s website, making the process easily accessible and efficient.
3.9 Communication Rack Scheme
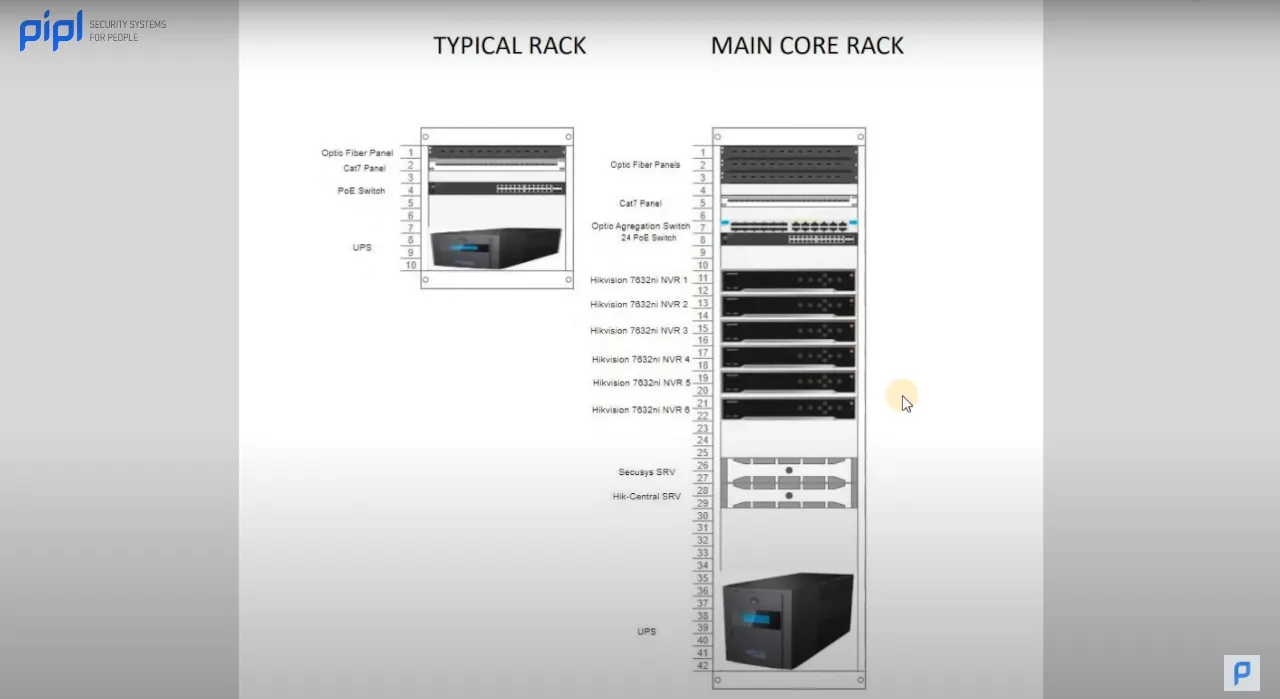
Similar to the previous sections, the Communication Rack Scheme elucidates how the rack will be mounted. This section features the typical rack and the core rack, showcasing all the NVRs, central servers, and UPS required for the installation. Additionally, optic fiber panels are detailed, emphasizing the need for optic fiber cables in specific installations.
3.10 Speedgate Specifications
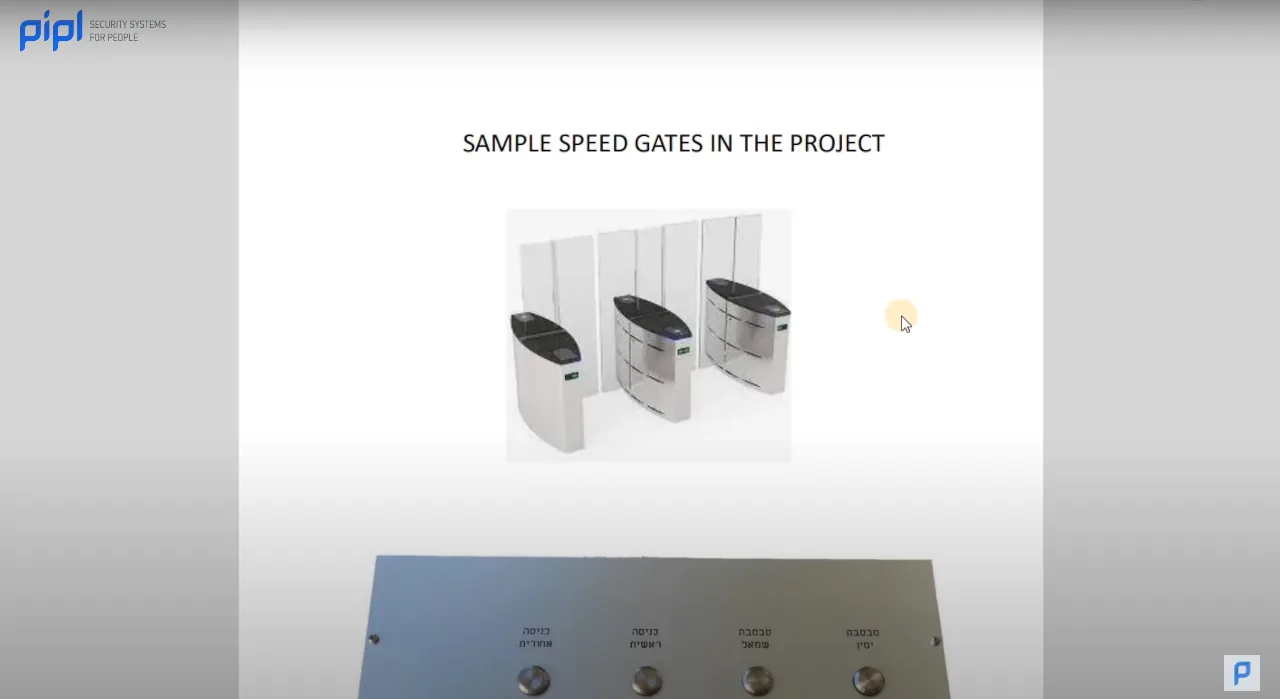
Incorporating speed gates into a security project adds another layer of complexity. This section provides insights into the type of speed gate used in the project. While the specifics can vary based on the project’s requirements, this documentation ensures clarity regarding the chosen technology.
3.11 Testing Results
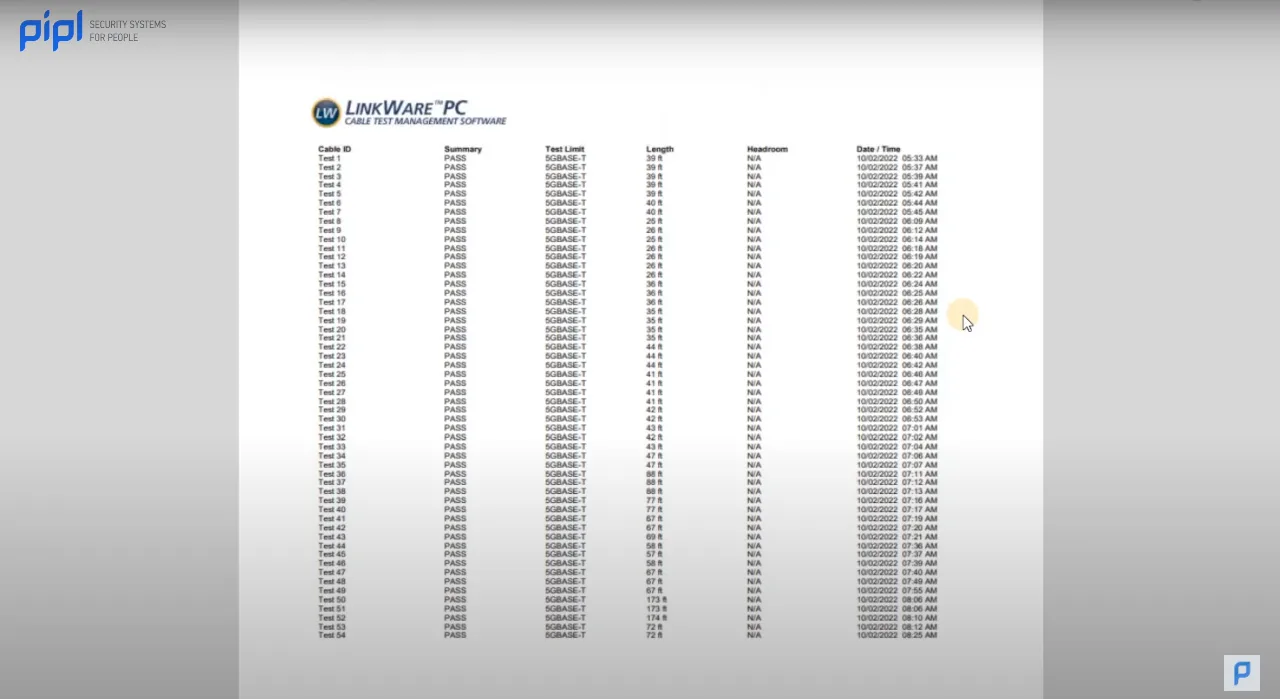
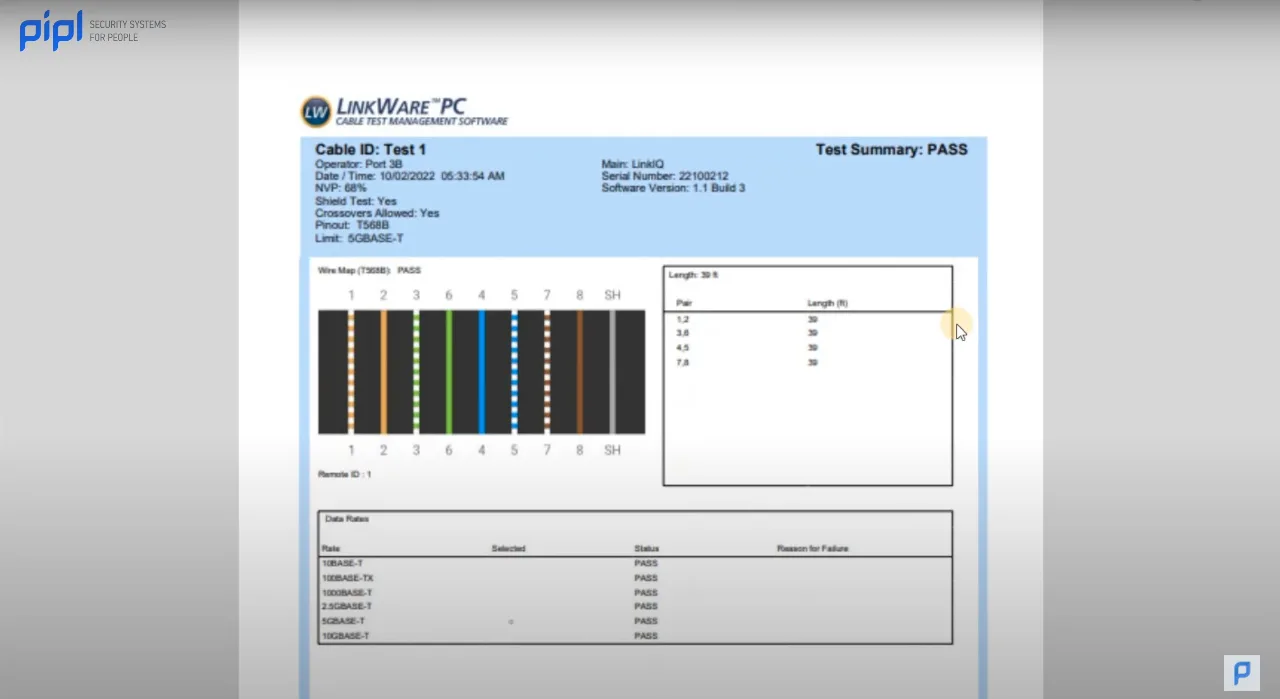
An often overlooked yet crucial aspect of any security project is the testing phase. Alex utilizes LinkWare from Fluke Networks to test the cables. This ensures that the right cables with the required bandwidth are used. The testing results section provides detailed information on cable performance, an essential aspect for ensuring the reliability and longevity of the entire security system. Tools from Fluke Networks, available on their website, facilitate comprehensive cable testing.
3.12 Network Address Table
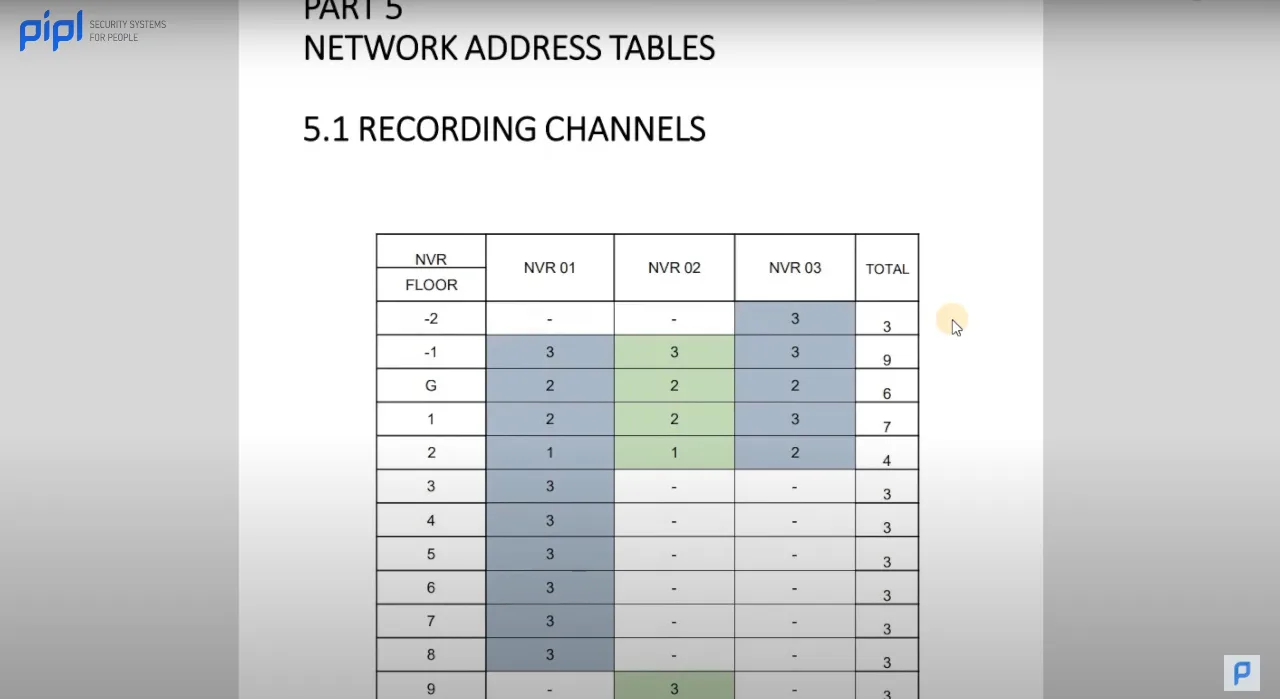
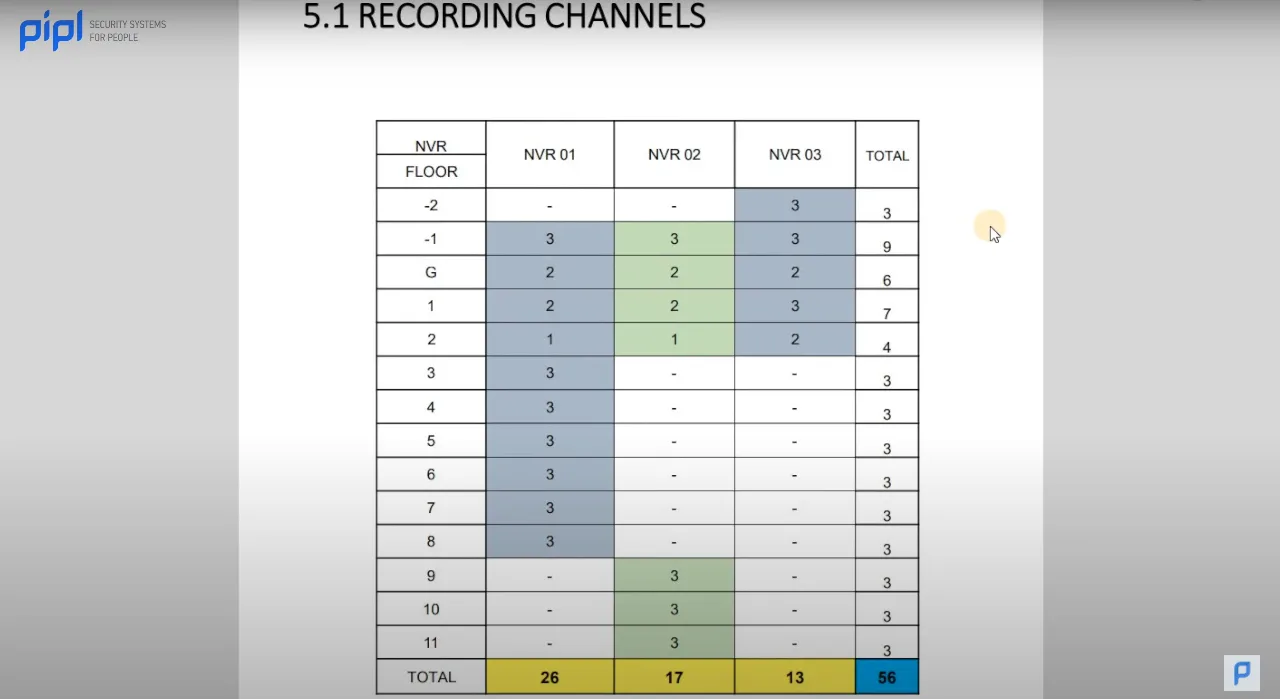
As security projects grow in complexity, managing the network becomes paramount. This section introduces the Network Address Table, delineating every level and floor, specifying which NVR controls what, and listing the network addresses of cameras and clients. This table is a strategic tool for future maintenance, saving time and minimizing complexities during subsequent projects.
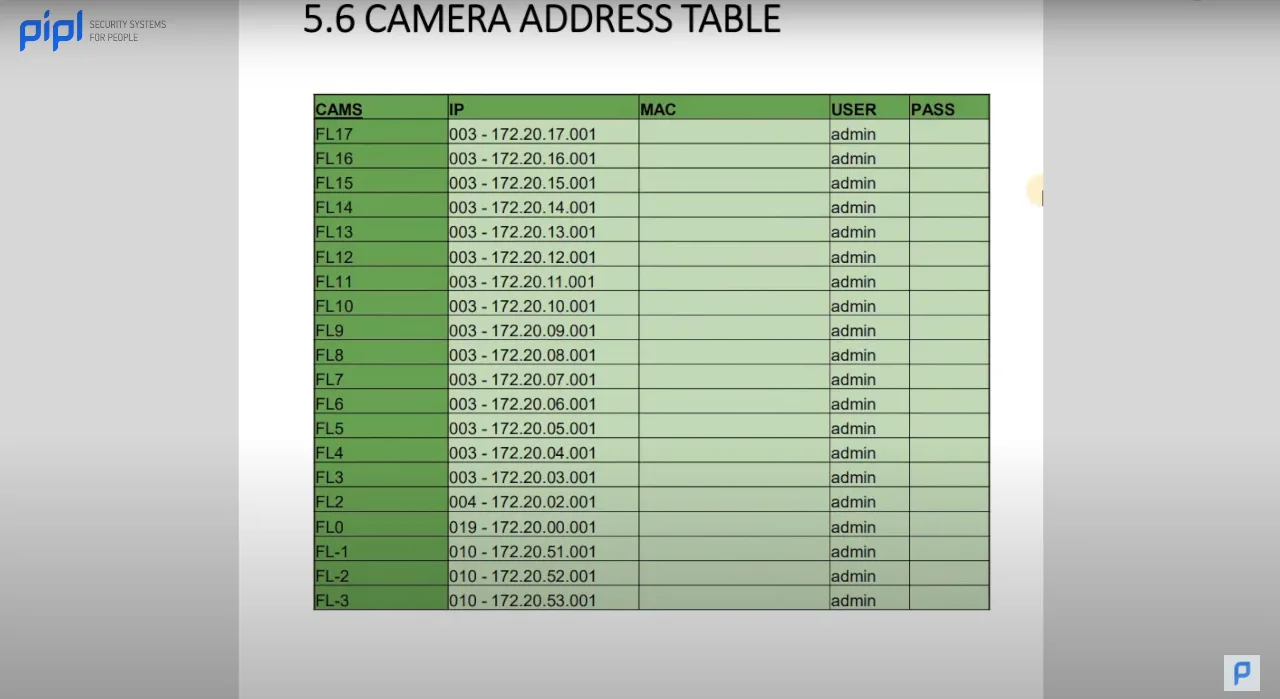
3.13 Camera Address Table
Further enhancing the network organization, the Camera Address Table provides detailed information on the address, username, and related details for each camera. This meticulous organization aids in efficient project management and simplifies any future modifications or expansions.
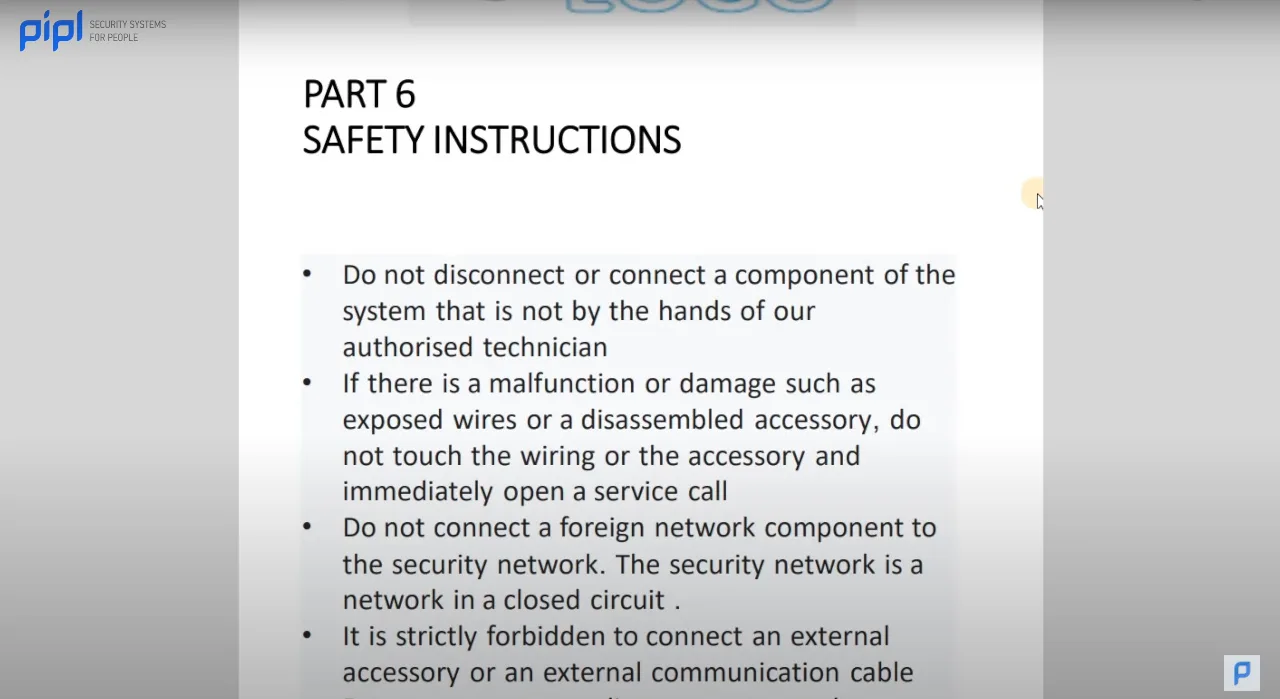
3.14 Safety Instructions
Closing the documentation with a responsible touch, this section includes safety instructions. This not only serves as a necessary precaution but also provides a comprehensive guide in case of unforeseen events. As security professionals, ensuring the safety of both the system and individuals involved is of paramount importance.
By including these detailed sections in your project documentation, you not only showcase professionalism but also set a strong foundation for the future of the security system. Remember, a well-documented project is a testament to your expertise and provides enduring value to both you and the end user.
Note: The information shared is based on practical experiences and insights from industry professionals, ensuring authenticity and relevance.
Part 4: Data Sheet: A Gateway to Product Information
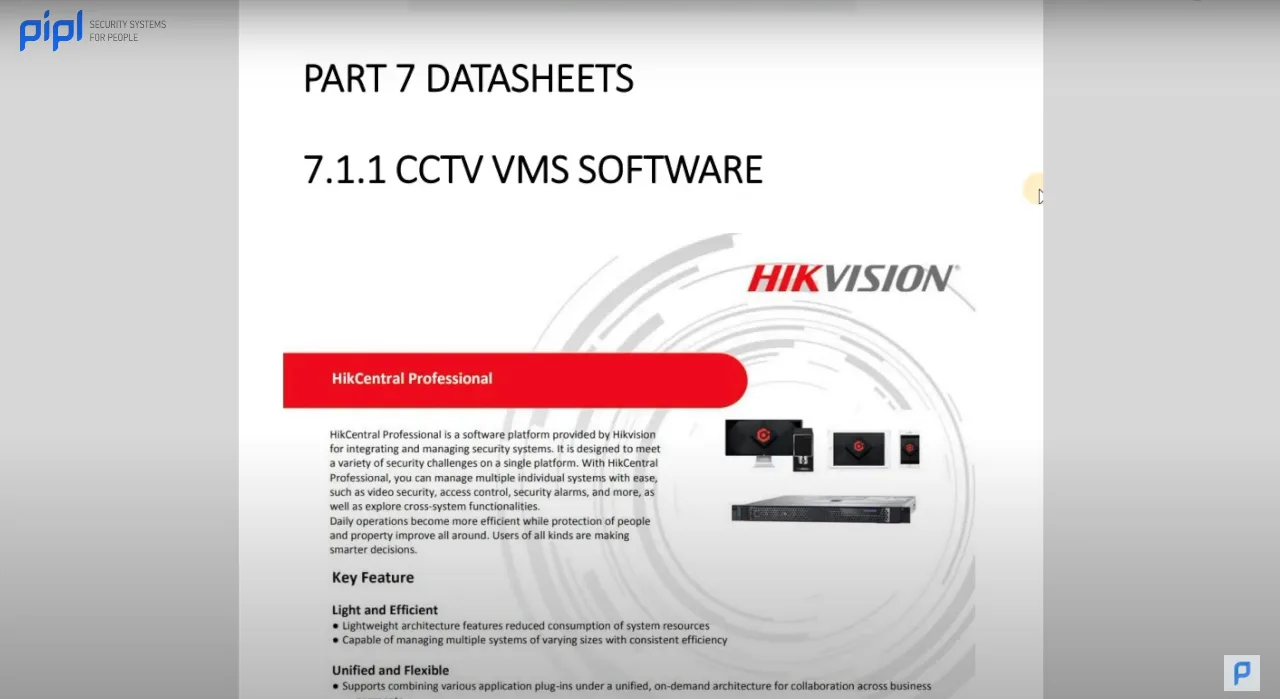
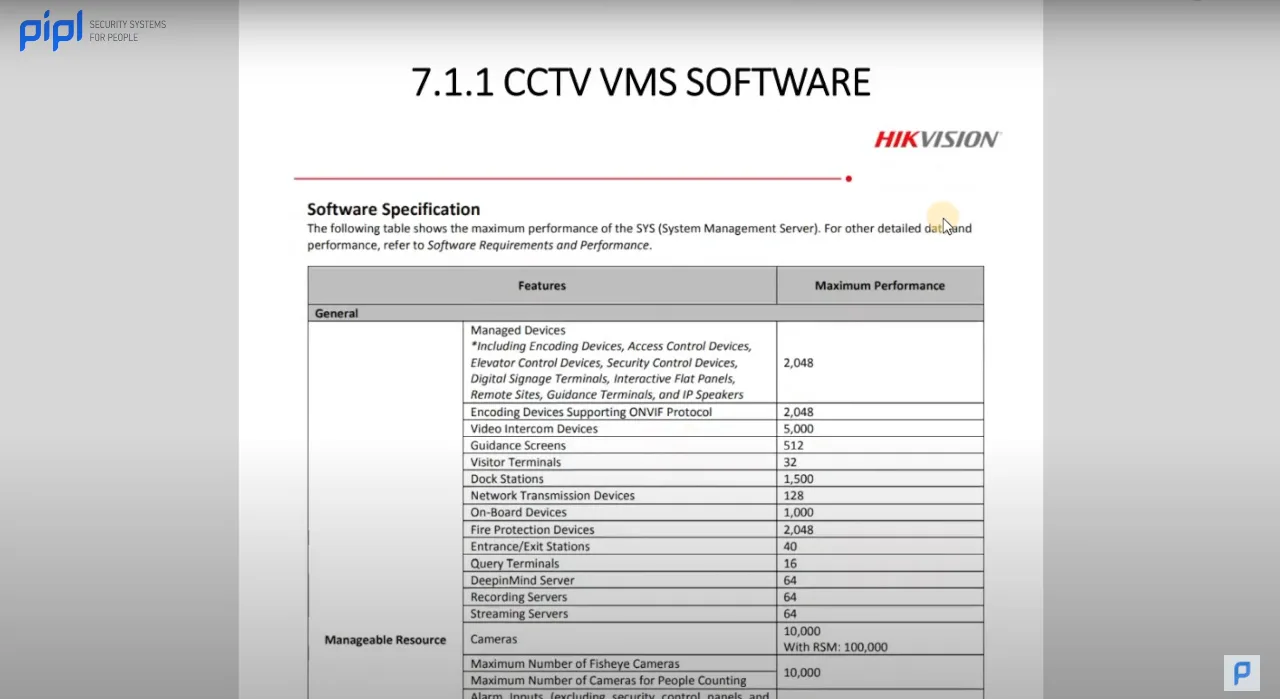
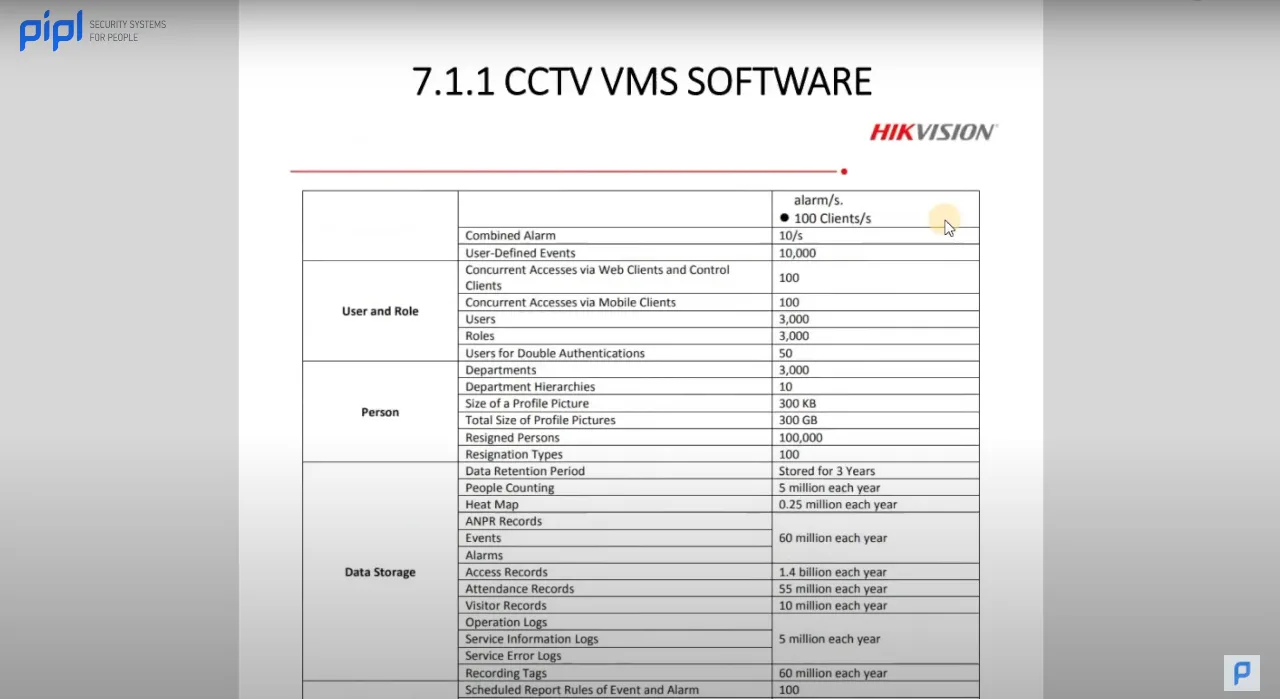
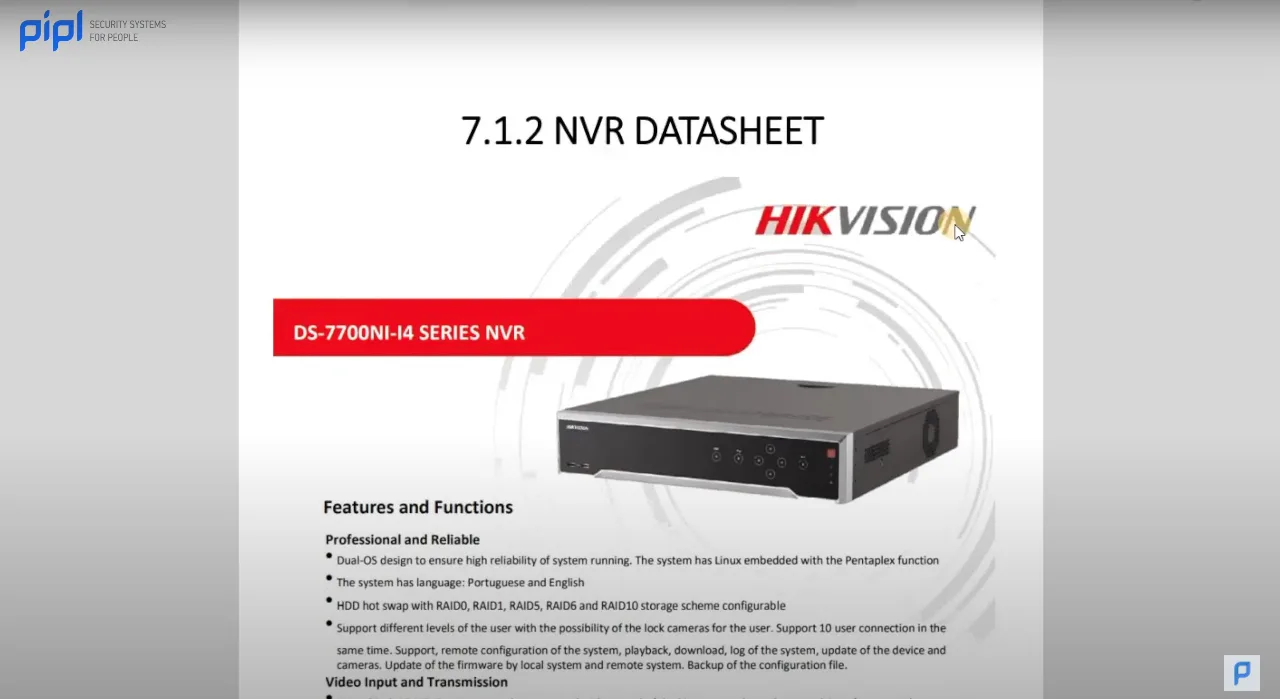
The final segment of our comprehensive project documentation is the Data Sheet. This section serves as a repository of detailed information on every product used in the security project. If you’ve collaborated with a specific manufacturer, obtaining these data sheets is a straightforward process. They present a wealth of information that proves invaluable to the end user.
4.1 Ease of Access
Accessing these data sheets is remarkably easy. A quick Google search usually leads you directly to the manufacturer’s website. Once there, you can download the detailed data sheets in PDF format. This uncomplicated process ensures that all the essential information is readily available.
4.2 Informed Decision-Making
The inclusion of data sheets in your project documentation offers a substantial advantage. It empowers the end user to conduct their research effectively. Armed with your document, they can navigate to the manufacturer’s website, scrutinize product details, and make informed decisions. This transparency fosters a sense of trust and collaboration.
4.3 Elevating Professionalism
By meticulously incorporating data sheets into your documentation, you not only showcase your professionalism but also demonstrate your commitment to utilizing cutting-edge technology. This becomes especially crucial in the rapidly evolving field of security technology.
4.4 Future-Proofing Installations
In the dynamic landscape of security installations, adaptability is key. Your project documentation, enriched with data sheets, becomes a tool for future installations. If the end user decides to scale or modify the existing system, having all the information neatly organized in one document significantly eases the process.
4.5 Case Studies and Professionalism
For security installers who often move from one project to another, creating a case study becomes challenging without tangible proof of their work. The project documentation, complete with data sheets, serves as this proof. It encapsulates the essence of your work without the need for an on-site visit.
Part 5: Shout Out to the Community
A special acknowledgment to our community members, like Alex, who generously share their insights and project documentation. One notable example is an installer currently working on a 40-floor intercom system in a building constructed in 2010 in New York. Faced with the absence of project documentation, this installer is confronted with the tedious task of deciphering existing wiring. This underscores the importance of documentation for both installers and end users.
Conclusion: Elevating Security Practices
In conclusion, project documentation is not just a formality; it is a strategic tool. It elevates your work, instills confidence in the end user, and serves as a blueprint for future endeavors. The meticulous organization of contact details, project descriptions, diagrams, testing results, and data sheets is a mark of professionalism.
As we advocate for the continual elevation of everyone in the security field, we encourage the adoption of robust documentation practices. The provided template, accessible on the Pipl Systems website, offers a starting point for creating impactful project documentation.
Our commitment is to share educational content that propels individuals to higher levels of proficiency in the security industry. We believe that the detailed project documentation exemplified here is a testament to what can be achieved for future projects, ensuring success in bids and flourishing installations.
Thank you to Alex and all our community members for contributing to this collective learning experience. For those interested in exploring the template and delving deeper into security practices, the link is provided in the description below. Stay tuned for more insightful content as we continue our journey of knowledge-sharing in the dynamic realm of security installations. See you on the next one!
Free Template Download Here
pptx – https://pipl.systems/download/13442/?tmstv=1705615631
pdf – https://pipl.systems/how-to-write-security-systems-project-documentation-free-template/sample-project-documentation/
Note: If you are unable to download the file, please email [email protected]


