Welcome to the Pipl Systems Security Insights Portal!

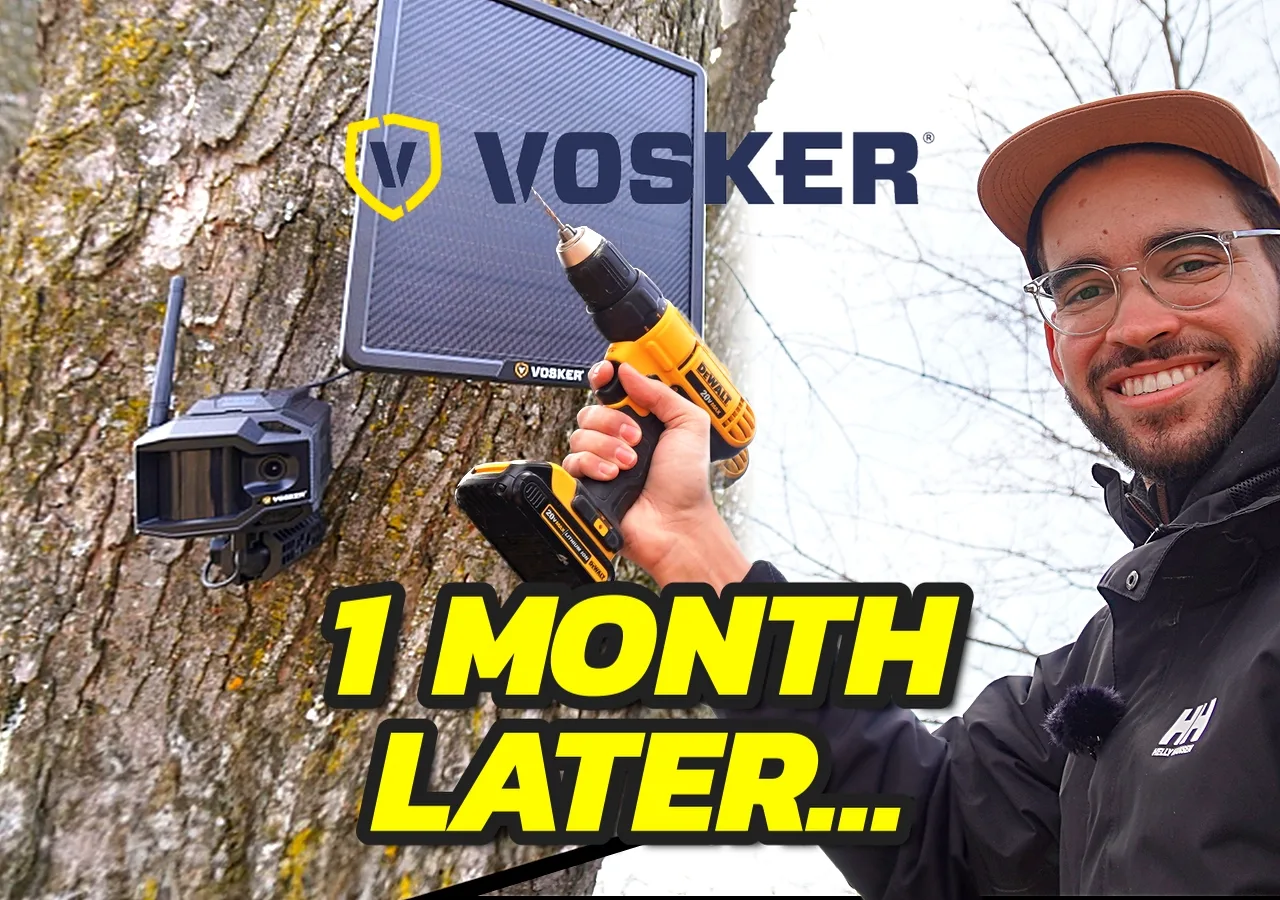
Today, we embark on a detailed journey with the Vosker V300 Ultimate, a cutting-edge solar security camera that promises not only to protect your premises but also to revolutionize the installation and maintenance of outdoor security systems.
The Vosker V300 Ultimate is not just another security camera. It's a robust solution designed for the discerning user who values both efficiency and performance. In our initial unboxing video, we provided a sneak peek into what this kit contains. Based on your feedback, we're now taking a closer step-by-step look at the installation process, as well as the operational nuances through the Vosker app.
Vosker V300 Ultimate and Solar Panel Installation

Installing the V300 Ultimate is a user-friendly process that caters to various mounting needs. Whether you're setting up on a flat home surface, a fence, or, as in our case, a tree, the kit includes all necessary components for a secure and efficient installation. Here’s how you can get your system up and running:
1. Choosing the Mount Type: The kit includes a flat mount for surfaces like walls and fences, and specialized screws for wood if you choose a tree as your mounting spot.
2. Preparation and Mounting: Drill a small hole at your chosen spot. Using the hand-friendly screws, secure the mount by hand – no heavy tools required. This ensures your camera stays stable.

3. Adjustable Angles: The mounts come with a swivel feature. For the camera, angle it to optimize the viewing area. For the solar panel, installation should ideally face south to catch sunlight from east to west, though southeast or southwest can also be effective based on geographical location.
On the Features of Charging the Vosker Camera and Solar Panel
One critical aspect often overlooked in solar-powered security systems is the initial charging. Here’s what you need to know:
a) Initial Charging: The V300 Ultimate's battery does not come charged. It is recommended to charge the battery fully before installation, which can take up to 6 hours.

b) Connecting the Camera and Solar Panel: Use the provided USB-C cable to connect the camera to the solar panel. This setup ensures your camera’s battery continually charges, extending the operational time significantly.
c) Maximizing Solar Panel Efficiency: Ensure there are no overhanging branches or other shade-causing obstacles. Proper placement is crucial for maximizing light exposure and, consequently, the efficiency of your system.
The combination of easy installation and sustainable power source makes the Vosker V300 Ultimate an attractive choice for those looking to enhance their security measures without constant maintenance.
Whether you’re a professional installer or a DIY enthusiast, the Vosker V300 Ultimate provides a robust, user-friendly, and sustainable security solution. Its installation simplicity paired with the efficient solar charging feature ensures that you can set it up quickly and rely on it for long-term monitoring.

As we delve deeper into the capabilities of the Vosker V300 Ultimate, a solar-powered LTE security camera, it's crucial to understand why it's a sterling choice for monitoring temporary sites like construction areas. We explore the practical features that make this camera stand out in the realm of outdoor security.
Effortless Setup and Immediate Activation

The Vosker V300 Ultimate arrives with a pre-installed SIM card, courtesy of Vosker, eliminating the hassle of seeking a service provider. This 4G LTE camera is not just wire-free but is designed for easy installation without the need for conventional PoE (Power over Ethernet) cables. This ease of setup, combined with its wireless functionality, makes the V300 Ultimate exceptionally user-friendly right out of the box.
Mastering the Vosker App: Smart Notifications and More
The Vosker app, available on both Google Play Store and Apple Store, is your gateway to managing the V300 Ultimate. Let’s break down some of the essential settings:
Setting Up Smart Notifications

Through the Vosker app, users can customize notifications to their preferences. The camera’s AI technology allows for the detection of various movements - be it vehicles, humans, or animals. By configuring your preferences, for instance, selecting only 'human detection', the system will alert you only when the camera spots a human. This smart filtering significantly reduces unnecessary notifications, keeping you focused on what truly matters.
Crafting an Operation Schedule

For sites that don't require round-the-clock monitoring, the operation schedule feature is invaluable. It allows the camera to be active only during specified times. For example, on a construction site, the camera might be set to monitor activities only after working hours. This not only enhances efficiency but also conserves the camera’s energy for when surveillance is most needed.
Sensitivity and Alarm Triggers

Adjusting the motion sensitivity and trigger speed is straightforward with Vosker’s intuitive tips. These settings can be fine-tuned to match the specific dynamics of your site, ensuring that the camera reacts appropriately to detected movements.
Reviewing Triggered Events: Images and Videos

Upon the detection of an event, the Vosker app provides instant access to images directly on your home screen. For a more detailed view, you can request a full HD video clip of the event. This request, processed over the LTE network, delivers a 10-second clip to your phone, offering a clearer insight into the activities captured by your camera.
Installation and Viewing Experience

The camera's solar panel ensures it remains charged, and its 1080p resolution with a wide 109-degree field of view ensures clear, comprehensive coverage. The process from installation to event review is designed for ease and effectiveness, keeping your premises secure without the complexity of traditional security setups.
Embrace Advanced Security with Vosker
The Vosker V300 Ultimate is an exemplary model of how modern technology can simplify and enhance security, particularly in temporary and remote sites. Its combination of LTE connectivity, solar power, and intelligent notifications ensures you remain in control, regardless of your location.
As part of our ongoing series on innovative security solutions, today we're diving deep into the capabilities and user experience of the Vosker V300 Ultimate, focusing on its practical application 30 days post-installation. Let’s unpack the features that make this camera a standout choice for monitoring remote and temporary sites.
How to Start a V300 Ultimate VOSKER Livestream
Engaging with real-time video feed is seamless with the Vosker V300 Ultimate. To begin a live stream:
- Access the Vosker app and select your camera.
- Tap on "View Live Stream" and choose the desired video quality.
- Hit 'Play' to connect and start viewing the live activities captured by your camera.

This feature ensures you can monitor your site anytime, providing peace of mind with crisp, clear images delivered directly to your mobile device.
Downloading Videos in HD Quality
The Vosker V300 Ultimate also allows users to download video clips in HD quality:
- Navigate to the 'Events' section in your Vosker app.
- Click on 'Request' to see your pending HD videos.
- Select the video you wish to download; the app will fetch a 10-second HD clip from the cloud.

These clips are crucial for detailed reviews and reporting, ensuring that you have the high-resolution evidence you need, when you need it.
2 Storage Solutions: Cloud Storage and Internal SD Card
The Vosker V300 Ultimate offers dual storage options to secure your data:
- Cloud Storage: Directly access your footage from anywhere via the Vosker app. This is ideal for immediate retrieval and review.
- Internal SD Card: A 32GB SD card comes standard with your camera, offering reliable local storage. This is especially useful if internet connectivity issues arise.

These two layers of redundancy mean you’re less likely to lose crucial footage.
You may also be interested in the previous article about Vosker: https://pipl.systems/first-look-at-the-v300-ultimate-by-vosker-2/
Subscription Plans for the Vosker Cloud Service
Understanding the subscription plans is key to maximizing the V300 Ultimate's potential:
- Initially, all new users enjoy the Elite plan free for 7 days, allowing full access to all features.
- Post-trial, you can select from various plans according to your needs, which can be adjusted directly in the app without any downtime or need to contact support.

This flexibility ensures that you can scale your service to match your specific security requirements.
Conclusion
The Vosker V300 Ultimate is more than just a security camera; it's a comprehensive monitoring solution adaptable to a variety of environments, particularly where traditional power sources and wiring are impractical. Its ease of installation, coupled with robust support through the Vosker app, makes it an excellent choice for both security professionals and novices.

Given its adaptability, ease of use, and dual storage solutions, the Vosker V300 Ultimate is a potent tool in the arsenal of anyone needing reliable surveillance on temporary or remote sites.
Stay Informed and Secure
For insights, reviews, and updates on the latest in security technology, don’t forget to subscribe to the Pipl Systems email newsletter. Join our community and stay at the forefront of security industry developments.