

Recently, we have released an article covering the topic of “How to update a firmware on the Hikvision security network camera.”, If you need it, go for it; that’s just a quick link/reminder. This time we’ve got Hikvision NVR and DVR Video Recorders to update firmware on. We are reviewing 3 methods, every single of which is demonstrated next
There are 3 ways to update the firmware on any Hikvision NVR and DVR, for both of which the instruction is identical:
- Web Interface;
- Batch Configurator tool;
- IVMS-4200.
All these tools are free to use (IVMS-4200 and Batch) from the Hikvision website. Now let’s start off with option #1 – the web interface.
Hikvision Firmware Update Via Web Interface
- Note that the following part is identical for all three options that we review today. To locate the device serial number and download the firmware file itself, and further in the video, I will be referring to this part.
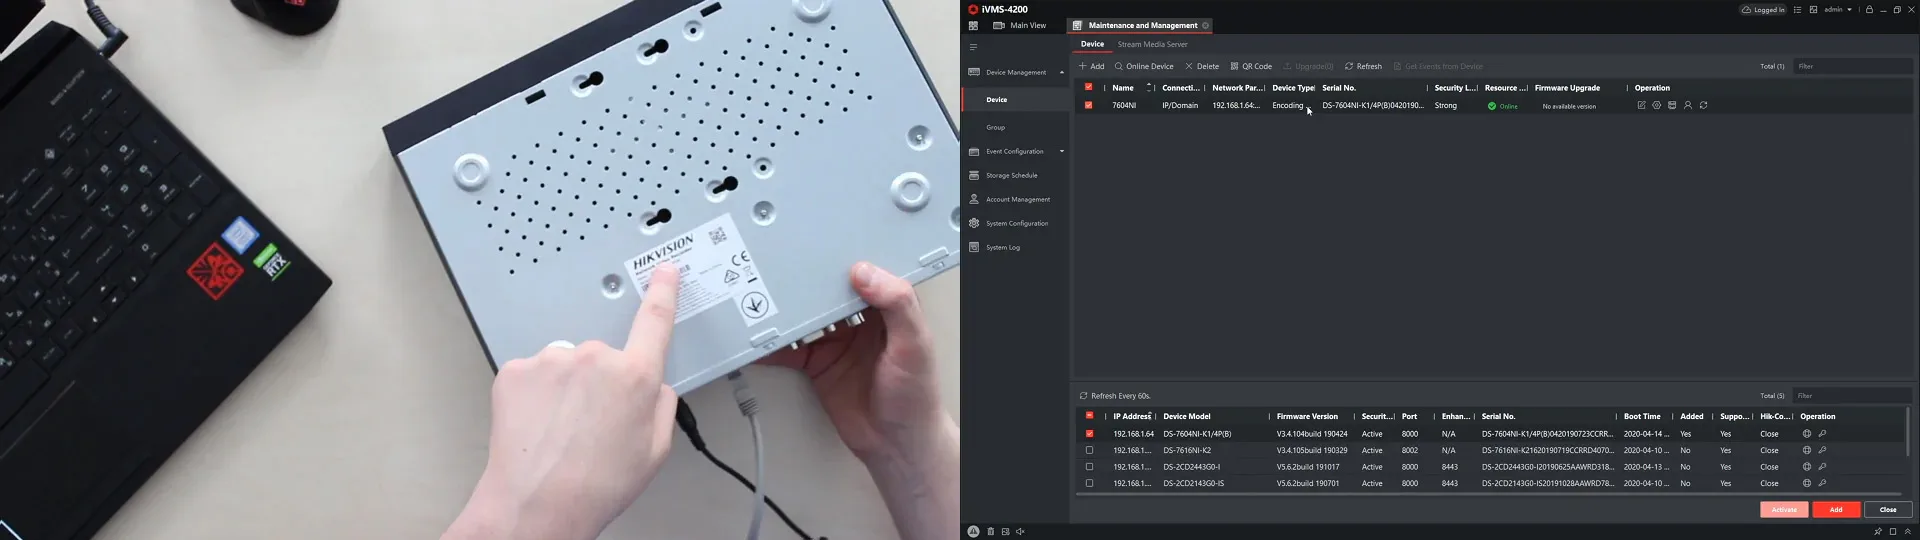
1. First of all, you need a full video recorder’s serial number or a factory marking, and note that this instruction is applicable to every Hikvision NVR and DVR, regardless of their class and features. You can locate yours on the video recorder’s box, on the information plate on the device body, and you can also locate that serial number in Hikvision PC tools, used to work with the appliance: IVMS-4200, SADP tool, Batch Configurator, and also directly on a web interface of the device.
2. Then go to the Hikvision website from the PC, locate the search button, type in your NVR factory marking in the field, and search. (It may be a different website layout for your country, but the idea is the same)
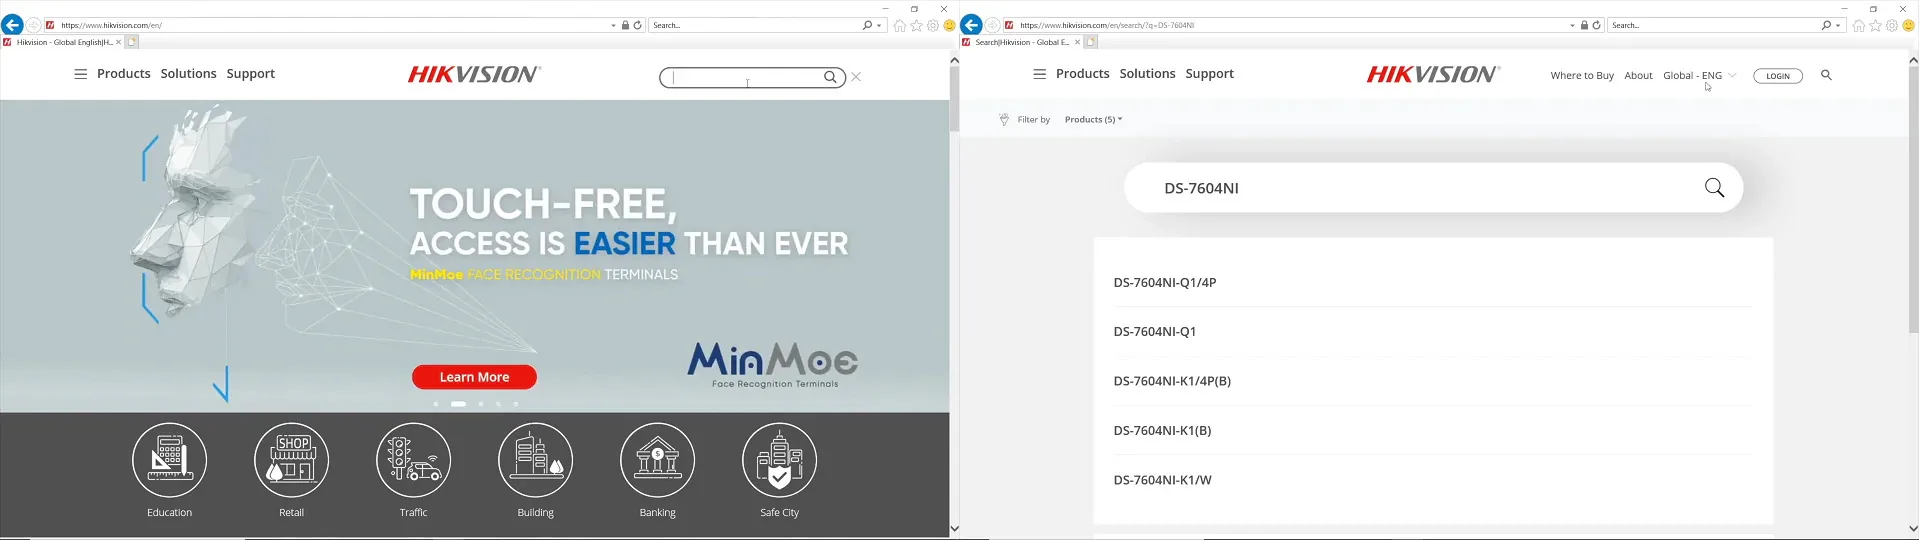
You get a list with search results, and here’s the recorder I was looking for. I press, and I’m redirected to the product card. I scroll down, and here in the download center, I have a firmware tab, where I press firmware download, and it gives me the latest available firmware for my NVR, and I’m saving a file, the download begins.
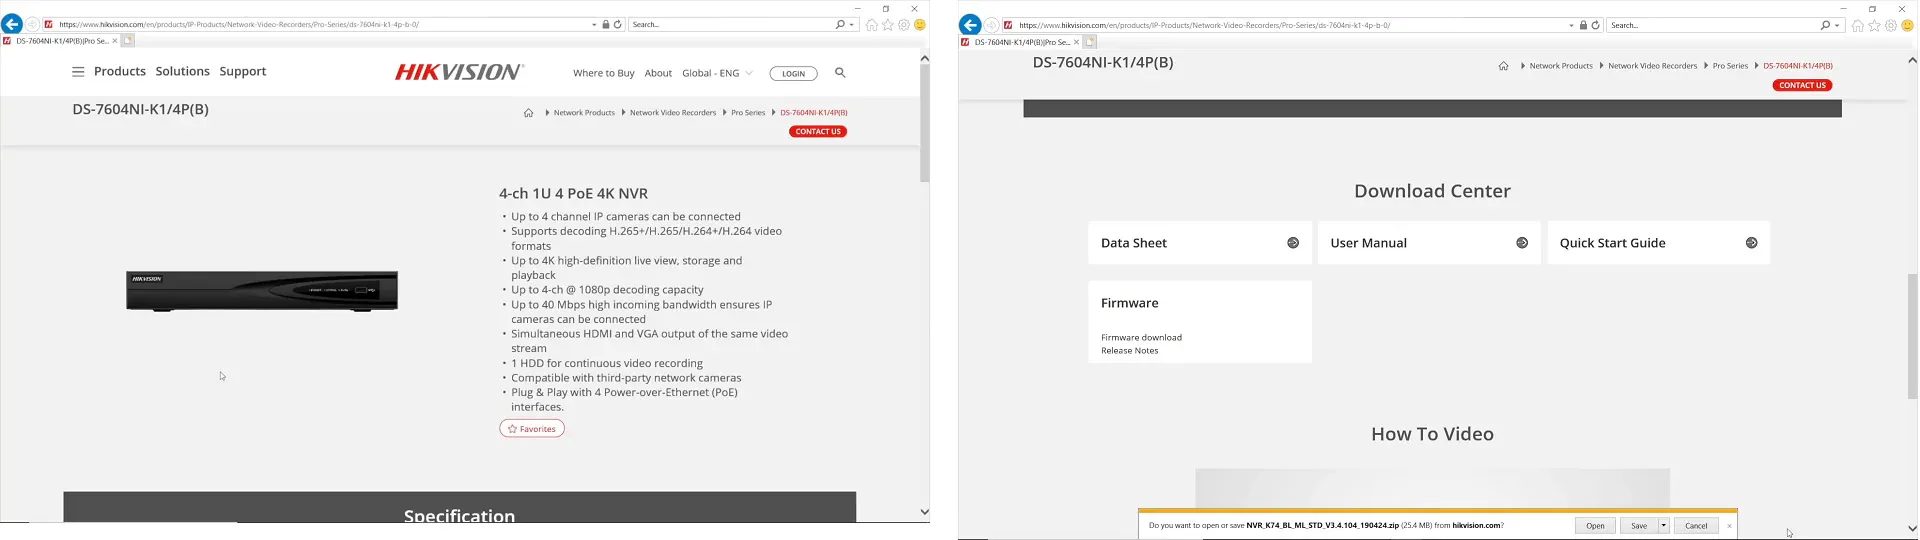
Once it’s downloaded, open the folder and unzip the archive. You will get the folder with the exact firmware file named “digicap.dav”.

3. Then go to the devices’ web interface via Internet Explorer or Mozilla Firefox; note that these browsers are mandatory to make it all work properly. Type in the recorder’s IP address and on the page, input your user data, log in, and go to the configuration tab. From there, System → Maintenance, and there on the bottom locate the upgrade item. Press Browse and locate the previously downloaded digicap.dav firmware file.
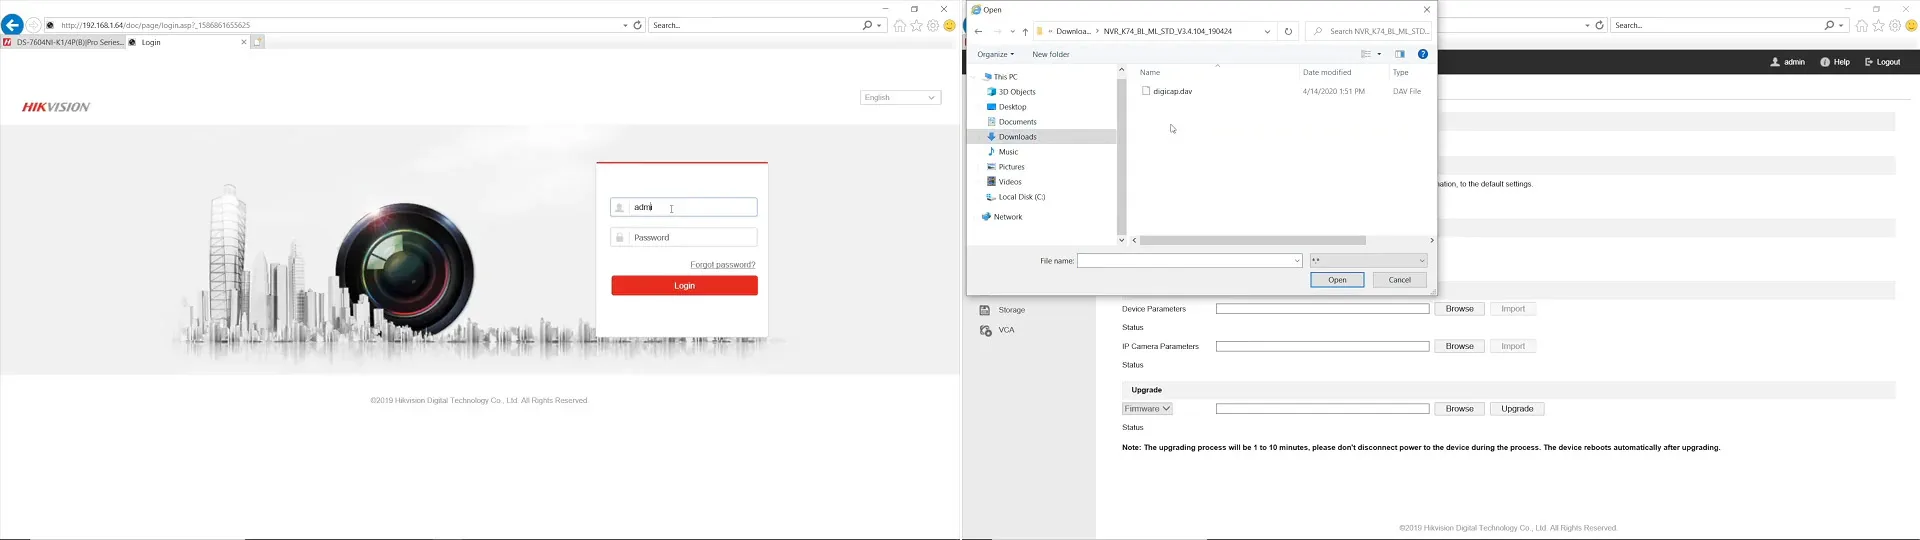
Now open it, and what’s left is to press the Upgrade button. You will now see a prompt saying that the recorder needs to reboot after installing a firmware, and that’s totally fine. Now, wait till the process is completed. After that is done, you are ready to work with a device running new firmware. Congratulations. Now the option #2.
Hikvision Firmware Update Via Batch Configurator
Option #2 allows us to update the NVR or DVR firmware with a specialized software named Batch Configurator, which is free and can be downloaded from the Hikvision website. From a previous part, we have got our video recorder’s serial number, and we have also downloaded a firmware file named digicap.dav, so we skip it here and go to the firmware update process itself.
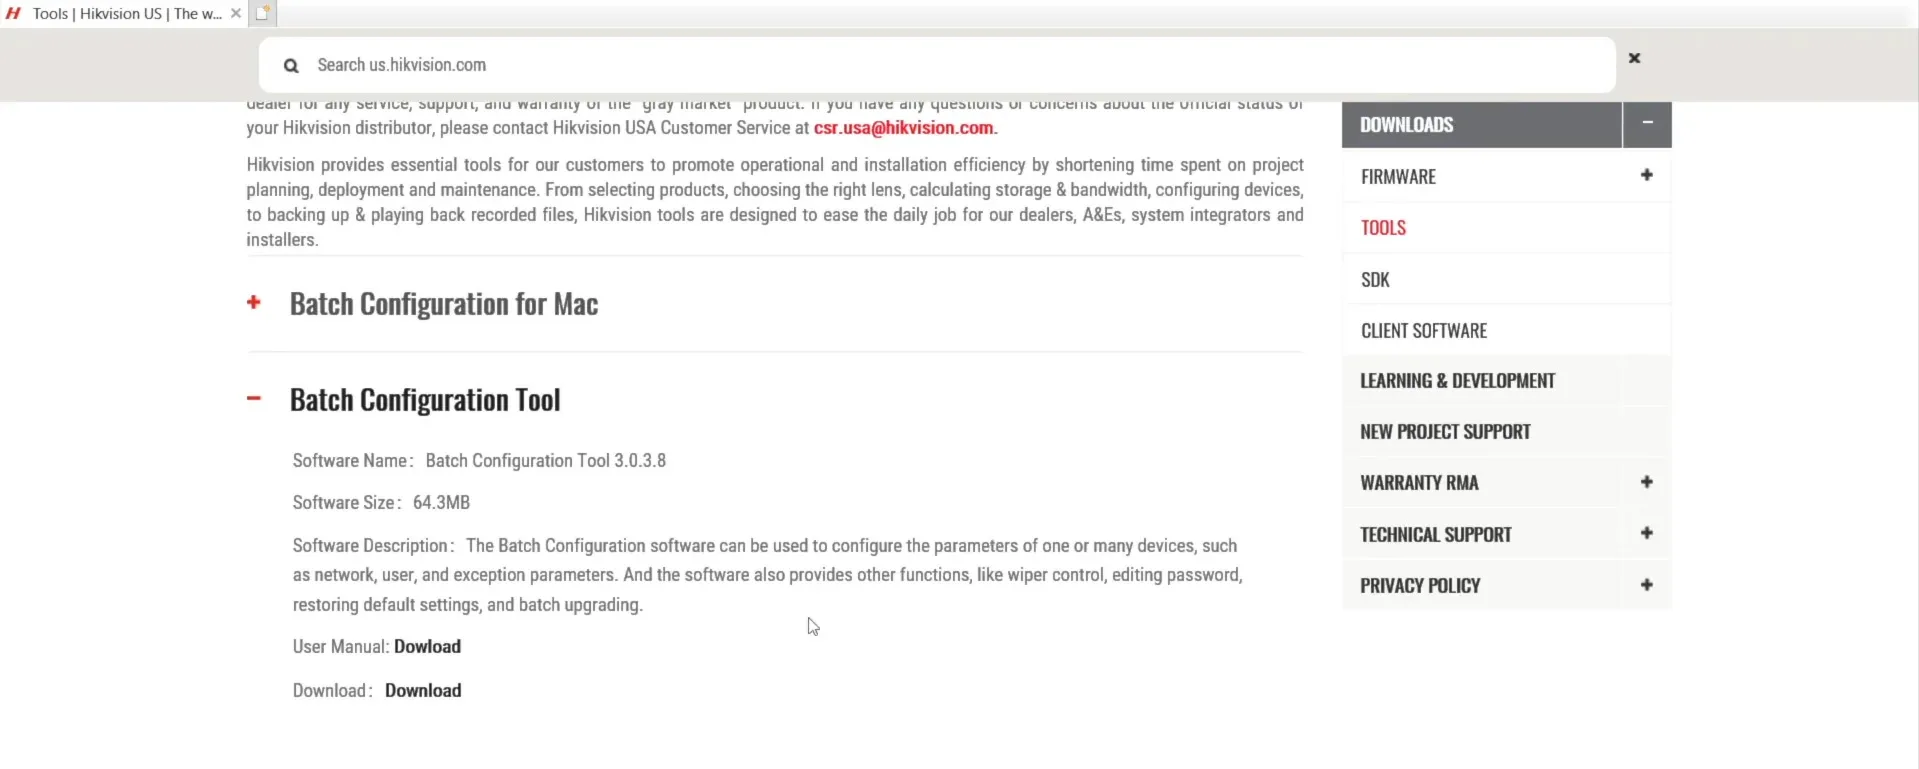
First of all, get that Batch Configurator tool and install it like a common program, and launch it. Once you are in the program, locate your video recorder, check the box left to it, and press Add. Identically to 1st option, input your username and password, and the device will now appear on top with the online status.
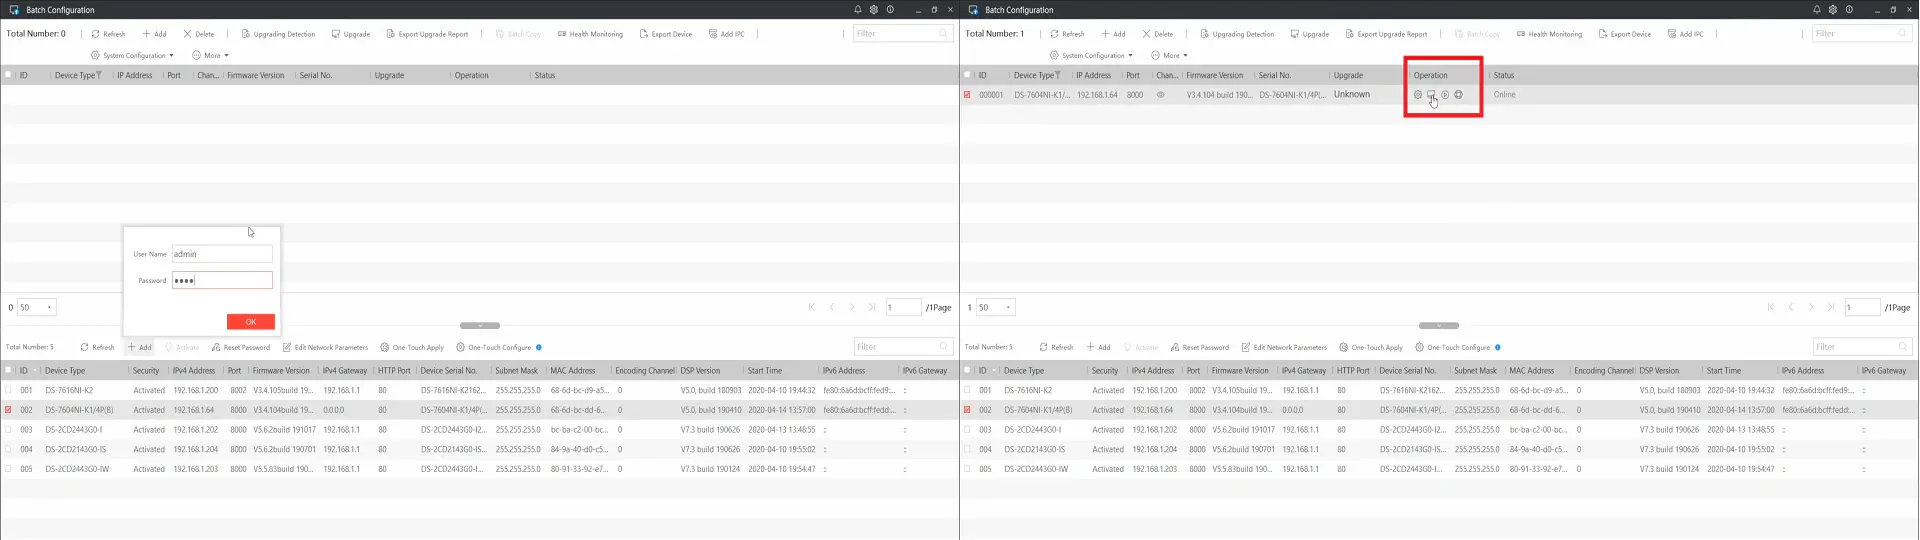
And here’s this button we were coming for; press it, and the tab on your right will appear – press and locate that digicap.dav file, press open. Now you’ll see that the status has updated and the progress bar has appeared. After the update is finished, your video recorder will reboot, and that’s OK. At this stage, you just have to wait a few minutes for the process to complete. After that is done, you are finally ready to work with your NVR or DVR running a new firmware. Now the option number three.

Hikvision Firmware Update Via Batch Configurator
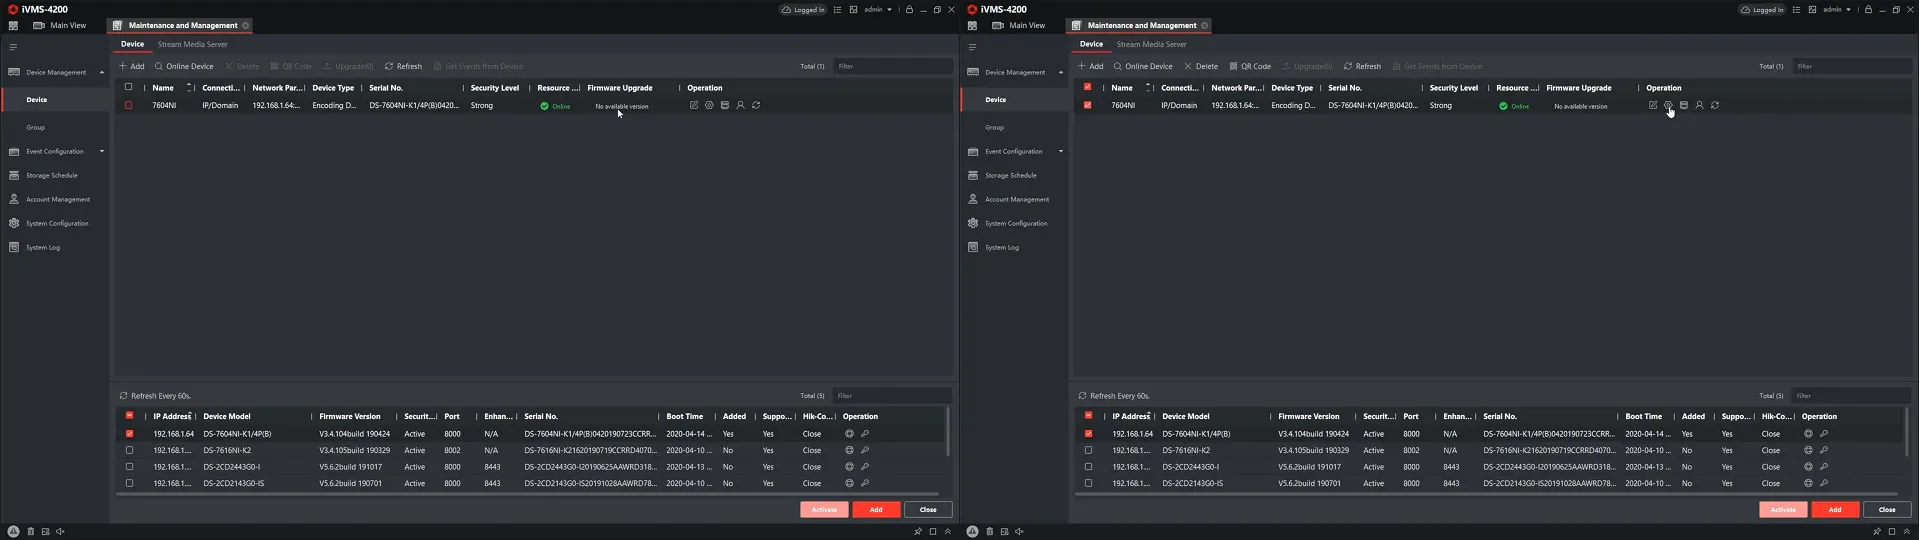
- For option #3, you need the installed Hikvision IVMS-4200.
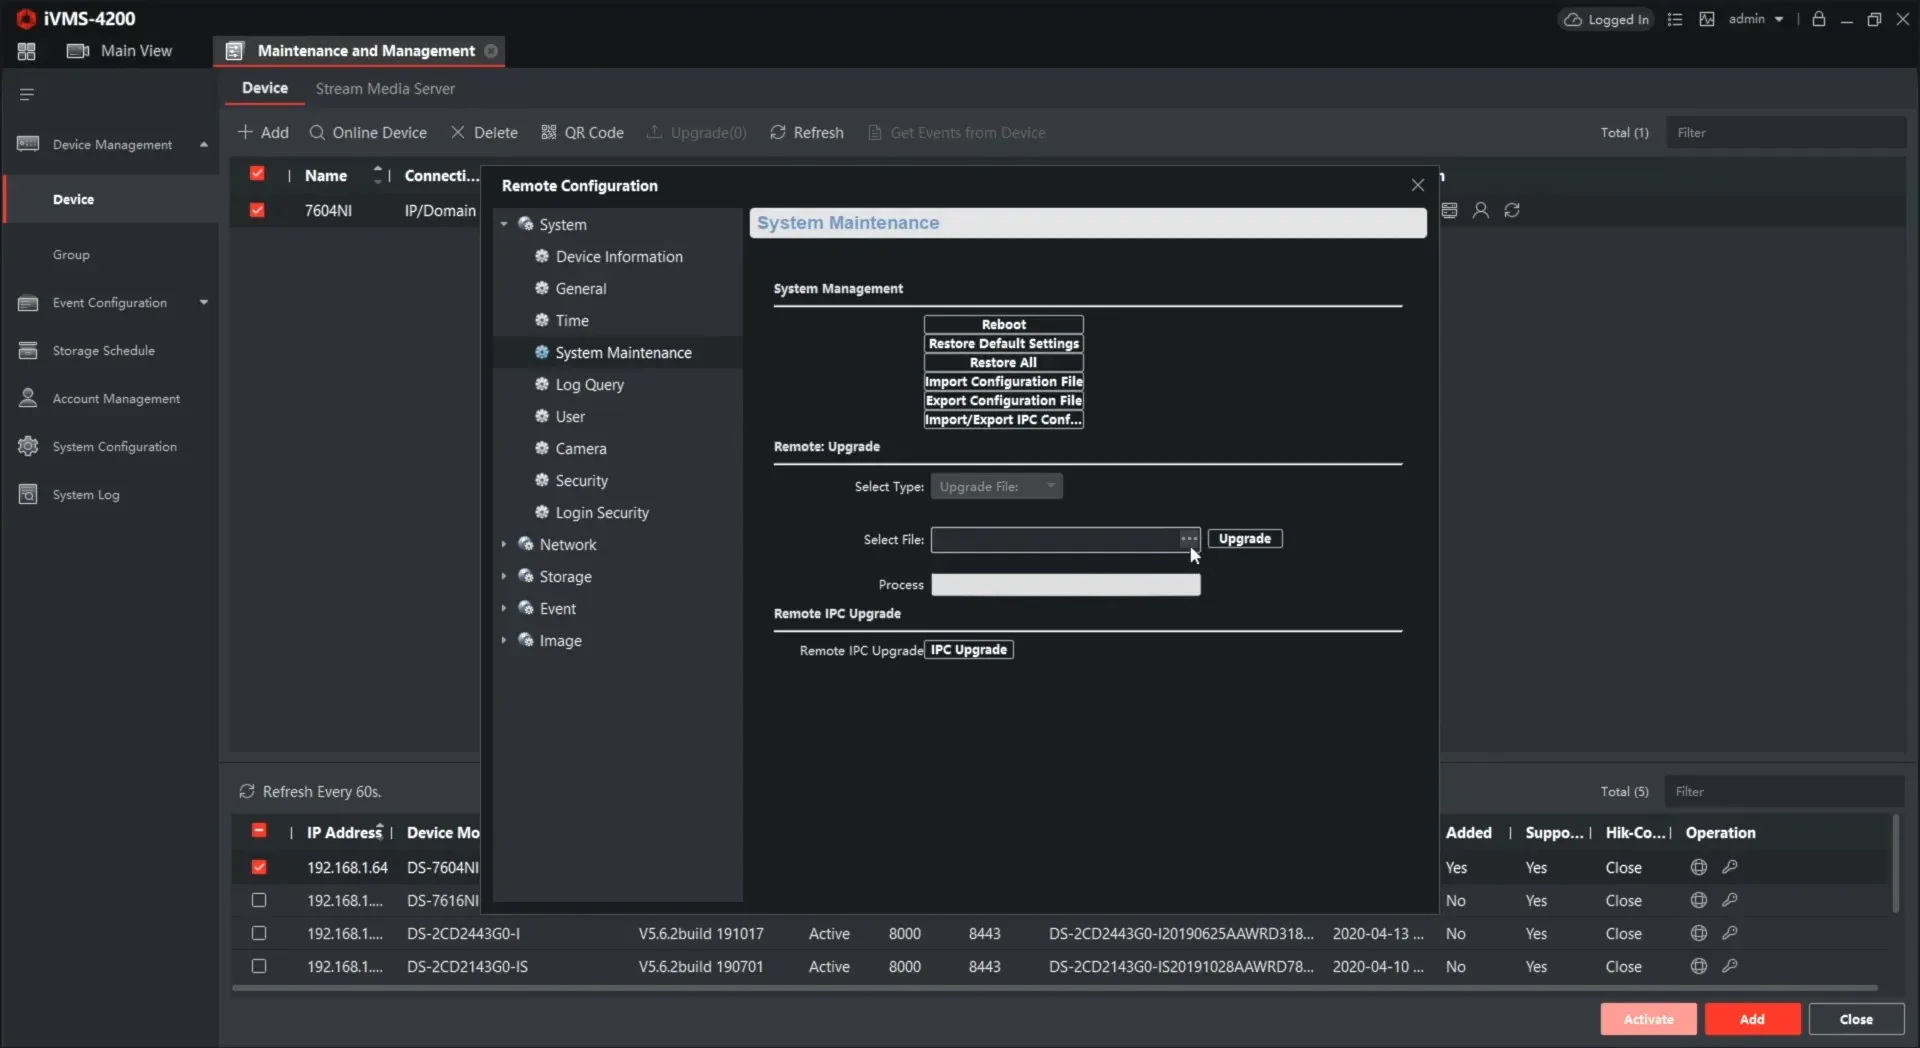
In the IVMS-4200, we need a device management tab, and don’t let this “No available version” in the firmware upgrade column mislead you – Hikvision appliance doesn’t support online firmware upgrade, every time you have to do it manually. Locate your device and now go into device remote configuration, and for that, press the cog button on the right of the device’s line, and from there go to System → System Maintenance, and here you’ve got the remote upgrade item.
Now, let’s press the dots icon and locate the downloaded digicap.dav. From there, just press Upgrade. You will see a prompt saying that after the update device is going to reboot, and that’s fine, OK. After this process is done, you can continue working with your NVR or DVR just like you did before, but running the new firmware. That’s it.
We went through 3 options to update the firmware on any Hikvision NVR and DVR, and to say something in the end, I am sure you will agree with me on that that was highly simple and fast. However, if you have some more complicated conditions or need help, ask about that in the comment section. My team and I will answer every single one.