
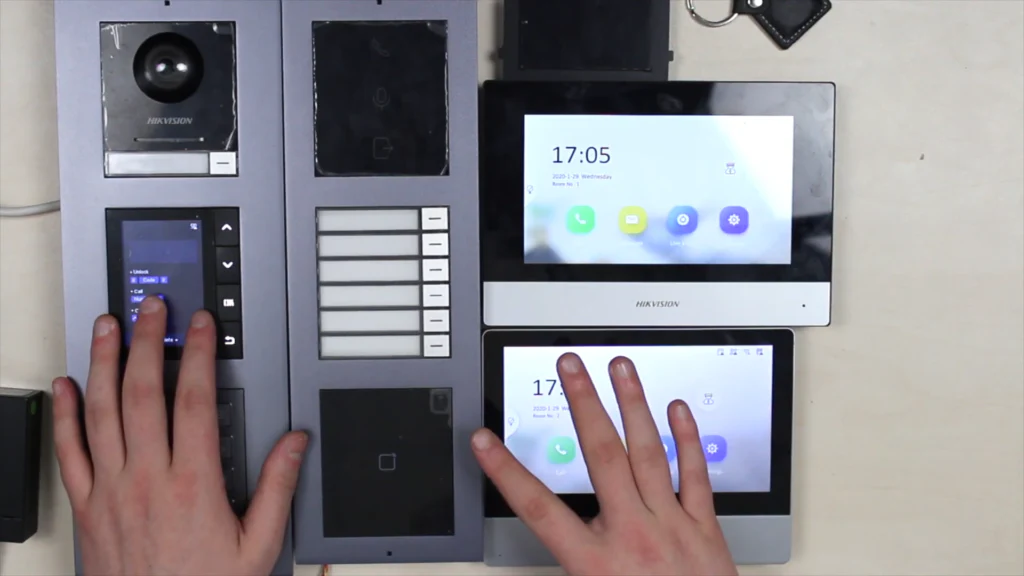
Today, we will thoroughly review all modules or extensions in the 2nd Generation Hikvision Modular Intercom System. The 2nd generation Hikvision modular intercom system consists of 3 elements: monitors, modules, and brackets. And if with the monitors and brackets everything is clear at first glance, the modules and their features have to be given some special attention. Today, our task is to thoroughly review the entire topic of Modules in the Hikvision 2nd Generation Intercom System – what these modules are, for which purposes, what the features, qualities, and so on. In addition, due to several special functions of some modules, we will focus on them a bit more.
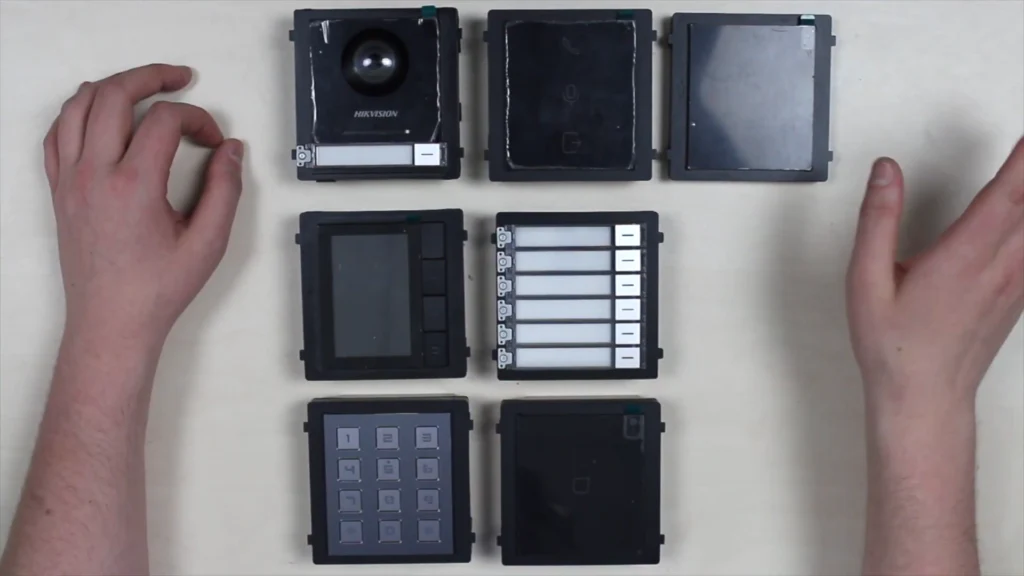
Hikvision 2ND Gen Intercom System: Modules Line-up
1 / 2
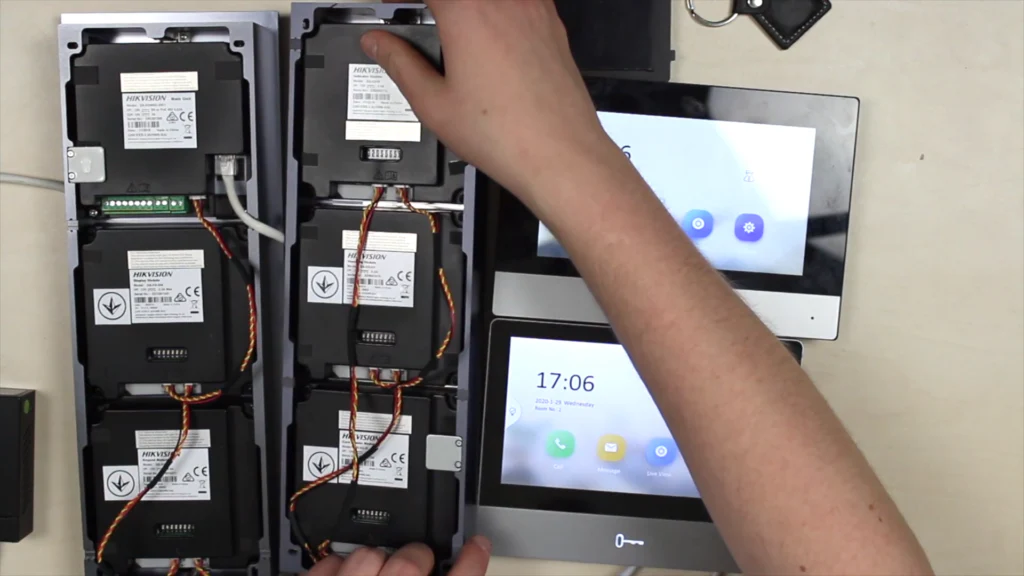
In total, the modules line consists of 8 modules, but we’ve got only 7 in out studio, the only 1 that hasn’t reached us is the EM-marine card reader module, we apologize for such an omission, but we emphasize that neither the appearance, neither the functionality is no different from a Mifare card reader module module. Again, the only distinction is a supported card format. Now we’ll review each of the modules separately, but first, what do all the modules have in common? Firstly, IP65 protection rate, where 6 indicates a full protection against dust, and 5 stands for protection against water jets, so neither snow nor rain is a threat to them. About interfaces – each of them, except the main panel, has DIP switches from 1 to 8 so that we can assign every single module its unique address in the circuit. Also, we have here two RS-485 interfaces – in and out, and also a 12V. power transmission interface as well.
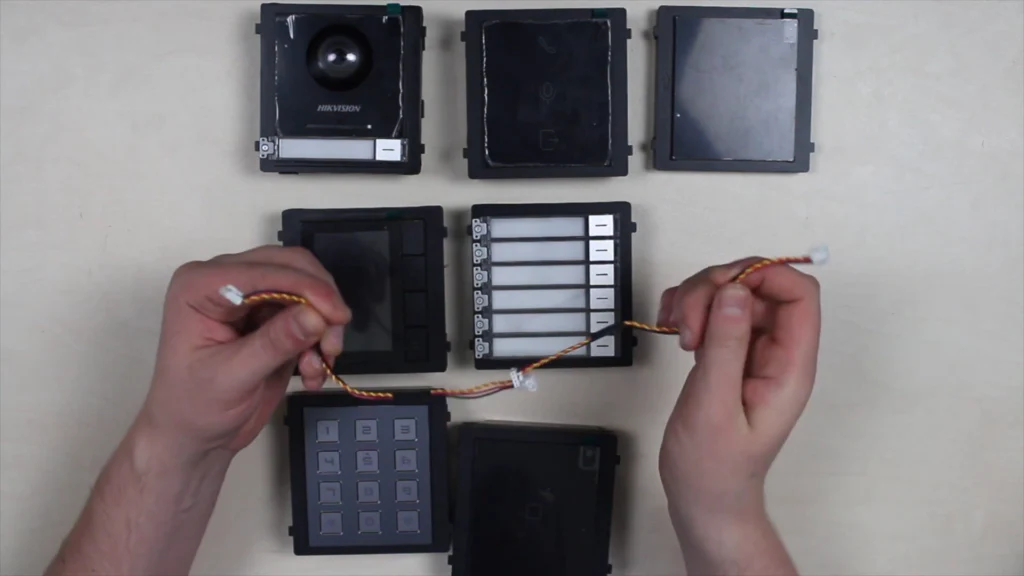
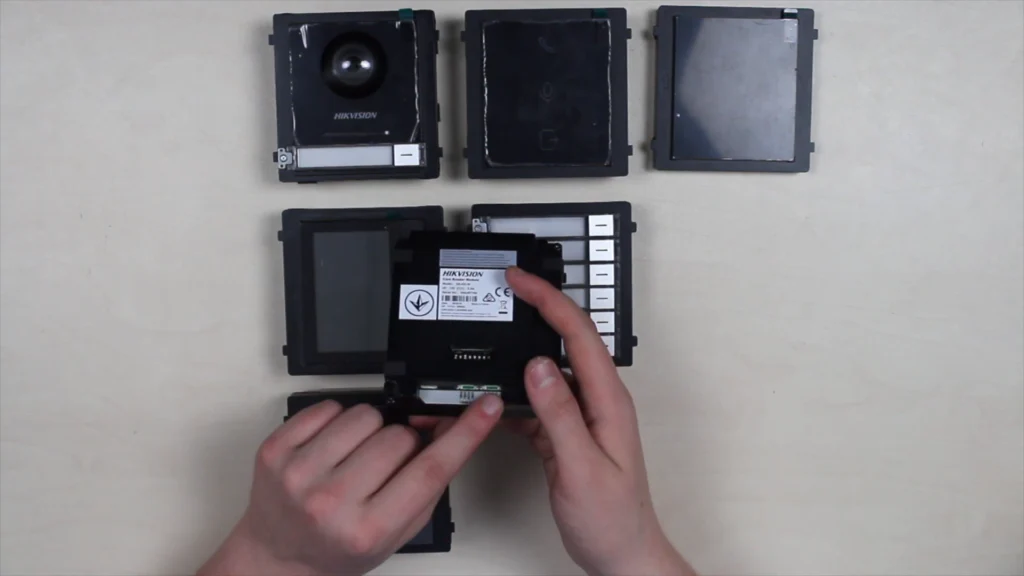
On your right, you can see the wires used for connecting modules. This is how they look, and you can find them in a box with a bracket. More precisely, the main door station receives network and power via the LAN cable from the PoE switch, and then distributes it to other modules via the power transfer interface and connects to them via an RS-485 interface. So that here’s a wire coming from the main module to the extension into the “in” port, and then coming from “out” to transfer the power and connection to the next module in a chain.
Hikvision 2ND Intercom: Outdoor Station

Indication Module

Mifare Card Reader Module

This is the Mifare-card reader module, and 1 of such cards is put in a door phone box for the test, convenience. As I said before, there is an identical module for reading EM-marine cards that is missing here, and in all respects, the card reading format is their only difference. And so with a card reader module, we start to interact with a specific functionality of the access control system. Either a company or a living building – in IVMS-4200. In the access control tab, we create an organization, then a person, and then assign him his personal identifier in the form of a card. And repeat that several times in a row until the required number of users is reached.
KeyPad Module

Continuing the topic of access control, we have a keypad module suitable for 2 ways of utilization at the same time – dial the apartment number and call or enter a building using a public or individual password.
Multi-person Calling Panel

Display Module

Something interesting here – a display module. It requires a keypad module to work properly, so it’s always a bundle of display and keypad. Why do you need this one – firstly, for displaying status, numbers, calls, and in addition, if we have a really large object – we can create up to 2 000 contacts and upload all of them straight to this module, and then use navigation keys and “OK” to find the required person in the list and call him instantly. And there’s a dummy. Accordingly, completely non-functional and not active element. I think it’s here to fill in the space in the bracket if it has formed.
Start-up and Connection
1 / 2
Demonstration
Dialing room number 1 from the keypad. The indicator module is instantly displaying this status, as well as the display module. The door phone, of course, shows us a video on the monitor, and from the monitor we can answer and talk with the interlocutor; the sound on the door phone comes from the speaker on the front panel. We also see that an active element has changed on the display module during the talk. Now let me make a call from the display module – it has built-in memory and it allows us to upload up to 2,000 contacts. Down Arrow, call – OK. And now, we are calling the 2nd apartment. The same is applicable to the multi-users extension – I press the top button and get a call to the monitor number 1, and if I press the 2nd button, accordingly getting a call to monitor 2. Now, a little about access control. I enter the public password that I created and instantly receive a confirmation that the door is open, and you also see the status change here. And now entering by a card – and voila, the same result. And a dummy, well, a dummy?
Watch Full Video Review On Youtube!
Sum Up
It’s unlikely that anyone will purchase all 8 modules and install them all at once in one place. Of course, it depends on your tasks and their scope. Here you have all that regular functionality that any IP-intercom system offers – the live video and audio, 2-way communication, door opening, and of course, you can access all the functionality from a phone. BUT! We also get more convenience with the indication module, more contacts owing to the display module, more people available for a call with multi-contact extension, the ability to log in using 2 types of cards and authentication by public and individual passwords, plus all-new updated monitors that I like.