
The object of our interest today is Dahua Technology’s latest IP intercom system as a part of the kit, which consists of a Door Station, Monitor, and a PoE Switch. PoE-switch, VTO series Door Station, and VTH series Monitor – we are going to start them up, activate, connect, and show you how that is done.
These are the basics of your intercom system:
- The door station is an active unit, installed outdoors for visitors to use at the entry.
- The monitor, installed indoors to answer calls and to lightly manage the system.
- The PoE switch is an additional part, but it makes so much use that Dahua has created a few kits that include a switch for the most usability.
Unboxing & Build Features
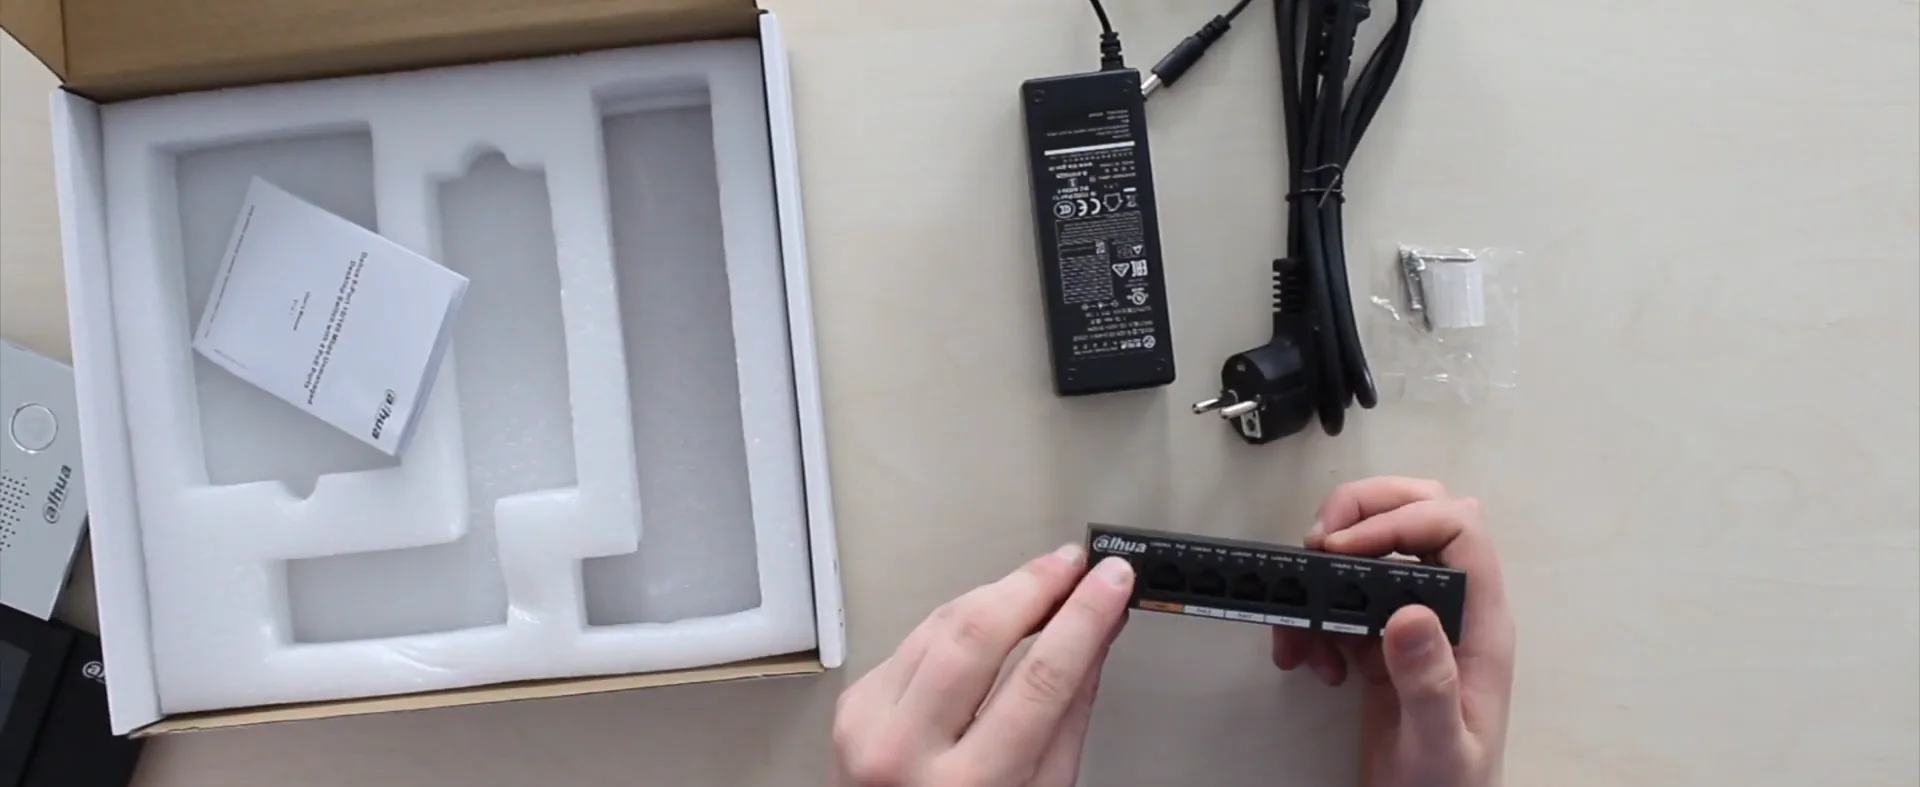
Beginning with Dahua Technology PFS3005-5ET-60 PoE Switch, which box fits inside the device itself, screws and anchors, user’s manual, a power adapter and the power cable. The device itself is simple – a DIP switch for the transmission mode, 4 PoE power supply ports, 2 uplink ports, and a light indication on top. On the front, we have a switch power port and Kensington lock interface.
Dahua Technology DHI-VTO2202F-P Door Station – that’s all you have in the box, except a quick start guide. The front panel is made of metal due to the device's outdoor status, so you’ve got IK07 anti-vandal protection and an IP65 ingress protection level. On the top half, we have a 2MP. camera module with the IR Supplement around it, bulging out from the front. 1.95 mm of focal length, 180 degrees view angle. The video from it is saved in H.265 compression rate and 30 FPS maximum recording speed. Microphone here and three indicators here: ongoing call, the call is in progress, and the door is open.
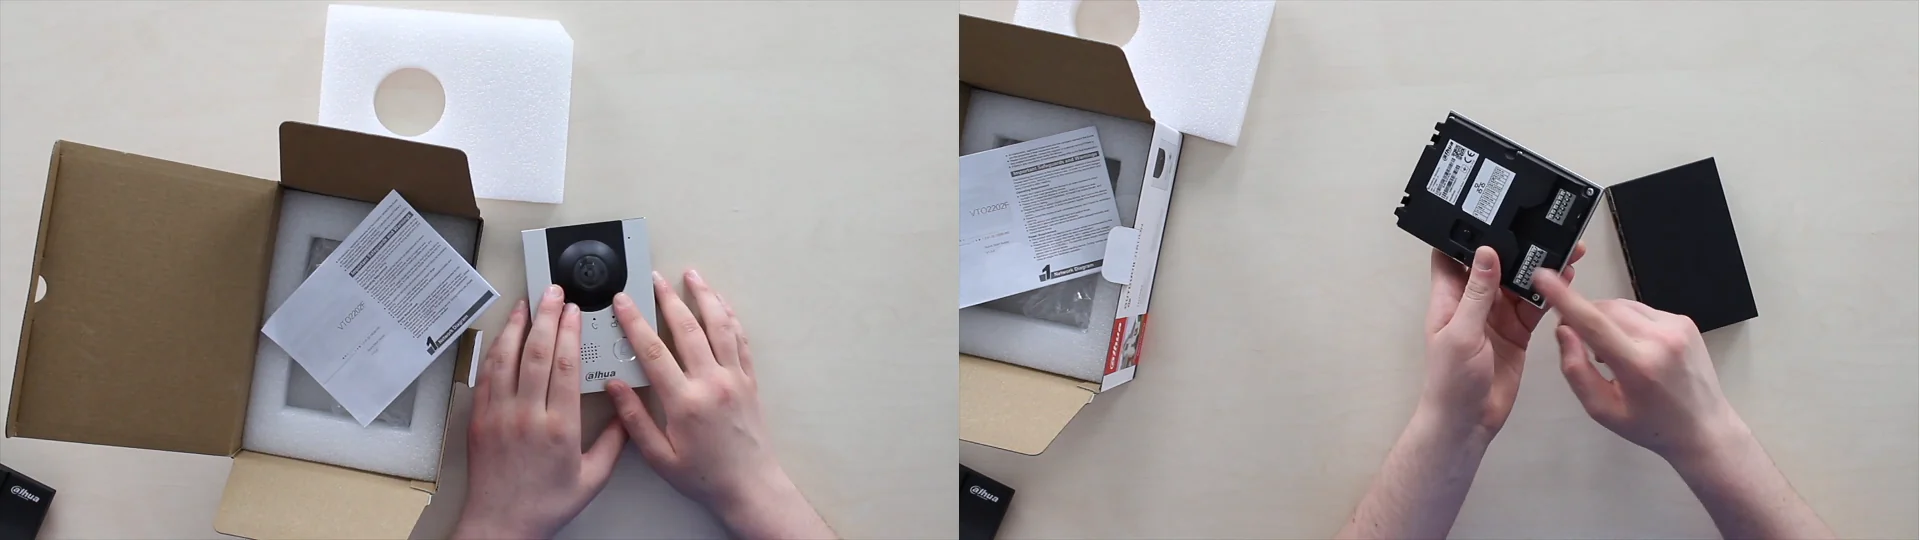
Physical call button and a speaker under the dots. Tamper button on the back, cable ports, and RJ-45 LAN cable input, which you can use to transfer power over Ethernet cable, coming from a PoE switch, included in the kit. That’s what's practically useful about it – you have everything you need to make it work on the spot. Or you can plug in 2 wires from a 12-volt power supply into the ports. On the side, there’s a rubber covering microSD card input, supporting 64 GB capacity maximum, and the reset button. Now let me show you a video, shot on this door station for you to see the quality:
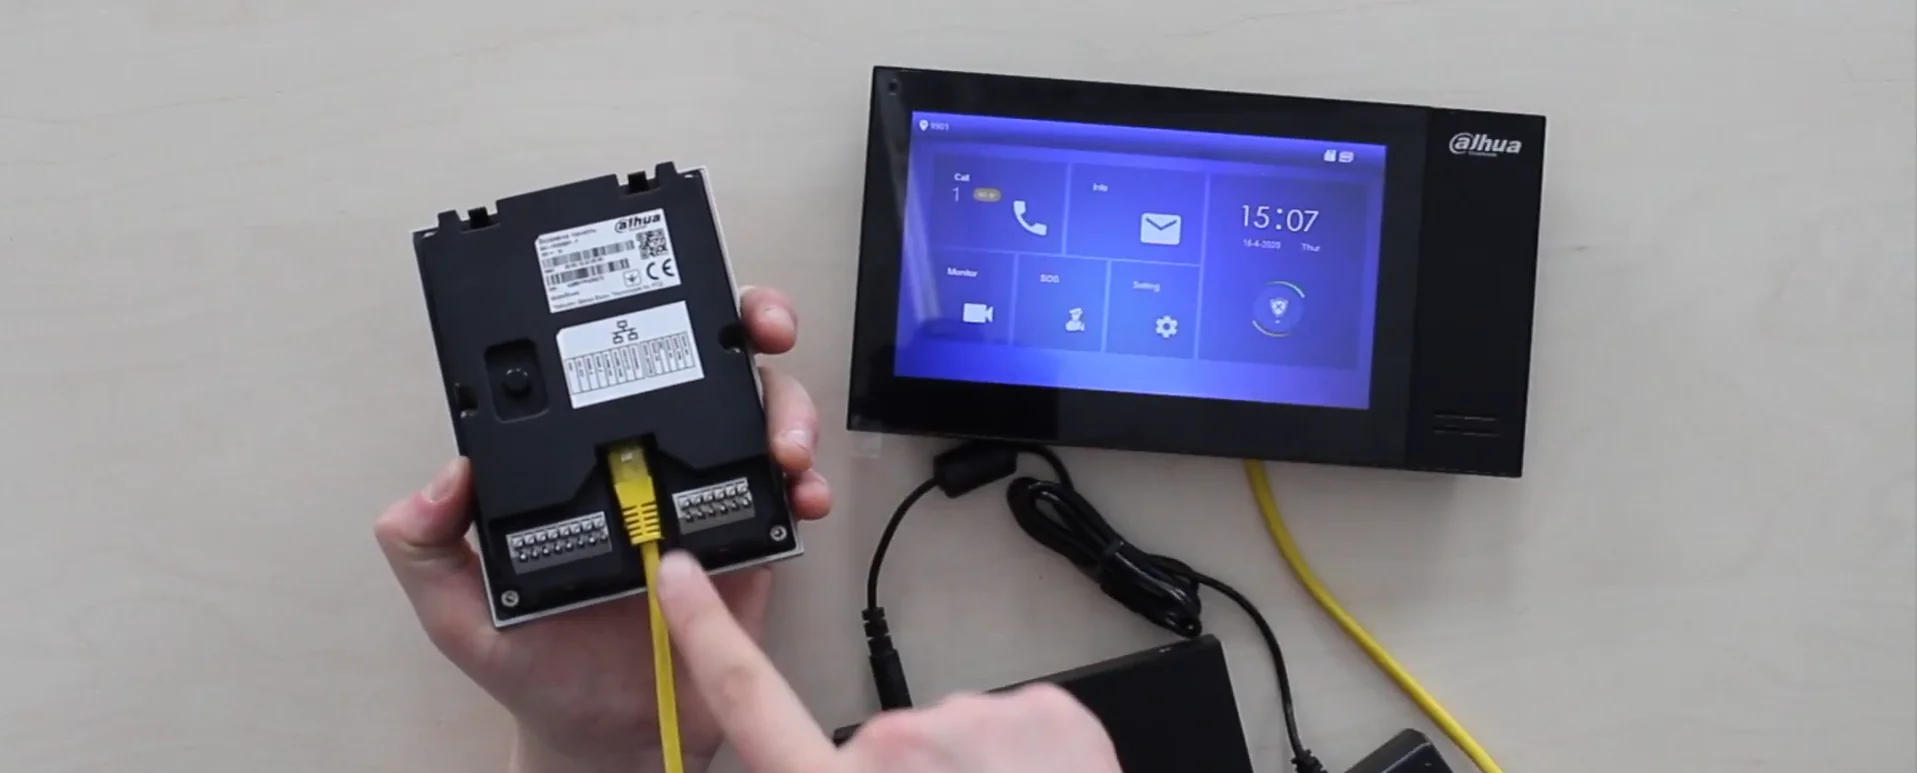
Dahua Technology DHI-VTH2421FW-P Monitor is simpler. 7-inch 1024×600 touch screen. The microphone, the speaker are on the front. On the rear, we’ve got a power in, alarm port, debug interface, and the network port, and I have powered the device via LAN cable, coming from a Switch in the box. Now, the functionality that you can access on the spot from the screen.

The Operation
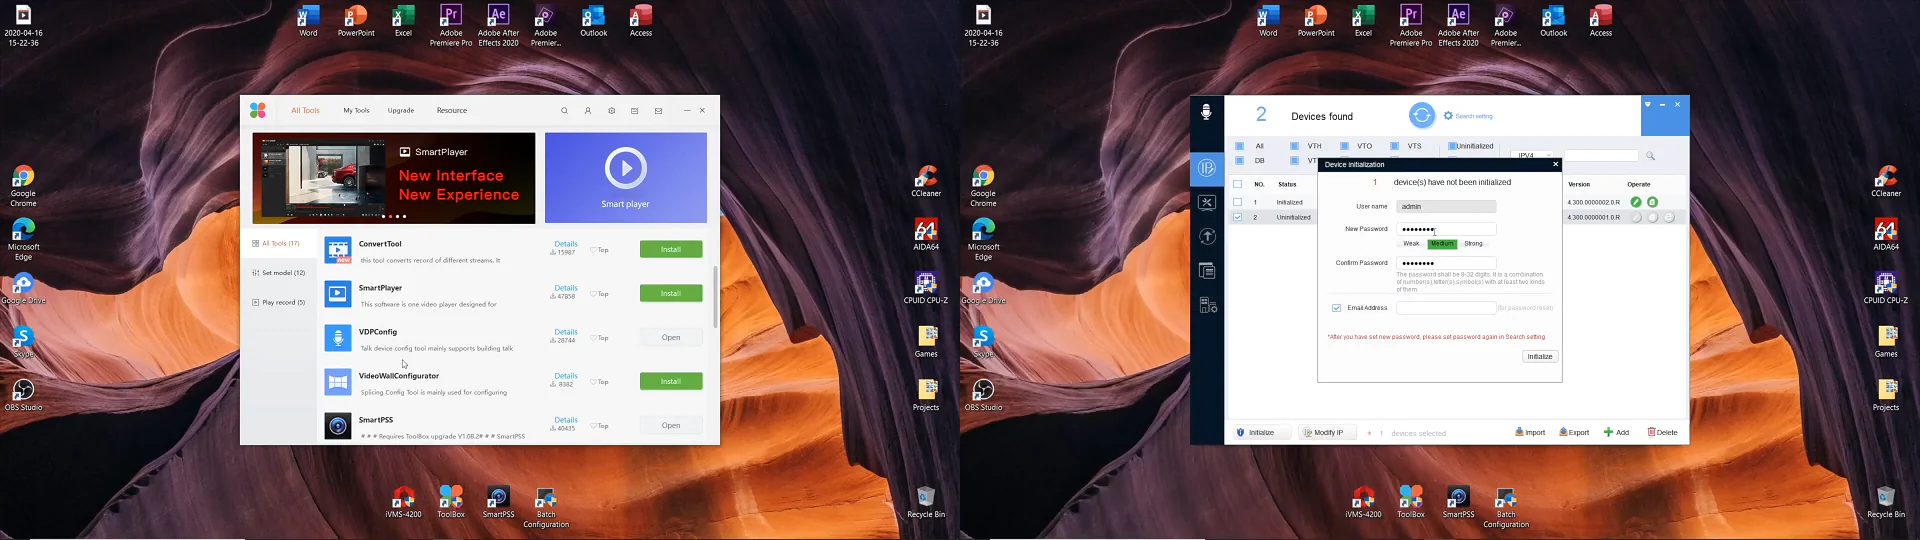
To work with the Dahua appliance, you need the specific manufacturer's software. Particularly for the intercom appliance, we use the VDPConfig Tool to initialize the device, and then the device’s web interface to work with the VTO door phone, while monitor settings are accessible on its screen.
1 / 2
Opening a hub for all Dahua software, a ToolBox, locating VDP Config in there, opening and seeing that I’ve got 2 devices with uninitialized status here. Going to change that, that’s it. Now I am going to the Door Station’s web interface in the browser.

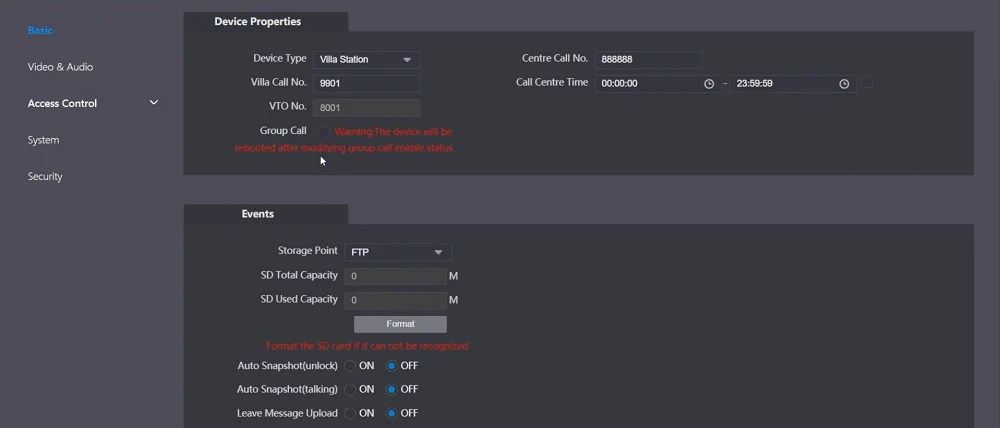
Right away, here I am going to synchronize the time. For that, I go to search settings and input the password I’ve created for the monitor. It’s 6 eights. The 2nd tab, check VTH, PC time – sync PC. Now the Door phone – same procedure. Alright, after this, I need my door station’s web interface. Opening the browser, typing in its IP address, username, password, and logging in. I go into local → basic, turning off group call and turning on all events, confirm, now it is going to reboot to apply new settings, waiting.
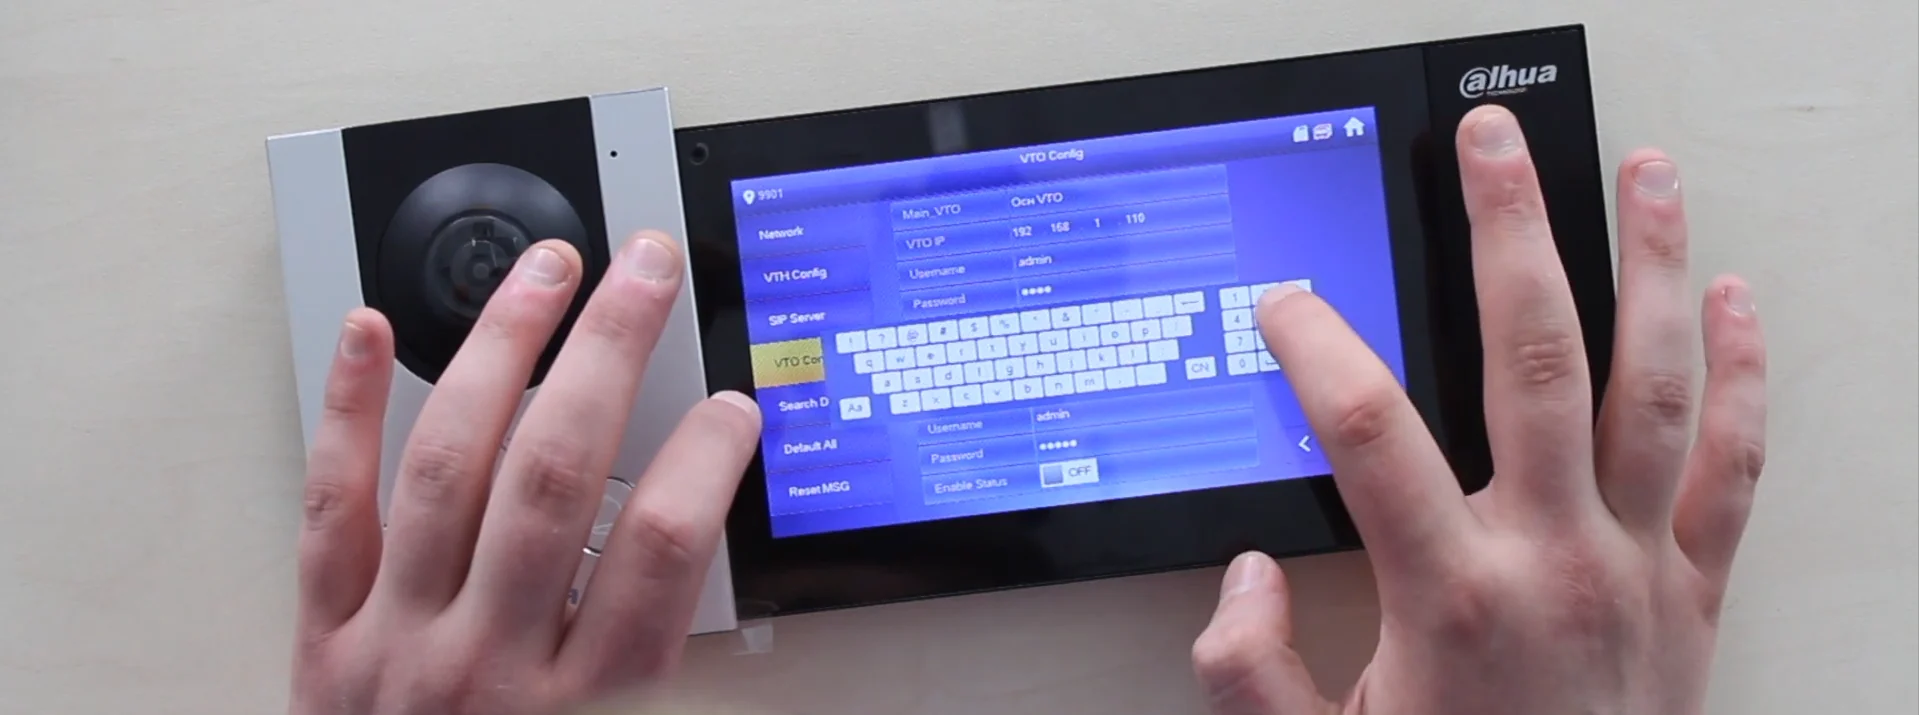
Alright. Logging in again, but network settings this time, SIP Server tab, unchecking here and modifying the IP address to the IP address of the door station, that is one hundred ten on the end. Checking enable and save. We’re done with the Door station setup, now the monitor and the demonstration.
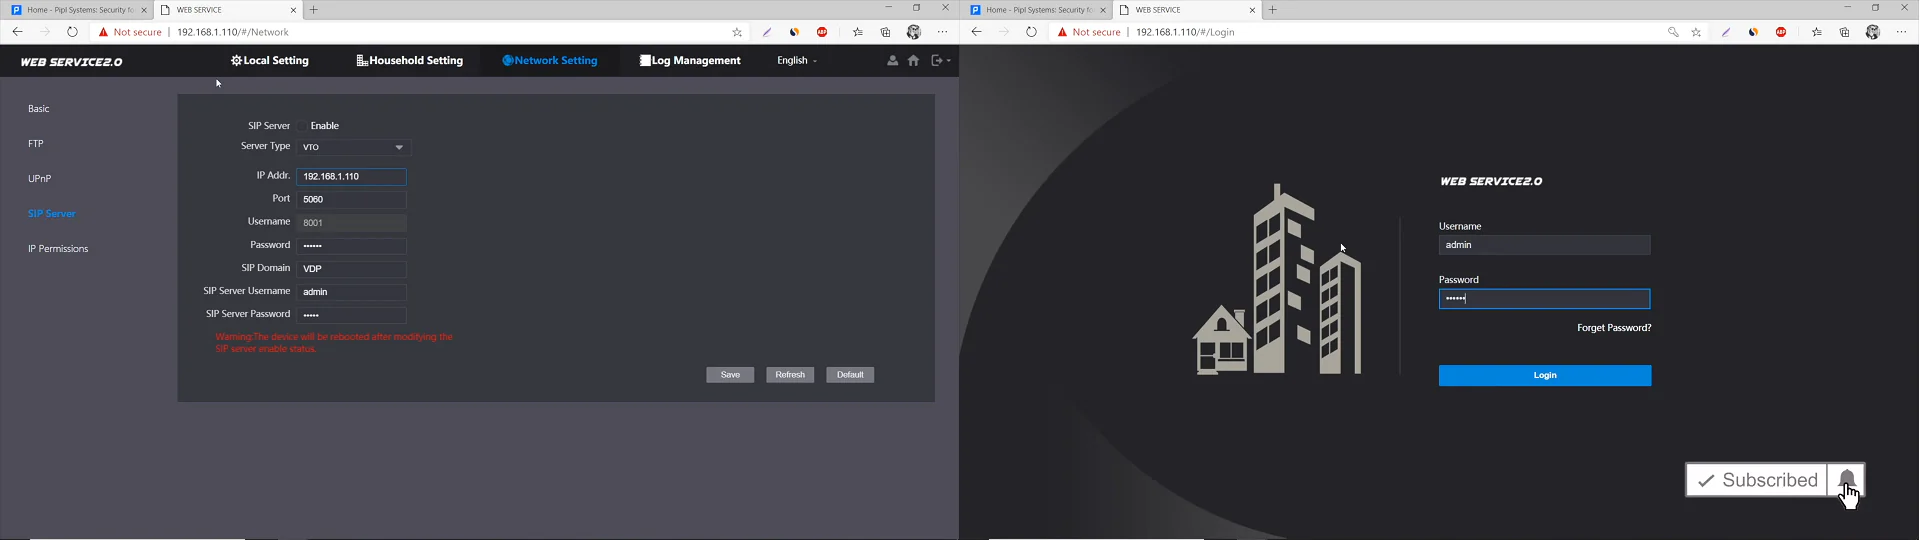
The monitor set up happens as follows: we need to access admin settings by pressing and holding the settings icon for 5 seconds. Now I type the password that I’ve created on the activation stage, that is 6 eights. Then I go to the SIP server and check if it’s working. Okay, it is 110 on the end, and it’s on, that’s what we need. Now the VTO config tab, we input the password and below, press enable. Success message, and we’re good. Now let the call happen and see it in a live view.