One day, we released a video about the ways to avoid a cloud storage subscription fee, and there were quite common options like switching multiple microSD cards, getting yourself a video recorder with a hard drive et cetera. This time, we went further with an option suggested by a viewer of our channel, who suggested using Open Broadcast Software, OBS, to stream the video from the camera to YouTube, which eventually gives us almost unlimited cloud video storage for free and 100% legit. Let’s set what it is and how to set it up for you
On the one hand, when you purchase a camera for yourself, you know that you need to take care of the storage for footage from the camera. There are offers from cloud services in the subscription form, there is a microSD card option, but not all cameras support it and the capacity is usually not large. There is a video recorder, where we additionally purchase a hard drive on a 1TB+ and this is the main and most common option.
So, YouTube. Judge by yourself – free video hosting for everyone in the world.
- Free
- Video hosting
- For everyone
No fees, and no limits, and if you restrict your channel to private access only – it’s even better. In fact, this is the same cloud storage for videos, but it’s free, commonly used by half of the world, almost unlimited and legit.
Software and The Principle
The essence of a method is that we install a certain software called OBS, and the tool, by the way, is widely used by streamers on Youtube and Twitch due to its simplicity and the fact it’s freeware. We take the RTSP stream incoming from the camera, which nearly every IP camera has support for, and we output it to our decoder on the PC – to the OBS software, which, in turn, converts the RTSP stream to the RTMP stream, supported by a majority of streaming services, including Youtube.
We turn on the broadcast on YouTube and start streaming from OBS to YouTube, and this broadcast will be saved on YouTube. So this is how we get free cloud storage for videos from our camera. It may sound complicated, but it’s a theory. In practice, it’s literally a couple of highly simple and quick steps, so I’m sorry to delay it – let’s move on to practice.
The Practice
I have my Hikvision DS-2CD2443 cube camera activated and added into the IVMS-4200, a Hikvision tool to work with their appliance.
- That is our 1st step – an activated and added camera with “Online” status.
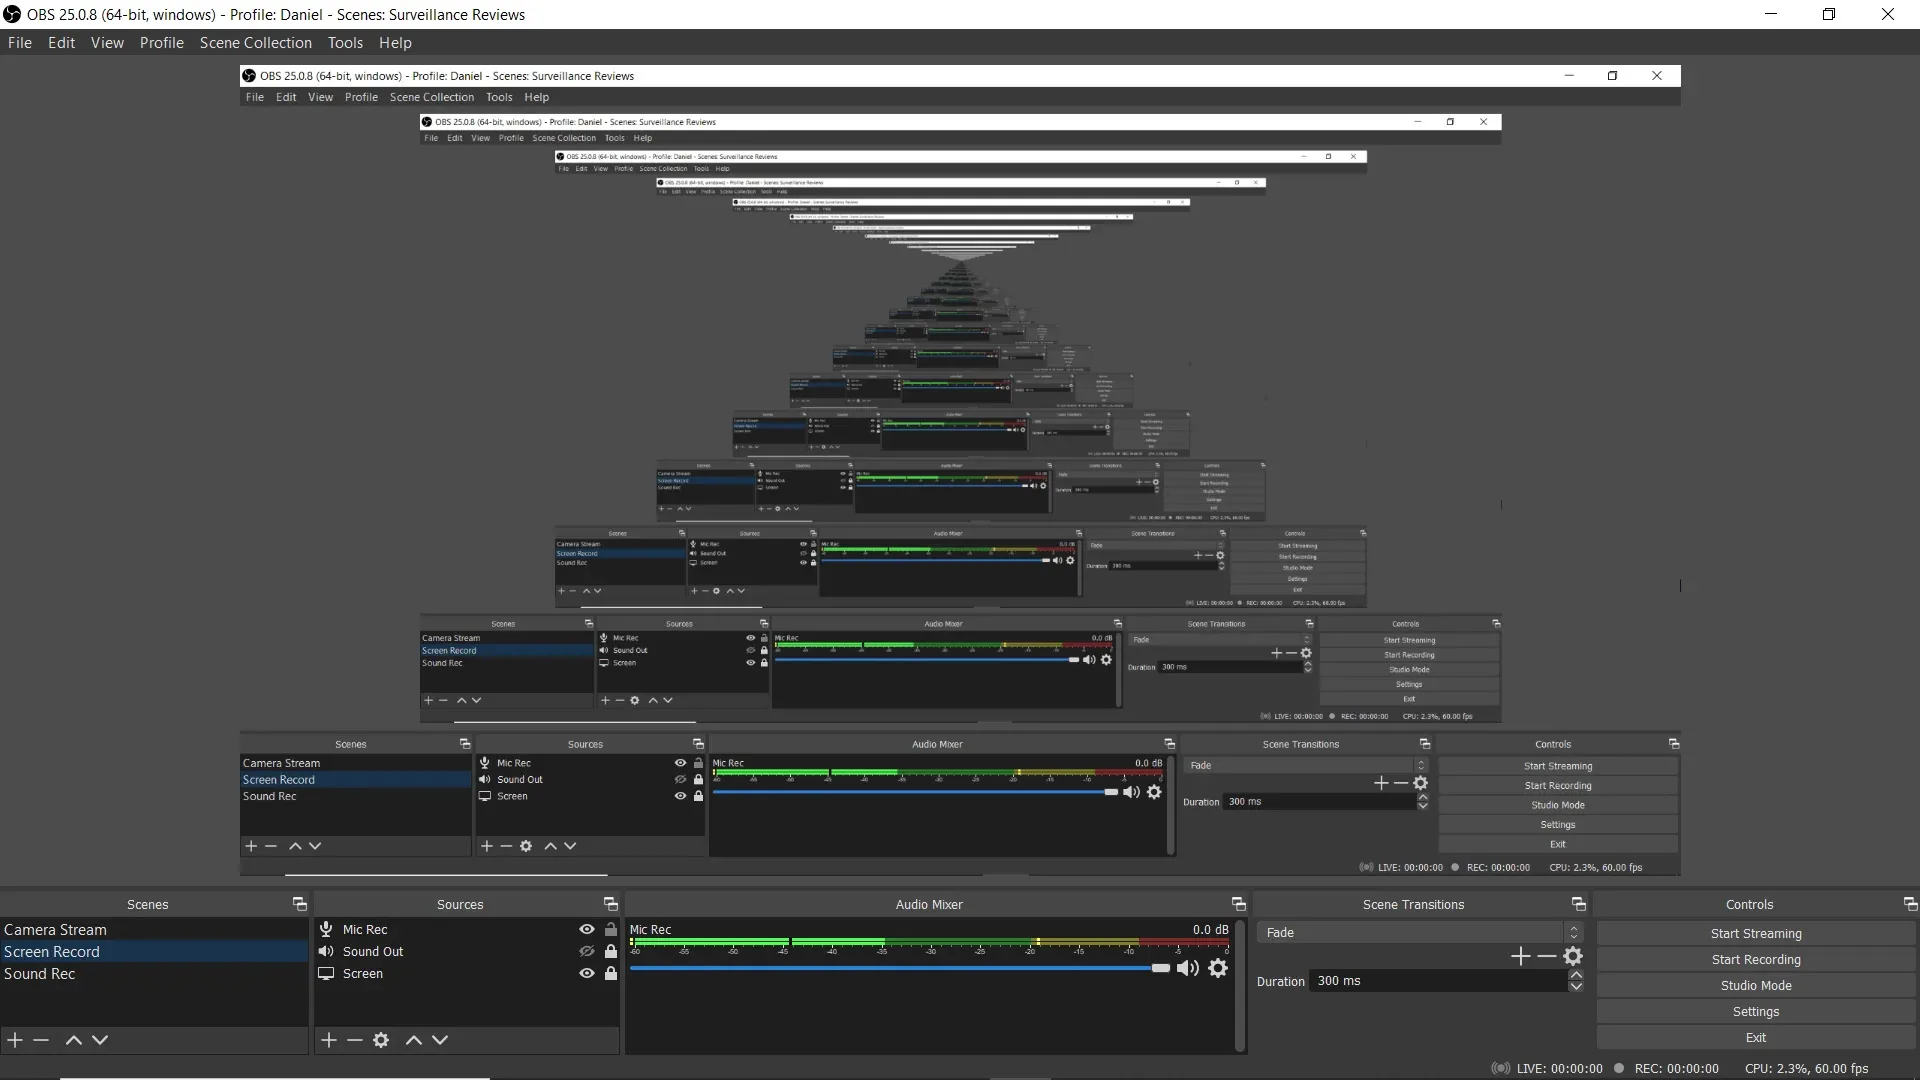
- Go to the site of the free Open Broadcast Software → download and install.
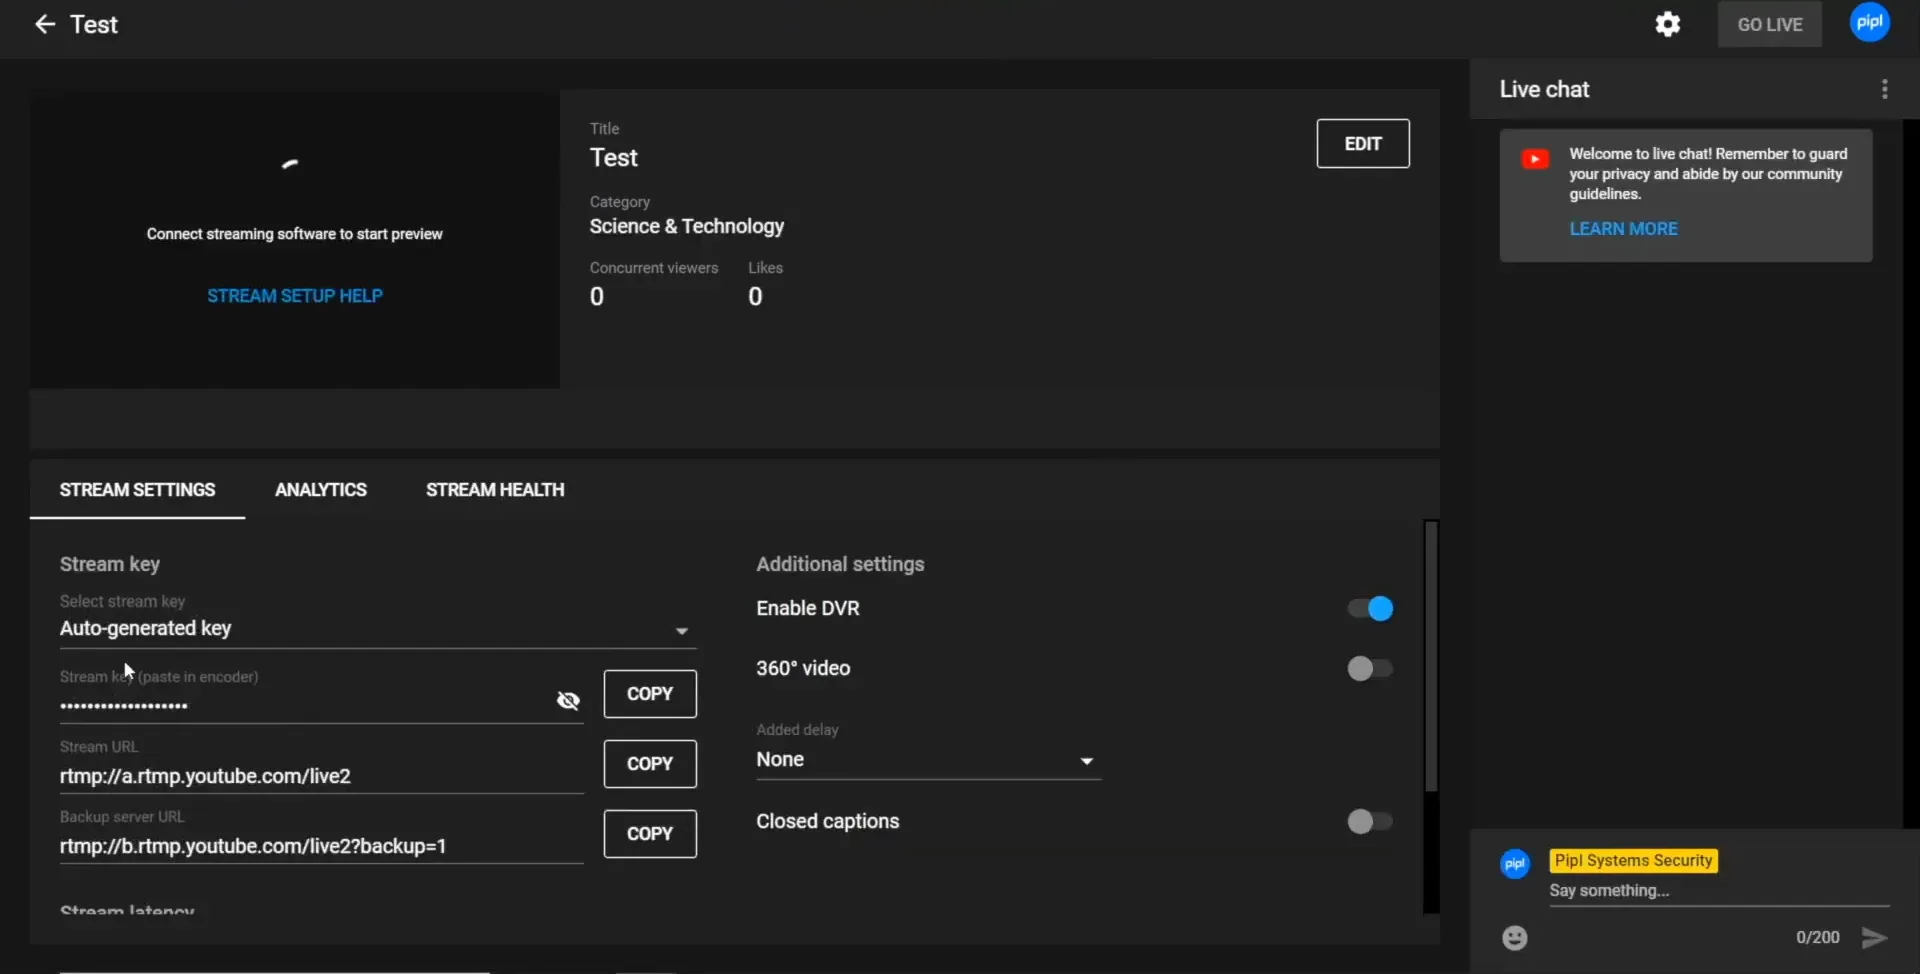
- While the installation is in progress, go to Youtube → settings → YouTube Studio → on the right top corner “click create” → Go live.
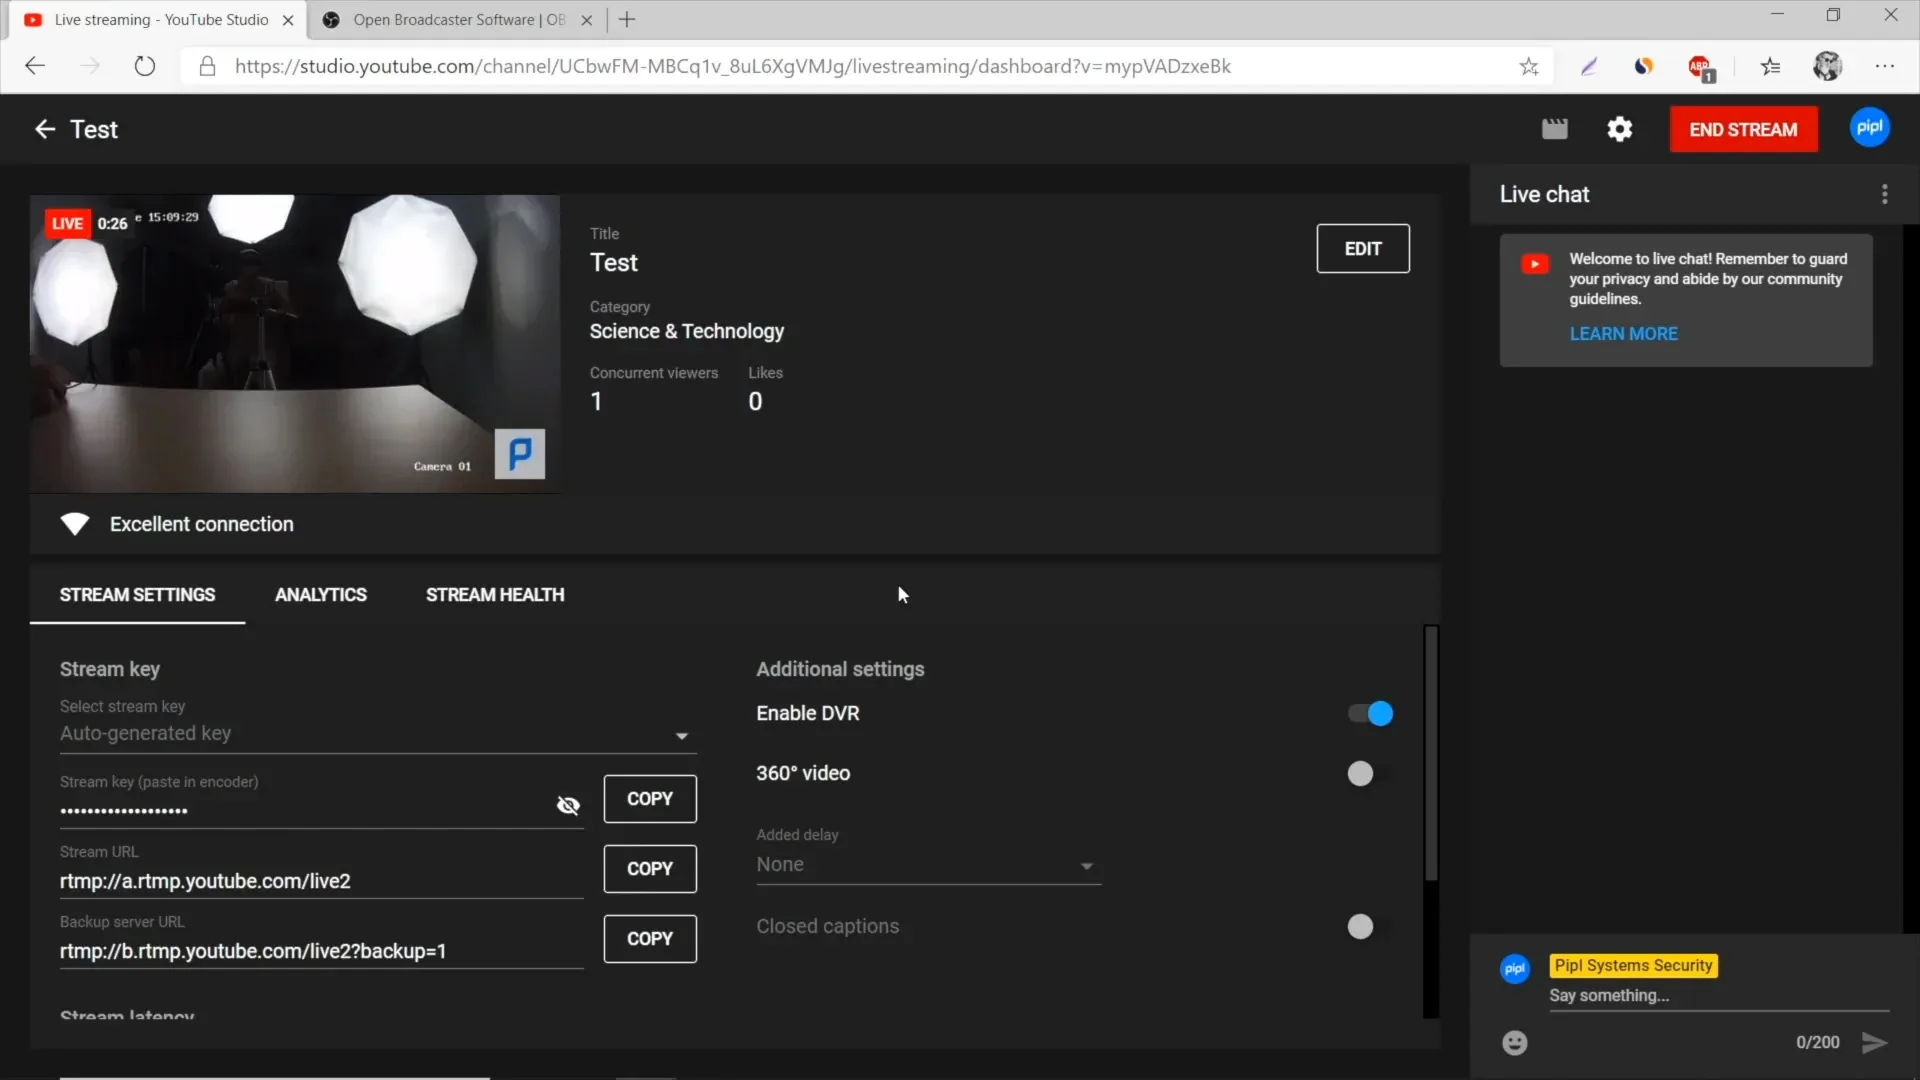
- Now on the page, you can choose anything- it’s a private broadcast anyway- and click “create stream”. Next, in that room, you will see data and don’t actually need all these settings; it’s up to you. The only thing I do is set it to ultra-low latency.
- Leave the browser in this position and launch OBS
The Set-up
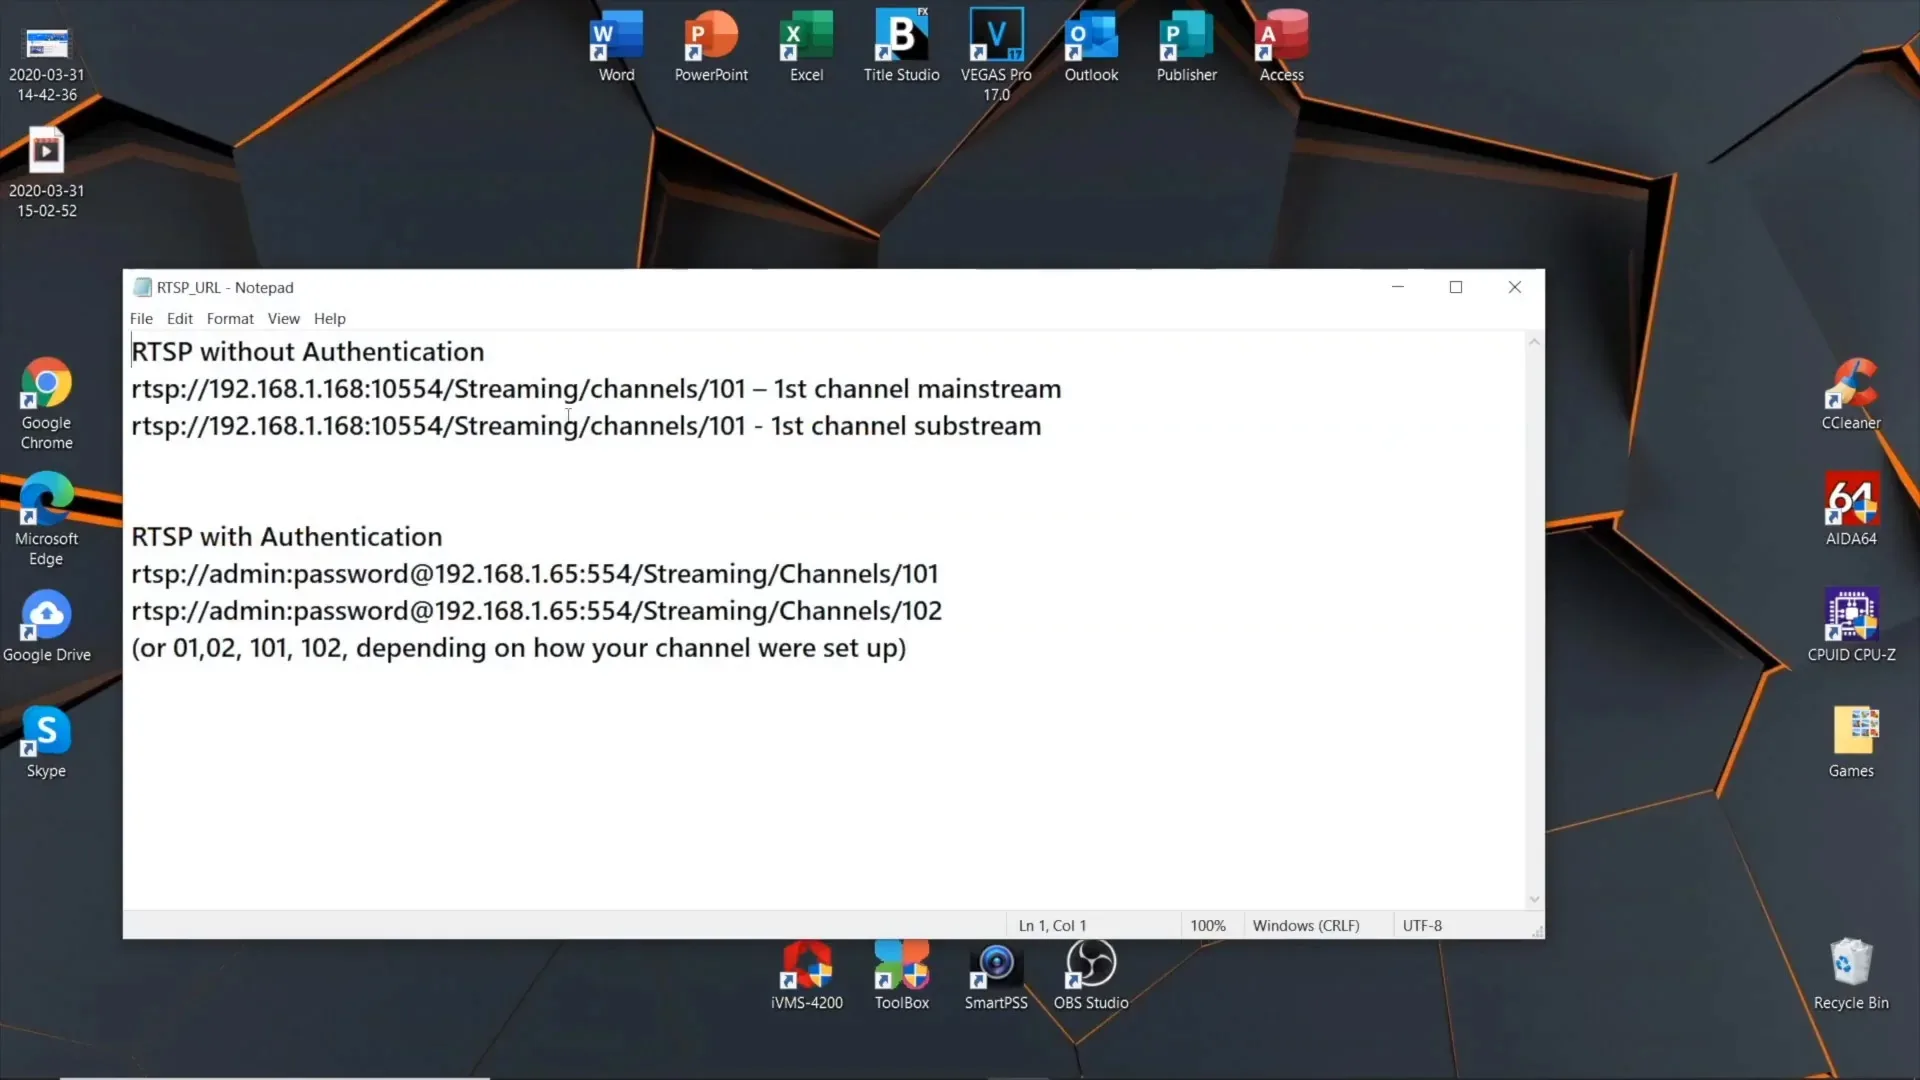
Now, we are going to output the RTSP video stream from our camera right to the OBS software. We start by creating the RTSP link. For Hikvision, and actually that is applicable to all other manufacturers, there is an instruction on the Manufacturer’s website. Here are the most common ones:
- rtsp://192.168.2.128:554/cam/realmonitor?channel=1&subtype=0&unicast=true&proto=Onvif
- rtsp://admin:[email protected]:554/cam/realmonitor?channel=1&subtype=1
- rtsp://192.168.2.128:554/live
Dahua Formula: rtsp://admin:[email protected]:554/cam/realmonitor?channel=1&subtype=1
Hikvision: rtsp://admin:[email protected]:554/Streaming/Channels/101
- rtsp — the protocol
- admin — user name (created upon registration)
- 12345 – the password for your camera/video recorder
- 192.168.200.11 — Camera IP-address
- 554 — RTSP-port of the camera (default and modifiable)
- 101 — 1st cam, 1st channel (could be just 01)
- 201 — 2nd cam, 1st channel
- 302 – 3rd cam, 2nd channel and et cetera.
RTSP is the type of protocol we use, then the username that you have created for the camera upon activation and the password. Next is the camera’ IP-address, port, streaming, channel, and channel number.
Copy the link that we have formed and open the OBS tool.
- Hit the “Plus” button in the “Source” tab
- In the menu, pick the “Media source” – name and press confirm.
- What we do now – uncheck the “Local File” box, and the new field will appear.
- Into the “Input” field paste that link and click okay. And here you are!
If done right, your camera stream will appear right there.
- The final step is as follows: we go to file on top → settings → stream, and there in the “service” select Youtube/Youtube Gaming.
- We need to specify the recipient address of this video stream, that is, the channel that we have created in a previous stage, the YouTube broadcast.
- Go back to the browser with your streaming room tab, and there, opposite to the “Stream Key” item, click copy, and now go back to OBS. Insert that key into the “stream key” field in OBS, click apply and close.
That’s it, we’re done. And now the most crucial step – launching the broadcast -“Start Streaming” button – press it and go back to YouTube in the browser. Wait for a little, then you’ll see the status of the connection, and if it’s good – press “Go Live” and you’re on the air, which is displayed both on YouTube and OBS.
The stream goes in parallel with the upload to YouTube servers, and so we’ve got an archive that we can view in the same way we do in any other cloud service. For your information – the maximum video length on YouTube is 12 hours, and the file size is 268 GB. maximum. BUT! There are no such restrictions for broadcasting and it can literally last forever, but the recording itself cannot exceed 12 hours, so I think YouTube will start a new recording every time after 12 hours of stream. What else do I want to mention – for streaming purposes the sub-stream is used, which always goes in significantly worse quality. And what we can do about it is to raise this quality in the camera settings, but don’t expect FULLHD every time.
Conclusion
Apparently, the only drawback of this method is that you need a PC as a server with such an OBS decoder that can work 24/7 to perform this decoding and the redirection of video to YouTube servers. It will be perfect if you have a stationary PC at home, and you can assign it to perform this function.
