
This is indeed one of the most frequently asked questions in our Pipl Systems Store: “How do I make my Network Door Phone record video straight to the NVR?”. The answer is simple – make the video recorder see the door phone as a network camera, and that is easy to do. Today, we’re performing it with Hikvision and Dahua Technology devices, and this is applicable to nearly all devices in this class.
Hardware

For the demo, we have selected:
- Hikvision DS-7608NI-K1/8P(B) 8-channel 1U 8 PoE 4K Network Video Recorder
- Hikvision DS-KV8113-WME1 Wifi Network Villa Door Station
And be aware that you need exactly the NVR of the 76XX or higher series. Either way, it may just not work, not guaranteed, but it won’t be a problem with modern Video Recorders. From Dahua’s side, it is:
- Dahua XVR5108HS-4KL-X 8-Channel Penta-brid 4K Mini 1U Digital Video Recorder
- Dahua VTO3211D-P Network Villa Outdoor Station
Emphasizing that this is applicable to literally all modern Hikvision and Dahua network devices.
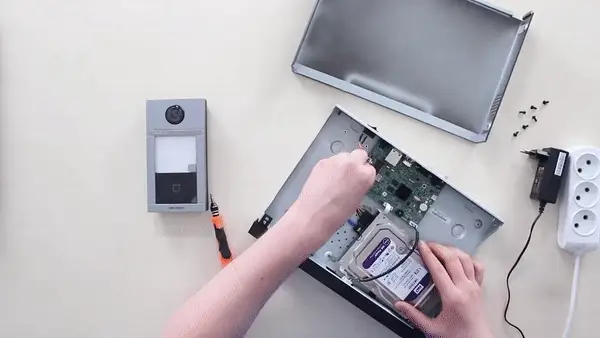
And we begin with Hikvision. Installing the WD Purple 1TB Hard Drive, plugging in the 12V. power into the NVR, and supplying the network via UTP to both, plus powering the door station due to PoE.

1 / 2
Making the Door Phone record video to the Hikvision NVR
As for the software part, I am using Hikvision SADP and IVMS-4200 software to activate both devices. Then the actual video recording set up – from the moment when you’ve got devices up and running, and you've made sure you get the video from the door station – we need the video recorder’s settings.
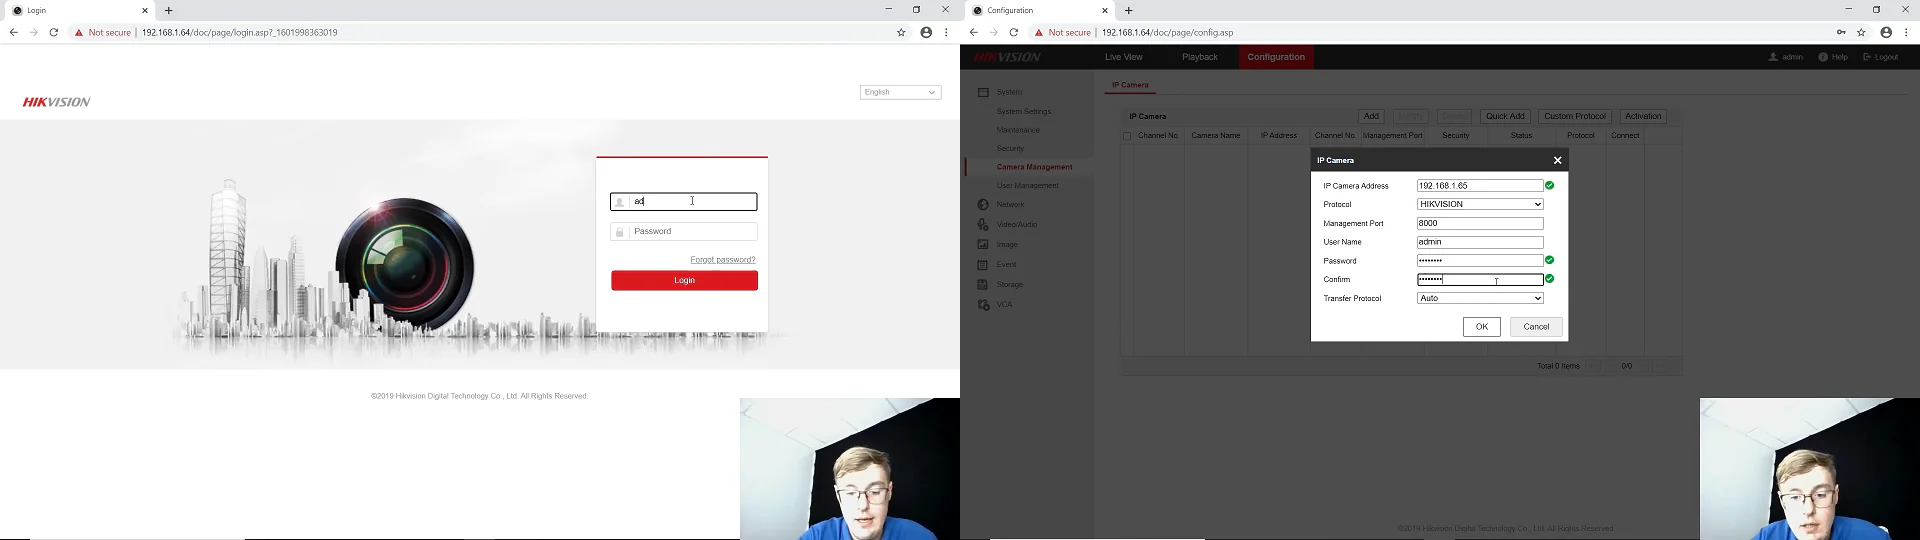
Input the Video Recorder’s IP address into the browser’s search field and enter. Log in to your account on the device’s web interface and switch to the configuration tab. Go to “System” → “Camera Management” → press “Add”. Now input the IP address of your door phone in there, user username, and your password 2 times → OK. Now wait a bit till it changes to online status, and there we go – this one’s done.
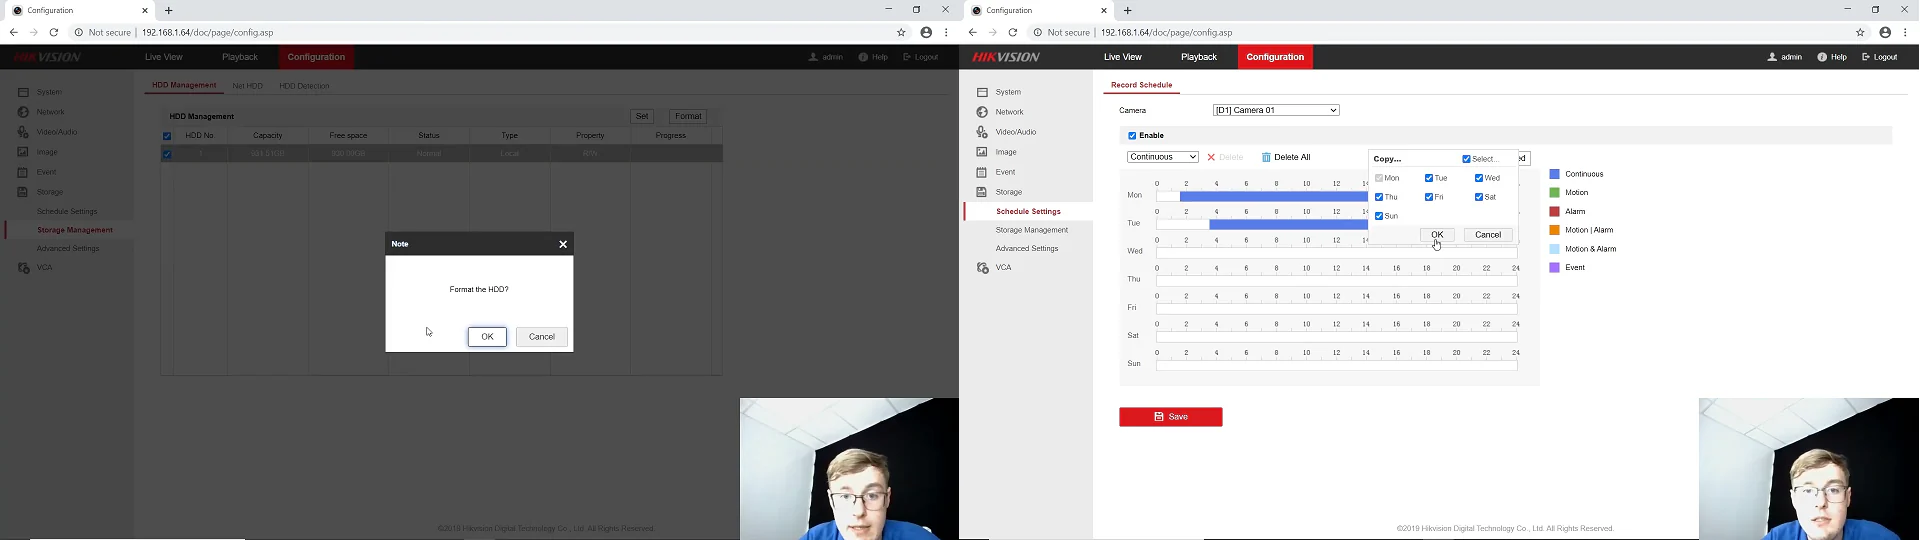
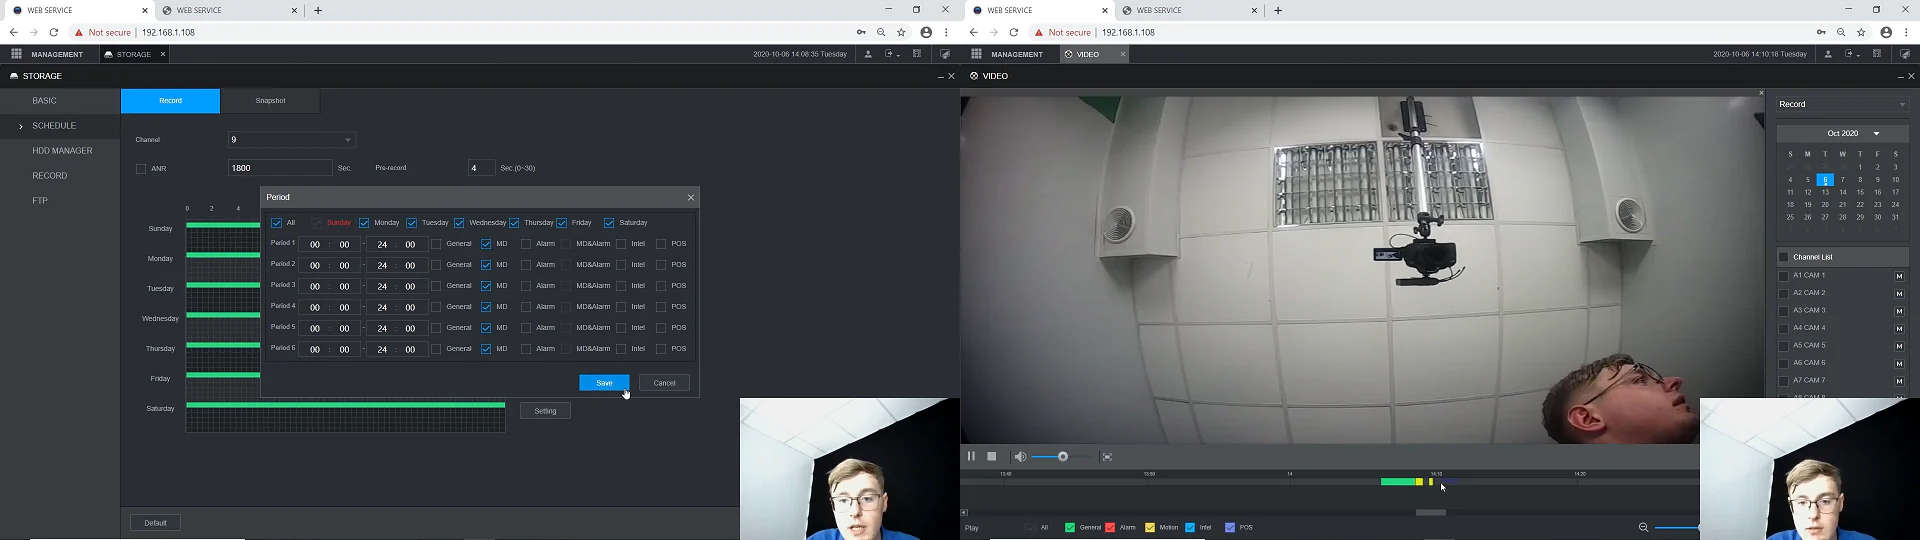
Now go to “Storage Management” in the “Storage” tab. And there you will see your HDD connected and running – format it. Now the schedule settings. As you can see, the continuous type of recording is turned on by default, though if it’s not for you, select your camera, recording type, draw a line and copy it, and paste it onto all other lines. Now, if you want it to record by detecting motion, you first need to configure the door station, so go into its settings in the IVMS-4200 or to its web interface. In there, you need the “Event” tab → Basic Event → and turn it on, save, and it’s ready.
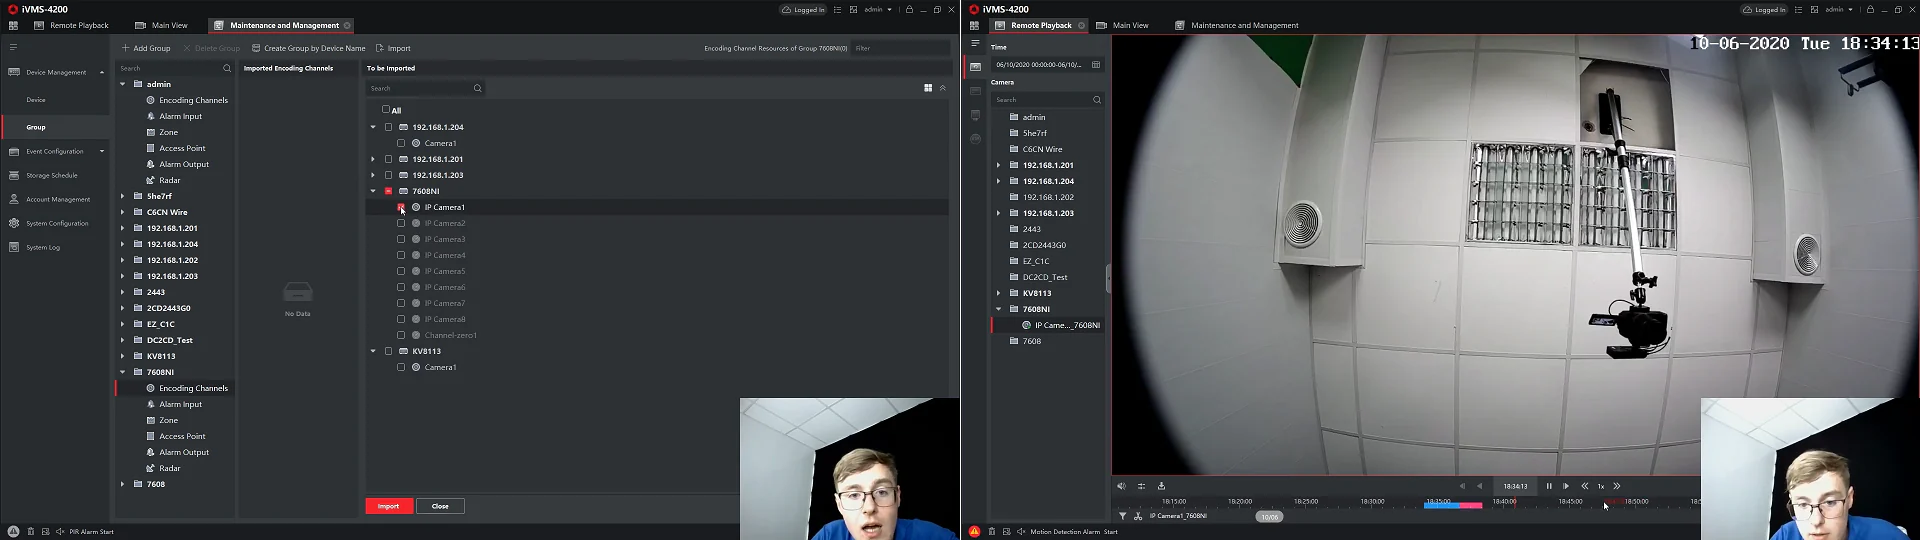
Back to video recorder: Event → basic event → check and save if turned off for you. Now the “Storage” → Schedule → select specifically “Event”. Now draw the lines, copy and paste them to all other fields, or the way you want. Save and it’s done. Go to IVMS-4200, enter “Remote playback”, but before – go into device management and import the IP-camera 1, our door station. From that moment, you can view in it there on the remote playback tab, straight from the NVR – the continuous recording with blue and the motion-activated with purple.
Making the Door Phone record video to the Dahua NVR
The same goes for Dahua appliance – installing the Hard Drive into the XVR video recorder, and then connecting and the device’ start up. Hard drive, 12V power there and there, and the network via UTP to both devices.
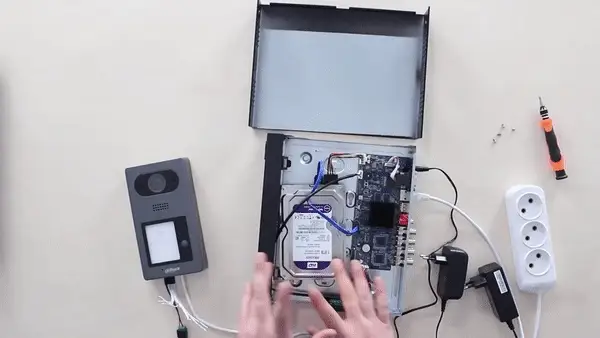
1 / 2
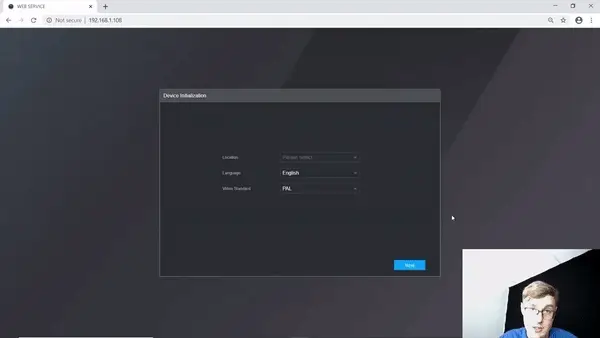
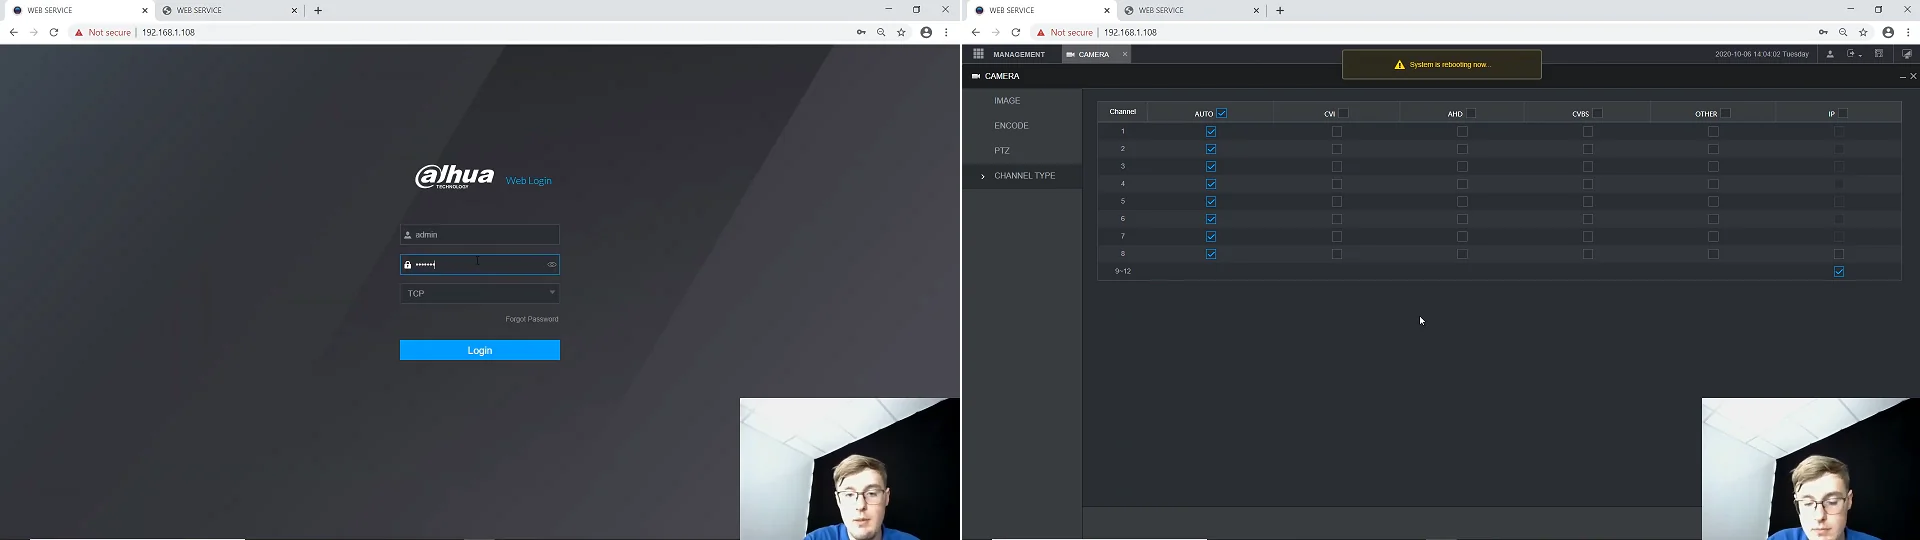
The software part with Dahua is a no-software part. We are using devices: Web Interface for activation, and then the actual video recording set up. After you’ve got your devices up and running and made sure you get the video from the door station, you need the video recorder’s settings. Log in to the account on the web interface and go to the management tab → camera → activate IP channels on the video recorder. Now the “channel type” item → check the box there → save → it’s going to reboot to apply settings.
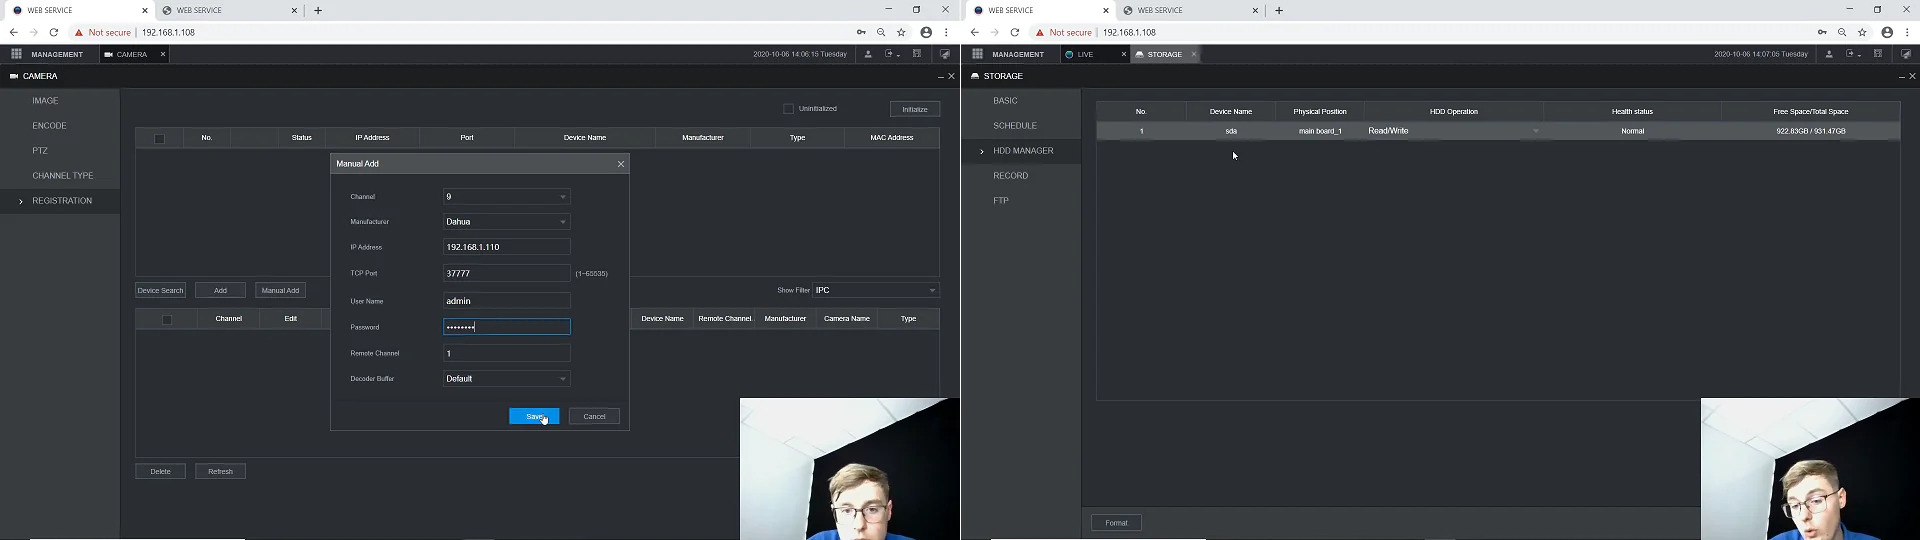
Now go into “Management” → camera → registration → manual adding. Select the channel you want to put the door phone on → input its IP address, user name, and the password → save. At first, you’ll get a red indication there. Wait up to the minute, refresh, you’ll get the green if done correctly. Now you can view the door phone straight from the video recorder. Close it, go to live view, select the channel with door phone → the management → storage → HDD manager. There you will see your hard drive, and if you were using it earlier, don’t forget to format it.
Now the Schedule → select your channel. By default, you will have a continuous general type of recording there, meaning if you go to the playback and select your channel, you will see that it has already started recording automatically, and you can access the video right there. But that’s not a finish, so let’s get back to storage → schedule → your channel → And let’s say you need it to record by the event of detecting a motion → tick the box opposite to that item → settings → select “MD” for all channels for the whole week and save. Now it will only record by detecting motion. Now, if you head back to the playback, you will see the yellow line, displaying the recording by the motion detection event.